1. Introduction
Thank you for choosing the vidaXL Shoe Cabinet. This manual provides essential information for the safe assembly, operation, and maintenance of your new shoe cabinet. Please read these instructions thoroughly before beginning assembly and retain them for future reference.
This compact shoe cabinet is designed to offer an organized storage solution for your footwear, particularly suitable for narrow spaces such as entryways, hallways, or cloakrooms. It features two flip-down drawers and a sturdy top surface for decorative items.
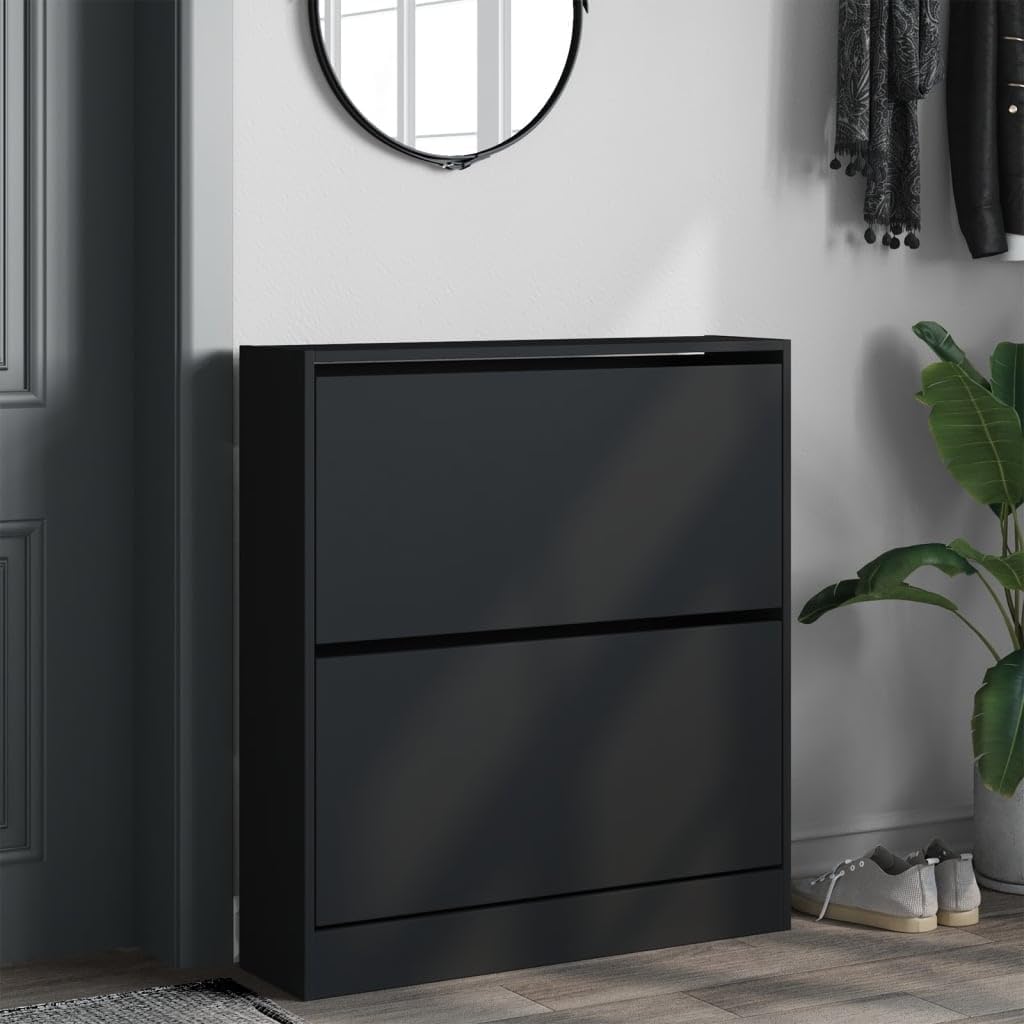
Image 1.1: The vidaXL Shoe Cabinet in a typical entryway setting.
2. Safety Instructions
- Wall Attachment: To prevent tipping and ensure stability, this product must be securely attached to the wall using the provided wall attachment device. Failure to do so can result in serious injury.
- Weight Capacity: Do not exceed the maximum load capacity of 40 kg (88 lbs) for the entire unit. Distribute weight evenly.
- Assembly: Assemble the unit on a soft, clean surface to prevent scratches. Ensure all parts are correctly installed and fasteners are tightened before use.
- Children: Keep children away from the product during assembly. Do not allow children to climb on or play with the cabinet.
- Placement: Place the cabinet on a level and stable surface. Avoid placing it in areas with high humidity or direct sunlight to prevent material damage.
3. Package Contents
Please check the package carefully to ensure all components are present and undamaged. If any parts are missing or damaged, contact vidaXL customer support.
- Shoe cabinet panels (engineered wood)
- 2 x Flip-down drawer mechanisms
- Assembly hardware (screws, dowels, cam locks, etc.)
- Wall attachment device (screws, wall plugs, strap)
- Assembly instructions (may be in multiple languages)
4. Setup and Assembly
Assembly is required for this shoe cabinet. Follow the detailed instructions provided in the separate assembly guide included in your package. The general steps are outlined below:
- Preparation: Clear a spacious, clean, and soft area for assembly to prevent damage to the product. Identify all parts and hardware using the assembly guide.
- Frame Assembly: Begin by assembling the main frame of the cabinet according to the step-by-step diagrams. Ensure all connections are secure.
- Drawer Mechanism Installation: Install the flip-down drawer mechanisms into the cabinet frame. Pay close attention to the orientation of these parts.
- Drawer Fronts: Attach the drawer fronts to the flip-down mechanisms. Adjust as necessary to ensure smooth operation and proper alignment.
- Back Panel: Secure the back panel to the cabinet frame.
- Wall Attachment: This is a critical safety step. Position the assembled cabinet in its desired location. Mark the wall for drilling the holes for the wall attachment device. Securely fasten the cabinet to the wall using the provided hardware. Ensure the wall plugs are appropriate for your wall type.
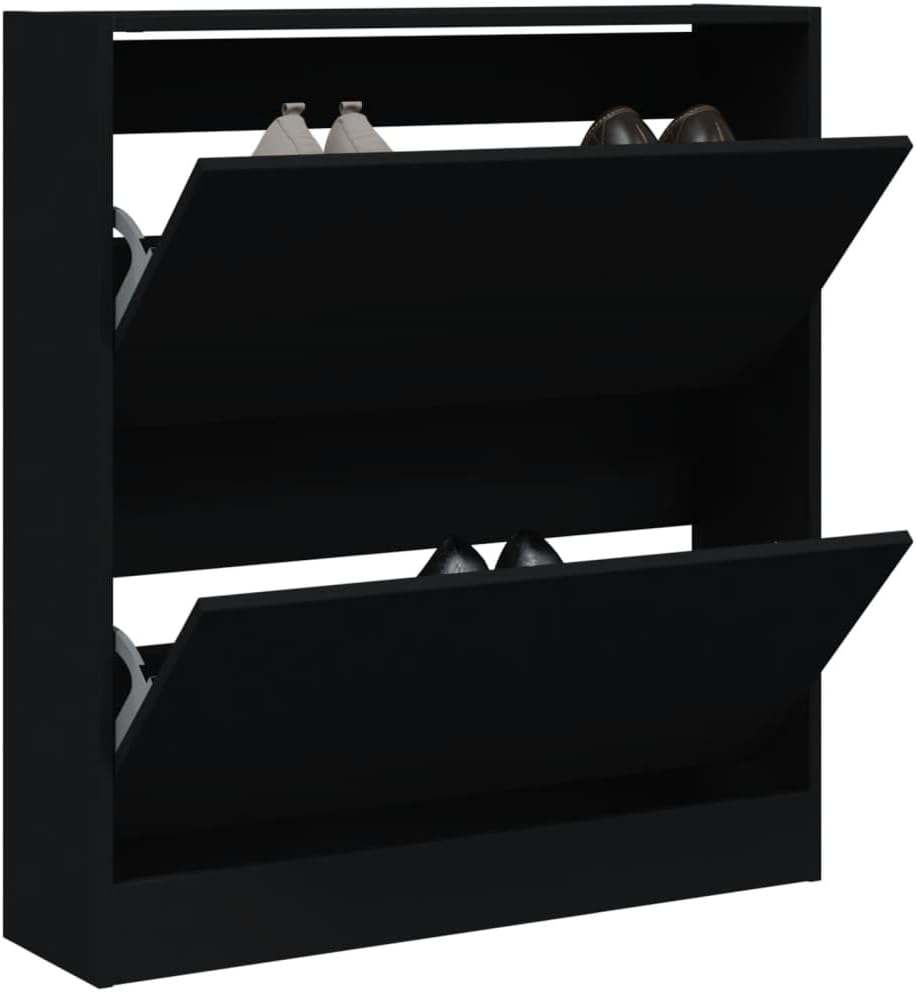
Image 4.1: Dimensional diagram of the shoe cabinet, showing height, width, and depth.
5. Operating Instructions
The vidaXL Shoe Cabinet is designed for straightforward use.
- Storing Shoes: To access the storage compartments, gently pull the top edge of each drawer front outwards. The drawer will flip down, revealing the shoe racks. Place your shoes neatly within the compartments.
- Closing Drawers: Push the drawer front upwards until it clicks securely into its closed position. Ensure shoes are not obstructing the closing mechanism.
- Top Surface: The robust top surface can be used to display decorative items, photo frames, or small potted plants. Do not place excessively heavy items on the top surface.

Image 5.1: The shoe cabinet with both drawers open, demonstrating shoe storage.

Image 5.2: The shoe cabinet with both drawers open, showing the internal structure.
6. Maintenance
- Cleaning: Wipe the cabinet surfaces with a soft, damp cloth. Avoid using harsh chemicals, abrasive cleaners, or polishes that may damage the engineered wood finish.
- Moisture: The engineered wood is moisture-resistant, but it is not waterproof. Promptly wipe up any spills to prevent water damage.
- Fasteners: Periodically check all screws and fasteners to ensure they remain tight. Retighten if necessary.
- Wall Attachment: Regularly inspect the wall attachment device to ensure it is still securely fastened to both the cabinet and the wall.
7. Troubleshooting
- Cabinet feels wobbly: Ensure the cabinet is placed on a level surface. Verify that all assembly fasteners are tightened. Crucially, confirm the wall attachment device is properly installed and secure.
- Drawers do not close smoothly: Check for any obstructions (e.g., shoes, debris) within the drawer compartments or the closing mechanism. Ensure the drawer mechanisms were installed correctly during assembly.
- Scratches or minor damage: For minor scratches, a furniture repair pen or marker matching the cabinet's black finish can be used.
8. Specifications
| Feature | Specification |
|---|---|
| Model Number | 839918 |
| Brand | vidaXL |
| Color | Black |
| Material | Engineered Wood |
| Overall Dimensions (W x D x H) | 80 cm x 21 cm x 87.5 cm (31.5" x 8.3" x 34.4") |
| Weight | 21.84 kg (48.15 lbs) |
| Maximum Load Capacity | 40 kg (88 lbs) |
| Number of Drawers | 2 |
| Assembly Required | Yes |
| Special Feature | Moisture Resistant, Wall Mountable |
9. Warranty and Support
For warranty information, product support, or to order replacement parts, please refer to the warranty card included with your purchase or visit the official vidaXL website. You can also contact vidaXL customer service directly for assistance.
Please have your model number (839918) and purchase details ready when contacting support.


