
BestEquip A03
VEVOR A03 Manual Paste Liquid Filling Machine User Manual
Model: A03 | Brand: BestEquip
1. Introduction
This manual provides comprehensive instructions for the safe and efficient operation, setup, maintenance, and troubleshooting of the VEVOR A03 Manual Paste Liquid Filling Machine. This machine is designed for precise filling of various liquids and pastes, suitable for pharmaceutical, cosmetic, food, and other industries. Please read this manual thoroughly before operating the machine to ensure proper usage and longevity of the product.

Figure 1: Overview of the VEVOR A03 Manual Paste Liquid Filling Machine with various liquid containers.
2. Safety Instructions
Always adhere to the following safety guidelines to prevent injury and damage to the machine.
- Ensure the machine is placed on a stable, level surface before operation.
- Do not operate the machine with wet hands or in a wet environment.
- Keep hands and loose clothing away from moving parts during operation.
- Use appropriate personal protective equipment (PPE) such as gloves and eye protection, especially when handling corrosive or hazardous materials.
- Do not attempt to modify or repair the machine yourself. Contact qualified personnel for service.
- Clean the machine thoroughly after each use, especially when changing filling materials, to prevent cross-contamination.
- Store the machine in a dry, clean environment when not in use.
3. Package Contents
Upon unpacking, verify that all the following items are included in your package:
- 1 x A03 Pro Manual Filling Machine
- 1 x Nozzle (Inside diameter 6mm, outside diameter 8mm)
- 5 x O-Rings
- 1 x Screwdriver
- 1 x Guide Manual
- 1 x 0.16"/4 mm Nozzle
- 1 x 0.31"/8 mm Nozzle
- 2 x Oil Seals (O.D.: 1.06"/27 mm, H: 0.35"/9 mm)
- 1 x O-Ring (O.D.: 0.47"/12 mm)
- 1 x O-Ring (O.D.: 0.55"/14 mm)
- 2 x O-Rings (O.D.: 0.75"/19 mm)
- 2 x O-Rings (O.D.: 0.98"/25 mm)
- 1 x O-Ring (O.D.: 1.97"/50 mm)
- 1 x 4# Hex Wrench
- 1 x 5# Hex Wrench

Figure 2: Package contents and key dimensions of the A03 Manual Filling Machine.
4. Specifications
| Parameter | Value |
|---|---|
| Model | A03 |
| Filling Range | 5-50ml |
| Hopper Capacity | 10L (338 fl.oz) |
| Height Range | 7.87" / 200mm (Adjustable Tray) |
| Bottle Diameter Range | 3-15 mm |
| Filling Accuracy | ±1% |
| Machine Size (L x W x H) | 10.6 x 10.6 x 27.5 inch / 270 x 270 x 710 mm |
| Net Weight | 22 lbs / 10 kg |
| Material | 304 Stainless Steel, SPCC Steel (Food-grade components) |
5. Setup and Assembly
Follow these steps to assemble and prepare your filling machine for first use.
- Unpacking: Carefully remove all components from the packaging. Inspect for any shipping damage.
- Base Placement: Place the main machine body on a stable, flat, and clean workbench.
- Hopper Installation: Attach the 10L hopper to the top of the machine, ensuring it is securely seated.
- Nozzle Attachment: Select the appropriate nozzle (0.16"/4mm or 0.31"/8mm) for your container and securely attach it to the filling outlet. Ensure O-rings are properly seated to prevent leaks.
- Adjustable Tray: Adjust the height of the bottle tray using the adjustment mechanism to match the height of your containers. This ensures the nozzle aligns correctly with the bottle opening.

Figure 3: Adjusting the height of the bottle tray for different container sizes.
- Initial Cleaning: Before first use, thoroughly clean all parts that will come into contact with the filling material using appropriate cleaning agents suitable for food-grade stainless steel. Rinse and dry completely.
6. Operating Instructions
This section details the steps for operating the VEVOR A03 Manual Paste Liquid Filling Machine.
- Prepare Material: Pour the liquid or paste material into the 10L hopper. Ensure the material is free of large particles that could clog the nozzle.
- Set Filling Volume: Locate the filling volume regulator knob on the side of the machine. Turn the knob clockwise or anti-clockwise to set the desired filling volume between 5ml and 50ml. The clear visible scale assists in precise adjustment.

Figure 4: Setting the precise filling volume using the adjustment knob and scale.
- Position Container: Place an empty container on the adjustable tray, directly beneath the filling nozzle.
- Initiate Filling: Pull down the handle switch firmly and smoothly. The machine will dispense the set volume of liquid or paste into the container. Release the handle to complete the filling cycle. The strengthened spring handle ensures effortless pulling and durability.

Figure 5: Operating the machine by pulling the handle for filling.
- Repeat: Remove the filled container and place the next empty one for continuous operation.
- Anti-Drip Feature: The high-quality anti-drip nozzle and gaskets ensure no dripping occurs after each fill, maintaining a clean workspace.
This machine is versatile and can be used for various liquids and pastes, including but not limited to honey, oil, drinks, lotions, ketchup, and shampoo.

Figure 6: Examples of suitable materials for filling.
7. Maintenance and Cleaning
Regular cleaning and maintenance are crucial for the longevity and hygienic operation of your filling machine.
- Daily Cleaning: After each use, especially when filling different materials, disassemble the hopper, nozzle, and any other parts that come into contact with the product. Wash them thoroughly with warm water and a mild, food-safe detergent. Rinse completely to remove all residue.
- Drying: Ensure all components are completely dry before reassembly or storage to prevent bacterial growth and corrosion.
- Lubrication: Periodically check the moving parts and O-rings. If necessary, apply a food-grade lubricant to ensure smooth operation and prevent wear.
- Inspection: Regularly inspect O-rings and seals for signs of wear, cracks, or damage. Replace them promptly using the provided spare O-rings or suitable replacements to prevent leaks and maintain filling accuracy.
- Storage: Store the machine in a clean, dry, and dust-free environment.
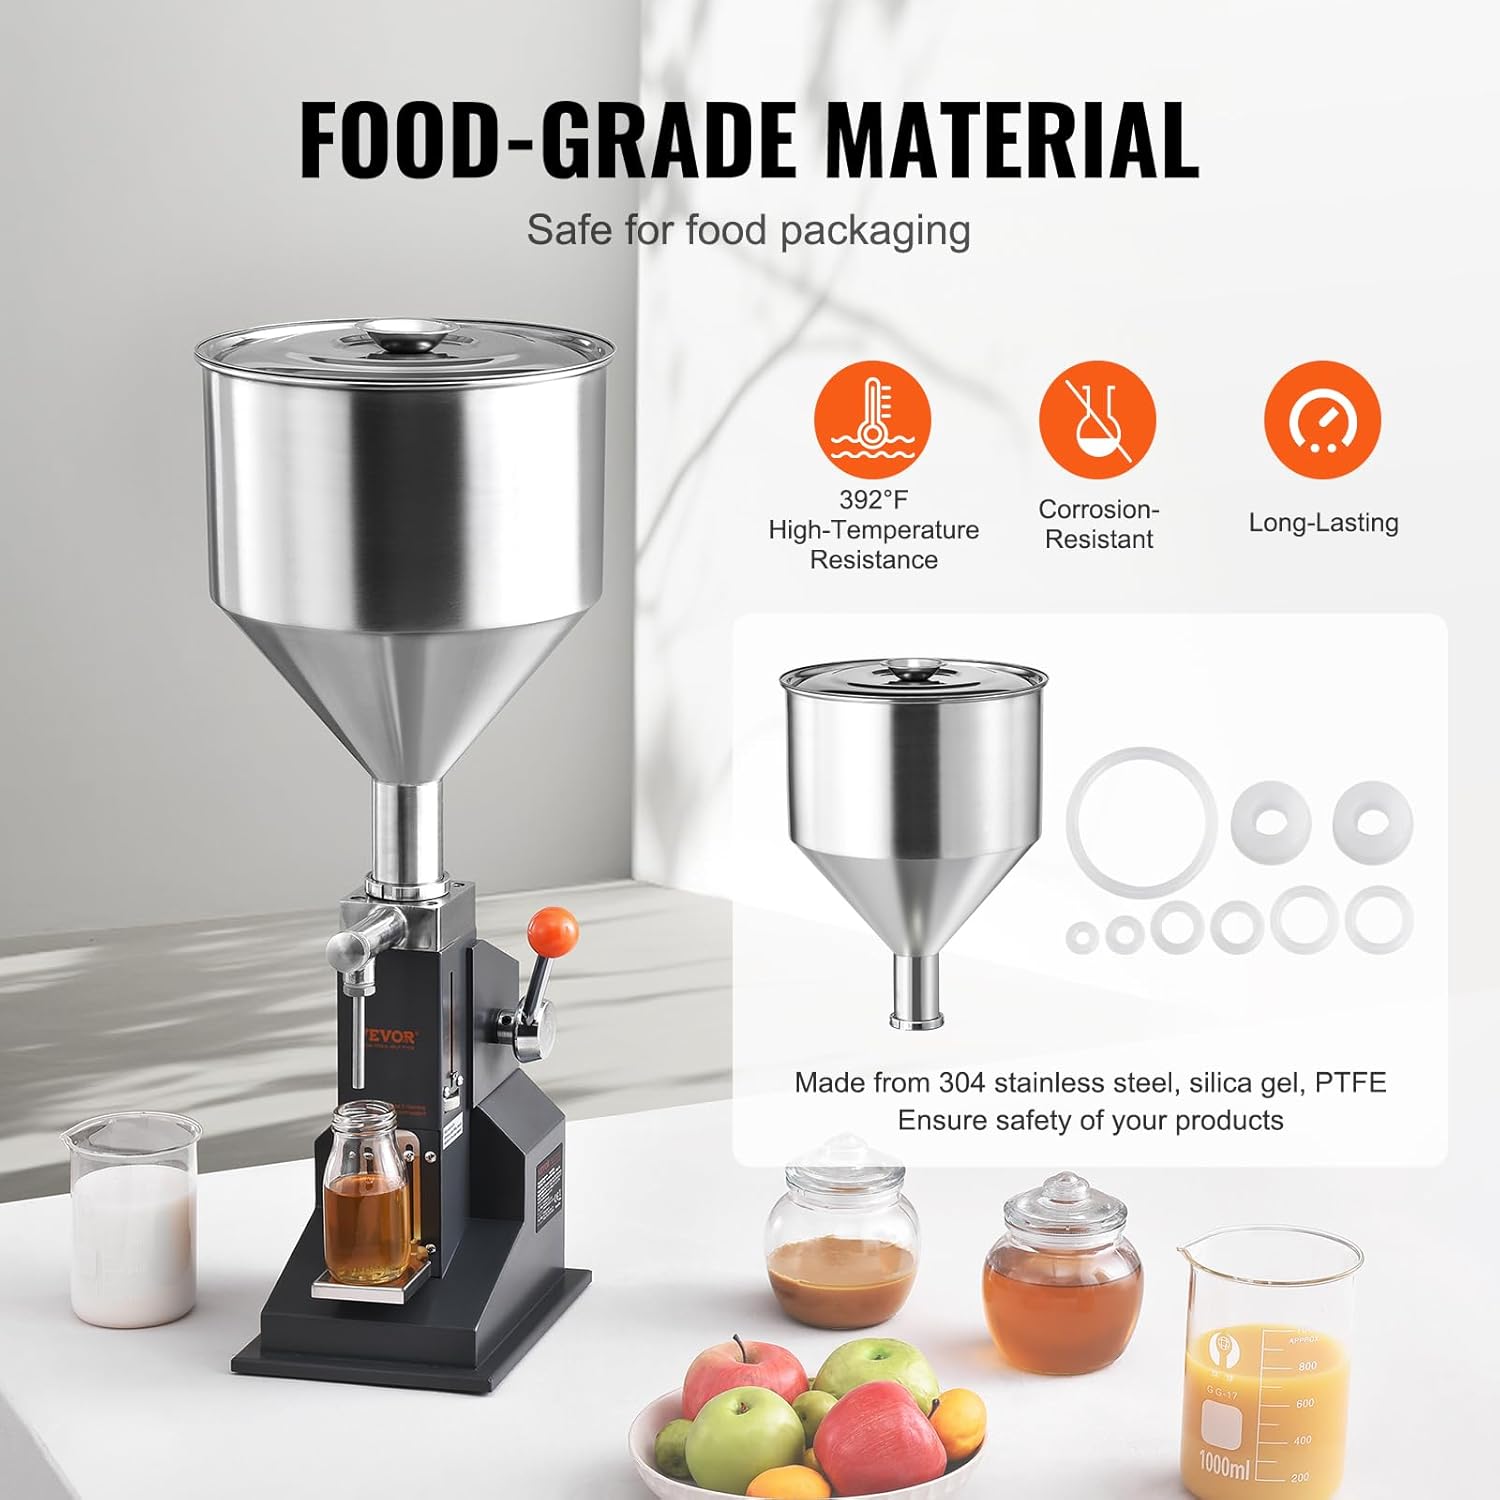
Figure 7: The machine is constructed from food-grade 304 stainless steel, silica gel, and PTFE for durability and hygiene.
8. Troubleshooting
This section addresses common issues you might encounter and their solutions.
| Problem | Possible Cause | Solution |
|---|---|---|
| Inconsistent Filling Volume |
|
|
| Material Leaking from Nozzle |
|
|
| Handle is Stiff or Difficult to Operate |
|
|
| Machine Not Dispensing |
|
|
9. Warranty and Support
For warranty information, technical support, or to purchase replacement parts, please contact BestEquip customer service. Refer to your purchase documentation for specific warranty terms and contact details.
You can also visit the official BestEquip store on Amazon for more information and support: BestEquip Amazon Store.
Ask a question about this manual
Ask about setup, troubleshooting, compatibility, parts, safety, or missing instructions. Manuals+ will review the question and use this page’s manual context to help answer it.