UYIKOO B0CTG6K2CX
UYIKOO 10000mAh Power Bank Security Camera User Manual
Model: B0CTG6K2CX
1. Introduction
The UYIKOO 10000mAh Power Bank Security Camera is a versatile device combining a high-capacity power bank with a discreet security camera. It is designed for various monitoring needs, including baby monitoring, pet surveillance, or general security. This device features 1080P HD video recording, infrared night vision, motion detection, and a gravity sensor to ensure upright video footage. It operates without Wi-Fi or an app, offering simple one-key operation and local storage via a Micro SD card.

Image: The UYIKOO 10000mAh Power Bank Security Camera, showcasing its sleek black design and hidden camera lens.
2. Product Overview and Components
Familiarize yourself with the different parts of your UYIKOO Power Bank Security Camera:

Image: Detailed diagram labeling the various ports, buttons, and features of the power bank security camera.
- Camera Lens: The hidden lens for video recording and photo capture.
- Mode Switch (M/L): Toggles between Motion Detection (M) and Loop Recording (L) modes.
- TF Card Slot: Slot for inserting the Micro SD card (up to 128GB, not included).
- USB Data Port: Micro-USB port for connecting to a computer to view files or for charging.
- Reset Button: Used to reset the device if needed.
- Camera Power Button: Controls the camera's power and initiates recording/photo capture.
- Night Vision Lights: Invisible infrared LEDs for low-light recording.
- Indicator Light: Displays device status (e.g., standby, recording, charging).
- Battery Indicator: LEDs showing the remaining power bank battery level.
- Power Bank Power Button: Activates the power bank function for charging external devices.
- Charging Ports (Micro, Type-C, IPH): Input ports for charging the power bank itself.
- Output Ports (OUT1, OUT2): USB-A ports for charging external devices.
3. What's in the Box
Upon opening the package, ensure all the following items are present:

Image: An illustration showing the power bank camera, USB cable, card reader, and user manual included in the package.
- UYIKOO 10000mAh Power Bank Security Camera
- USB Charging/Data Cable
- USB Card Reader
- User Manual
- Adhesive Face-plates (for concealing ports/buttons)
4. Setup
4.1 Charging the Device
Before first use, fully charge the power bank camera. It has a 10000mAh battery capacity, providing extended operation time.
- Connect the provided USB cable to one of the charging input ports (Micro, Type-C, or IPH) on the power bank.
- Connect the other end of the USB cable to a standard USB power adapter (not included) or a computer's USB port.
- The battery indicator LEDs will illuminate to show charging progress. All LEDs will be solid when fully charged.

Image: The power bank camera connected via USB cable, charging a smartphone, demonstrating its dual functionality.
4.2 Inserting the Micro SD Card
A Micro SD card (not included) is required for storing recorded videos and photos. The device supports up to 128GB.
- Ensure the device is powered off.
- Locate the TF Card Slot on the camera end of the device.
- Gently insert the Micro SD card into the slot until it clicks into place. Ensure it is formatted to FAT32 before insertion for optimal performance.
- To remove, push the card in slightly until it springs out.
5. Operating Instructions
The camera features simple one-key operation. Pay attention to the indicator light for status confirmation.

Image: A visual guide detailing the one-key operation for powering on, taking photos, and video recording modes.
5.1 Power On/Off
- Power On: Long press the Camera Power Button for 3 seconds. The red and blue indicator lights will be on for 2 seconds, then the blue light will remain solid, indicating standby mode. If no operation occurs within 1 minute, the camera will automatically turn off.
- Power Off: Long press the Camera Power Button for 5 seconds. The red indicator light will flash 6 times, and the device will power off.
5.2 Taking Photos
- In standby mode (blue light solid), short press the Camera Power Button once. The blue indicator light will flash once, indicating a photo has been taken.
5.3 Video Recording
The camera supports two video recording modes: Loop Recording and Motion Detection.
- Loop Recording (Default 'L' Mode):
In standby mode, press the Camera Power Button again for 3 seconds. The blue indicator light will flash 3 times and then turn off, indicating continuous loop recording has started. The camera will record continuously, overwriting the oldest files when the SD card is full. - Motion Detection ('M' Mode):
Slide the Mode Switch to 'M' position. In standby mode, the camera will automatically start recording when it detects movement. The red light will flash 4 times and then turn off. Recording will stop when motion ceases and resume upon new detection, saving SD card space.

Image: An illustration depicting the motion detection feature, highlighting how the camera automatically records when movement is detected.
5.4 Night Vision
The camera is equipped with 4 invisible infrared LED lights for clear recording in low-light or dark conditions. The night vision function activates automatically when ambient light is insufficient.

Image: A split image demonstrating the camera's night vision, showing a room in normal light and then in complete darkness with clear visibility.
5.5 Gravity Sensor
The built-in gravity sensor ensures that recorded video footage is always upright, regardless of the camera's orientation (even if flipped 180 degrees). This eliminates the need to manually rotate videos during playback.
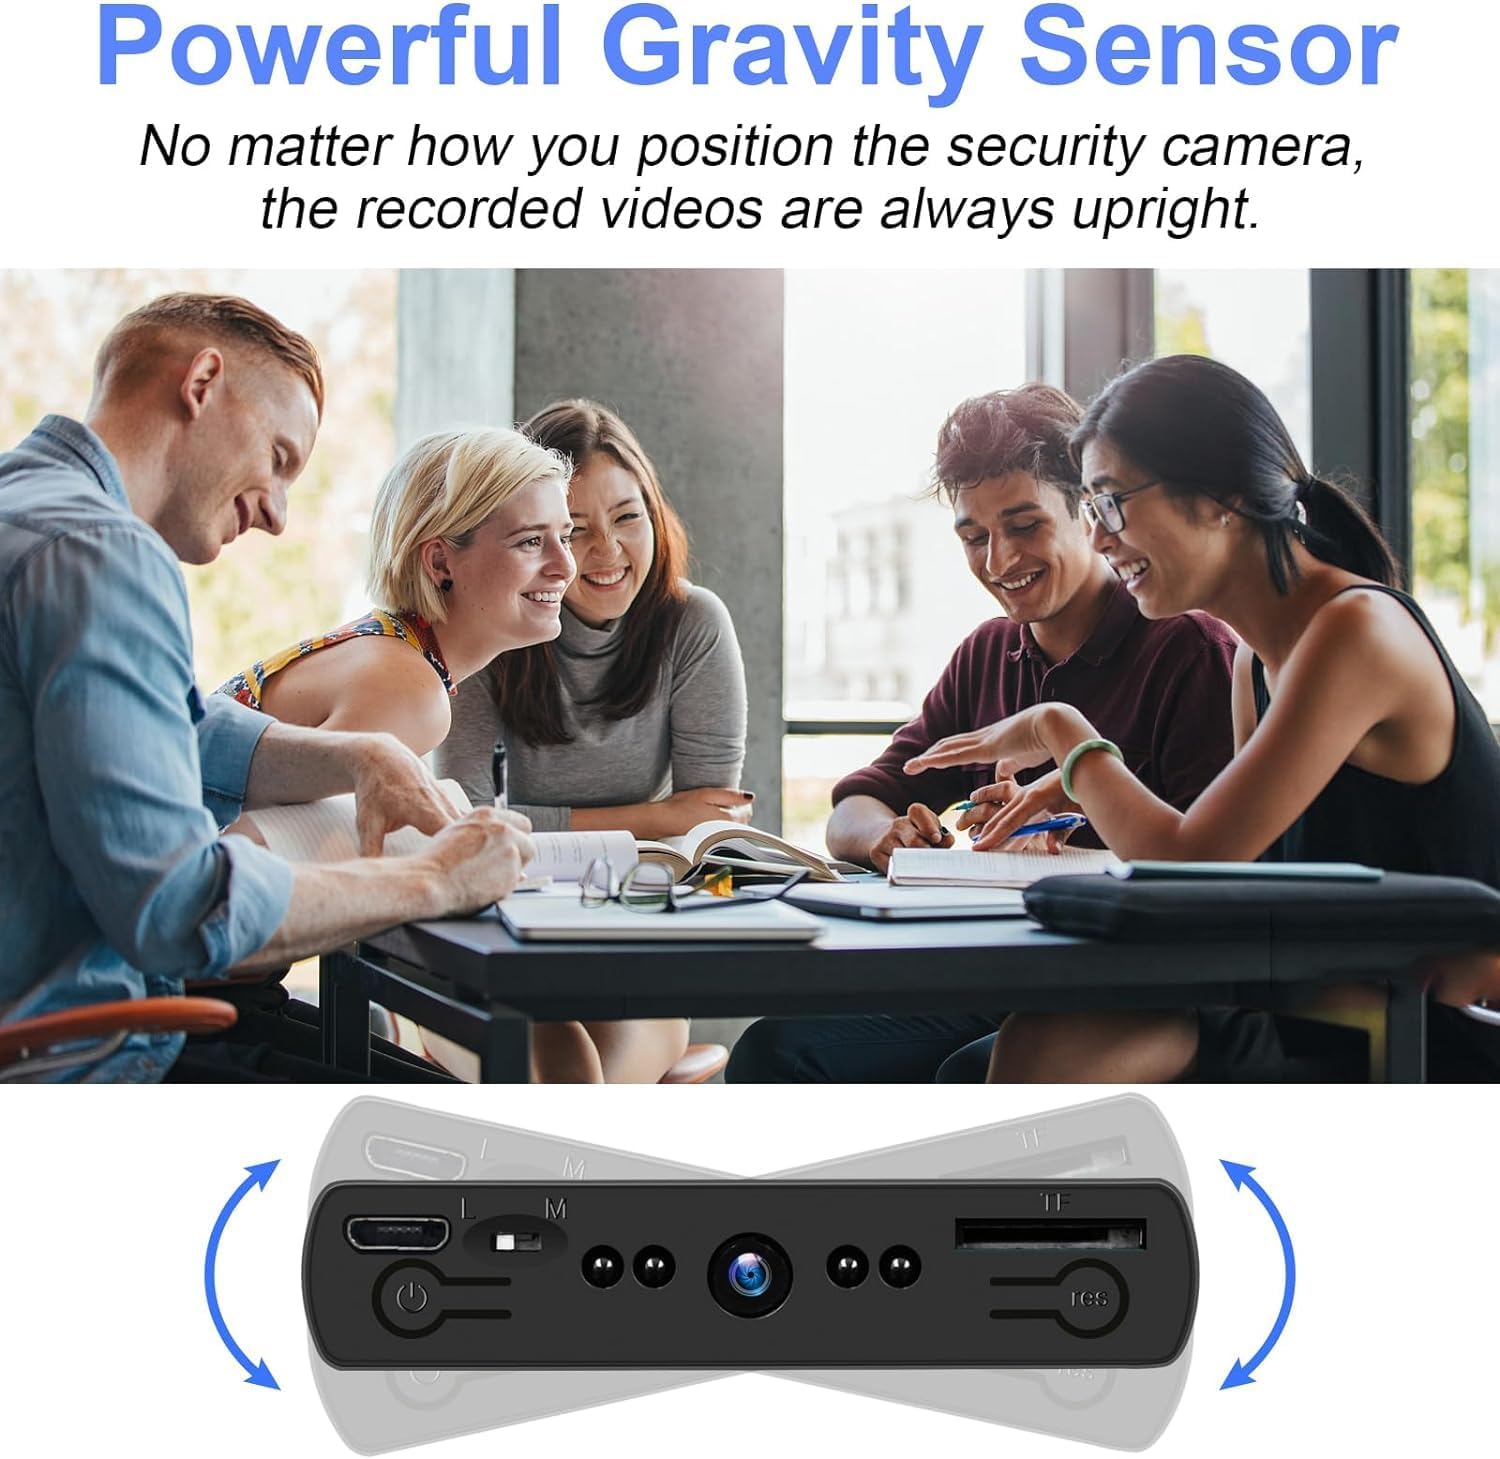
Image: An illustration demonstrating the gravity sensor, showing the camera rotating while the video displayed remains upright.
5.6 Viewing Recorded Files
To view your recorded videos and photos:
- Using the USB Cable: Connect the power bank camera to your computer using the provided USB cable. The device will appear as a removable disk, allowing you to access the files.
- Using the Card Reader: Remove the Micro SD card from the device and insert it into the provided USB card reader. Plug the card reader into your computer's USB port to access the files.

Image: The power bank camera connected to a laptop via USB cable, with a visual representation of video files being viewed on screen.
6. Maintenance
- Keep the device dry and away from moisture.
- Avoid extreme temperatures.
- Clean the camera lens and device surface with a soft, dry cloth. Do not use harsh chemicals.
- Store in a cool, dry place when not in use for extended periods.
- Regularly back up important recordings from the Micro SD card to prevent data loss.
7. Troubleshooting
- Device not powering on: Ensure the device is fully charged. If the issue persists, try resetting the device using the reset button.
- Cannot record video/take photos: Check if a Micro SD card is inserted and properly formatted (FAT32). Ensure the card is not full.
- Poor video quality: Ensure the camera lens is clean and free from obstructions. Check lighting conditions; night vision activates automatically in low light.
- Files not accessible on computer: Ensure the USB cable is securely connected. Try using the provided card reader to access files directly from the Micro SD card.
- Device automatically turns off: If no operation is performed within 1 minute after powering on, the camera will automatically turn off to save power. This is normal behavior.
8. Specifications

Image: A visual comparison of the power bank camera's dimensions (5.5 x 2.7 inches) next to a smartphone for scale.
| Feature | Specification |
|---|---|
| Model | B0CTG6K2CX |
| Battery Capacity | 10000mAh |
| Video Capture Resolution | 1080p |
| Frame Rate | 30 fps |
| Viewing Angle | 90 Degrees |
| Storage | Micro SD card, up to 128GB (FAT32 format) |
| Connectivity | No Wi-Fi/App required |
| Power Source | Battery Powered |
| Dimensions (L x W x H) | 5.5 x 2.64 x 0.59 inches |
| Item Weight | 12 ounces |
| Color | Black |
| Special Features | Night Vision, Motion Detection, Gravity Sensor, Portable |
9. Warranty and Support
For warranty information and technical support, please refer to the contact details provided with your purchase or visit the official UYIKOO website. Keep your purchase receipt as proof of purchase for any warranty claims.
Ask a question about this manual
Ask about setup, troubleshooting, compatibility, parts, safety, or missing instructions. Manuals+ will review the question and use this page’s manual context to help answer it.