1. Introduction
Thank you for choosing the MEGEAR Level 1-2 EV Charger. This manual provides essential information for the safe and efficient operation of your new electric vehicle charger. Please read this manual thoroughly before use and retain it for future reference.
Important Safety Information
- Always connect the charger to a properly grounded power outlet.
- Do not use the EV charger if it is damaged, appears cracked, frayed, broken, or otherwise damaged.
- Do not attempt to open, disassemble, repair, tamper with, or modify the EV charger. User-serviceable parts are not inside.
- Ensure the charging cable is not exposed to severe rain, snow, electrical storms, or other inclement weather during use.
- Do not touch the EV charger's end terminals with sharp metallic objects.

Figure 1: MEGEAR Level 1-2 EV Charger components.
2. What's in the Box
Verify that all items listed below are included in your package:
- MEGEAR Level 1-2 EV Charger (with integrated NEMA 6-20 plug and J1772 connector)
- NEMA 5-15 Adapter
- User Manual
- Carry Bag
- Velcro Cable Tie

Figure 2: Package contents of the MEGEAR EV Charger.
3. Key Features
- Dual Level Charging: Supports both Level 1 (110V) and Level 2 (240V) charging for versatile use.
- High Amperage: Delivers up to 16 Amps for efficient charging.
- Extended Cable Length: Features a 25-foot cable for convenient reach.
- Universal Compatibility: Equipped with a J1772 connector, compatible with all SAE J1772 electric vehicles. Also Tesla-compatible with a J1772 to Tesla adapter (sold separately).
- Comprehensive Safety: Includes over-voltage, over-current, short circuit, ground protection, overheating protection, leakage protection, and lightning protection.
- Durable Design: Dustproof and waterproof (IP65 rated) for reliable outdoor use, designed to withstand harsh conditions.
- Portable: Comes with a carry bag for easy transport and storage.

Figure 3: High-power charging capabilities of the MEGEAR EV Charger.

Figure 4: Integrated safety features for secure charging.
4. Setup Instructions
4.1 Power Connection
The MEGEAR EV Charger comes with a NEMA 6-20 plug for Level 2 charging. A NEMA 5-15 adapter is included for Level 1 charging.
- For Level 2 Charging (240V, 16A): Plug the charger's NEMA 6-20 plug directly into a compatible 240V NEMA 6-20 wall socket. Ensure the socket is properly installed and grounded.
- For Level 1 Charging (110V, 12A max recommended): Attach the NEMA 5-15 adapter to the charger's NEMA 6-20 plug. Then, plug the NEMA 5-15 adapter into a standard 110V household outlet. It is recommended to set your vehicle's charging current to 12 Amps or lower when using a 110V outlet to prevent overheating of the household circuit.

Figure 5: NEMA 6-20 plug and NEMA 5-15 adapter for power connection.
4.2 Vehicle Connection
- Open your electric vehicle's charging port.
- Insert the J1772 connector firmly into the vehicle's charging port. Ensure a secure connection.
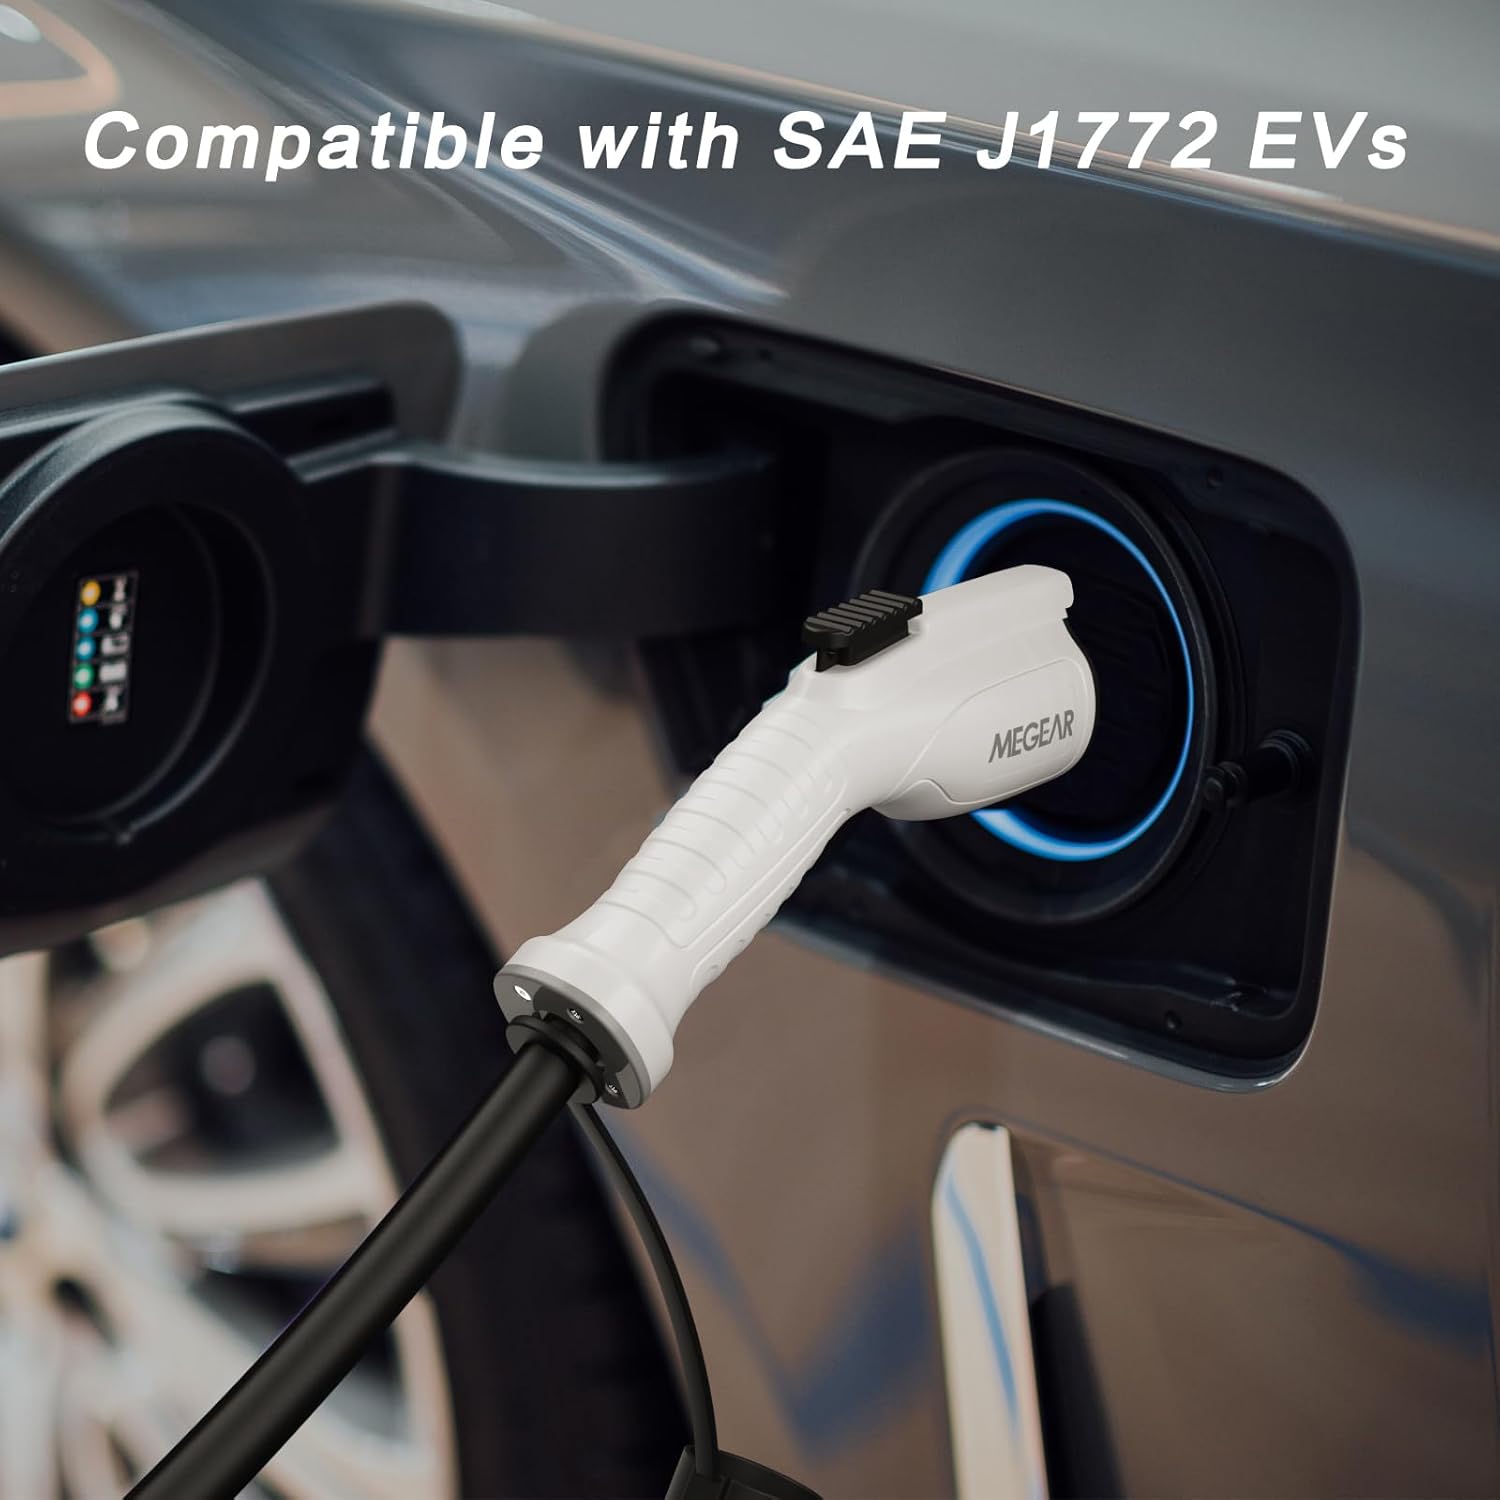
Figure 6: J1772 connector inserted into an EV charging port.
Video 1: Demonstrates the process of connecting the portable EV charger to a wall socket and then to the vehicle's charging port, showing indicator lights for successful connection and charging status.
5. Operating Instructions
5.1 LED Indicator Status
The control box features LED indicators to display the charger's status:
- Power (Green): Solid green indicates the charger is powered on.
- Fault (Red): Flashing red indicates an error. Refer to the troubleshooting section.
- Charge (Green): Blinking green indicates active charging. Solid green indicates charging is complete.
- AC Output (Green): Solid green indicates AC power is being supplied to the vehicle.

Figure 7: Understanding the LED indicator lights.
5.2 Starting and Stopping Charging
- Once the charger is connected to both the power source and the vehicle, charging will typically begin automatically.
- To stop charging, disconnect the J1772 connector from your vehicle first, then unplug the charger from the wall outlet.
Video 2: Overview of the MEGEAR Level 1-2 EV Charger, demonstrating its compact size and ease of use for charging an electric vehicle.
6. Maintenance and Storage
- Keep the charger clean and free from dust and debris. Use a soft, dry cloth for cleaning.
- Store the charger in its provided carry bag when not in use to protect it from damage.
- Avoid storing the charger in direct sunlight or extreme temperatures.
- Ensure the dust cap is placed over the J1772 connector when not in use.

Figure 8: Portable design with included carry bag for easy storage.
7. Troubleshooting
If you encounter issues, refer to the LED indicator status on the control box and the table below:
| Condition | Power (Green) | Fault (Red) | Charge (Green) | AC Output (Green) |
|---|---|---|---|---|
| Initial Status | On | Flash 2s | Flash 2s | Flash 2s |
| Ready for Charging | On | Off | Off | Off |
| Contact | On | Off | On | Off |
| Charging | On | Off | Flash 0.5s | On |
| Charge Complete | On | Off | On | Off |
| NG1: AC Voltage Error | On | Flash Once | Off | Off |
| NG2: AC Current Error | On | Flash Twice | Off | Off |
| NG3: CP Function Error | On | Flash 3 Times | Off | Off |
| NG4: Leakage Error | On | Flash 4 Times | Off | Off |
| NG5: FG/PE Error | On | Flash 5 Times | Off | Off |
NOTE: Charging will not be interrupted when FG/PE error occurs; please contact your electrician to check the ground wire.
8. Specifications
- Input Voltage: 100-265V AC
- Output Current: 16A Max
- Operating Temperature: -30°C to +50°C (-22°F to 122°F)
- Cable Length: 25 feet
- Connector Type: J1772
- Power Plug: NEMA 6-20 (with NEMA 5-15 adapter)
- Protection: IP65 (Dustproof & Waterproof)
- Item Weight: 8.49 pounds
- Product Dimensions: 300 x 75 x 91.44 inches (Control Box)
9. Warranty and Support
The MEGEAR Level 1-2 EV Charger is backed by a 1-year limited warranty. Additionally, lifetime technical support is provided to assist you with any questions or issues you may encounter during the product's lifespan.
For warranty claims or technical assistance, please contact MEGEAR customer service through the retailer where the product was purchased or visit the official MEGEAR website.