
1. Introduction
The Seismic Audio Connect is a portable, self-contained PA speaker system designed for various audio applications. It features an 8-inch 2-way speaker, a Class D amplifier, a 3-channel mixer, Bluetooth 5.0 connectivity, True Wireless Stereo (TWS) functionality, and a rechargeable battery. This manual provides instructions for safe operation, setup, and maintenance of your Connect PA speaker.

Figure 1: Front view of the Seismic Audio Connect Portable PA Speaker.
2. Safety Information
- Read all instructions before operating the device.
- Keep this manual for future reference.
- Do not expose the unit to rain or moisture.
- Do not block any ventilation openings.
- Do not install near any heat sources such as radiators, heat registers, stoves, or other apparatus (including amplifiers) that produce heat.
- Only use attachments/accessories specified by the manufacturer.
- Unplug this apparatus during lightning storms or when unused for long periods of time.
- Refer all servicing to qualified service personnel.
- The battery is rechargeable. Do not attempt to replace the battery yourself. Contact qualified service personnel.
3. Package Contents
Verify that all items listed below are included in your package:
- Seismic Audio Connect Portable PA Speaker
- Power Cable
- User Manual (this document)
4. Product Features
- Model: Connect - Powered 8 Inch Portable 2-Way Compact PA Speaker with Rechargeable Battery
- Connectivity: Bluetooth 5.0, TWS (True Wireless Connectivity)
- Amplifier: Class D High Powered Amplifier
- Drivers: LF: 8 Inch Driver, HF: 1 Inch Titanium Compression Driver
- Mixer: 3-channel mixer with 2 Mic Preamps
- EQ: 2-band Channel EQ
- DSP: Sampling Frequency 48kHz, MIC Howling Detector, Crossover, Limiter, Reverb, EQ
- DSP Modes: Music, Speech, Monitor, Sub
- Inputs: 2 x XLR-1/4" combo, 1 x 1/8" TRS (stereo), RCA Input
- Outputs: 1 x XLR (mix out)
- Effects: Bass Boost, Feedback Eliminator, Reverb, Talk Over
- Mounting Options: Speaker pole mounted, tilted back, seated on the floor, or used as a wedge monitor.
5. Controls and Connections
Familiarize yourself with the control panel and input/output connections of your Connect PA speaker.

Figure 2: Detailed view of the control panel.
5.1 Mixer Channels (CH 1, CH 2, CH 3)
- Volume Knobs: Adjust the input level for each channel.
- Bass Knobs: Adjust the low-frequency response for each channel.
- Treble Knobs: Adjust the high-frequency response for each channel.
5.2 Master Controls and DSP
- Master Volume: Controls the overall output level of the speaker.
- Pair Button: Initiates Bluetooth pairing mode.
- TWS Button: Initiates True Wireless Stereo pairing mode.
- Effects Buttons:
- Bass Boost: Enhances low frequencies.
- Feedback Eliminator: Reduces audio feedback.
- Reverb: Adds spatial effect to the sound.
- Talk Over: Automatically ducks music volume when a microphone signal is detected.
- DSP Voicing Modes: Selectable modes for optimizing sound based on application.
- Music: Optimized for music playback.
- Speech: Optimized for vocal clarity.
- Monitor: Optimized for use as a stage monitor.
- Sub: Optimized for use with an external subwoofer.
- Battery Level Indicator: LEDs display the current battery charge level.
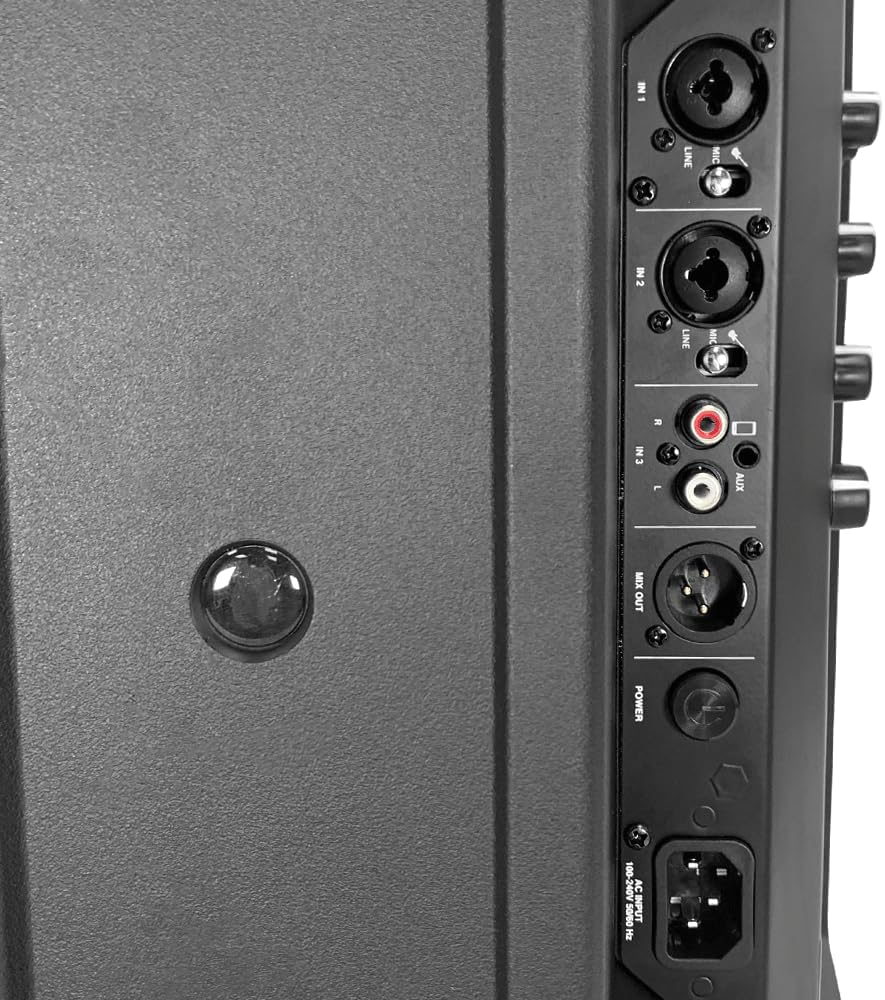
Figure 3: Input and Output Connections.
5.3 Input/Output Panel
- IN 1 / IN 2 (XLR-1/4" Combo Jacks): Connect microphones or line-level instruments.
- IN 3 (RCA Input / 1/8" TRS Stereo): Connect external audio devices such as MP3 players or smartphones.
- MIX OUT (XLR): Provides a mixed output signal for connecting to another PA system or recording device.
- POWER Input: Connect the supplied AC power cable for charging and operation.
6. Setup
6.1 Initial Charging
Before first use, fully charge the internal rechargeable battery. Connect the supplied power cable to the POWER input on the speaker and then to a standard AC outlet. The battery indicator LEDs will show charging progress. A full charge is indicated when all LEDs are lit and stable.
6.2 Placement Options
The Connect PA speaker offers versatile placement options:
- Pole Mount: Use a standard speaker pole for elevated sound projection.
- Floor Standing: Place directly on a flat, stable surface.
- Tilted Back: Position the speaker on its side with the integrated tilt-back design for use as a personal monitor.
- Wedge Monitor: Utilize the angled design for stage monitoring.
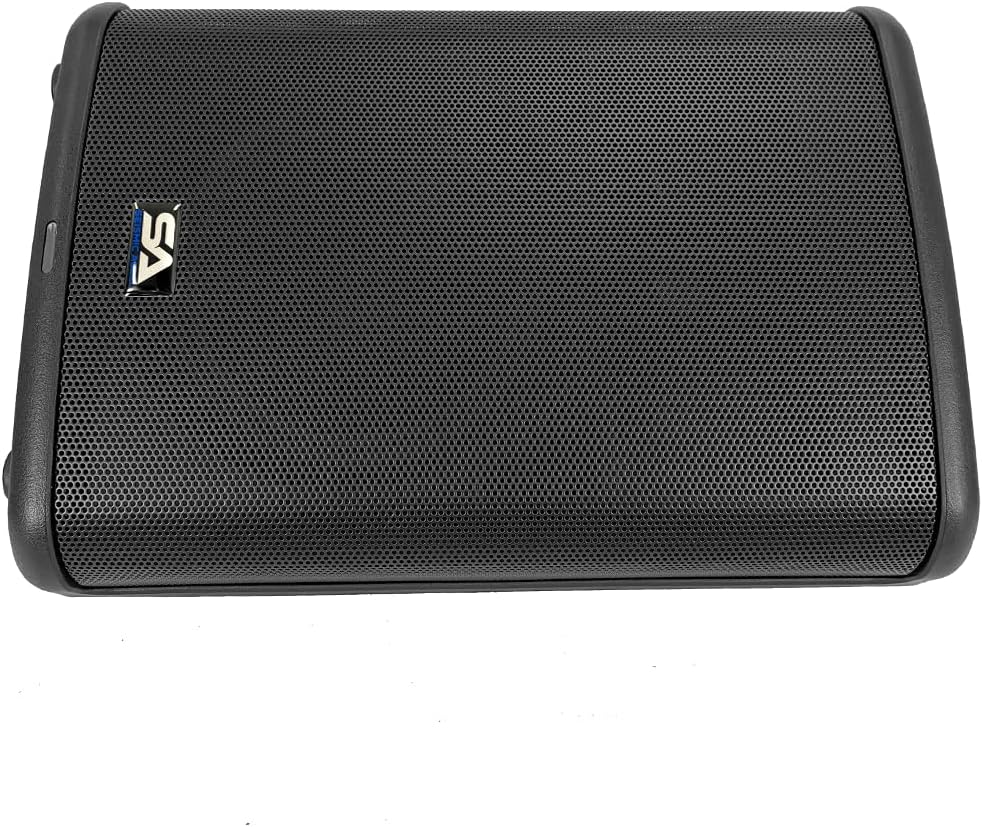
Figure 4: Top view of the speaker, illustrating portability.
6.3 Connecting Audio Sources
Ensure the speaker is powered off before connecting any audio sources.
- Microphones/Instruments: Connect XLR or 1/4" cables to IN 1 or IN 2.
- External Devices (MP3/Smartphone): Connect RCA cables or a 1/8" TRS cable to IN 3.
- Daisy Chaining: Use the MIX OUT XLR to connect to another PA system or powered speaker.
7. Operating Instructions
7.1 Power On/Off
Press and hold the power button located on the control panel to turn the speaker on or off. The power indicator LED will illuminate when the unit is on.
7.2 Bluetooth Pairing
- Turn on the Connect PA speaker.
- Press the "Pair" button on the control panel. The Bluetooth indicator LED will flash, indicating pairing mode.
- On your Bluetooth-enabled device (e.g., smartphone, tablet), search for "Seismic Connect" in the Bluetooth settings.
- Select "Seismic Connect" to connect. The Bluetooth indicator LED on the speaker will become solid when successfully paired.
7.3 TWS (True Wireless Stereo) Pairing
To use two Connect PA speakers in stereo mode:
- Ensure both Connect speakers are powered on and not currently paired via Bluetooth to any device.
- On one speaker (this will be the master), press the "TWS" button. The TWS indicator LED will flash.
- On the second speaker (this will be the slave), press the "TWS" button.
- The two speakers will automatically connect. The TWS indicator LEDs on both speakers will become solid when successfully paired.
- Now, pair your Bluetooth device to the master speaker as described in Section 7.2. Audio will play in stereo across both units.
7.4 DSP Modes
Select the appropriate DSP mode for your application using the DSP Voicing Mode buttons:
- Music: General purpose music playback.
- Speech: Enhances vocal clarity for presentations or public speaking.
- Monitor: Optimizes sound for close-range monitoring.
- Sub: Adjusts frequency response for integration with an external subwoofer.
7.5 Mixer Controls
Adjust the Volume, Bass, and Treble knobs for each channel (CH 1, CH 2, CH 3) to achieve the desired sound mix. Use the Master Volume knob for overall output level adjustment.
8. Maintenance
- Cleaning: Use a soft, dry cloth to clean the exterior of the speaker. Do not use abrasive cleaners or solvents.
- Storage: When not in use for extended periods, store the speaker in a cool, dry place. Ensure the battery is partially charged (around 50%) before long-term storage to prolong battery life.
- Battery Care: Avoid fully discharging the battery frequently. Recharge the battery regularly, even if the speaker is not in active use.
9. Troubleshooting
| Problem | Possible Cause | Solution |
|---|---|---|
| No power | Battery discharged; Power cable not connected; Power button not pressed. | Charge the battery; Ensure power cable is securely connected; Press and hold the power button. |
| No sound output | Volume too low; Incorrect input selected; Source device not playing; Cables not connected properly. | Increase Master Volume and channel volumes; Verify input connections; Check source device playback; Re-seat all audio cables. |
| Bluetooth not pairing | Speaker not in pairing mode; Device too far; Interference; Already paired to another device. | Press the "Pair" button; Move device closer; Reduce interference; Disconnect from other devices and try again. |
| TWS not connecting | One or both speakers already Bluetooth paired; Speakers too far apart. | Ensure both speakers are not Bluetooth paired to any device; Place speakers within close proximity for TWS pairing. |
| Feedback (howling) | Microphone too close to speaker; Microphone gain too high. | Move microphone away from speaker; Reduce microphone volume; Activate Feedback Eliminator effect. |
10. Specifications
| Model | Connect |
| Power Rating RMS (LF + HF) | 70 Watts + 30 Watts |
| Power Rating Peak (LF + HF) | 140 Watts + 60 Watts |
| Amplifier Type | Class D |
| LF Driver | 8 Inch |
| HF Driver | 1 Inch Titanium Compression Driver |
| Number of Mixer Channels | 3 |
| Mic Preamps | 2 |
| EQ | 2-band Channel EQ |
| Frequency Response | 60Hz - 19kHz |
| Max SPL | 115 dB |
| THD | 0.01% (20Hz - 20kHz) |
| DSP Sampling Frequency | 48kHz |
| Inputs | 2 x XLR-1/4" combo, 1 x 1/8" TRS (stereo), RCA Input |
| Outputs | 1 x XLR (mix out) |
| Bluetooth Version | 5.0 |
| Built-In Media | Bluetooth, True Wireless Stereo |
| Power Source | Battery Powered (Rechargeable Lithium-ion) |
| Item Dimensions (L x W x H) | 11 x 10.5 x 15.5 inches |
| Item Weight | 17.3 Pounds |
| Enclosure Material | Plastic |
11. Warranty and Support
The Seismic Audio Connect Portable PA Speaker comes with a 1-Year Warranty from the date of purchase. This warranty covers manufacturing defects and workmanship under normal use.
For warranty claims, technical support, or service inquiries, please contact Seismic Audio customer service. Keep your proof of purchase for warranty validation.
Note: Unauthorized repairs or modifications will void the warranty.