1. Introduction
Welcome to the user manual for your PARKVISION Handlebar Bike Mirror. This innovative bicycle rear view camera system is designed to enhance your cycling safety and awareness by providing a clear, wide-angle view of what's behind you. Featuring a high-definition 4.3-inch 1080P monitor with an anti-glare sunshade and a long-lasting 8000mAh battery, this system is suitable for various bikes including mountain bikes, e-bikes, and road bikes. Please read this manual thoroughly to ensure proper installation, operation, and maintenance of your device.
2. Product Overview
The PARKVISION Handlebar Bike Mirror system comprises a high-resolution camera and a bright display monitor, engineered for optimal visibility and ease of use during cycling.
2.1 Key Features
- 1080P Enhanced Ultra-Bright Display: The 4.3-inch monitor features an ultra-bright 1000 nits display and a patented sunshade, ensuring superior visibility even in direct sunlight.
- Improved 120° Wide-Angle View: Offers a panoramic view behind you, significantly reducing blind spots and enhancing driving safety. The display accurately represents distances without deformation.
- High-Capacity 8000mAh Battery: Provides up to 9 hours of continuous operation. Equipped with a Type-C interface for fast charging and a battery percentage display for convenient power monitoring.
- Easy Installation: Tool-free, plug-and-play setup that can be completed in minutes. The shockproof support ensures stable display even on uneven roads.
- Reliable Cycling Rear Camera System: Features color night vision for clear visibility during night rides. The housing keypad prompts are clearly visible, and the 360-degree rotatable joint ball allows for effortless angle adjustment. The adjustable bracket fits most bikes.
2.2 Product Visuals

Figure 1: The PARKVISION Handlebar Bike Mirror system, showcasing the monitor and camera unit.

Figure 2: Visual comparison demonstrating the superior brightness of the 1000 nits display in real-time under strong ambient light.

Figure 3: An infographic detailing the advantages of the PARKVISION system, including high brightness, anti-glare, auto-brightness sensor, and an 8000mAh battery.
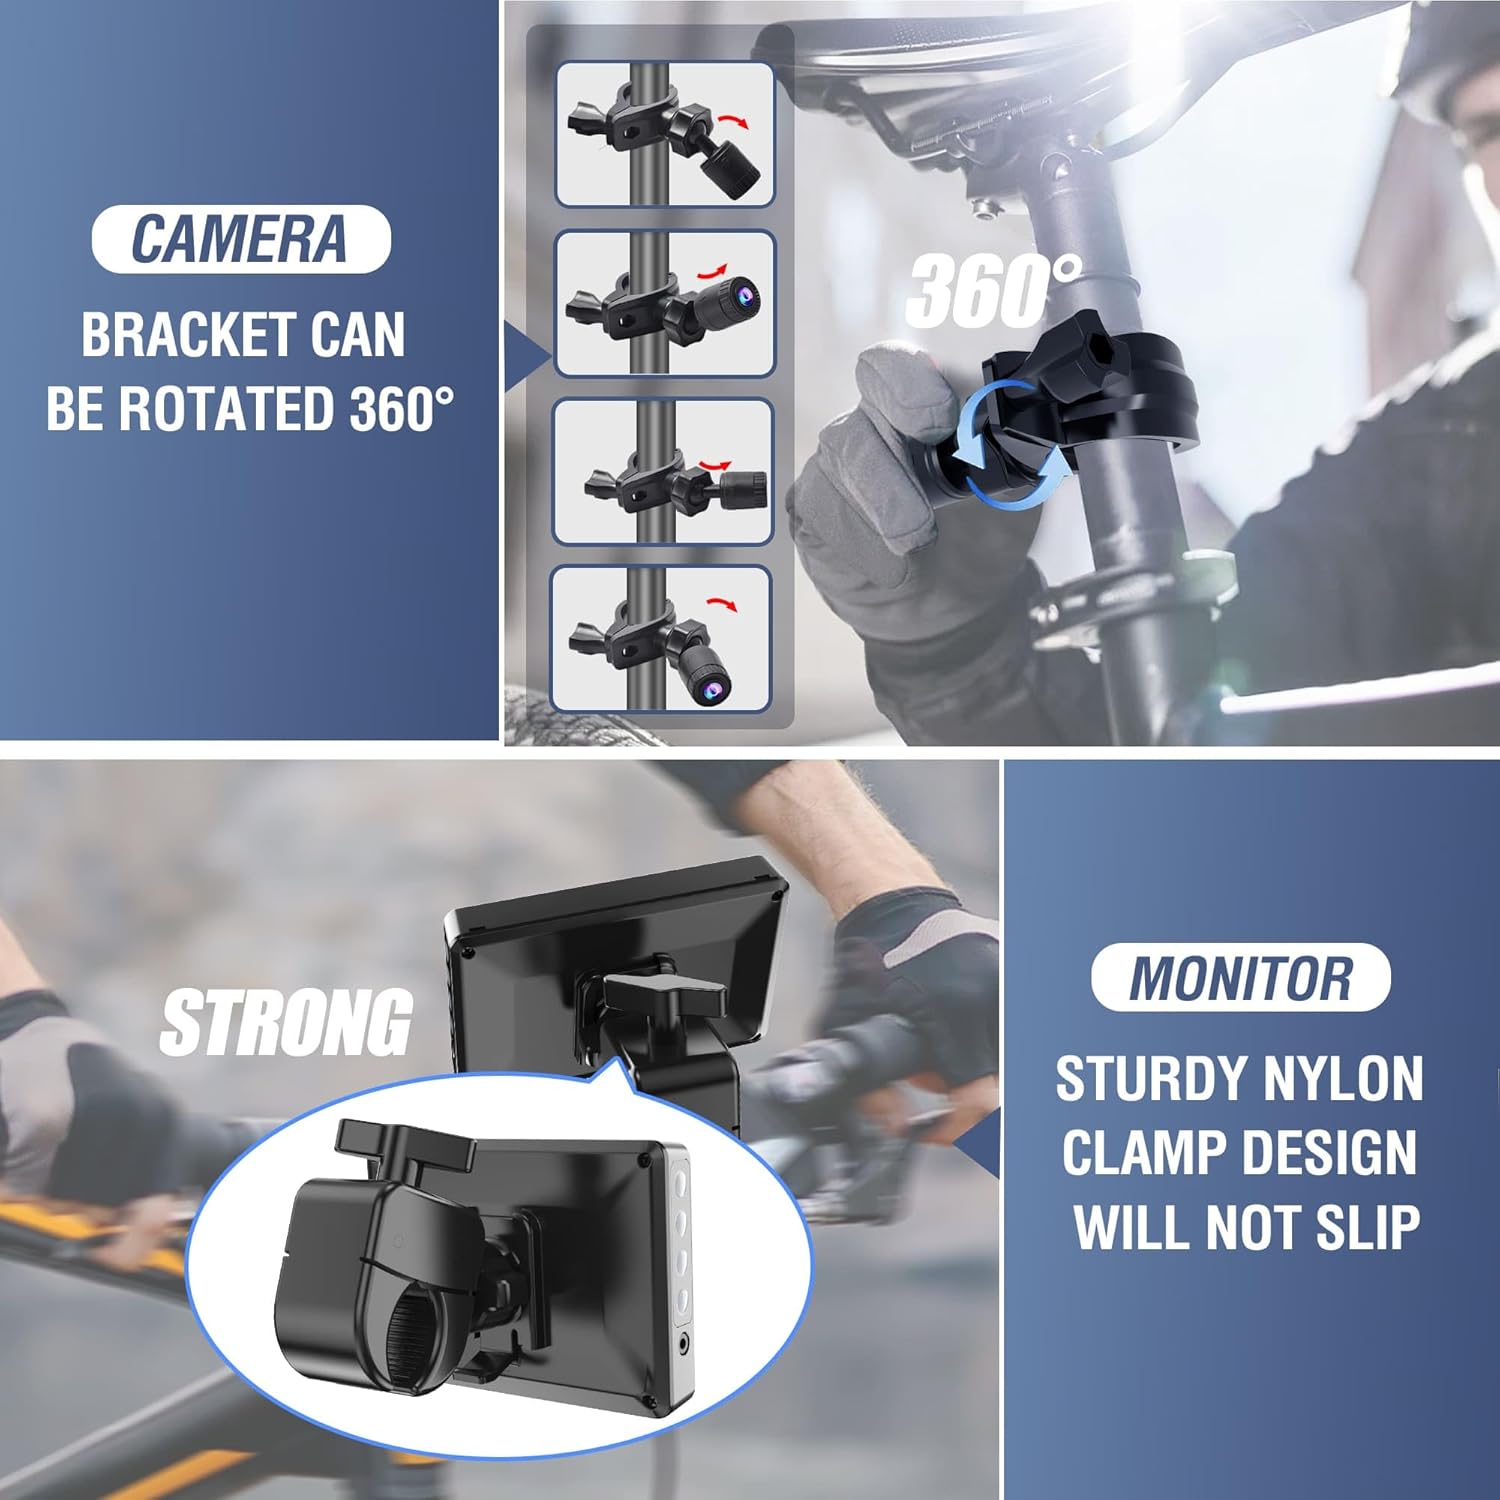
Figure 4: Illustration of the camera bracket's 360-degree rotation capability and the secure nylon clamp design for the monitor.

Figure 5: Depiction of the 8000mAh battery providing up to 9 hours of usage and the convenience of USB Type-C fast charging.

Figure 6: Visual explanation of the automatic brightness adjustment feature, adapting to low light and bright environments.

Figure 7: Examples of various vehicles compatible with the PARKVISION system, including different types of bicycles and electric wheelchairs.

Figure 8: Demonstration of the monitor's 360-degree rotation and detachable design for convenience and security.
3. What's in the Box
Upon opening your PARKVISION Handlebar Bike Mirror package, you should find the following components:
- 4.3" HD 1080P Monitor
- Rear View Camera
- Connection Cable (9.8ft)
- USB Type-C Charging Cable
- Handlebar Mounting Bracket (Aluminum Clamp)
- Removable Sunshade
- Instruction Manual
- Gasket
- Cable Ties
- Hook & Loop Taps
4. Setup and Installation
The PARKVISION Handlebar Bike Mirror is designed for quick and easy installation without the need for specialized tools.
- Mount the Monitor: Attach the monitor to your bicycle's handlebar using the provided aluminum clamp. Ensure it is securely fastened and positioned for optimal viewing. The monitor features a sturdy nylon clamp design to prevent slipping.
- Mount the Camera: Install the rear view camera on the seat bar or another suitable rear location using its bracket. The camera bracket can be rotated 360 degrees for flexible positioning.
- Connect the Cables: Connect the camera to the monitor using the 9.8ft connection cable. Ensure the connection is firm and fully inserted. A common issue is the camera not working if the connection is not fully seated, even if it clicks.
- Attach Sunshade (Optional): Slide the removable sunshade onto the monitor for improved visibility in bright conditions.
- Secure Cables: Use the provided cable ties and hook & loop taps to neatly route and secure the cables along your bike frame, preventing interference with moving parts.
5. Operating Instructions
Operating your PARKVISION Handlebar Bike Mirror is straightforward.
- Power On/Off: Press and hold the Power Switch button on the monitor to turn the device on or off.
- Automatic Brightness Adjustment: The monitor features an automatic brightness adjustment function. It will increase brightness in low light environments and adjust based on ambient light sensing in bright environments. No manual adjustment is typically required.
- Manual Brightness Adjustment (if needed):
For detailed visual instructions on adjusting brightness, please refer to the video below:
Video: How to improve Brightness and Enhance visibility? This video demonstrates how to access system settings and image effects to manually adjust screen brightness, contrast, and saturation.
- To turn off automatic brightness: Enter System Setting, navigate to the relevant option, and turn off the automatic brightness function.
- To manually adjust: Enter Image Effect settings. Use the 'Add key' and 'Reduce key' buttons to adjust brightness, contrast, and saturation to your preference.
- Viewing the Feed: Once powered on, the monitor will display the real-time feed from the rear camera.
- Night Vision: The camera automatically switches to color night vision in low-light conditions, ensuring clear visibility even when riding at night.
- Detachable Monitor: The monitor can be easily detached from its mount for security or storage.
6. Maintenance
To ensure the longevity and optimal performance of your PARKVISION Handlebar Bike Mirror, follow these maintenance guidelines:
- Cleaning: Use a soft, dry cloth to clean the monitor screen and camera lens. For stubborn smudges, a slightly damp cloth with mild, non-abrasive cleaner can be used, ensuring no liquid enters the device.
- Battery Care: Charge the 8000mAh battery regularly, even if not in frequent use, to maintain its health. Avoid fully discharging the battery for extended periods.
- Storage: When not in use for extended periods, store the device in a cool, dry place away from direct sunlight and extreme temperatures. Detaching the monitor can help protect it.
- Cable Inspection: Periodically check all cables for any signs of wear, fraying, or damage. Replace damaged cables immediately to prevent malfunction or safety hazards.
- Water Resistance: The camera is IP68 waterproof, designed to withstand various weather conditions. However, avoid submerging the monitor.
7. Troubleshooting
If you encounter any issues with your PARKVISION Handlebar Bike Mirror, please refer to the following common troubleshooting steps:
| Problem | Possible Cause | Solution |
|---|---|---|
| Monitor does not power on. | Low battery; Power button not pressed correctly. | Charge the monitor using the Type-C cable. Ensure the power button is pressed and held until the screen illuminates. |
| No image on screen / Camera not working. | Camera cable not fully connected; Damaged cable or camera. | Ensure the camera connection cable is fully and firmly inserted into the video socket on the monitor. Even if it clicks, push it in further to ensure a complete connection. Check for visible damage to the cable or camera. |
| Image is too dark/bright. | Automatic brightness setting; Manual adjustment needed. | The system has automatic brightness. If manual adjustment is desired, refer to Section 5 for instructions on how to turn off automatic brightness and adjust manually. |
| Monitor is unstable/slips on handlebar. | Mounting clamp not tightened sufficiently. | Ensure the handlebar mounting clamp is securely tightened. |
If the problem persists after trying these solutions, please contact PARKVISION customer support for further assistance.
8. Specifications
| Feature | Detail |
|---|---|
| Product Dimensions | 3.7 x 2.2 x 0.8 inches |
| Item Weight | 1.46 pounds |
| ASIN | B0CTC9NDCV |
| Batteries | 1 Lithium Ion battery (included) |
| Connectivity Technologies | Auxiliary, Wireless |
| Special Features | Night Vision |
| Color | Black |
| Manufacturer | PARKVISION |
| Model Name | Handlebar Bike Mirror |
| Orientation | Drivers Side |
| Vehicle Service Type | Bicycle |
| Video Capture Resolution | 1080p |
| Mounting Type | Seat Bar Mount |
9. Warranty and Support
PARKVISION products are designed for reliability and performance. For information regarding warranty coverage, please refer to the warranty card included with your product or visit the official PARKVISION website.
For technical support, troubleshooting assistance beyond this manual, or inquiries about replacement parts, please contact PARKVISION customer service.
- Online Support: Visit the PARKVISION Store on Amazon for FAQs and product information.
- Manufacturer: PARKVISION Electronics Technology Limited