VEVOR JH-310J
VEVOR Evaporative Cooler User Manual
Model: JH-310J
1. Introduction
Thank you for choosing the VEVOR Evaporative Cooler. This manual provides important information regarding the safe operation, installation, maintenance, and troubleshooting of your new evaporative cooler. Please read this manual thoroughly before using the product and retain it for future reference.
The VEVOR Evaporative Cooler (Model: JH-310J) is designed to provide efficient cooling and humidification for indoor and outdoor spaces up to 550 sq. ft. It features adjustable airflow, oscillation, and convenient water refilling options.
2. Product Features
- 3-in-1 Multi-function Cooler: Functions as an air cooler, humidifier, and fan to maintain comfortable indoor and outdoor environments.
- Oscillation & Adjustable Airflow: Covers areas up to 550 sq. ft. with 1400 CFM adjustable airflow. Features manual vertical louver adjustment and automatic horizontal oscillation (0° to 72°).
- Enhanced Cooling: Includes 2 ice packs and 1-sided rigid high-density cooling pads (1.18'' / 35 mm thickness) to increase evaporative surface area for more effective cooling.
- User-Friendly Operation: Equipped with durable mechanical buttons that resist blurring over time.
- Convenient Water Refilling: Large 5-gallon (19 L) tank with options for top-fill and continuous fill via a garden hose connection (0.98'' / 25 mm adapter). Features water shortage protection.
- Portability: Designed with wheels and side handles for easy movement without water spillage.

Image: Diagram illustrating the portable evaporative cooler's airflow, covering up to 550 sq. ft. with 72-degree oscillation.
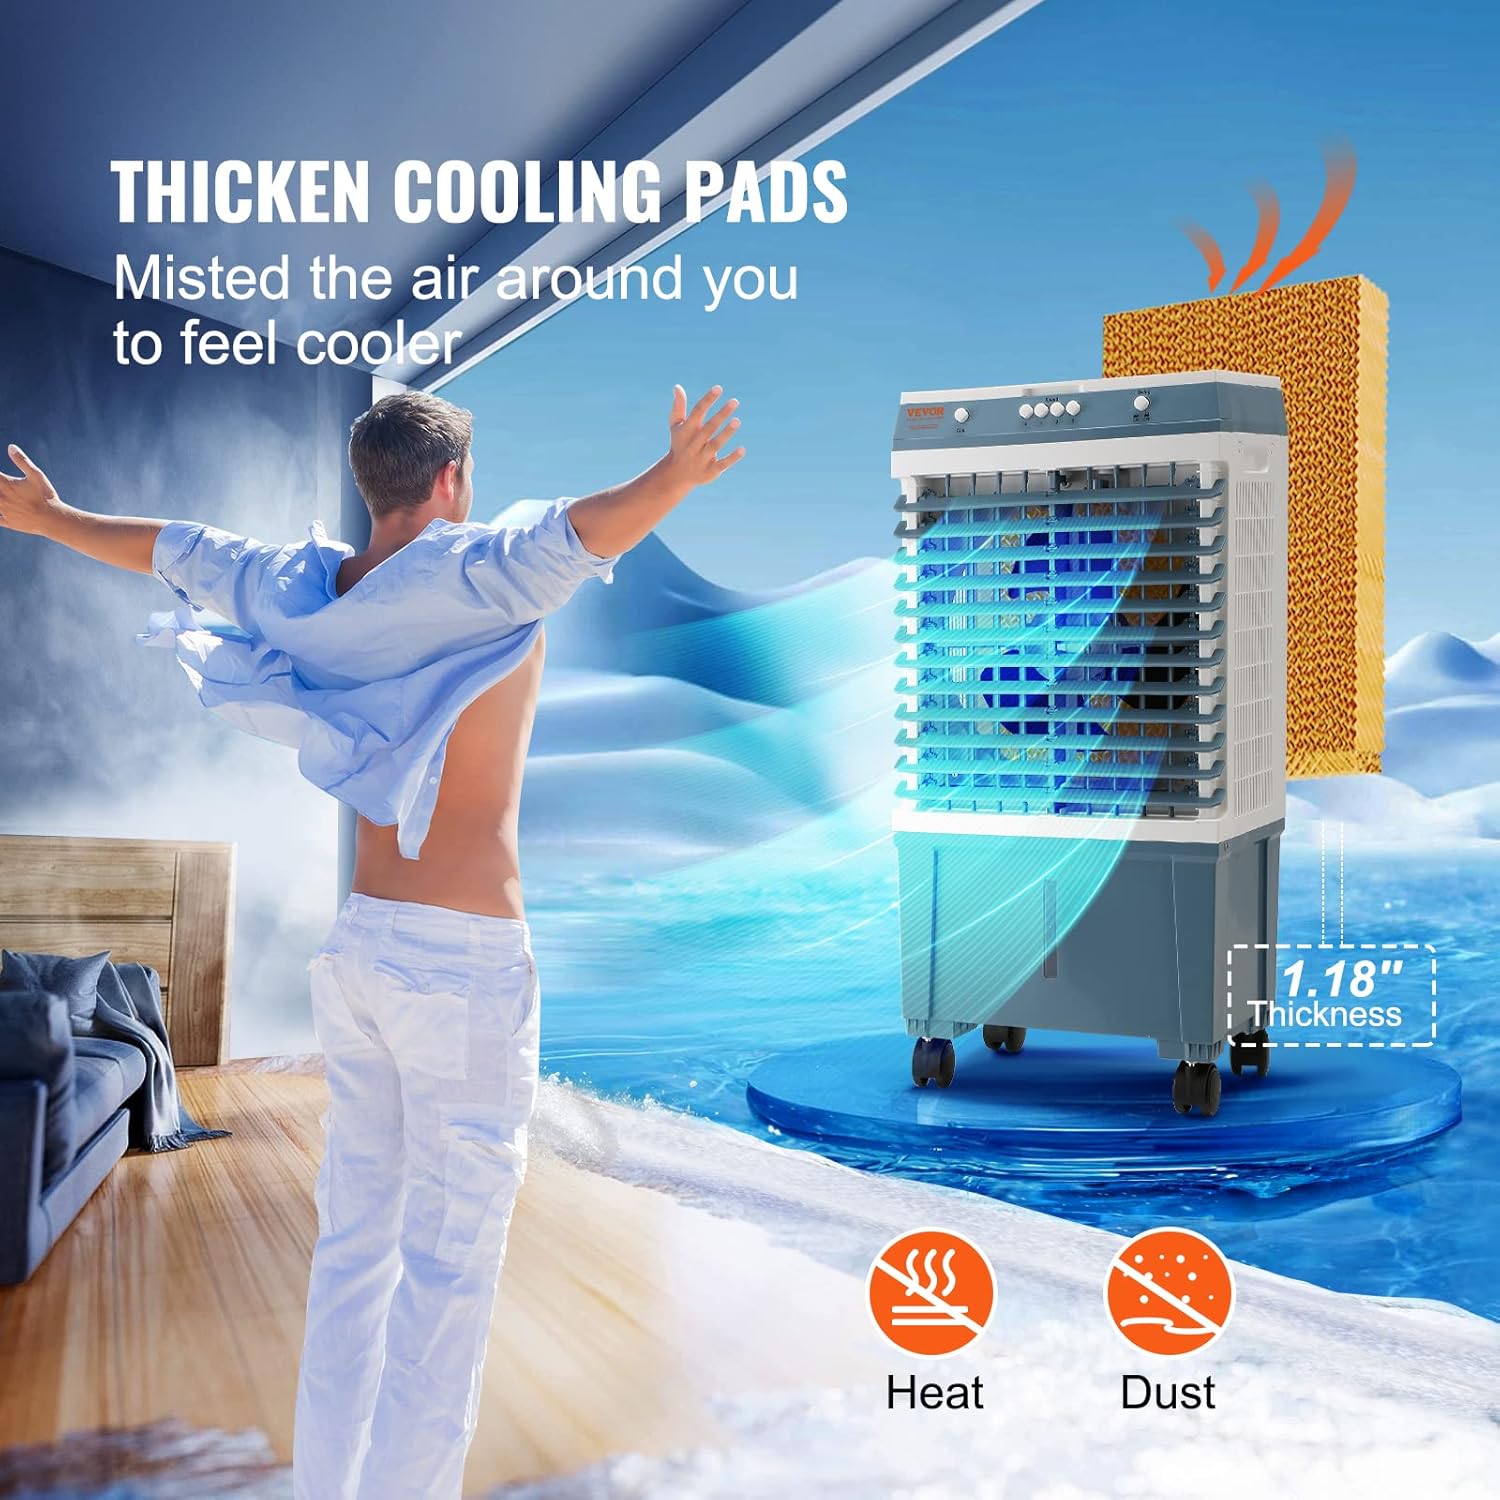
Image: Close-up view of the evaporative cooler's thick cooling pads, highlighting their 1.18-inch thickness for efficient misting and air cooling.
3. Package Contents
Please check the package contents upon unboxing to ensure all items are present and undamaged:
- 1 x VEVOR Evaporative Cooler (Model: JH-310J)
- 2 x Ice Packs
- 1 x Brass Adapter (0.98'' / 25 mm)
- 1 x Cooling Pad (pre-installed or separate)
- 1 x User Manual (this document)
4. Setup
4.1 Unpacking and Placement
- Carefully remove the evaporative cooler and all accessories from the packaging.
- Place the unit on a flat, stable surface. Ensure there is adequate space around the unit for proper airflow.
- For indoor use, it is recommended to open a door or window to allow for proper air circulation and prevent excessive humidity buildup.
4.2 Adding Water and Ice Packs
- Open the top cover of the evaporative cooler.
- Fill the water tank with clean water. Do not exceed the maximum fill line indicated on the unit. The tank capacity is 5 gallons (19 L).
- For enhanced cooling, place the provided ice packs (pre-frozen) into the designated compartments within the water tank.
- Alternatively, for continuous operation, connect a garden hose to the 0.98-inch (25 mm) adapter port at the back of the unit. Ensure the connection is secure to prevent leaks. The unit features water shortage protection.

Image: A hand pouring water into the top of the evaporative cooler, demonstrating the easy top-fill method without needing to bend down.

Image: Diagram showing how to connect a garden hose to the evaporative cooler for continuous water refilling, highlighting the 0.98-inch diameter adapter.
5. Operating Instructions
5.1 Powering On/Off
- Plug the power cord (8 ft / 2.4 m) into a standard 120V / 60Hz electrical outlet.
- Press the Power button on the control panel to turn the unit ON or OFF.
5.2 Adjusting Fan Speed
- The unit offers 3 adjustable fan speeds. Press the Speed button repeatedly to cycle through Low, Medium, and High settings.
5.3 Activating Cooling/Humidification
- Press the Cool/Humidify button to activate the evaporative cooling function. The water pump will start, and water will flow over the cooling pads.
- To use as a fan only, ensure the Cool/Humidify function is turned off.
5.4 Oscillation Control
- Press the Oscillation button to activate the automatic horizontal swing (0° to 72°). Press again to stop oscillation.
- The vertical angle of the louvers can be adjusted manually to direct airflow up or down (up to 84°).

Image: The VEVOR Evaporative Cooler actively blowing cool air, with ice packs and brass adapter shown alongside the unit.
6. Maintenance
Regular maintenance ensures optimal performance and longevity of your evaporative cooler.
6.1 Cleaning the Water Tank
- Unplug the unit from the power outlet before cleaning.
- Drain any remaining water from the tank.
- Clean the water tank regularly (e.g., weekly) with a mild detergent and water to prevent mold, mildew, and mineral buildup. Rinse thoroughly.
6.2 Cleaning/Replacing Cooling Pads
- The cooling pads should be inspected periodically for mineral deposits or debris.
- If heavily soiled, the pads may need to be removed and rinsed under running water. Allow them to dry completely before reinserting.
- Replacement of cooling pads may be necessary over time depending on water quality and usage. Refer to VEVOR customer support for replacement parts.
6.3 Exterior Cleaning
- Wipe the exterior of the unit with a soft, damp cloth. Do not use abrasive cleaners or solvents.
6.4 Storage
- Before storing, ensure the water tank is completely drained and dry.
- Clean the unit thoroughly.
- Store the evaporative cooler in a cool, dry place, away from direct sunlight and extreme temperatures.
7. Troubleshooting
If you encounter issues with your VEVOR Evaporative Cooler, please refer to the following common problems and solutions:
| Problem | Possible Cause | Solution |
|---|---|---|
| Unit does not turn on. | No power supply. Power button not pressed. | Check if the power cord is securely plugged into a working outlet. Press the Power button firmly. |
| No cooling effect. | Water tank is empty. Cooling function not activated. High humidity in the environment. | Refill the water tank. Press the Cool/Humidify button. Evaporative coolers are less effective in high humidity. Ensure proper ventilation (open window/door). |
| Weak airflow. | Fan speed set too low. Air inlet/outlet blocked. | Increase the fan speed. Ensure no obstructions are blocking the air intake or output grilles. |
| Unpleasant odor. | Stagnant water or dirty cooling pads. | Drain and clean the water tank. Clean or replace cooling pads. Use fresh water. |
| Water leakage. | Water tank overfilled. Loose hose connection (if continuous fill used). | Do not exceed the maximum fill line. Ensure the garden hose connection is tight and the brass adapter is properly installed. |
If the problem persists after attempting these solutions, please contact VEVOR customer support for assistance.
8. Specifications
| Specification | Value |
|---|---|
| Item Model Number | JH-310J |
| Air Flow | 1400 CFM Adjustable |
| Left and Right Swing | 72° |
| Up and Down Angle | 84° |
| Tank Capacity | 5 Gal / 19 L |
| Max. Room Size | 550 Sq.ft / 51 ㎡ |
| Cooling Pads Thickness | 1.18'' / 35 mm |
| Adapter Size | 0.98'' / 25 mm |
| Power | 60 W, 120 V / 60 Hz |
| Power Cord Length | 8 ft / 2.4 m |
| Weight | 13.4 lbs / 6.08 kg |
| Noise Level | ≤60 db |
| Item Size (L x W x H) | 15 x 10.7 x 30.7 in / 382 x 271 x 780 mm |
| Material | Plastic |
| Mounting Type | Freestanding |
| Color | Blue |

Image: Detailed diagram showing the dimensions (length, width, height) and key specifications of the VEVOR Evaporative Cooler.
9. Warranty and Support
VEVOR products come with a standard warranty. For specific warranty terms and conditions, please refer to the warranty card included with your product or visit the official VEVOR website.
For technical support, troubleshooting assistance, or to inquire about replacement parts, please contact VEVOR customer service. Contact information can typically be found on the VEVOR website or on the product packaging.
Manufacturer: VEVOR
Country of Origin: China
Ask a question about this manual
Ask about setup, troubleshooting, compatibility, parts, safety, or missing instructions. Manuals+ will review the question and use this page’s manual context to help answer it.