Cooler Master NR200PV2-KCNN-S00
Cooler Master NR200P V2 Mini-ITX PC Case User Manual
Brand: Cooler Master | Model: NR200PV2-KCNN-S00
1. Introduction
The Cooler Master NR200P V2 is a compact Mini-ITX PC case designed for high-performance builds. It offers extensive support for liquid cooling systems and large GPUs, ensuring optimal thermal performance within a small form factor. This manual provides detailed instructions for assembly, operation, and maintenance of your NR200P V2 case.
2. Key Features
- Compact ITX Design: Optimized for Mini-ITX motherboards with a sleek 18.25L footprint.
- Vertical GPU Mounting: Supports high-end GPUs up to 357mm, including RTX 5080 | RX 9070 XT, with an included PCIe 4.0 riser cable.
- Easy, Tool-Free Access: Features quick-release pins and a removable GPU back panel for simplified installation.
- Advanced Cooling Support: Ready for top-mounted 240mm/280mm radiators for maximum thermal efficiency. 525mm tubing is recommended for clean front routing.
- SFX PSU Compatibility: Designed for compact SFX power supplies up to 130mm in length.
- Dual Panel Options: Includes both a tempered glass side panel for aesthetics and a vented steel panel for enhanced airflow.
- USB Type-C Connectivity: Integrated USB Type-C port on the front I/O panel.
- Efficient Airflow: Benefits from efficient vertical airflow with a 120mm bottom-mounted fan for enhanced cooling.
3. Package Contents
Please verify that all items are present and in good condition upon unboxing:
- Cooler Master NR200P V2 Mini-ITX PC Case
- Tempered Glass Side Panel (pre-installed or separate)
- Vented Steel Side Panel
- PCIe 4.0 Riser Cable
- Accessory Box (containing screws, zip ties, and other small parts)
- User Manual (this document)
If any items are missing or damaged, please contact your retailer or Cooler Master support.
4. Setup and Installation
Before beginning installation, ensure you have a clean, static-free workspace. It is recommended to wear an anti-static wrist strap.
4.1. Case Preparation
- Place the case on a stable, flat surface.
- Remove the side panels by gently pulling them away from the chassis. The panels are secured with quick-release pins.
- Remove the top panel by sliding it backward and lifting.
- Familiarize yourself with the internal layout and component mounting points.

The Cooler Master NR200P V2 case, showcasing its compact design and the removable tempered glass side panel, offering a clear view of the internal components.

An exploded view of the NR200P V2, illustrating its modular design and easily removable panels and internal brackets for simplified assembly and maintenance.
4.2. Motherboard Installation
- Install your Mini-ITX motherboard into the designated area. Align the motherboard with the standoffs and secure it with the provided screws.
- Connect the front panel I/O cables (USB, audio, power/reset switches, LEDs) to the motherboard headers according to your motherboard manual.
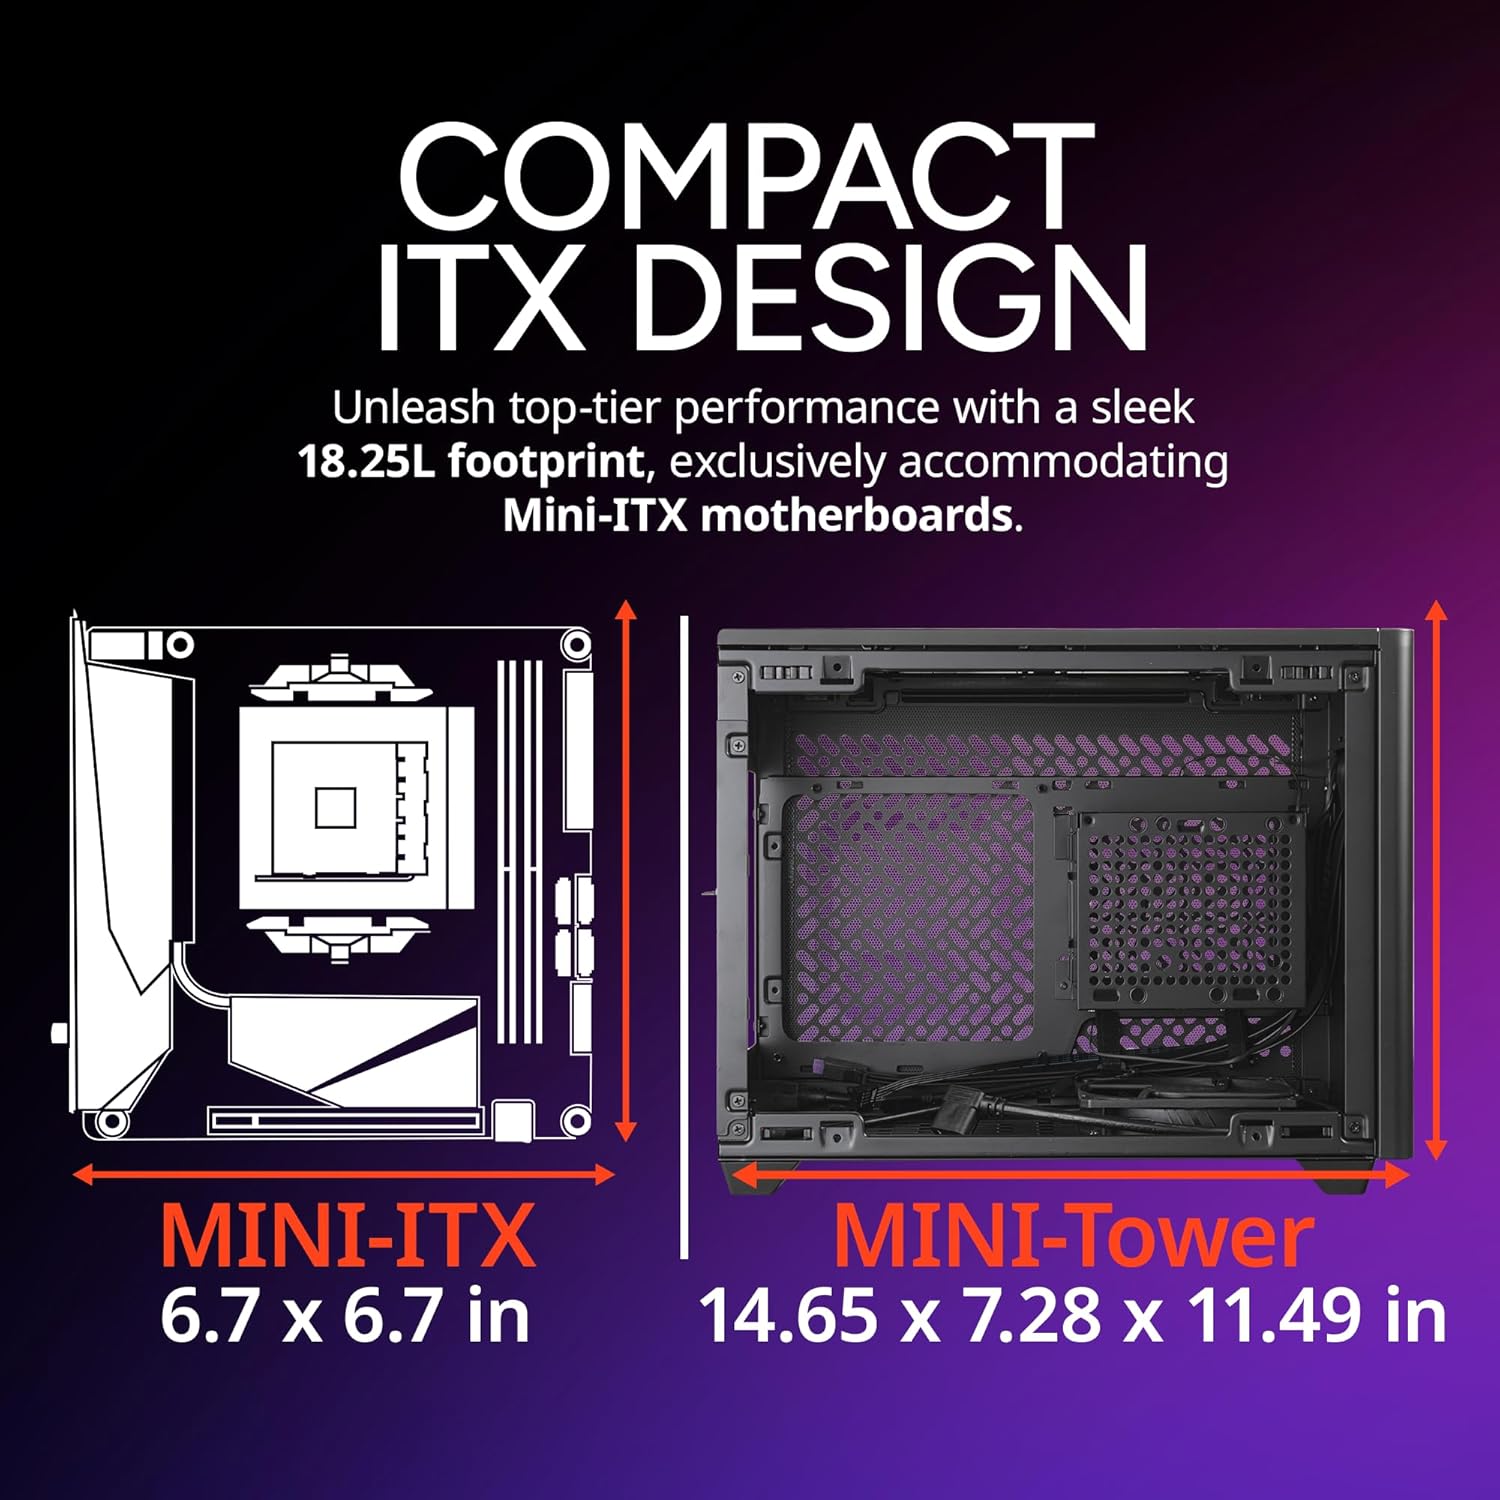
This diagram highlights the compact 18.25L footprint of the NR200P V2, designed exclusively for Mini-ITX motherboards. It shows the case dimensions of 14.65 x 7.28 x 11.49 inches.
4.3. GPU Installation
The NR200P V2 supports vertical GPU mounting.
- Remove the GPU back panel by releasing its quick-release pins.
- Attach your GPU to the included PCIe 4.0 riser cable.
- Carefully slide the GPU and riser cable assembly into the vertical mounting slot until it clicks into place.
- Secure the GPU to the chassis using the provided screws.
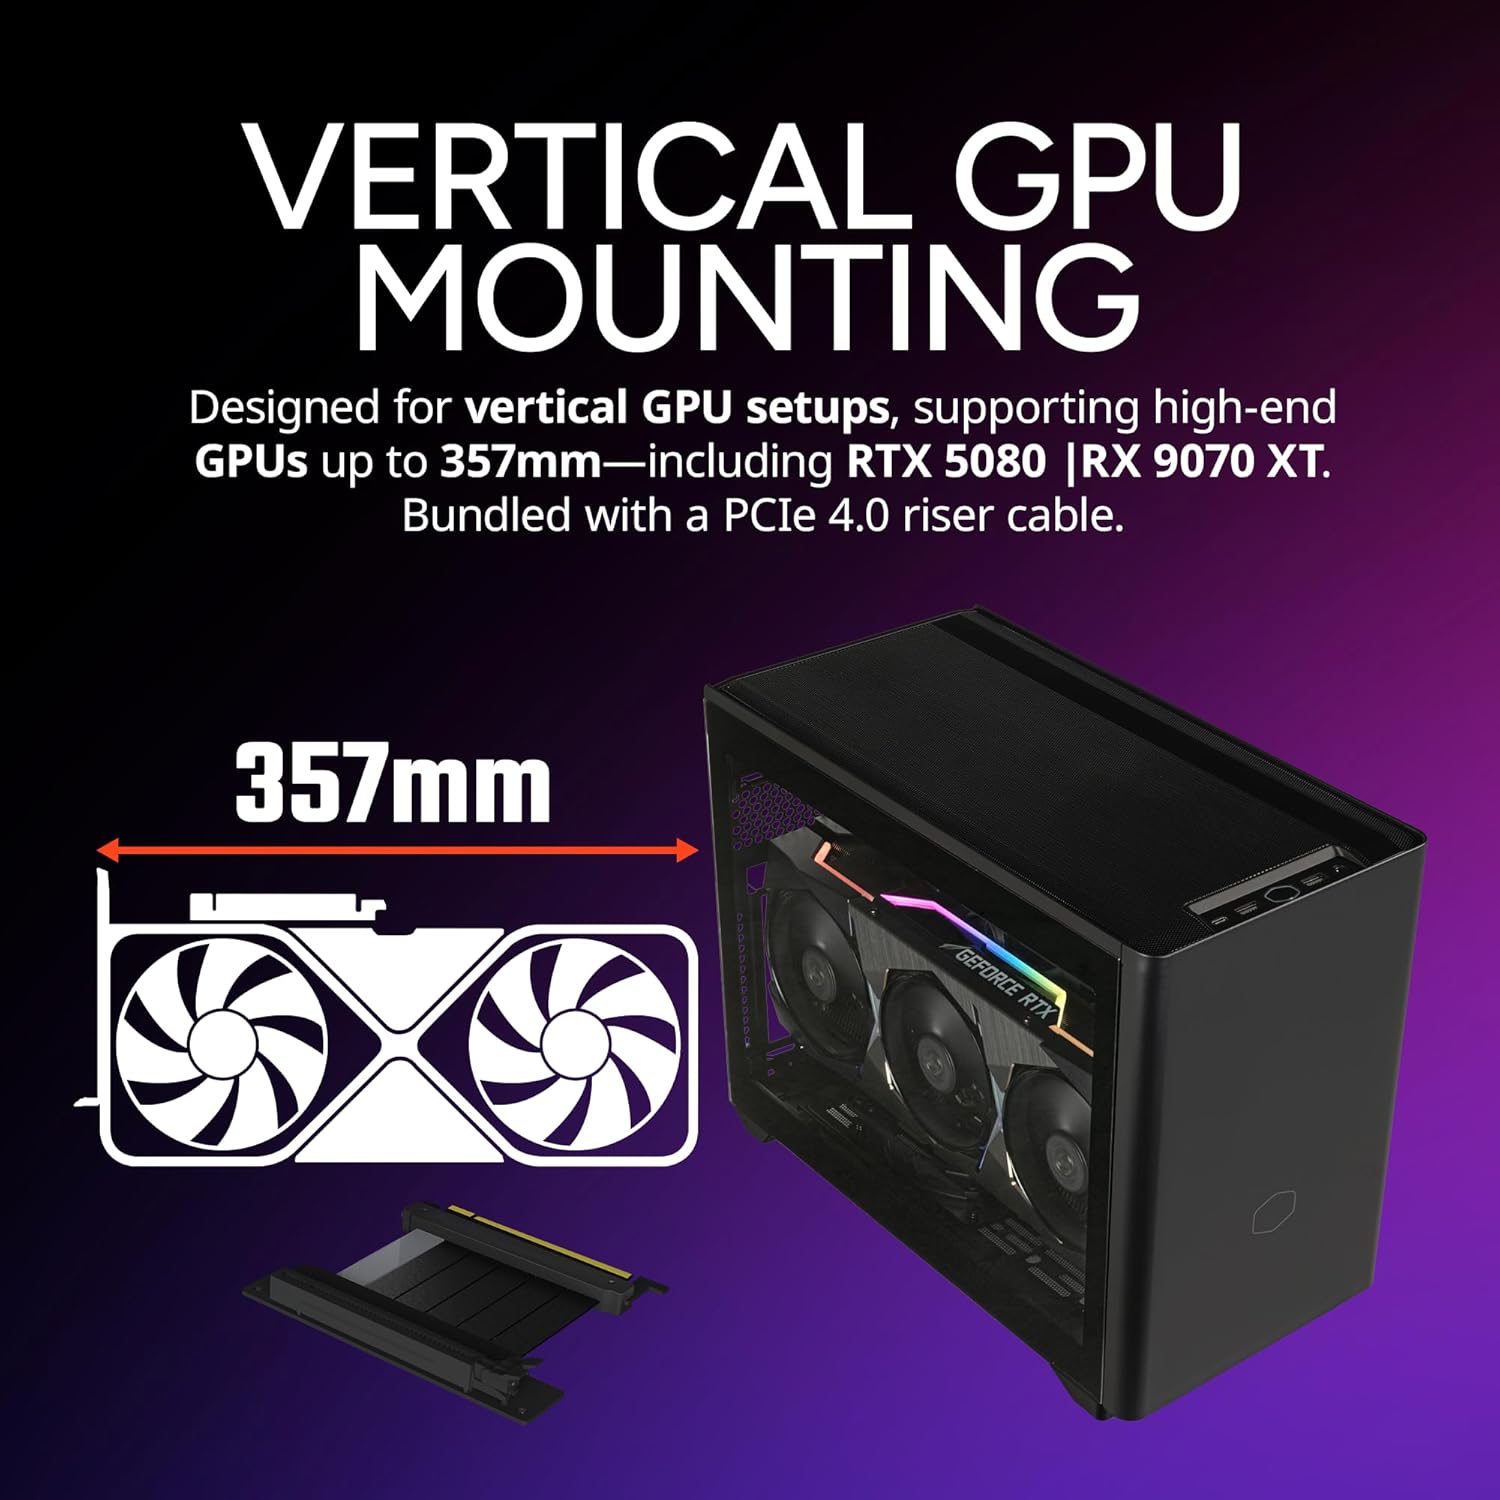
The NR200P V2 supports vertical GPU setups, accommodating high-end GPUs up to 357mm in length. A PCIe 4.0 riser cable is included for this configuration.

Installation is streamlined with quick-release pins for panels and a removable GPU back panel, allowing for easy, tool-free access to internal components.
4.4. PSU Installation
- Mount your SFX power supply (up to 130mm in length) into its designated bracket.
- Secure the PSU bracket to the case using the provided screws.
- Connect the necessary power cables to your motherboard, GPU, and storage devices.
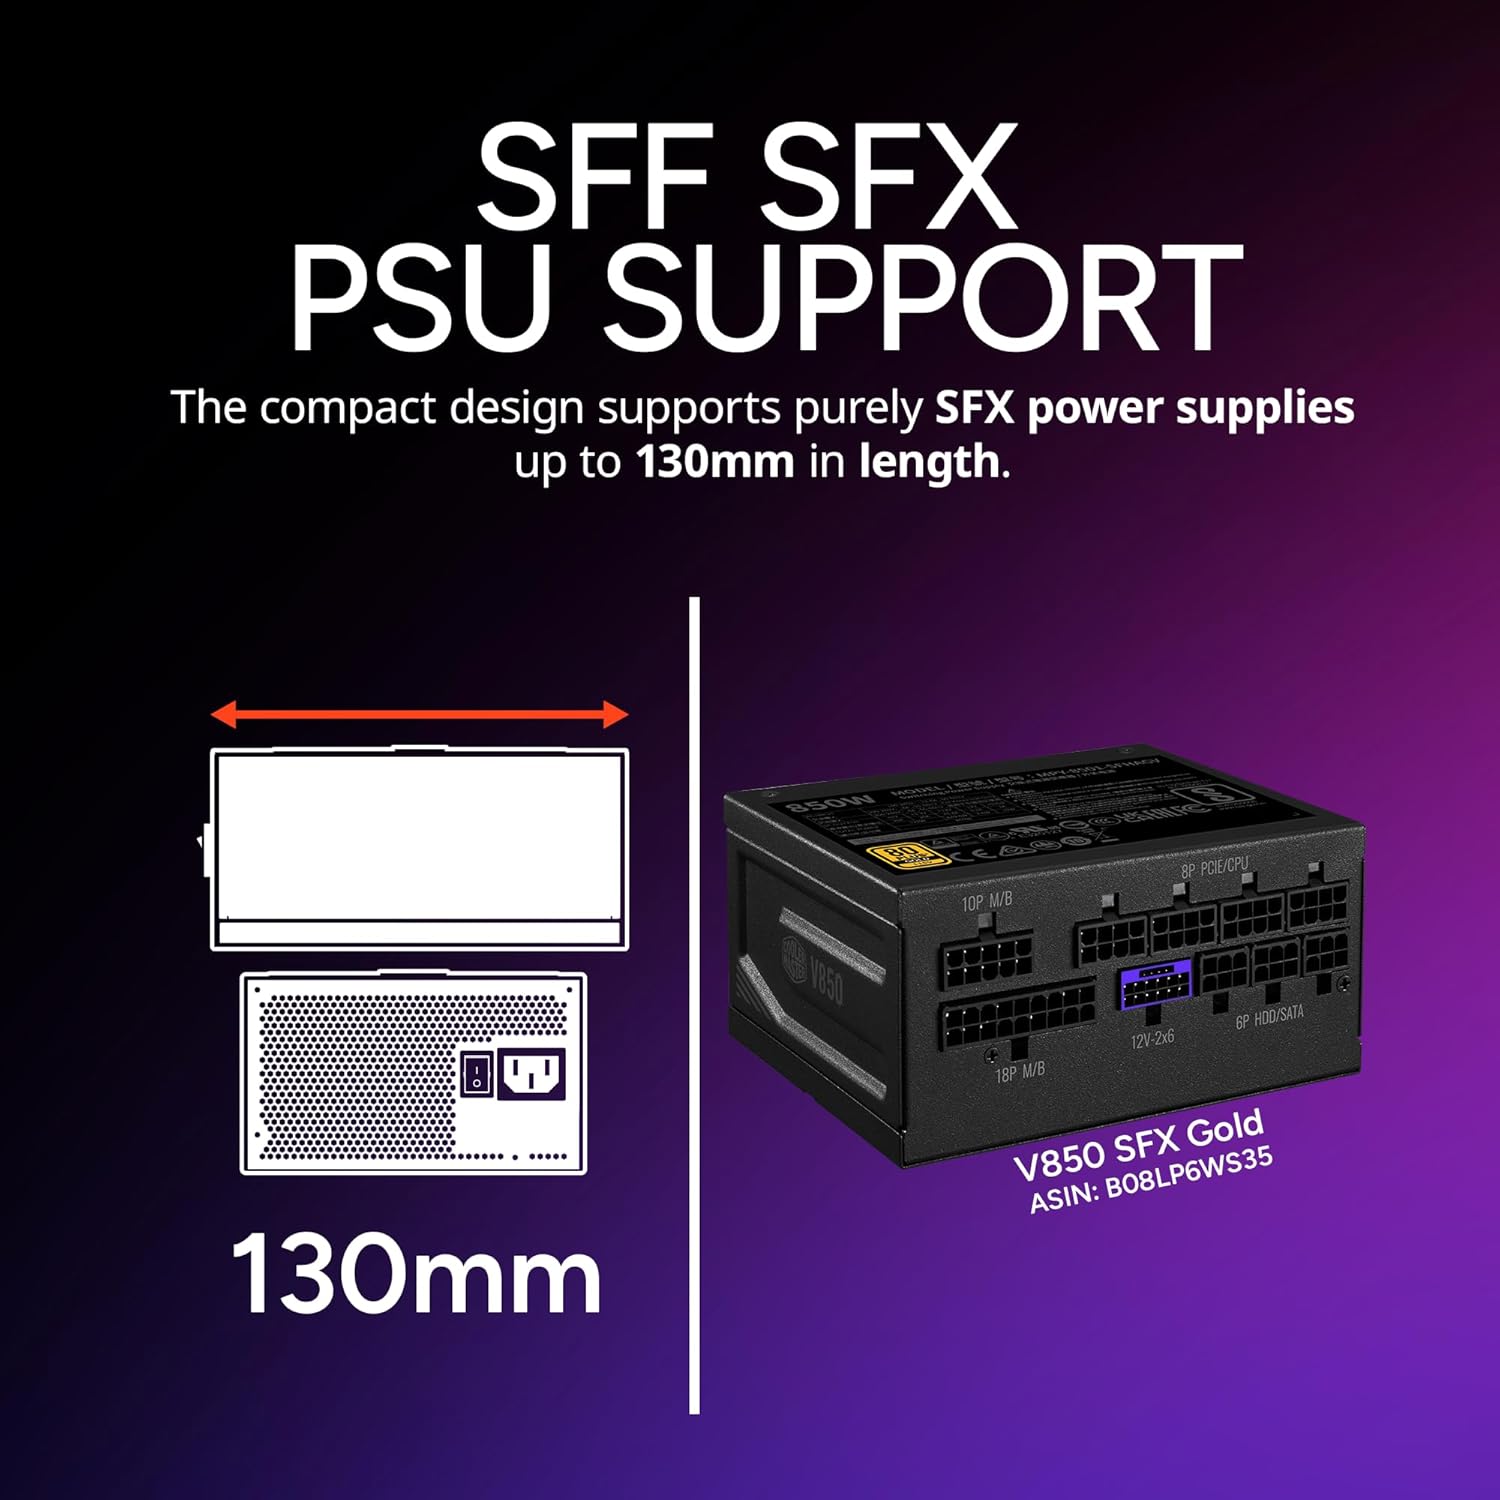
The compact design of the NR200P V2 supports purely SFX power supplies, with a maximum length of 130mm.
4.5. Cooling System Installation
The NR200P V2 supports various cooling configurations.
- Top Radiator/Fan Installation: Install your 240mm or 280mm AIO radiator and fans to the top bracket. Secure with screws.
- Bottom Fan Installation: Install up to two 120mm fans at the bottom of the case for enhanced vertical airflow.
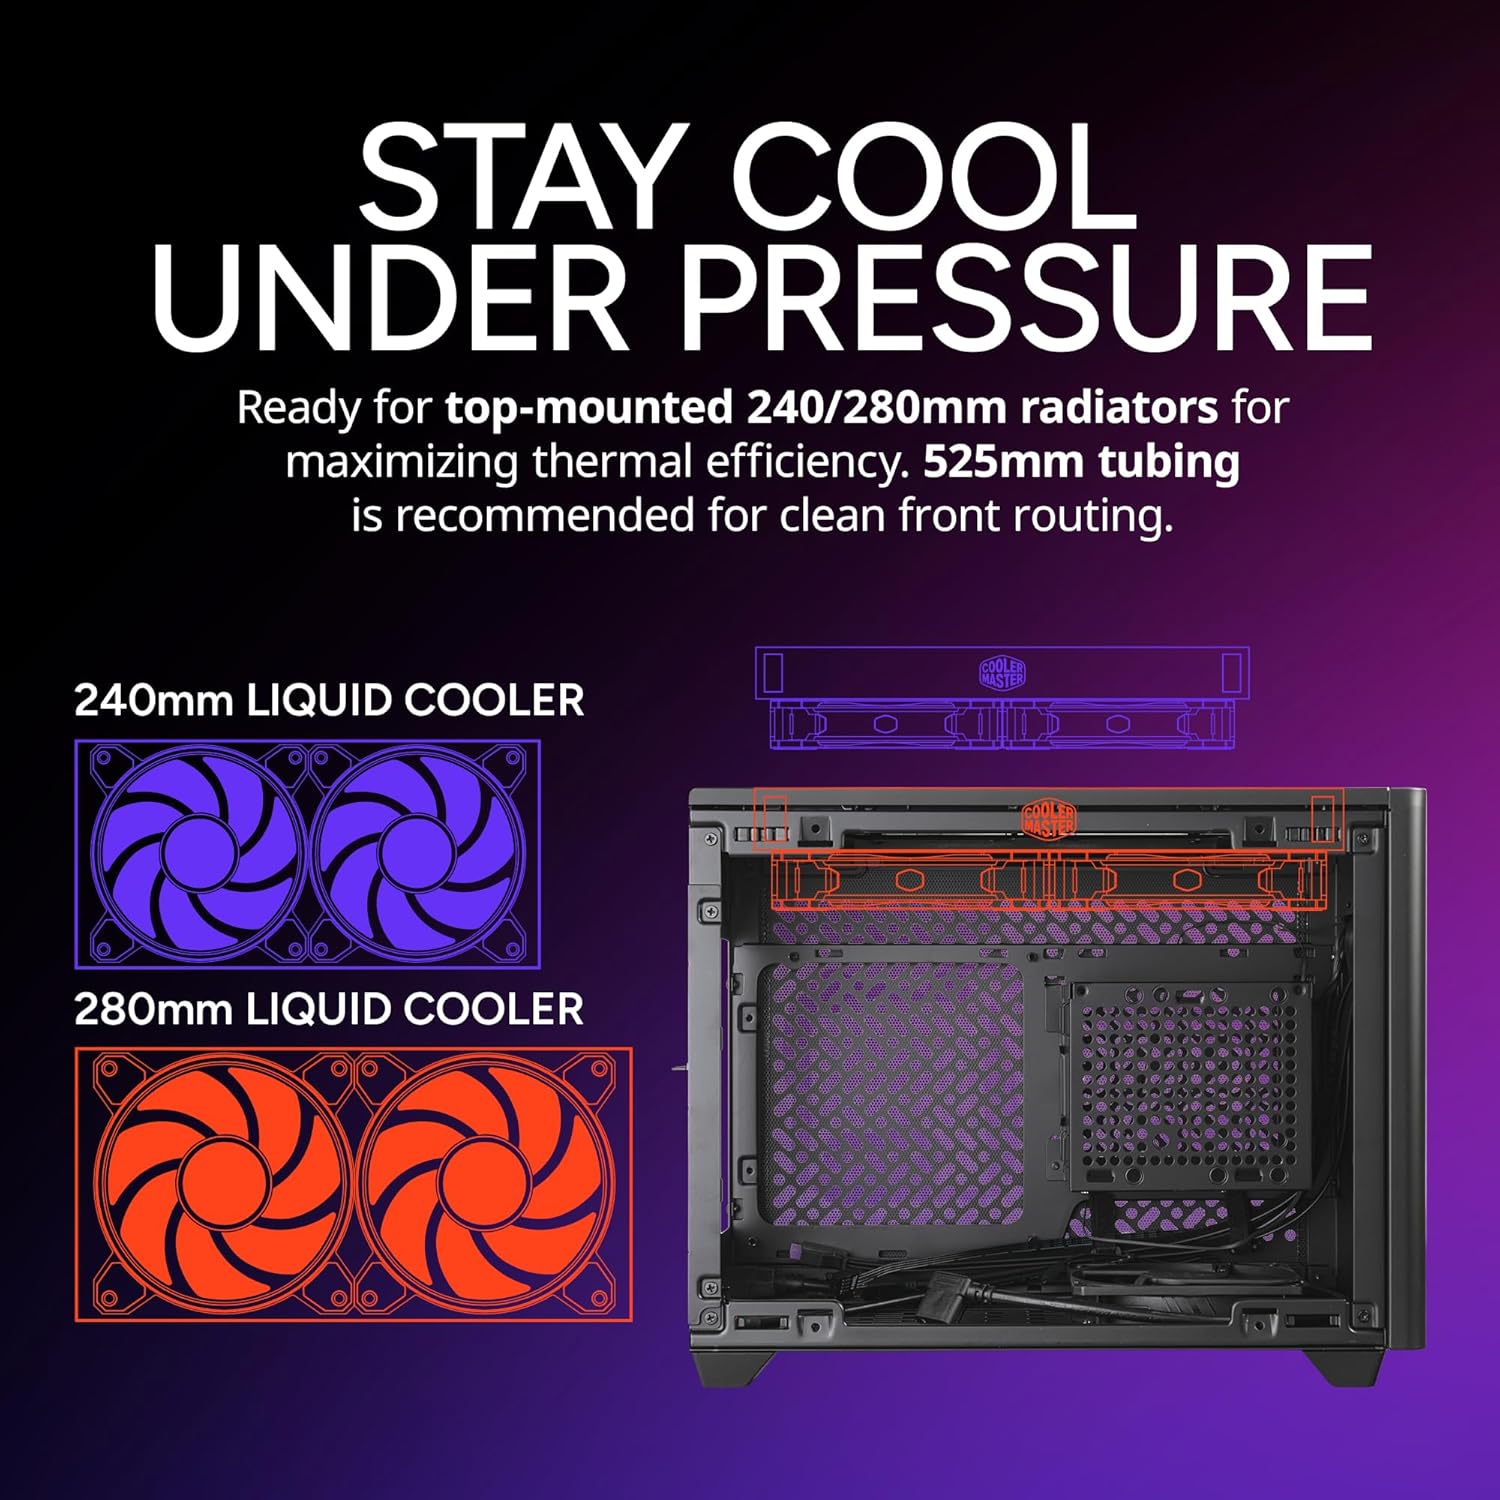
The case is ready for top-mounted 240mm or 280mm radiators, maximizing thermal efficiency for liquid cooling systems. 525mm tubing is recommended for clean front routing.
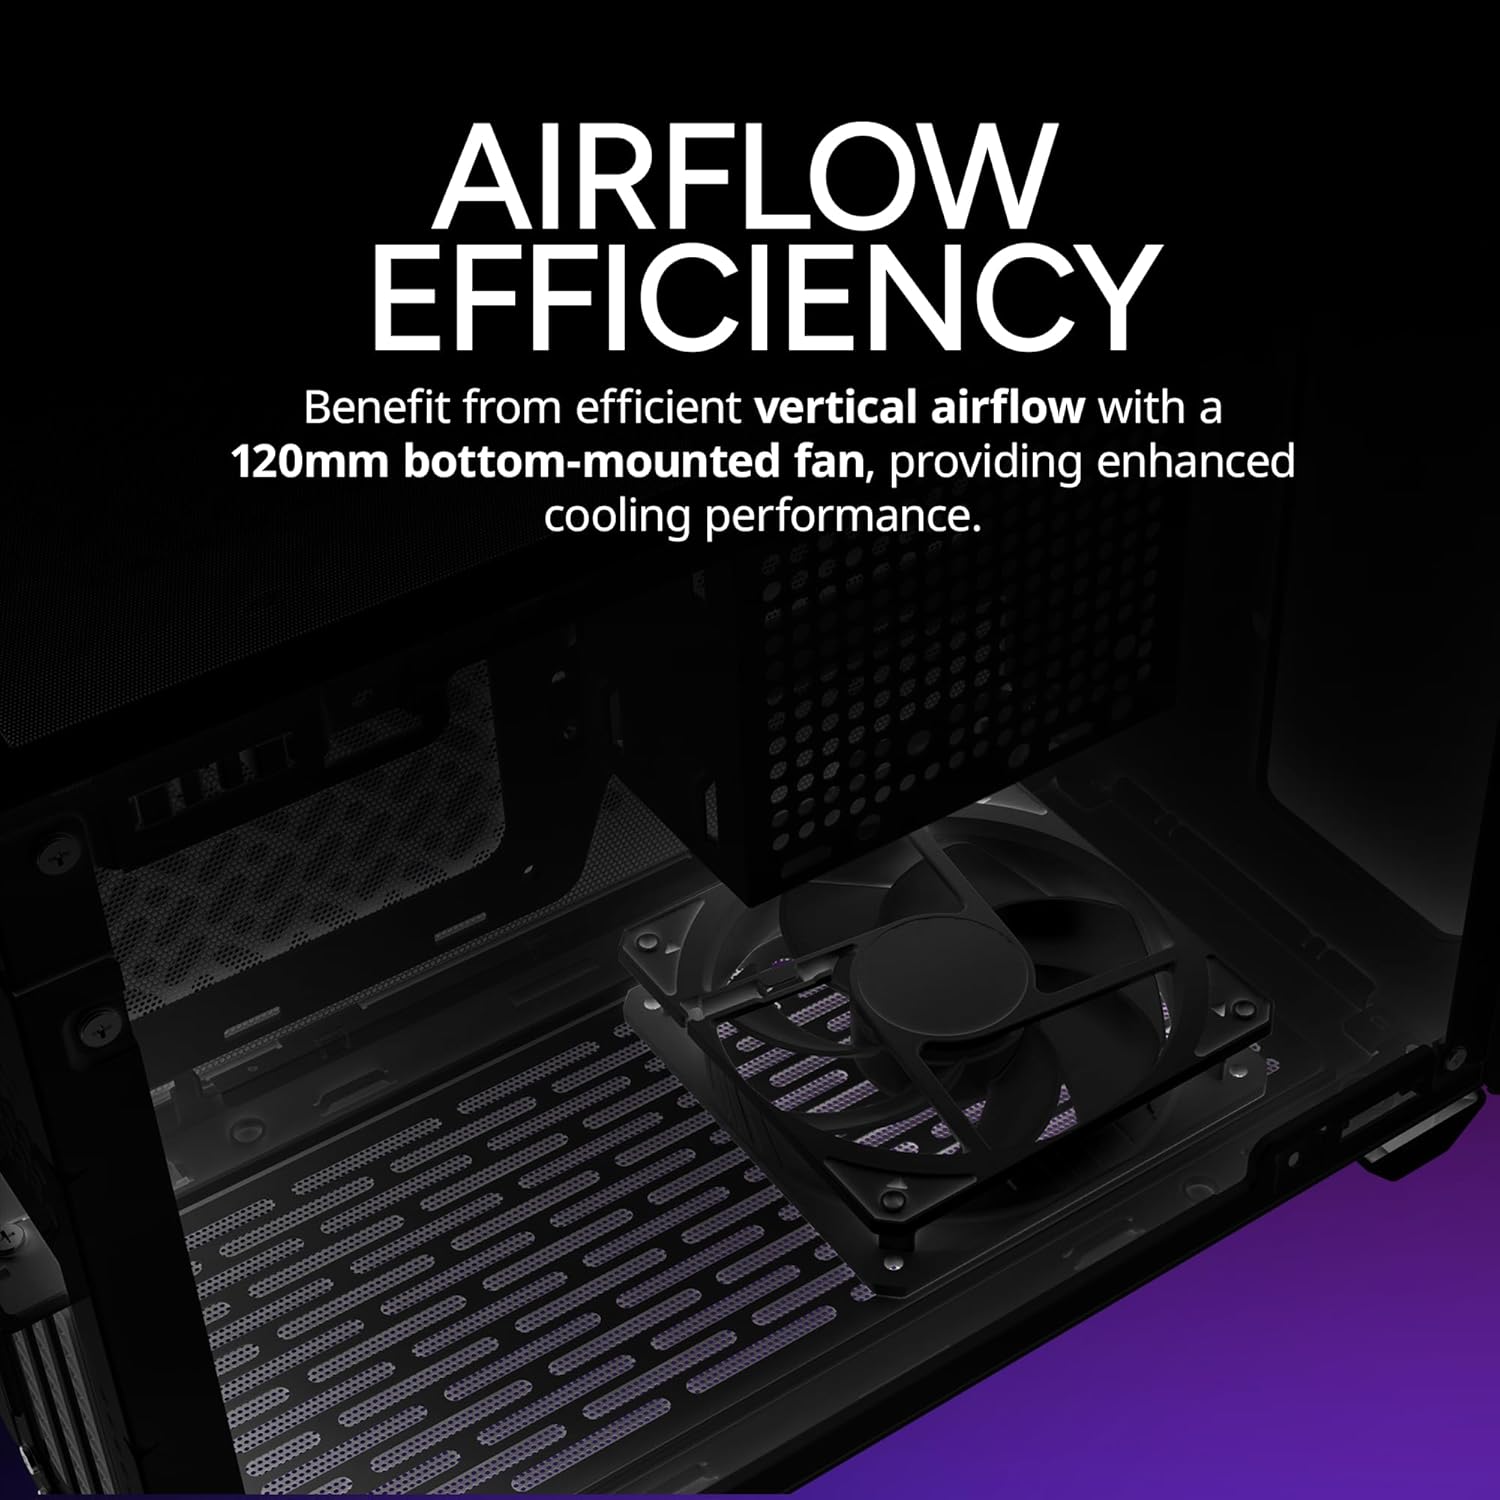
Benefit from efficient vertical airflow with a dedicated 120mm bottom-mounted fan, providing enhanced cooling performance for internal components.
4.6. Cable Management
Route all cables neatly to ensure optimal airflow and a clean build. Utilize the cable tie points and included zip ties to secure cables.
4.7. Re-installing Panels
- Re-install the top panel by aligning it and sliding it forward until it locks.
- Choose your preferred side panel: the tempered glass panel for display or the vented steel panel for maximum airflow.
- Align the side panel with the chassis and gently push until the quick-release pins engage.
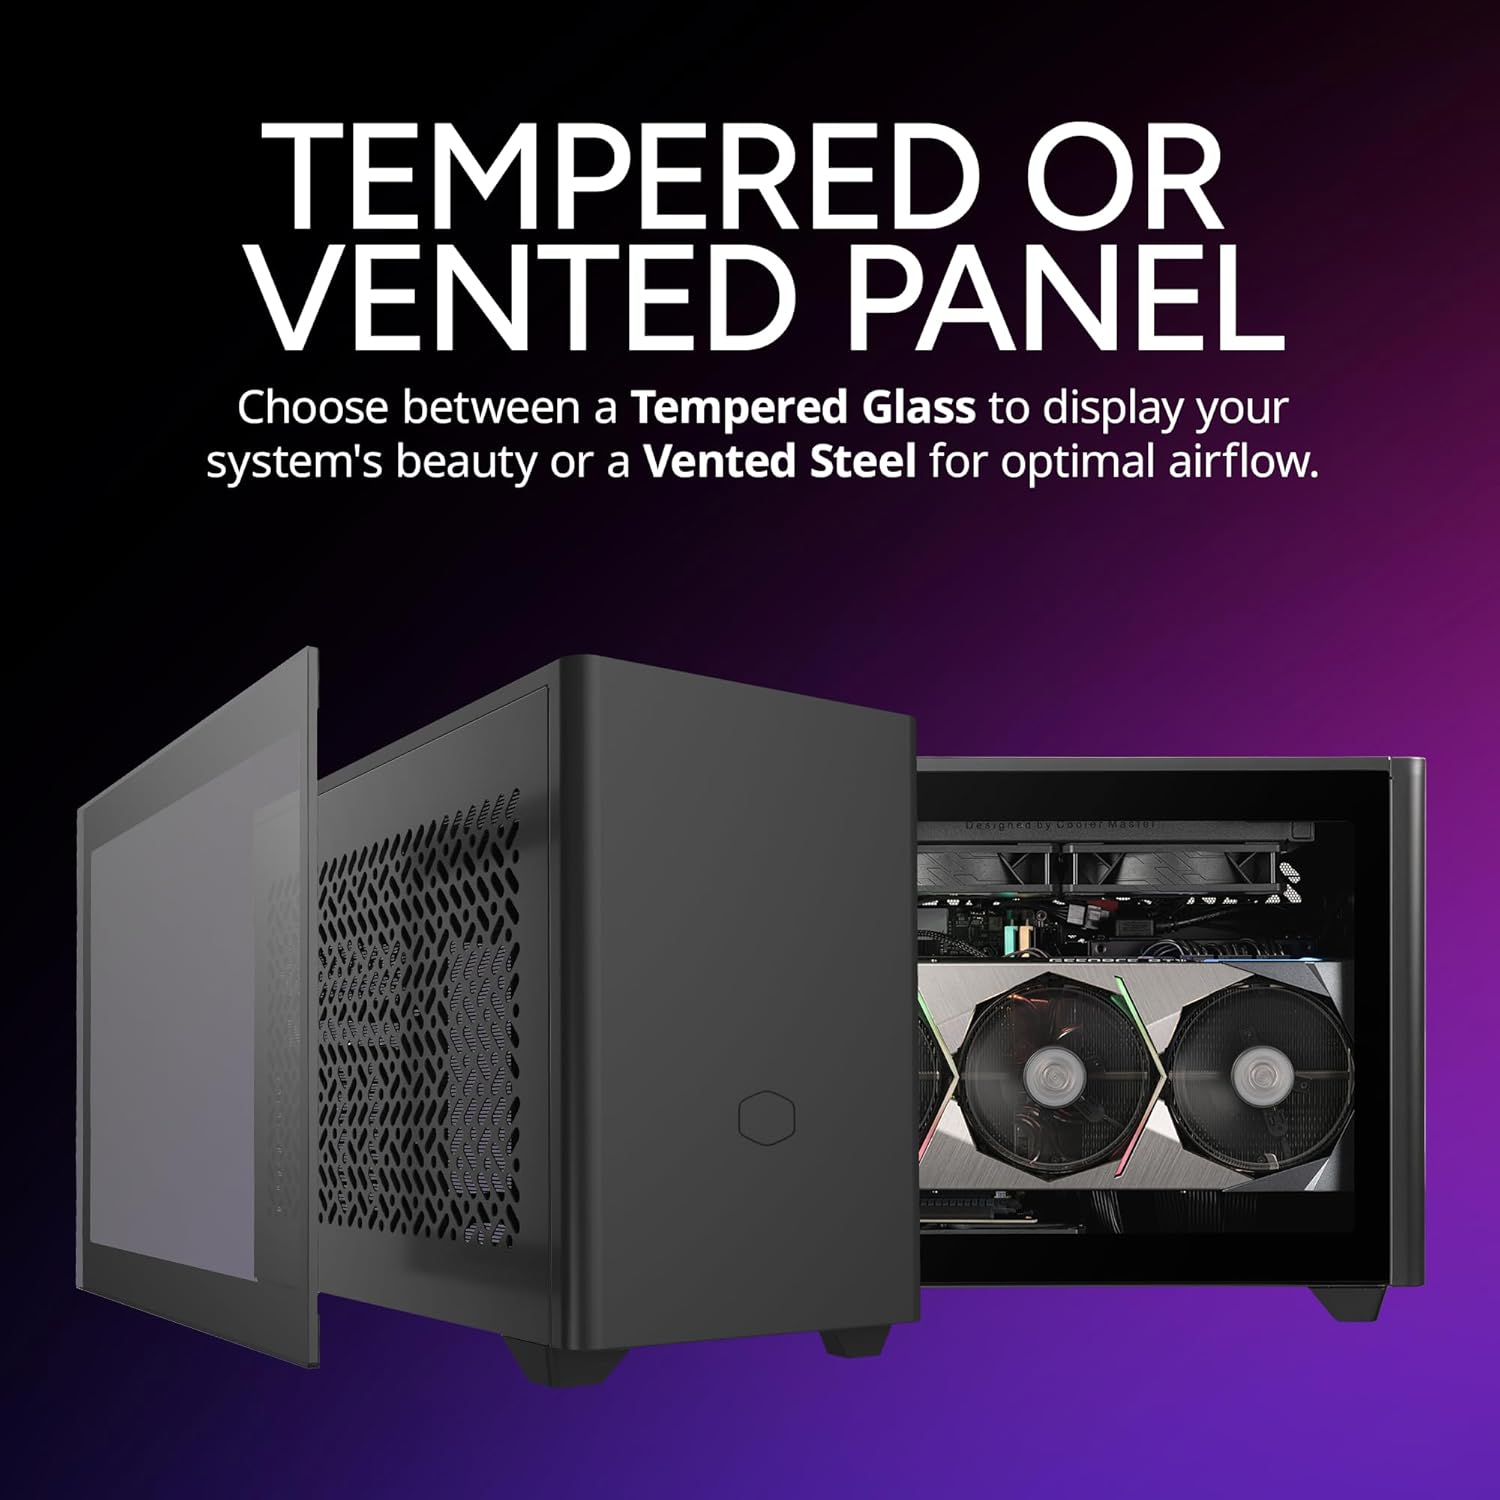
Users can choose between a tempered glass side panel to showcase internal components or a vented steel panel for optimal airflow, both included with the case.

The front I/O panel includes a convenient USB Type-C port for modern connectivity.
5. Operating Your PC Case
Once all components are installed and secured, connect your peripherals and power cable. Press the power button on the front I/O panel to start your system. Monitor temperatures and fan speeds through your operating system's utilities or third-party software to ensure optimal performance and cooling.
6. Maintenance
Regular maintenance helps ensure the longevity and performance of your PC case and components.
- Dust Filter Cleaning: The NR200P V2 features removable dust filters. Periodically remove and clean these filters with compressed air or water (ensure they are completely dry before re-installation).
- General Cleaning: Use a soft, damp cloth to wipe down the exterior of the case. Avoid abrasive cleaners or solvents.
- Internal Dust Removal: Every few months, open the case and use compressed air to remove dust buildup from fans, heatsinks, and other components.
7. Troubleshooting
If you encounter issues with your PC build within the NR200P V2 case, consider the following common troubleshooting steps:
- No Power: Ensure the PSU is switched on, all power cables are securely connected to the motherboard and components, and the front panel power switch cable is correctly connected to the motherboard.
- Fans Not Spinning/High Noise: Check fan connections to the motherboard or fan controller. Ensure no cables are obstructing fan blades. High noise might indicate dust buildup or a fan issue.
- Overheating: Verify all fans are spinning correctly and oriented for proper airflow. Ensure CPU cooler and GPU heatsinks are free of dust. Check thermal paste application on CPU.
- Display Issues: Confirm the GPU is properly seated in its PCIe slot and power cables are connected. Ensure the display cable is connected to the GPU, not the motherboard (unless using integrated graphics).
For more complex issues, consult your component manuals or Cooler Master's official support resources.
8. Specifications
| Feature | Detail |
|---|---|
| Brand | Cooler Master |
| Model Name | NR200P V2 |
| Item Model Number | NR200PV2-KCNN-S00 |
| Case Type | Mini-Tower |
| Motherboard Compatibility | Mini ITX |
| Color | Black |
| Item Weight | 10.85 pounds |
| Product Dimensions (LxWxH) | 14.65 x 7.28 x 11.5 inches |
| GPU Clearance | Up to 357mm (Vertical Mount) |
| PSU Support | SFX (up to 130mm length) |
| Radiator Support (Top) | 240mm / 280mm |
| Fan Support (Bottom) | 2 x 120mm |
| USB 3.0 Ports | 2 |
| USB Type-C Ports | 1 |
| Material | Steel, Plastic, Tempered Glass |
9. Warranty and Support
Cooler Master products are backed by a manufacturer's warranty. For detailed warranty information, including terms, conditions, and duration, please refer to the official Cooler Master website or the warranty card included with your product.
For technical support, troubleshooting assistance, or to inquire about replacement parts, please visit the Cooler Master support portal or contact their customer service team. Keep your proof of purchase handy for warranty claims.
Cooler Master Official Website: www.coolermaster.com