Image Description: A black 62-inch warmiplanet indoor ceiling fan with five blades and an integrated LED light, shown installed on a white ceiling.
1. Safety Information
Please read and understand this entire manual before attempting to assemble, operate, or install the product. Failure to do so could lead to electric shock, fire, or other injuries.
- Ensure all electrical connections comply with local codes, ordinances, and the National Electrical Code (NEC).
- Consult a qualified electrician if you are unfamiliar with electrical wiring.
- Before installation, disconnect power by turning off the circuit breakers at the main fuse box.
- The mounting structure must be capable of supporting the weight of the fan (approximately 17.36 pounds).
- Keep hands clear of fan blades during operation.
- Do not operate the fan with damaged wiring or if it is not functioning correctly.
2. Setup and Installation
For detailed visual instructions, please refer to the official installation video below. Ensure power is disconnected at the circuit breaker before beginning installation.
Video Description: Official installation guide for the warmiplanet ceiling fan. This video demonstrates the step-by-step process of assembling and mounting the fan, including wiring connections and blade attachment. It covers identifying parts, preparing the ceiling, attaching the hanging bracket, assembling the downrod with the motor, connecting electrical wires, and securing the canopy and blades.
Installation Steps Summary:
- Prepare the Ceiling: Install the hanging bracket to the octagon box using appropriate screws and washers for concrete or wooden ceilings.
- Assemble Downrod: Loosen screws on the coupler, pull out the R-pin, disassemble the downrod, then install the up canopy and down canopy to the downrod.
- Attach Motor to Downrod: Feed wires through the downrod, insert the cross-pin and fix it with the R-pin, tighten the screws on the coupler. Push the hemisphere upward, ensuring the small rod falls into its groove, then tighten the screws on the hemisphere.
- Hang the Fan and Wire Connections: Hang the fan to the hanging bracket, aligning the bulge on the bracket with the notch on the hemisphere. Connect the wires from the motor to the receiver, then connect the wires on the other side of the receiver to the home circuit (live, neutral, ground).
- Secure the Canopy: Rotate the up canopy and tighten the two screws to secure it to the ceiling.
- Install Blades: Install each blade to its blade holder. Remove the screws used to install blades from the motor, then install the blades and tighten the screws.
- Install Light Plate and Cover: Remove the three screws used to install the light plate. Connect the light power cord, install the light plate, and then rotate the light cover until it is fixed.
3. Operating Instructions
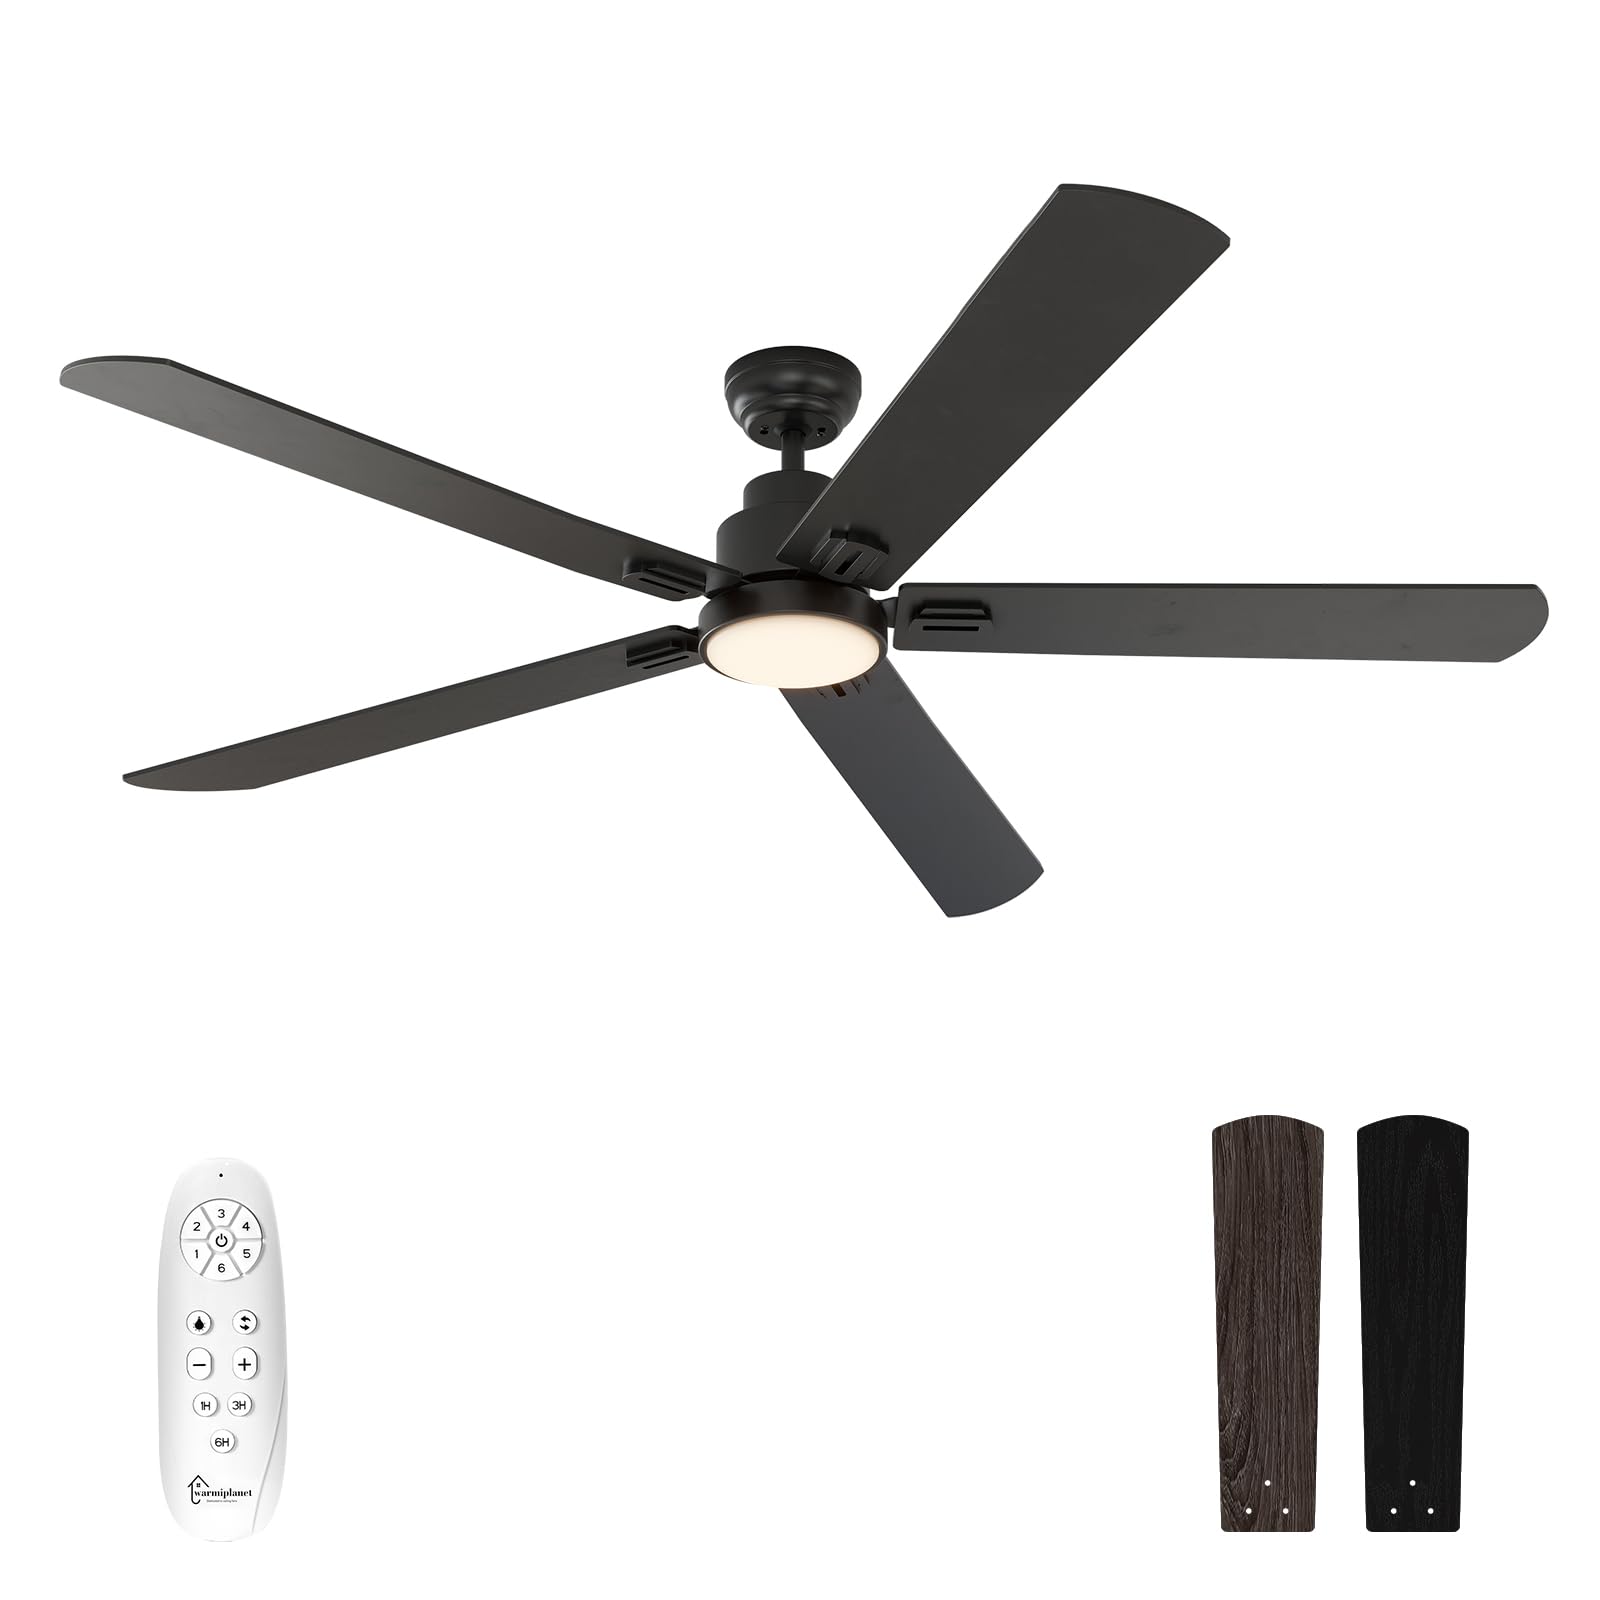
Your warmiplanet ceiling fan is controlled by a multi-function remote control. Ensure the remote has working batteries and is within range of the fan.

Image Description: A white multi-functional remote control for the ceiling fan, showing buttons for fan speed, light control, timer settings, and reversible function.
Remote Control Functions:
- Fan Speed Control: Select from 6 available speeds to adjust airflow.
- Light Control:
- Color Temperature Adjustment: Cycle through 3 color temperatures: cool white (6000K), natural light (4000K), and warm white (3000K).
- Dimmable LED Light: Adjust brightness from 10% to 100%.
- Reversible DC Motor:
- Summer Mode: Counter-clockwise rotation creates a downdraft, providing a cooling effect.
- Winter Mode: Clockwise rotation creates an updraft, circulating warm air.
- Timer Function: Set the fan to turn off automatically after 1, 3, or 6 hours.
- Memory Function: The fan and light retain their last used speed and color settings when turned off and on again.
Video Description: A product demonstration video showcasing the 62-inch warmiplanet ceiling fan with its integrated lights and remote control features, including speed adjustments and light color changes.
Video Description: A short video demonstrating the warmiplanet 62-inch ceiling fan in operation, highlighting its quiet performance and airflow.

Image Description: An illustration showing the ceiling fan generating a large volume of air, indicating 7250 CFM max air volume and 10% larger volume.

Image Description: A person sleeping peacefully in a bedroom, illustrating the quiet operation of the ceiling fan with a sound level of 30dB, comparable to a page turning.

Image Description: Three images demonstrating the ceiling fan's light at different color temperatures: 3000K Warm Light, 4000K Natural Light, and 6000K Cool White Light, with a 10-100% dimmable range.

Image Description: An illustration showing the ceiling fan's reversible function for different seasons: counter-clockwise updraft for summer cooling and clockwise downdraft for winter warmth.

Image Description: A detailed diagram of the DC Brushless Motor, highlighting its energy efficiency with 80% energy savings compared to ordinary AC motors.
4. Maintenance
Regular maintenance ensures optimal performance and longevity of your ceiling fan.
- Cleaning: Use a soft, damp cloth to clean the fan blades and motor housing. Do not use abrasive cleaners or solvents as they may damage the finish.
- Blade Inspection: Periodically check the blade attachments for tightness. Loose blades can cause wobbling and noise.
- Light Cover: Ensure the light cover is securely fastened. Clean the light cover with a soft, dry cloth.
- Electrical Connections: Annually inspect all electrical connections for any signs of wear or loose wiring. If any issues are found, consult a qualified electrician.
5. Troubleshooting
If you experience issues with your ceiling fan, refer to the following common problems and solutions:
| Problem | Possible Cause | Solution |
|---|---|---|
| Fan does not start | No power to the fan; Loose wire connections; Remote control issue. | Check circuit breaker and wall switch. Ensure all wire connections are secure. Replace remote batteries or re-pair the remote if necessary. |
| Fan wobbles | Loose blade screws; Unbalanced blades; Loose mounting bracket. | Tighten all blade screws. Ensure blades are installed correctly. Check that the hanging bracket is securely fastened to the ceiling. |
| Light does not work | Loose wire connection to light kit; Faulty LED light plate. | Check light kit wiring connections. If the LED light plate is faulty, contact customer support for a replacement. |
| Remote control not working | Dead batteries; Remote not paired with receiver. | Replace batteries in the remote control. Refer to the remote pairing instructions (usually involves pressing a button on the receiver or remote within a specific timeframe after power-on). |
6. Specifications
| Feature | Detail |
|---|---|
| Brand | warmiplanet |
| Model Name | WICF16-1 |
| Product Dimensions | 62"D x 62"W x 12.6"H |
| Color | Black |
| Number of Blades | 5 |
| Motor Type | DC (Reversible) |
| Number of Power Levels | 6 Speeds |
| Light Type | 24-watt Dimmable LED |
| Color Temperature | 3000K (Warm White), 4000K (Natural Light), 6000K (Cool White) |
| Control Method | Remote Control |
| Special Features | Adjustable Color Temperature, Dimmable, Timer, Memory Function |
| Voltage | 120 Volts |
| Item Weight | 17.36 pounds |
| Indoor/Outdoor Usage | Indoor |

Image Description: A diagram illustrating the product dimensions of the 62-inch ceiling fan, showing a 62-inch diameter, 12.6-inch height, and a 4.9-inch downrod length. Recommended room size is 15ft x 15ft to 20ft x 20ft with a 7ft clearance from blade to floor.
7. Warranty and Support
warmiplanet is committed to providing high-quality products and customer satisfaction.
- Motor Warranty: The DC motor of this ceiling fan is covered by a 10-year warranty. If the motor fails within this period, it can be replaced free of charge.
- Full Fan Warranty: The entire fan, excluding the motor, is covered by a 2-year warranty.
- Customer Support: For any questions regarding installation, operation, or warranty claims, please contact warmiplanet customer support. We aim to reply within 24 hours and provide the best possible service.
- Logistics Damage: In case of damage caused by logistics factors, please contact us for compensation or a satisfactory solution.