1. Introduction
This manual provides essential information for the safe and efficient use of your new EVVO H10 electric built-in oven. Please read these instructions carefully before installation and operation, and keep them for future reference. This appliance is designed for domestic use only.
2. Safety Instructions
- Electrical Safety: Ensure the oven is correctly earthed and connected to a suitable power supply. Installation must be performed by a qualified electrician. Do not use adapters or extension cords.
- Hot Surfaces: The oven and its accessible parts become hot during use. Exercise caution to avoid touching heating elements. Keep children away from the appliance.
- Triple Glazing: The oven features triple glazing for improved energy efficiency and reduced external door temperature, but the door surface can still be hot.
- Cleaning: Always disconnect the power supply before cleaning or maintenance. Use appropriate cleaning agents and methods as described in the maintenance section.
- Child Safety Lock: Utilize the child safety lock feature to prevent accidental operation by children.
- Ventilation: Ensure adequate ventilation around the oven as specified in the installation guidelines.
3. Product Overview
The EVVO H10 is a 77-liter electric built-in oven with 4 cooking programs and a powerful 2800W heating element. It features a sleek black design and intuitive controls.
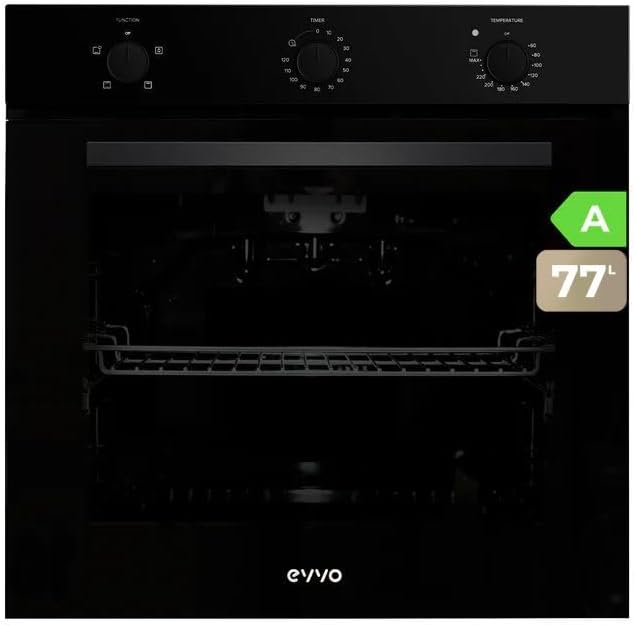
Image 3.1: Front view of the EVVO H10 oven.
Control Panel
The control panel consists of three rotary knobs:
- Function Selector: Used to choose the desired cooking program (e.g., conventional, grill).
- Timer: Sets the cooking duration or acts as a minute minder.
- Temperature Selector: Adjusts the oven temperature in degrees Celsius.

Image 3.2: Detail of the oven control knobs.
4. Installation
The EVVO H10 oven is designed for built-in installation. Proper installation is crucial for safety and optimal performance. It is highly recommended that installation be carried out by a qualified professional.
Dimensions and Cabinet Requirements
Ensure the cabinet opening meets the specified dimensions for a secure and flush fit. Refer to the diagram below for precise measurements.

Image 4.1: Oven installation dimensions.
- Electrical Connection: The oven requires a 220V electrical supply. Ensure the wiring is appropriate for the oven's 2800W power rating.
- Ventilation: Maintain adequate space around the oven for proper air circulation to prevent overheating.
- Securing the Oven: Secure the oven to the cabinet using the provided screws to prevent tipping.
5. Operating Instructions
Familiarize yourself with the oven's controls and functions before first use.
Initial Setup
- Before first use, clean the oven interior with a damp cloth.
- Heat the empty oven at maximum temperature for approximately 30 minutes to burn off any manufacturing residues. Ensure good ventilation during this process.
Using the Oven
- Power On: Turn the function selector knob to the desired cooking program.
- Set Temperature: Rotate the temperature selector knob to the required temperature.
- Set Timer: If a specific cooking duration is needed, set the timer knob. Important: For the oven to operate, the timer knob must be set to the 'infinite' position (usually indicated by a clock symbol or 'MAX' beyond the timed settings) if not using a specific timed program. If the timer is set to 'zero' or an expired time, the oven will not activate.
- Cooking Programs: The oven offers 4 programs. Consult the symbols on the function selector for specific heating elements (e.g., top heat, bottom heat, grill, conventional).
- Grill Function: Select the grill program for browning and grilling. Monitor food closely to prevent burning.
- Preheating: For best results, preheat the oven to the desired temperature before placing food inside.
6. Cleaning and Maintenance
Regular cleaning and maintenance ensure the longevity and hygienic operation of your oven.
- Before Cleaning: Always ensure the oven is cool and disconnected from the power supply.
- Interior Cleaning: Use a soft cloth and mild detergent for the interior. Avoid abrasive cleaners or scourers that can damage surfaces.
- Steam Assistance: The oven may feature a steam assistance function to aid in cleaning. Consult the specific instructions for activating this feature, which helps loosen baked-on food residues.
- Exterior Cleaning: Wipe the exterior surfaces with a damp cloth and mild detergent. Do not use harsh chemicals.
- Accessories: The included tray and chrome shelf can be removed and washed with warm soapy water.

Image 6.1: Oven with steam assistance.
7. Troubleshooting
If you encounter issues with your oven, refer to the following common problems and solutions:
| Problem | Possible Cause | Solution |
|---|---|---|
| Oven does not heat up or turn on. | Timer knob is set to 'zero' or an expired time. No power supply. | Ensure the timer knob is set to the 'infinite' position (or a valid timed program). Check the circuit breaker and power connection. |
| Uneven cooking. | Incorrect rack position. Overcrowding the oven. | Use the recommended rack position for your dish. Avoid placing too many items in the oven at once. |
| Excessive smoke during cooking. | Food spillage. Excessive fat. | Clean the oven interior thoroughly. Use a drip tray for fatty foods. |
If the problem persists after attempting these solutions, please contact customer support.
8. Specifications
Detailed technical specifications for the EVVO H10 electric built-in oven:
| Feature | Specification |
|---|---|
| Brand | EVVO |
| Model Number | H10 Black |
| Capacity | 77 Liters |
| Power | 2800 Watts |
| Voltage | 220V |
| Energy Efficiency Class | A |
| Annual Energy Consumption | 81 kWh/year |
| Dimensions (H x W x D) | 59.4 x 59.5 x 52.1 cm |
| Weight | 28 Kilograms |
| Material | Stainless Steel |
| Special Features | Automatic stop, Grilling, Timer, Trays, Roasting, Child safety lock, Triple glazing |
| Included Components | 1 tray, 1 chrome shelf |

Image 8.1: EVVO H10 Energy Label.
9. Warranty and Support
EVVO provides a warranty for this product in accordance with local regulations. Please retain your proof of purchase for any warranty claims.
- Spare Parts Availability: Spare parts for the EVVO H10 oven are available for a period of 10 years from the date of purchase.
- Customer Support: For technical assistance, warranty inquiries, or to order spare parts, please contact EVVO customer support through the official website or your retailer.


