Brother MFC-J3940DW
Brother MFC-J3940DW A3 All-in-One Color Ink Cartridge Printer User Manual
Model: MFC-J3940DW | Brand: Brother
Introduction
This manual provides detailed instructions for the setup, operation, maintenance, and troubleshooting of your Brother MFC-J3940DW A3 All-in-One Color Ink Cartridge Printer. Please read this manual thoroughly before using the printer to ensure correct and safe operation.
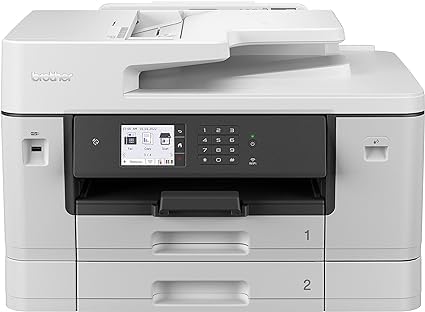
Image: Front view of the Brother MFC-J3940DW A3 All-in-One Color Ink Cartridge Printer. This image displays the printer's control panel, paper trays, and overall design.
1. Setup
1.1 Unpacking and Placement
- Carefully remove the printer from its packaging. Retain all packaging materials for future transport.
- Remove all protective tapes and packing materials from the exterior and interior of the printer. Refer to the quick setup guide for specific locations.
- Place the printer on a flat, stable surface with adequate space around it for ventilation and access to cables.
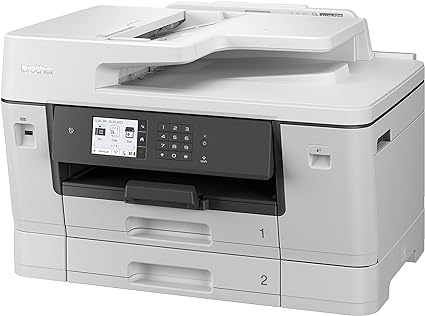
Image: Angled front-right view of the Brother MFC-J3940DW printer. This perspective highlights the paper output tray and the right side of the device.
1.2 Power Connection
- Connect the power cord to the AC inlet on the back of the printer.
- Plug the other end of the power cord into a grounded electrical outlet.
- Press the power button to turn on the printer.
1.3 Ink Cartridge Installation
- Open the ink cartridge cover.
- Unpack each ink cartridge and gently shake it horizontally 15 times.
- Insert each cartridge into its corresponding slot until it clicks into place. Ensure the colors match the labels.
- Close the ink cartridge cover. The printer will begin an initial ink charging process.
1.4 Paper Loading
- Pull out the paper tray completely.
- Adjust the paper guides to fit the paper size you are loading (e.g., A4, A3).
- Load paper into the tray, ensuring it is flat and not exceeding the maximum fill line.
- Gently push the paper tray back into the printer.
- Confirm the paper size and type on the printer's display if prompted.
1.5 Network Setup (Wi-Fi / Ethernet)
The MFC-J3940DW supports both Wi-Fi and Ethernet connectivity.
Wi-Fi Setup:
- On the printer's control panel, navigate to Network > WLAN > Setup Wizard.
- Select your Wi-Fi network (SSID) from the list.
- Enter the network key (password) using the touchscreen keyboard.
- Confirm the settings. The printer will attempt to connect to the network.
Ethernet Setup:
- Connect an Ethernet cable from your router or network hub to the Ethernet port on the back of the printer.
- The printer will automatically detect the wired connection and obtain an IP address.
1.6 Driver and Software Installation
For full functionality, install the latest drivers and software on your computer.
- Visit the official Brother support website for your model (MFC-J3940DW).
- Download the full driver and software package compatible with your operating system.
- Follow the on-screen instructions to complete the installation.
2. Operating Instructions
2.1 Printing
Basic Printing:
- Ensure the printer is connected to your computer or network.
- Open the document you wish to print.
- Select Print from the application's menu (e.g., File > Print).
- Choose Brother MFC-J3940DW as your printer.
- Adjust print settings (e.g., paper size, orientation, number of copies) as needed.
- Click Print.
A3 and 2-sided Printing:
- To print on A3 paper, ensure A3 paper is loaded in the correct tray and select A3 as the paper size in your print settings.
- For automatic 2-sided (duplex) printing, select the 2-sided printing or Duplex option in your printer driver settings.
2.2 Scanning
Scanning from the Control Panel:
- Place your document face down on the scanner glass or face up in the Automatic Document Feeder (ADF).
- On the printer's control panel, press the Scan button.
- Select your desired scan destination (e.g., Scan to PC, Scan to Email).
- Follow the on-screen prompts to adjust settings and start the scan.
2.3 Copying
- Place your document on the scanner glass or in the ADF.
- On the printer's control panel, press the Copy button.
- Enter the number of copies using the numeric keypad.
- Adjust settings such as Enlarge/Reduce, Quality, or 2-sided Copy if needed.
- Press Start (Color or Mono) to begin copying.
2.4 Faxing
Ensure a telephone line is connected to the printer's LINE jack.
Sending a Fax:
- Place your document face down on the scanner glass or face up in the ADF.
- On the printer's control panel, press the Fax button.
- Enter the recipient's fax number using the numeric keypad.
- Press Start (Color or Mono) to send the fax.
Receiving a Fax:
- The printer is set to receive faxes automatically by default.
- You can change the receive mode (e.g., Manual, Fax/Tel) through the Fax settings on the control panel.
2.5 Mobile and Cloud Connectivity
- Apple AirPrint™: Print directly from your Apple iOS device without installing drivers. Ensure your device and printer are on the same Wi-Fi network.
- Wi-Fi Direct: Connect your mobile device directly to the printer without a router. Enable Wi-Fi Direct on the printer and connect from your device's Wi-Fi settings.
- Brother Mobile Connect: Download the Brother Mobile Connect app for advanced printing, scanning, and device management from your smartphone or tablet.

Image: Angled front-left view of the Brother MFC-J3940DW printer. This view highlights the left side panel and the paper output area.
3. Maintenance
3.1 Replacing Ink Cartridges
When an ink cartridge is low or empty, a message will appear on the printer's display.
- Open the ink cartridge cover.
- Press the release lever for the empty cartridge and remove it.
- Unpack a new genuine Brother ink cartridge and gently shake it horizontally 15 times.
- Insert the new cartridge into its correct slot until it clicks into place.
- Close the ink cartridge cover.
Note: Use only genuine Brother ink cartridges to ensure optimal print quality and prevent damage to the printer.
3.2 Cleaning the Printer
Cleaning the Print Head:
If print quality declines (e.g., missing lines, streaking), perform a print head cleaning.
- On the printer's control panel, navigate to Menu > Maintenance > Improve Print Quality > Cleaning.
- Select the color(s) to clean (Black, Color, or All).
- Follow the on-screen instructions. You may need to perform multiple cleaning cycles.
Cleaning the Scanner Glass:
- Open the document cover.
- Wipe the scanner glass and the white plastic strip beneath the document cover with a soft, lint-free cloth dampened with glass cleaner.
- Ensure no residue remains before closing the cover.
4. Troubleshooting
This section addresses common issues you might encounter with your Brother MFC-J3940DW printer.
4.1 Printer Not Responding
- Check Power: Ensure the printer is plugged in and turned on.
- Check Connections: Verify USB, Ethernet, or Wi-Fi connections are secure and active.
- Restart Devices: Turn off the printer, computer, and router. Wait a few minutes, then turn them back on in sequence (router first, then printer, then computer).
- Printer Driver: Ensure the correct printer driver is installed and updated on your computer.
4.2 Print Quality Issues
- Streaks or Missing Colors: Perform a print head cleaning (refer to Section 3.2).
- Faded Prints: Check ink levels and replace any low or empty cartridges.
- Incorrect Colors: Ensure you are using genuine Brother ink cartridges. Perform a print head alignment if available in the maintenance menu.
- Paper Type: Verify that the paper type selected in your print settings matches the paper loaded in the tray.
4.3 Paper Jams
- Turn off the printer and unplug the power cord.
- Carefully open all covers and trays to locate the jammed paper.
- Gently pull the jammed paper in the direction of the paper path. Avoid tearing the paper.
- Ensure all paper fragments are removed.
- Close all covers, plug in the power cord, and turn on the printer.
4.4 Network Connectivity Problems
- Wi-Fi Connection Failure: Re-run the Wi-Fi Setup Wizard on the printer. Ensure the Wi-Fi password is correct. Check if the printer is within range of your router.
- Ethernet Connection Failure: Verify the Ethernet cable is securely connected at both ends. Check the network status on the printer's control panel.
- Firewall Settings: Your computer's firewall may be blocking communication. Temporarily disable it for testing, or configure it to allow Brother printer communication.
5. Specifications
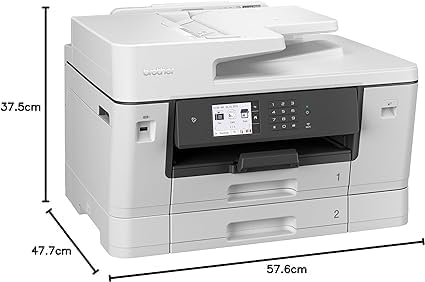
Image: Angled front-left view of the Brother MFC-J3940DW printer with dimensions labeled. The image shows the height (37.5cm), depth (47.7cm), and width (57.6cm) of the device.
| Feature | Detail |
|---|---|
| Model Name | MFC-J3940DW |
| Product Dimensions | 47.7 x 57.6 x 37.5 cm |
| Item Weight | 23.4 kg |
| Manufacturer | Brother |
| Connectivity Technology | Ethernet, USB, Wi-Fi |
| Printer Technology | Inkjet |
| Special Features | Auto-Duplex, Network-Ready |
| Color | White |
| Printer Output | Color |
| Maximum Print Speed (Color) | 28 ppm |
| Maximum Print Speed (Black and White) | 28 ppm |
| Country of Origin | Philippines |
| Date First Available | 23 January 2024 |
6. Warranty and Support
6.1 Manufacturer's Warranty
Your Brother MFC-J3940DW printer is covered by a manufacturer's warranty. For specific terms, conditions, and duration of the warranty, please refer to the warranty card included with your product or visit the official Brother support website.
Keep your proof of purchase for warranty claims.
6.2 Extended Warranty Options
Extended warranty plans may be available for purchase to provide additional coverage beyond the standard manufacturer's warranty. For example, options such as a 1-Year or 2-Year Extended Warranty by Salama Care may be offered.
- 1-Year Extended Warranty: Provides coverage for an additional year.
- 2-Year Extended Warranty: Provides coverage for an additional two years.
Note: Availability and terms of extended warranties may vary. Please consult the provider for full details.
6.3 Customer Support
For technical assistance, driver downloads, FAQs, and further support, please visit the official Brother support website or contact their customer service directly. Have your model number (MFC-J3940DW) and serial number ready when contacting support.
Official Brother Support: www.brother.com/support