1. Introduction
Thank you for choosing the GAMEPOWER Rapid 27-inch 1080P 360Hz Gaming Monitor. This monitor is designed to provide an immersive gaming experience with its high refresh rate, fast response time, and vibrant display. This manual provides essential information for setting up, operating, and maintaining your monitor. Please read it thoroughly before use and retain it for future reference.
2. Safety Information
- Always place the monitor on a stable, flat surface to prevent it from falling.
- Do not block ventilation openings. Ensure adequate space around the monitor for proper airflow.
- Use only the power adapter and cables provided by the manufacturer.
- Keep the monitor away from water, moisture, and direct sunlight.
- Avoid exposing the monitor to extreme temperatures.
- Do not attempt to disassemble or repair the monitor yourself. Refer all servicing to qualified personnel.
- Unplug the monitor from the power outlet during lightning storms or when unused for extended periods.
3. Package Contents
Verify that all items are present in your package:
- GAMEPOWER Rapid 27-inch Gaming Monitor
- Monitor Stand (Base and Neck)
- Power Adapter
- DisplayPort Cable
- User Manual (this document)
4. Setup
4.1 Assembling the Stand
- Carefully remove the monitor and stand components from the packaging.
- Attach the stand neck to the stand base, securing it with the provided screws.
- Attach the assembled stand to the back of the monitor panel. Ensure it clicks securely into place or is fastened with screws as per the design.
4.2 Connecting Cables
Connect the necessary cables to the monitor and your computer or other devices.
- Power Cable: Connect the power adapter to the monitor's power input, then plug the adapter into a power outlet.
- DisplayPort Cable: For optimal performance (360Hz refresh rate), connect one end of the DisplayPort cable to the monitor's DisplayPort input and the other end to your computer's DisplayPort output.
- HDMI Cable: Alternatively, connect an HDMI cable to one of the monitor's HDMI inputs and your device's HDMI output. Note that HDMI may support lower refresh rates depending on the version.
- USB Cables: If your monitor has USB upstream ports, connect a USB upstream cable from the monitor to your computer to enable the monitor's USB downstream ports.
4.3 Initial Power-On
Press the power button on the monitor. The power indicator light will illuminate, and the display will turn on. If no signal is detected, ensure your computer is on and the correct input source is selected on the monitor.
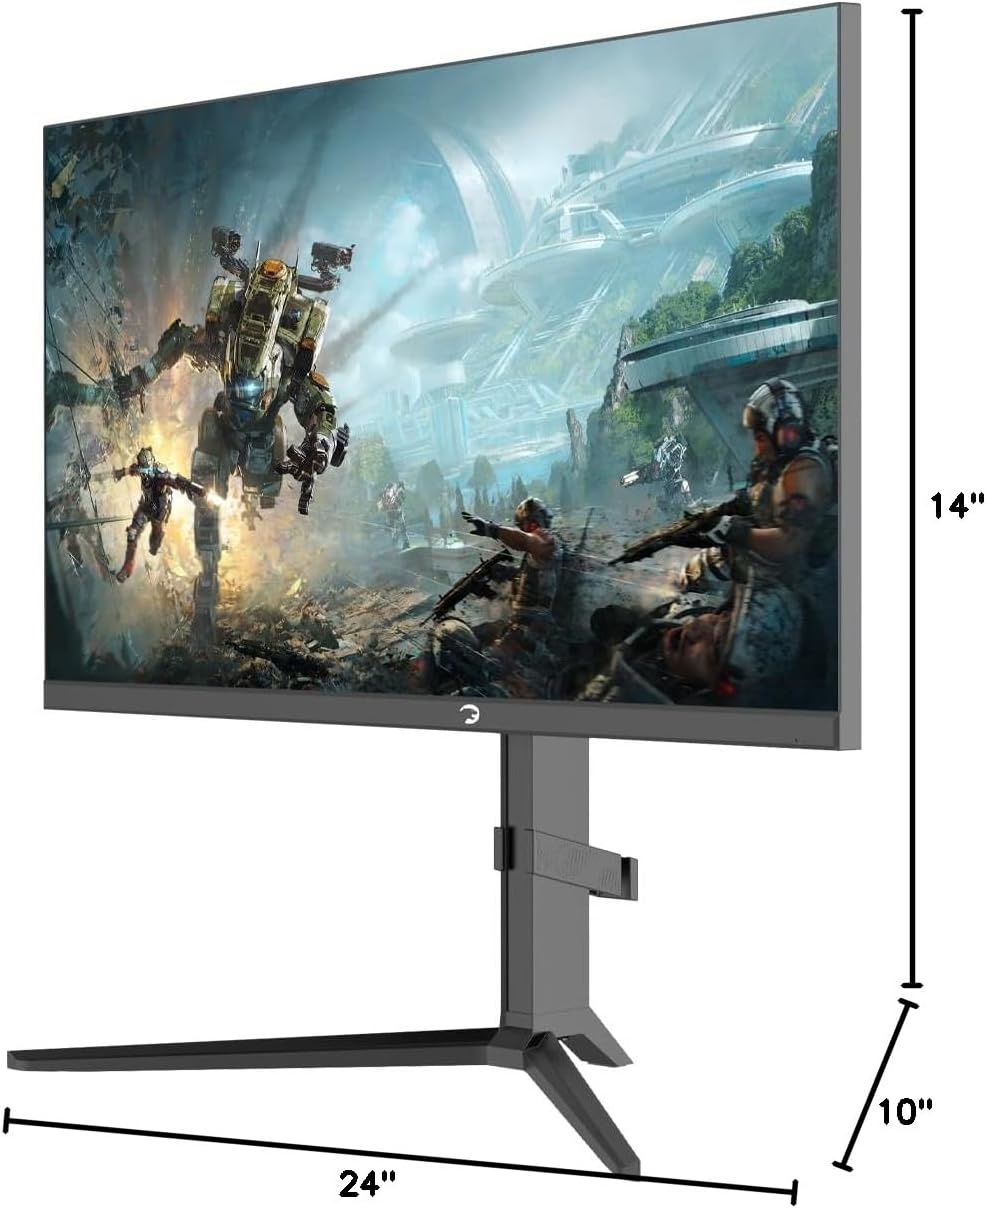
Figure 4.1: Monitor Dimensions and Stand Assembly
5. Operating Instructions
5.1 Power On/Off
Press the power button located on the monitor to turn it on or off.
5.2 Input Selection
Use the monitor's OSD (On-Screen Display) menu or dedicated input selection button to switch between DisplayPort and HDMI inputs.
5.3 Monitor Adjustments
The GAMEPOWER Rapid monitor offers ergonomic adjustments for optimal viewing comfort:
- Height Adjustment: Adjust the monitor's vertical position to eye level.
- Tilt Adjustment: Tilt the screen forward or backward to find the best viewing angle.
- Swivel Adjustment: Rotate the monitor horizontally left or right.
- Pivot Adjustment: Rotate the screen 90 degrees to switch between landscape and portrait modes.

Figure 5.1: Ergonomic Adjustments (Height, Tilt, Swivel, Pivot)
5.4 OSD Menu Navigation
The On-Screen Display (OSD) menu allows you to configure various monitor settings. Access the OSD menu using the buttons on the monitor (refer to your monitor's specific button layout for details). Navigate through the menu options using the directional buttons and confirm selections with the enter button.
Common OSD settings include:
- Picture Settings: Brightness, Contrast, Sharpness, Color Temperature.
- Display Settings: Resolution, Refresh Rate, Aspect Ratio.
- Input Select: Choose between DisplayPort and HDMI.
- Audio Settings: Volume control for built-in speakers.
- Gaming Features: Adaptive Sync, Low Blue Light, Flicker Free, Response Time settings.
6. Key Features
6.1 Ultra-Fast 360Hz Refresh Rate & 1ms Response Time
Experience incredibly smooth motion and minimal input lag with a 360Hz refresh rate and 1ms response time, crucial for competitive gaming.
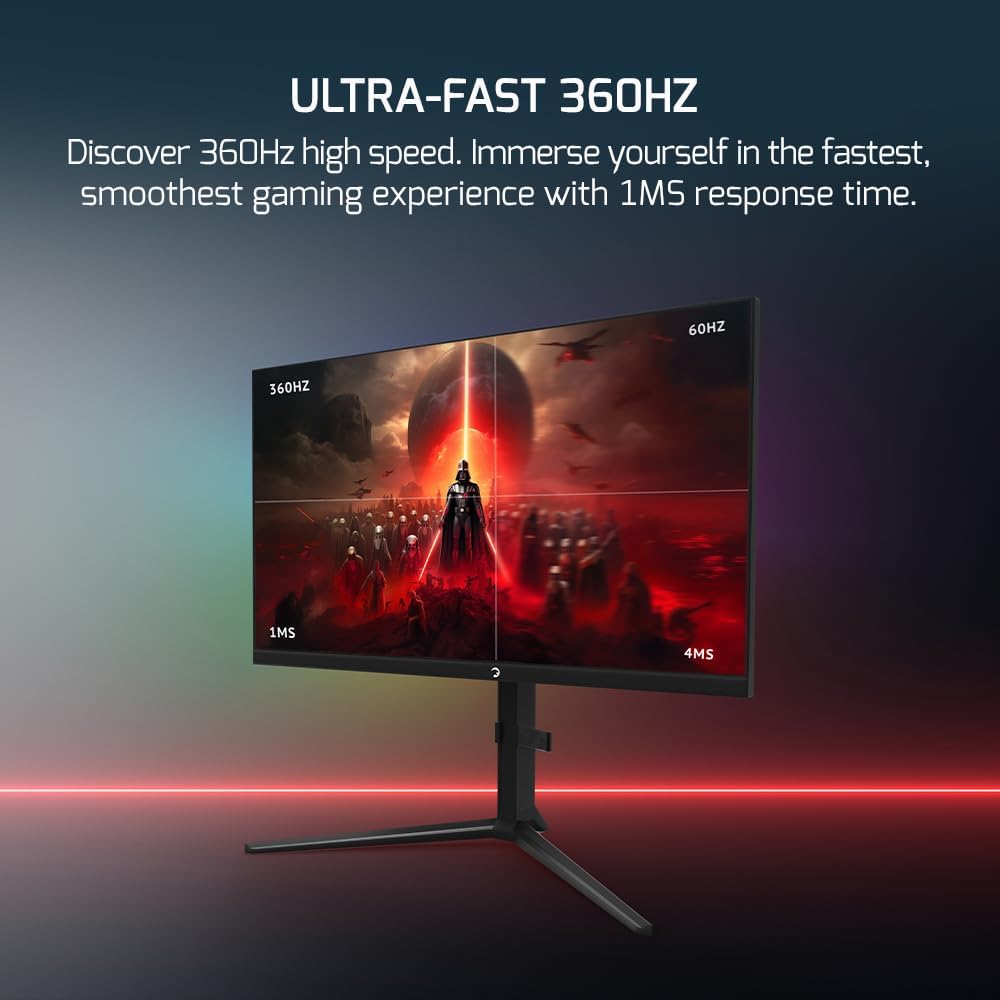
Figure 6.1: 360Hz Refresh Rate and 1ms Response Time
6.2 Fast IPS Panel
The Fast IPS panel technology provides accurate colors, wide viewing angles, and consistent image quality, enhancing your visual experience in games and other applications.

Figure 6.2: Fast IPS Panel Display
6.3 HDR10 Support
With HDR10 support, the monitor delivers enhanced brightness, deeper blacks, and richer colors, resulting in more realistic and dynamic visuals.

Figure 6.3: HDR10 Visual Enhancement
6.4 Adaptive Sync (FreeSync & G-Sync Compatible)
Adaptive Sync technology synchronizes the monitor's refresh rate with your GPU's frame rate, eliminating screen tearing and stuttering for a smoother gaming experience.

Figure 6.4: Adaptive Sync for Tear-Free Gaming
6.5 Low Blue Light & Flicker-Free Technology
Designed for extended use, the monitor features Low Blue Light mode to reduce eye strain and Flicker-Free technology to minimize screen flickering, promoting comfortable viewing during long gaming sessions.

Figure 6.5: Low Blue Light Feature

Figure 6.6: Flicker-Free Technology
6.6 100% sRGB Color Gamut
Enjoy true-to-life imagery with 100% sRGB color gamut coverage, ensuring accurate and vibrant color reproduction for all your content.

Figure 6.7: 100% sRGB Color Accuracy
6.7 Integrated Cable Management
The monitor stand includes a cable organizer to help keep your workspace tidy and cables neatly arranged.

Figure 6.8: Cable Management System
6.8 RGB Lighting and Laser Logo
The monitor features customizable RGB lighting on the rear and a projected laser logo on the desk, allowing for personalization of your gaming setup.

Figure 6.9: Rear RGB Lighting
Figure 6.10: Laser Logo Projection
7. Maintenance
7.1 Cleaning the Monitor
To clean the screen, gently wipe it with a soft, lint-free cloth. For stubborn marks, dampen the cloth slightly with water or a mild, non-abrasive screen cleaner. Never spray liquid directly onto the screen. To clean the monitor casing, use a soft, dry cloth.
7.2 Storage
When storing the monitor for an extended period, unplug it from the power source and store it in a cool, dry place, preferably in its original packaging to protect it from dust and physical damage.
8. Troubleshooting
If you encounter issues with your monitor, refer to the following common problems and solutions:
| Problem | Possible Cause | Solution |
|---|---|---|
| No image on screen | Monitor not powered on; Incorrect input selected; Video cable loose or disconnected; Computer in sleep mode. | Ensure power cable is connected and monitor is on; Select correct input source via OSD; Check video cable connections; Wake up computer. |
| Image is blurry or distorted | Incorrect resolution or refresh rate; Video cable issue. | Set display resolution to 1920x1080 and refresh rate to 360Hz in your operating system settings; Try a different video cable. |
| Screen tearing or stuttering | Adaptive Sync not enabled; Graphics card driver issues. | Enable Adaptive Sync (FreeSync/G-Sync) in the monitor OSD and your graphics card control panel; Update graphics drivers. |
| No sound from speakers | Volume too low or muted; Incorrect audio output selected on computer. | Adjust monitor volume via OSD; Check audio output settings on your computer. |
| Monitor not adjusting | Stand not properly assembled or locked. | Ensure the stand is fully assembled and secured to the monitor. Apply gentle, firm pressure when adjusting. |
9. Specifications
| Feature | Specification |
|---|---|
| Model Name | Rapid |
| Screen Size | 27 Inches |
| Panel Type | Flat IPS |
| Resolution | 1920 x 1080 Pixels (FHD 1080p) |
| Aspect Ratio | 16:9 |
| Refresh Rate | 360Hz |
| Response Time | 1ms |
| Brightness | 350 cd/m² |
| HDR Support | HDR10 |
| Adaptive Sync | FreeSync, G-Sync Compatible |
| Connectivity | 2 x HDMI 2.1, 2 x DisplayPort 1.4, USB |
| Audio | Integrated Speakers |
| Ergonomics | Height, Tilt, Swivel, Pivot Adjustable |
| Special Features | RGB Anti-Glare Display, Laser Logo, Low Blue Light, Flicker Free, Cable Management |
| Product Dimensions | 10 x 14 x 24 inches |
| Item Weight | 12.5 pounds |
| Voltage | 100V to 240V (Global Voltage Range) |
9.1 Energy Efficiency Label
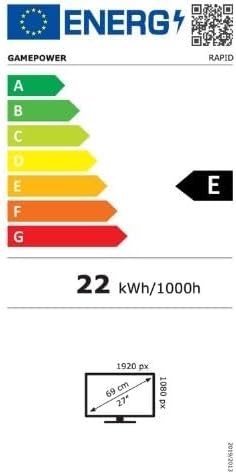
Figure 9.1: Energy Efficiency Label
10. Warranty and Support
The GAMEPOWER Rapid monitor comes with a manufacturer's warranty. Please refer to the warranty card included in your package for specific terms and conditions, including warranty duration and coverage details. For technical support, troubleshooting assistance, or warranty claims, please contact GAMEPOWER customer service through their official website or the contact information provided with your purchase.
Minimum guaranteed availability of software and firmware updates: Not specified
Minimum guaranteed availability of spare parts: 2 years
Minimum guaranteed product support: 5 years


