1. Introduction and Overview
This user manual provides essential information for the installation, maintenance, and replacement of your VRTYVEYBB replacement vacuum filter and side brush kit. This kit is designed to maintain the optimal cleaning performance of your compatible robot vacuum cleaner.
The side brushes are engineered to reach deep into carpets and along edges, effectively sweeping dirt and debris into the vacuum's path. The filters are designed to capture fine particles, reducing allergens and dust in the air you breathe, contributing to a cleaner home environment.
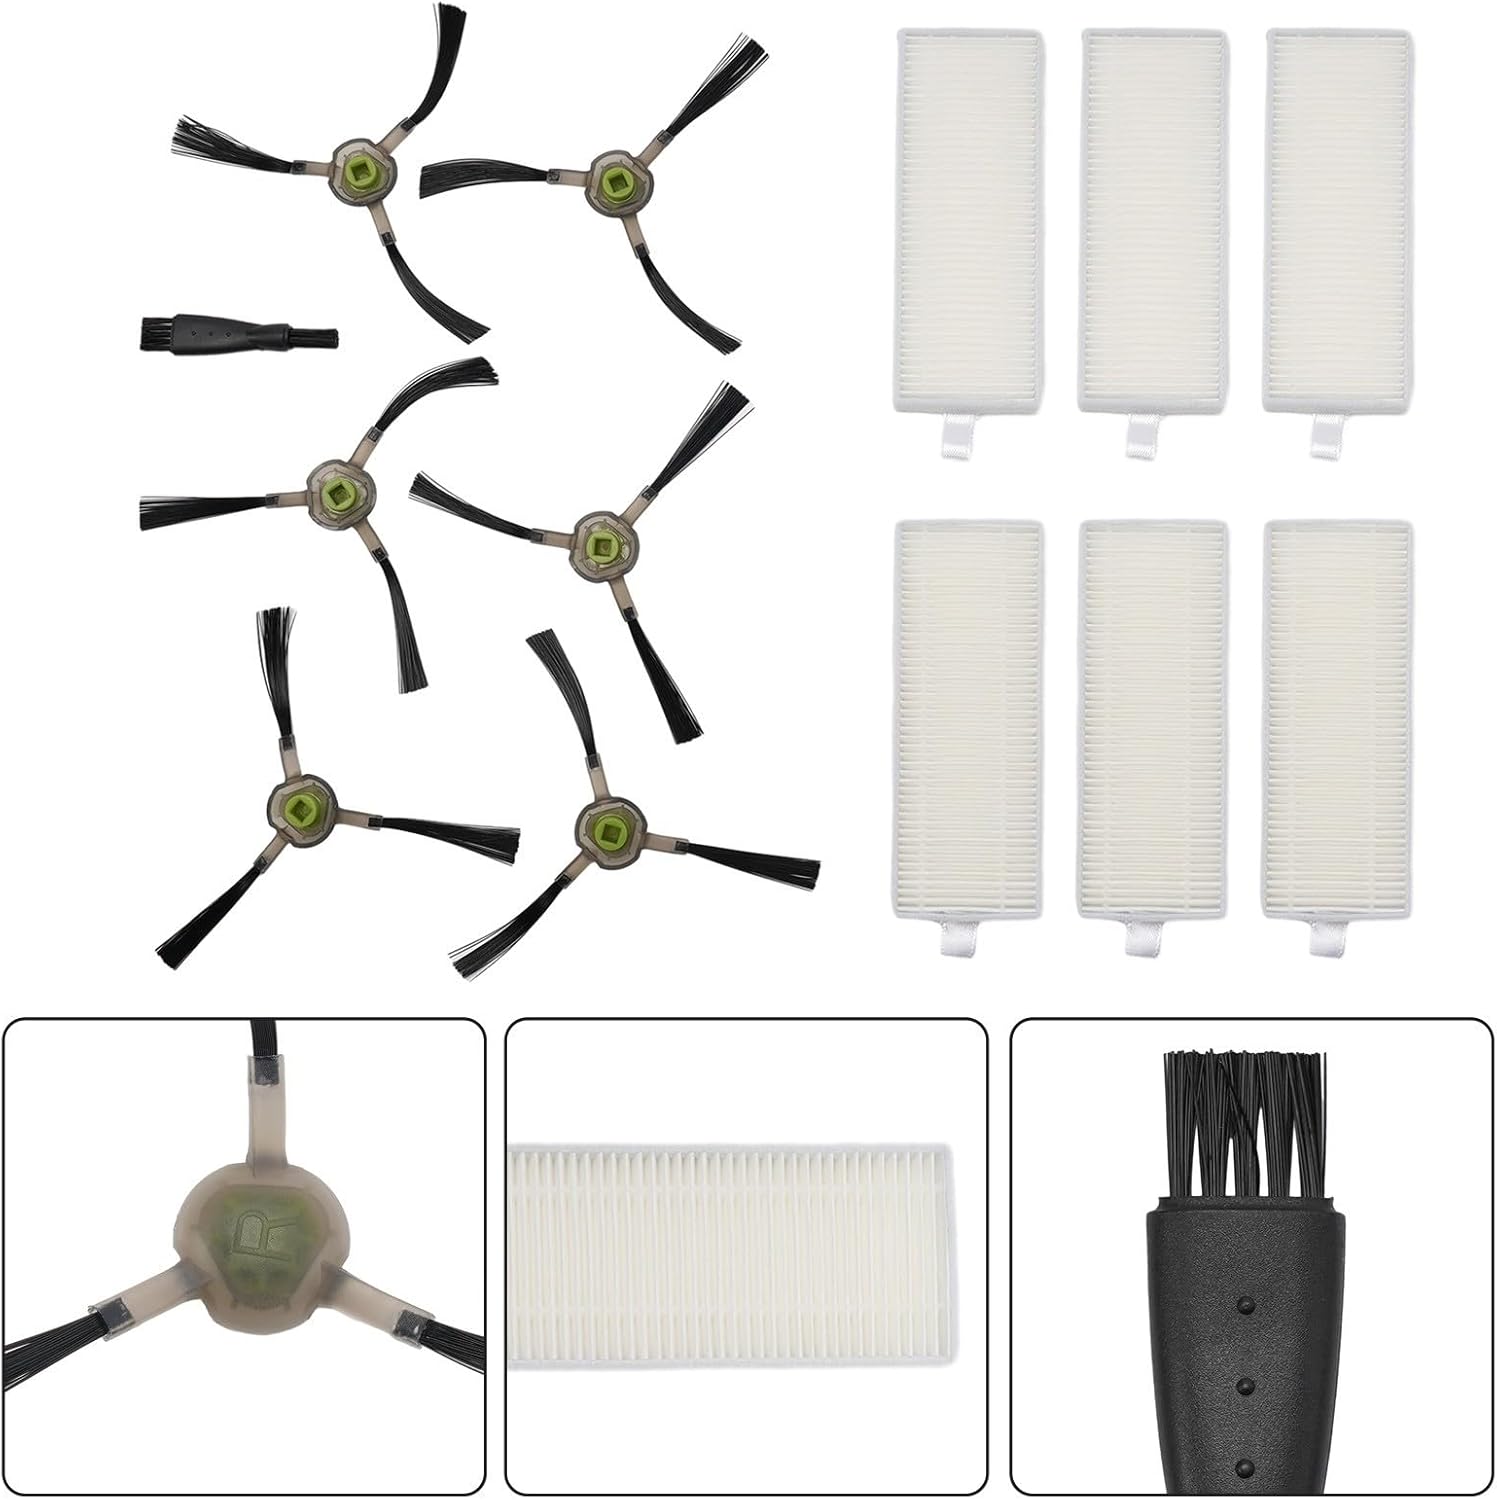
Image 1.1: Overview of the VRTYVEYBB Replacement Kit, showing six filters, six side brushes, and one cleaning brush.
2. Package Contents
Verify that all items are included in your package:
- 6 x High-Efficiency Filters
- 6 x Side Brushes (3-arm design)
- 1 x Cleaning Brush Tool
3. Compatibility
This replacement kit is fully compatible with the following robot vacuum cleaner models:
- OKP Life K2
- OKP Life K3
- OKP Life K4
- OKP Life K5
- Lefant M210
- Lefant M210S
- Lefant M210B
- Lefant M213
Ensure your robot vacuum model is listed above for proper fit and function.
4. Installation Instructions
4.1. Replacing Side Brushes
- Turn off your robot vacuum cleaner and place it on a flat surface with the underside facing up.
- Locate the existing side brushes. Depending on your model, you may need a screwdriver to remove a small screw holding each brush in place.
- Carefully remove the old side brushes.
- Align the new side brushes with the corresponding posts on the vacuum. Ensure the brush arms are correctly oriented.
- If applicable, secure the new brushes with the screws previously removed.

Image 4.1: Detailed view of a side brush, showing its three-arm design and approximate dimensions for reference.
4.2. Replacing Filters
- Turn off your robot vacuum cleaner.
- Open the dustbin compartment. This usually involves pressing a release button or latch.
- Remove the dustbin from the vacuum.
- Locate the filter housing within the dustbin. Remove the old filter by pulling on its tab or frame.
- Discard the old filter.
- Insert a new filter into the filter housing, ensuring it is seated correctly and securely. The tab should face outwards for easy removal next time.
- Close the dustbin compartment and reinsert the dustbin into the vacuum cleaner.

Image 4.2: A set of six high-efficiency replacement filters, ready for installation into the robot vacuum's dustbin.
5. Maintenance and Care
Regular maintenance of your replacement parts ensures your robot vacuum operates at peak efficiency.
- Filter Cleaning: Filters are not washable. Tap them gently over a trash can to remove accumulated dust and debris. Do not rinse with water.
- Side Brush Cleaning: Use the provided cleaning brush tool to remove hair and debris tangled around the side brushes.
- Recommended Replacement: For optimal performance, it is recommended to replace the filters and side brushes every 2 to 3 months, depending on usage frequency and home environment (e.g., presence of pets).

Image 5.1: The included cleaning brush tool, useful for removing hair and debris from side brushes and other vacuum components.
6. Specifications
| Feature | Detail |
|---|---|
| Brand | VRTYVEYBB |
| Compatible Devices | OKP Life K2, K3, K4, K5; Lefant M210, M210S, M210B, M213 |
| Item Weight | 3.2 ounces (approx. 90.7 grams) |
| Product Dimensions (Kit) | 7.87 x 3.94 x 1.97 inches (approx. 20 x 10 x 5 cm) |
| Filter Dimensions | Approx. 127mm (5in) x 47mm (1.85in) |
| Side Brush Dimensions | Approx. 51mm (2in) arm length, 27mm (1.06in) diameter base |
| Reusability | Reusable (filters are not washable, but brushes are) |
| Number of Pieces | 13 (6 filters, 6 side brushes, 1 cleaning brush) |
Image 6.1: Visual representation of the approximate dimensions for both the replacement filter and side brush.
7. Troubleshooting
If you encounter issues after replacing parts, consider the following:
- Reduced Suction: Ensure the new filter is correctly seated in the dustbin and that the dustbin is properly installed in the vacuum. Check for any blockages in the vacuum's air ducts.
- Brushes Not Spinning: Verify that the side brushes are securely attached and that no hair or debris is tangled around their base or motor. Ensure the screws (if applicable) are tightened.
- Unusual Noise: Check all installed parts for proper fit. Remove and re-install if necessary. Ensure no foreign objects are caught in the brushes or wheels.
- General Performance: If performance issues persist, ensure you are replacing parts within the recommended 2-3 month interval.
8. Customer Support
For any questions or concerns regarding your VRTYVEYBB replacement kit, please contact our customer service. We are committed to providing premium service and will assist you within 12 hours.
Refer to your product packaging or purchase platform for specific contact details.