1. Introduction
The Phomemo P12 Pro is a compact and versatile label printer designed for various labeling needs at home, in the office, or at school. It features Bluetooth connectivity for seamless smartphone integration and supports a wide range of label types. This manual provides detailed instructions for setting up, operating, and maintaining your P12 Pro label printer.
2. Product Overview and Unboxing
The Phomemo P12 Pro label printer comes with essential accessories to get you started. Upon unboxing, you will find the printer unit, a data cable, an instruction manual, and a sample label roll.
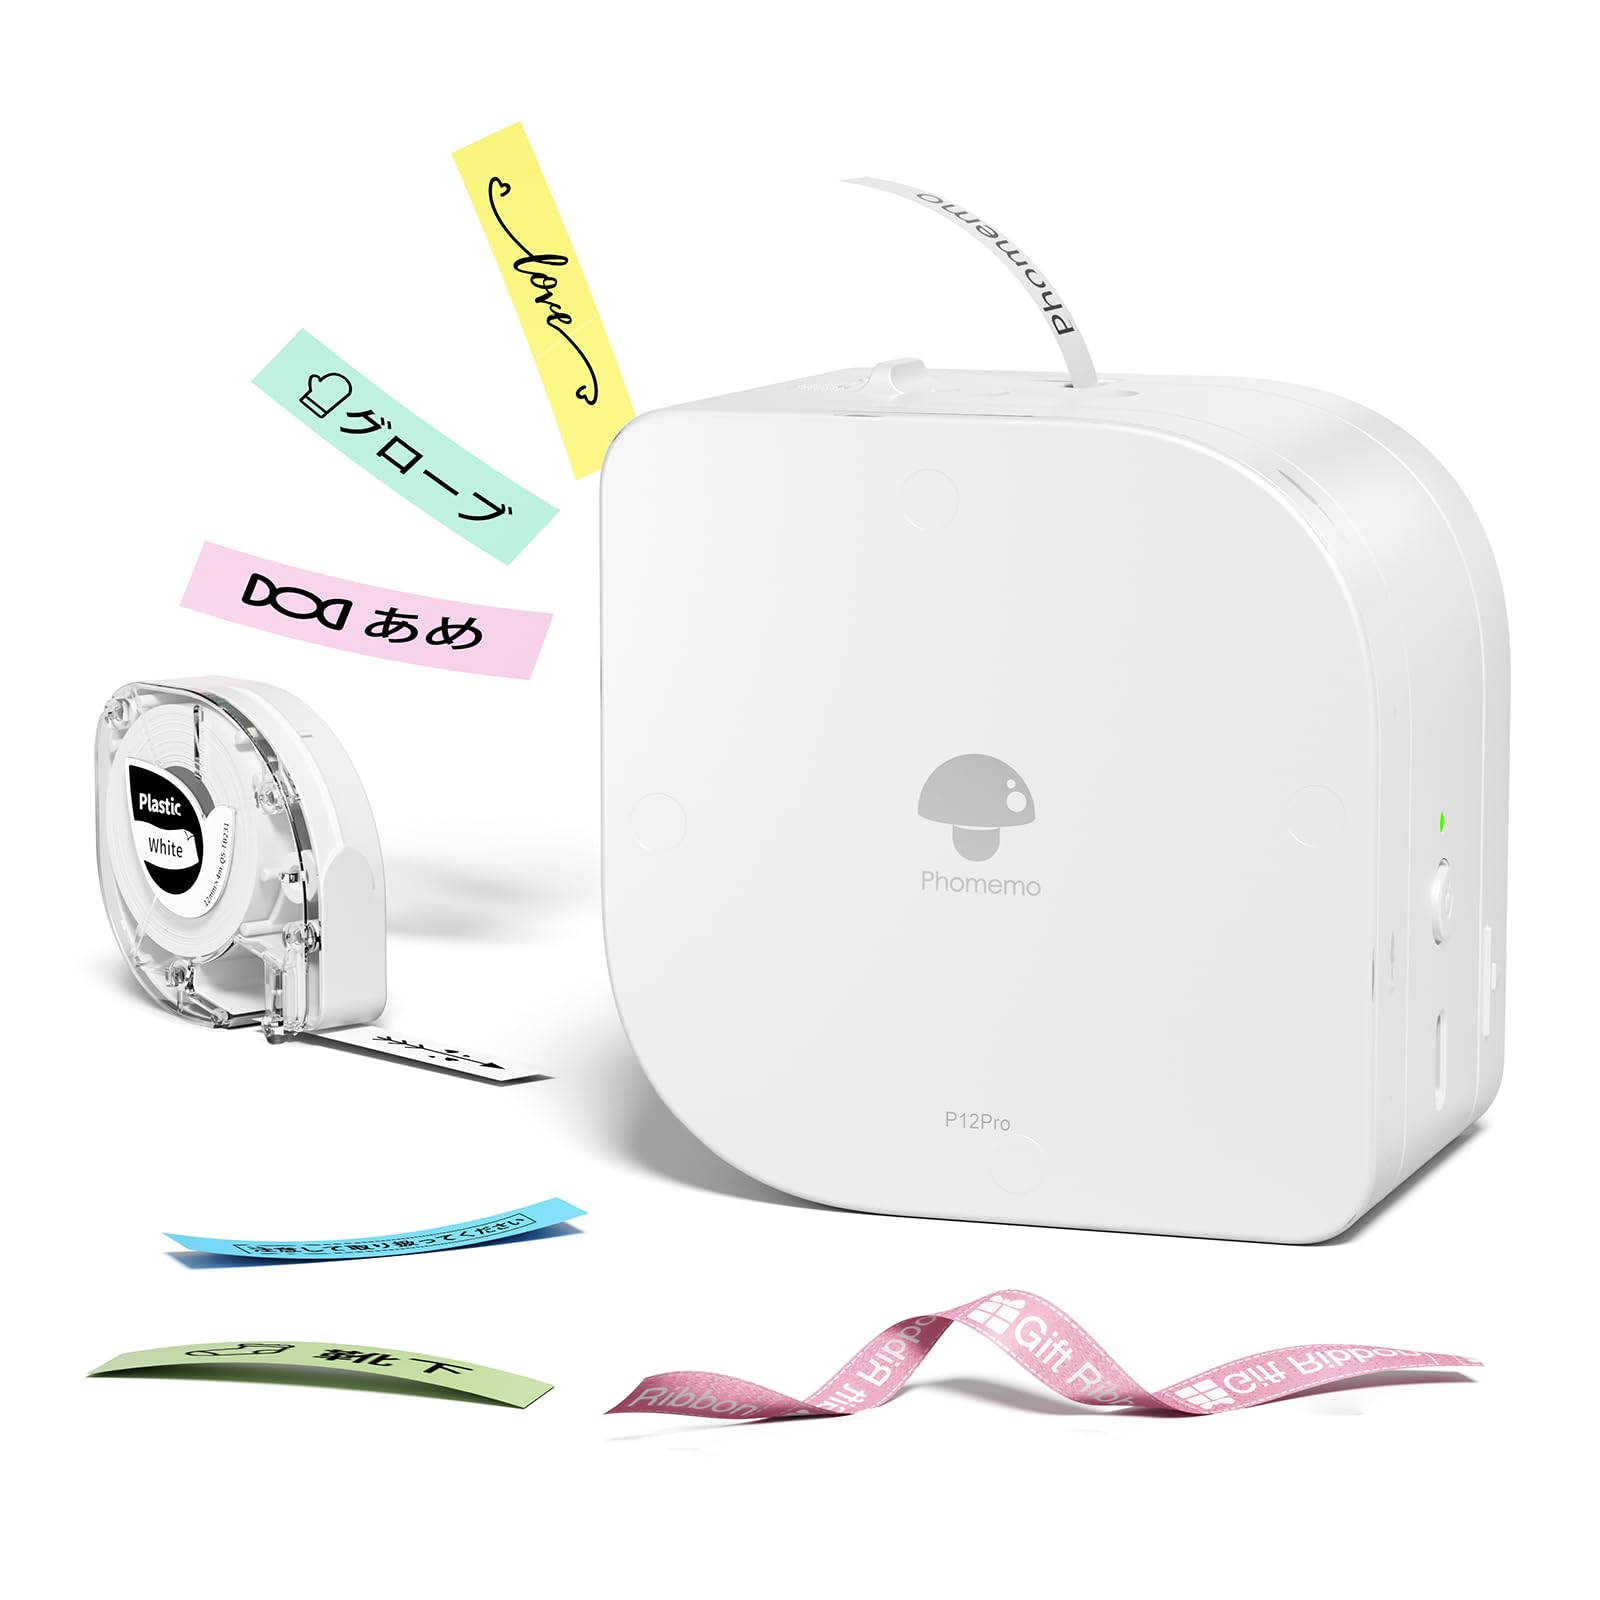
Image: The Phomemo P12 Pro label printer, its packaging, a data cable, and a sample label roll.
Video: This video demonstrates the unboxing of the Phomemo P12 Pro label printer and the installation of a label roll, showing the compact design and ease of setup.
3. Setup Guide
3.1 App Download and Installation
The Phomemo P12 Pro operates via the 'Print Master' mobile application. Ensure your smartphone is connected to the internet before proceeding.
- Search for 'Print Master' in the Google Play Store (for Android devices) or the Apple App Store (for iOS devices).
- Download and install the application.
- Open the 'Print Master' app after installation.
3.2 Bluetooth Connection
To connect your printer to your smartphone:
- Ensure the Phomemo P12 Pro printer is charged and powered on. Press and hold the power button for 3 seconds to turn it on.
- Enable Bluetooth on your smartphone.
- Open the 'Print Master' app. The app will automatically search for nearby Phomemo devices.
- Select your P12 Pro printer from the list of available devices to establish a connection. A successful connection will be indicated within the app.
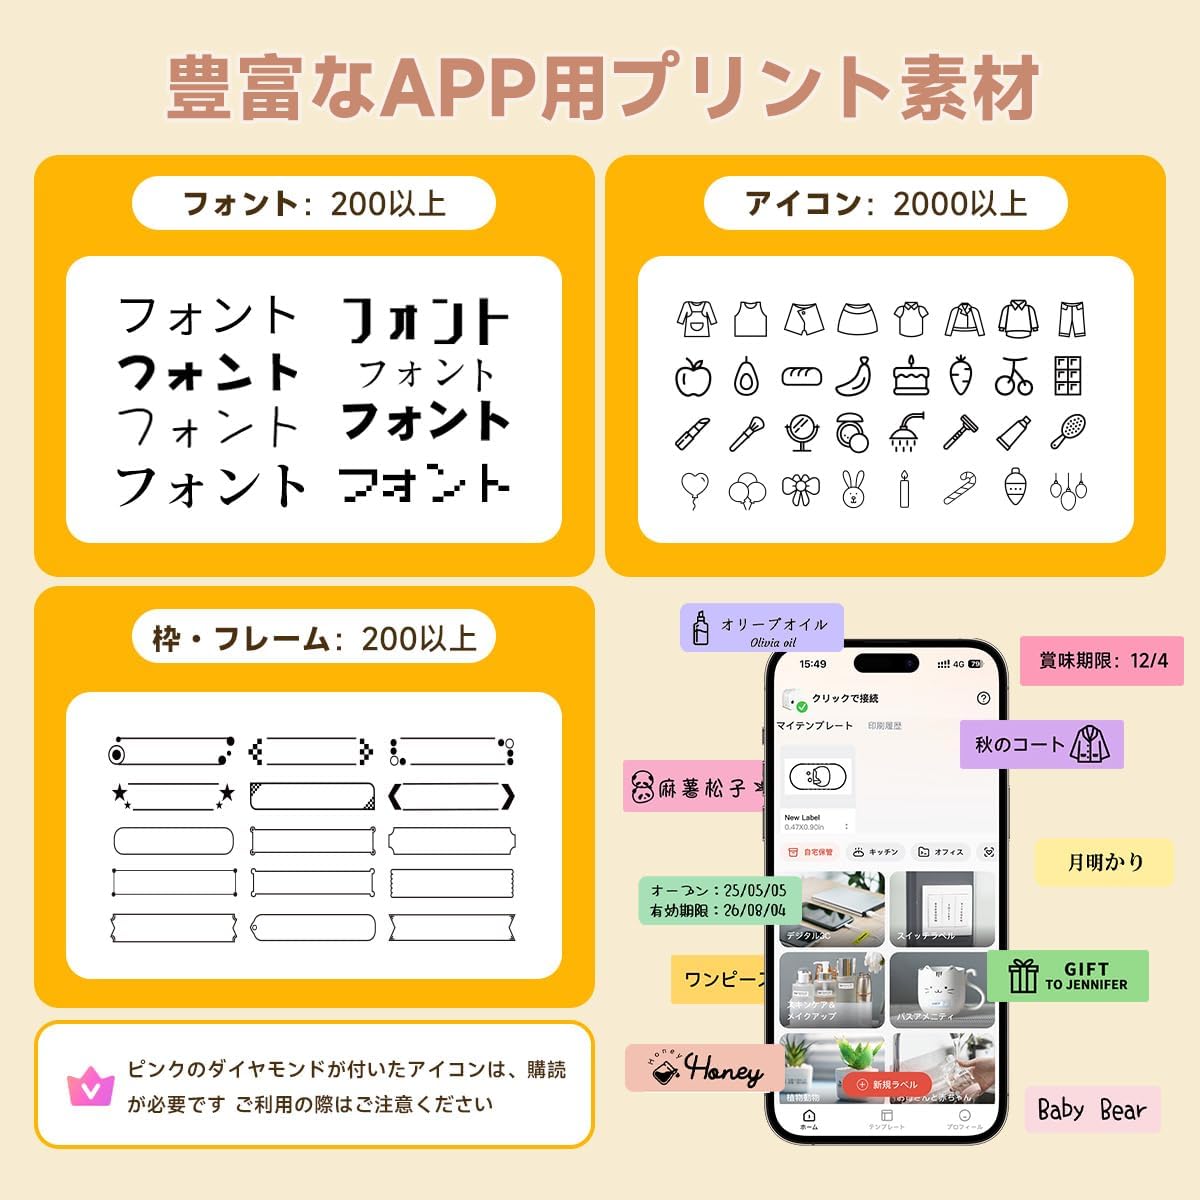
Image: A visual guide showing the four steps: downloading the 'Print Master' app, connecting to the printer via Bluetooth, editing the label content, and finally printing the label.
3.3 Loading Label Rolls
The P12 Pro supports label rolls up to 12mm wide.
- Open the printer cover.
- Insert the label roll into the designated slot, ensuring the label feeds out correctly.
- Close the printer cover firmly until it clicks into place.

Image: A three-step visual guide demonstrating how to open the printer cover, correctly insert a new label roll, and close the cover for label replacement.
4. Operating Instructions
4.1 Creating and Editing Labels
The 'Print Master' app offers extensive customization options for your labels:
- Text Input: Enter your desired text. The app provides over 200 fonts for selection.
- Icons and Frames: Choose from over 2,000 icons and 200 frames to enhance your labels.
- Special Features: Create barcodes, QR codes, dates, and tables directly within the app.

Image: A screenshot of the 'Print Master' app interface, highlighting the wide selection of fonts, icons, and frames available for label customization.
4.2 Printing Labels
After designing your label in the app:
- Review your label design on the app screen.
- Tap the print button in the app.
- The printer will automatically print and cut the label to the specified length.
4.3 Supported Label Types
The P12 Pro is compatible with various label types, offering flexibility for different applications:
- Thermal Labels: Standard labels for general use.
- Thermal Transfer Labels: Durable labels suitable for long-term use.
- Ribbon Labels: Ideal for decorative purposes, such as gift wrapping.
- Fabric Iron-on Labels: For labeling clothing and textiles.
- Glow-in-the-Dark Labels: For visibility in low-light conditions.

Image: This image displays various label types supported by the P12 Pro, including thermal labels for general use, thermal transfer labels for durability, ribbon labels for decoration, and fabric iron-on labels for textiles.
4.4 Printing Orientation
The printer supports both vertical and horizontal printing, allowing you to choose the best orientation for your label content.
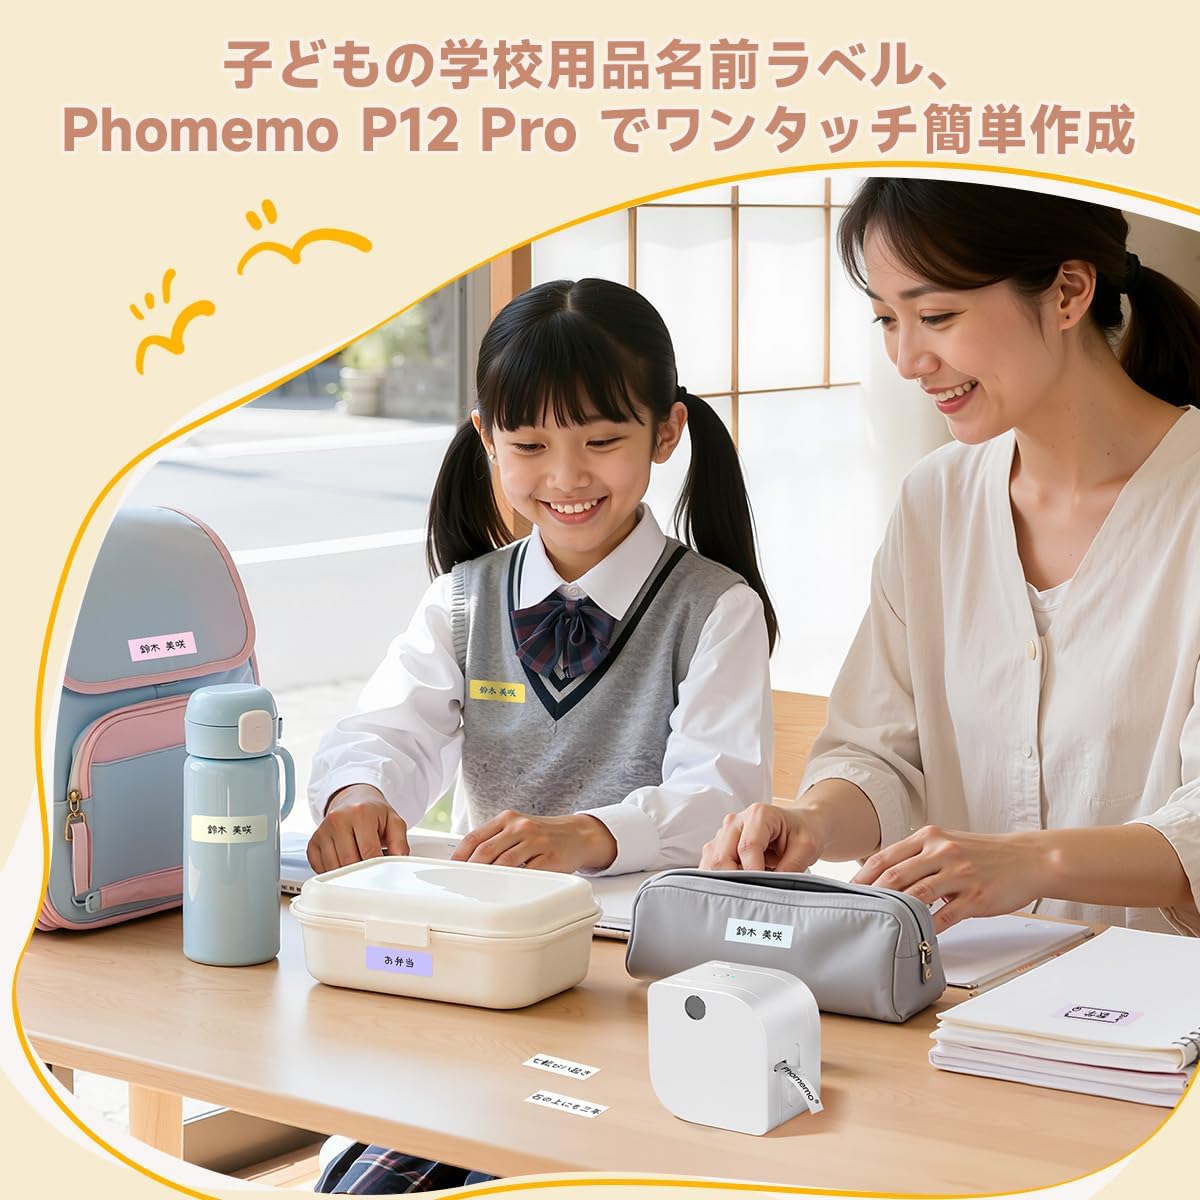
Image: A demonstration of vertical printing, showing labels applied to kitchen containers with text oriented vertically.
4.5 Application Examples
The Phomemo P12 Pro is suitable for a wide range of uses:
- Home Organization: Labeling kitchen containers, storage boxes, and managing expiration dates.
- School: Creating name tags for children's belongings.
- Office: Classifying documents, labeling cables, and managing assets.
- Crafts & Gifts: Personalizing ribbons for gift wrapping and decorative purposes.
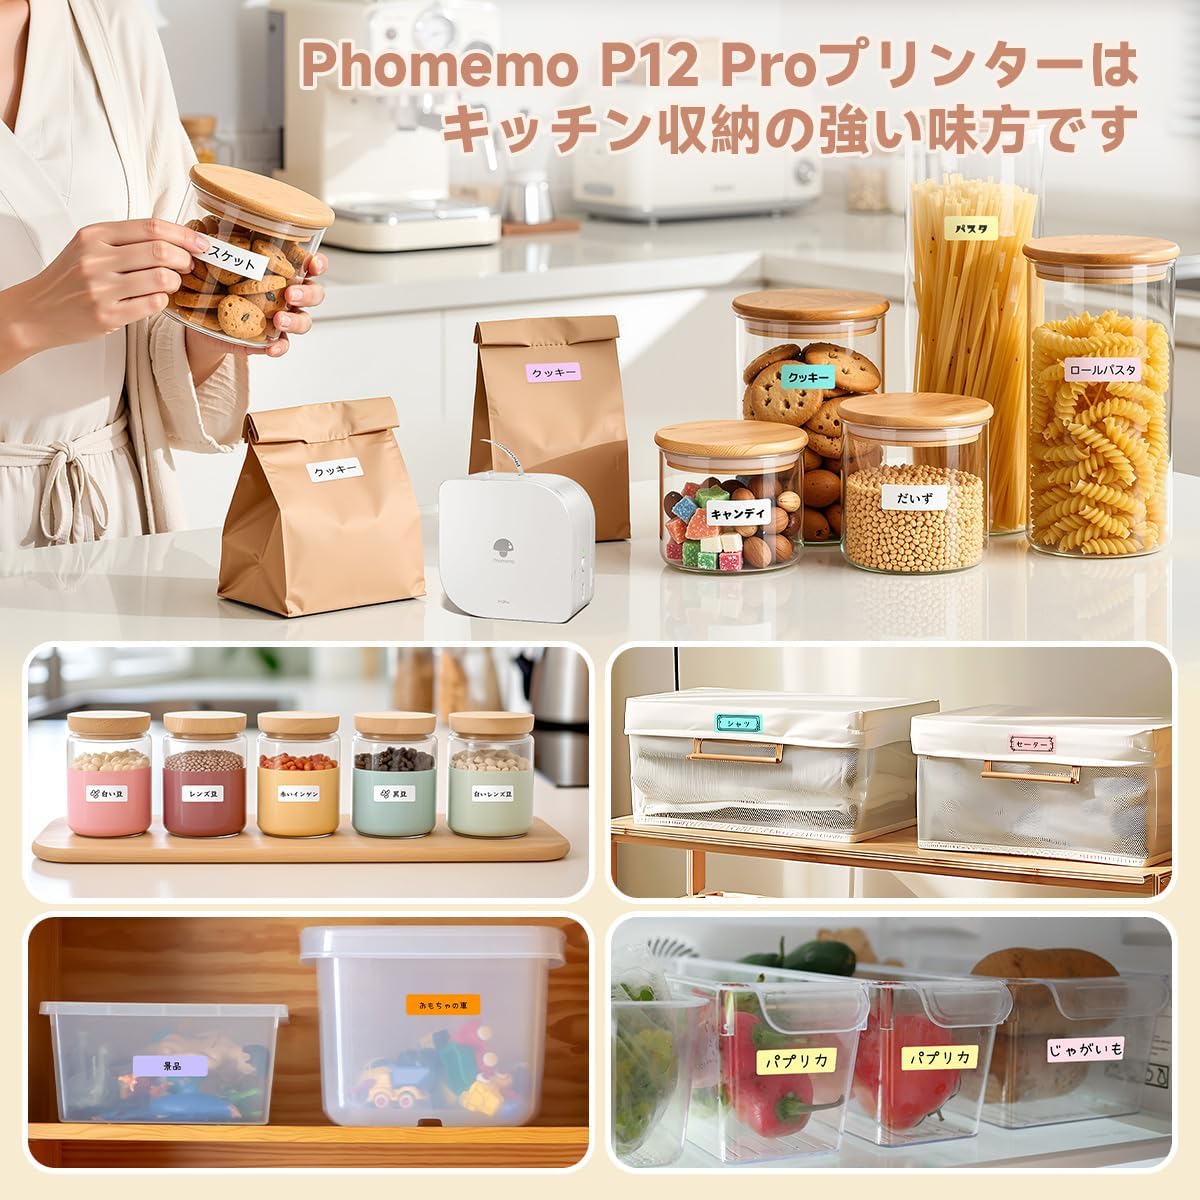
Image: The Phomemo P12 Pro label printer being used to create labels for organizing various items in a kitchen, such as food containers and pantry staples.

Image: The Phomemo P12 Pro label printer in an office setting, demonstrating its use for organizing documents, files, and other office supplies.

Image: The Phomemo P12 Pro label printer being used to print custom messages on ribbons for gift wrapping, adding a personalized touch to presents.
Video: This video shows the Phomemo P12 Pro label printer being used to print custom text on ribbons for gift wrapping and flower arrangements, demonstrating its versatility for creative applications.
5. Maintenance
5.1 Charging the Battery
The Phomemo P12 Pro features a built-in rechargeable battery. Connect the printer to a USB power source using the provided data cable when the battery is low. The indicator light will show charging status.
5.2 Cleaning the Printer Head
To ensure optimal print quality, periodically clean the printer head with a soft, lint-free cloth lightly dampened with isopropyl alcohol. Ensure the printer is turned off before cleaning.
6. Troubleshooting
If you encounter issues with your Phomemo P12 Pro label printer, please refer to the following common solutions:
- Printer Not Connecting: Ensure Bluetooth is enabled on your smartphone and the printer is powered on and within range. Restart both the printer and the app.
- Poor Print Quality: Check if the label roll is installed correctly. Clean the printer head as described in the maintenance section. Ensure the label type is compatible with the printer.
- Labels Not Feeding: Verify that the label roll is properly seated and not jammed. Ensure the printer cover is securely closed.
- App Issues: Update the 'Print Master' app to the latest version. If problems persist, try reinstalling the app.
For further assistance, please contact Phomemo customer support.
7. Specifications
| Feature | Specification |
|---|---|
| Brand | Phomemo |
| Model Name | P12 Pro |
| Connectivity Technology | Bluetooth |
| Printing Technology | Thermal |
| Special Features | Network Ready, Portable, Thermal Transfer |
| Color | White |
| Printer Output | Monochrome |
| Max Print Speed (Monochrome) | 10 mm/s |
| Item Weight | 198 grams |
| Compatible Devices | Smartphone (Android & iOS) |
| Ink Color | Black |
| Resolution | 203 dpi |
| Max Media (Paper) Size | 12mm |
| Product Dimensions (D x W x H) | 8.2 x 8.2 x 6.1 cm |
8. Warranty and Support
8.1 Manufacturer's Warranty
The Phomemo P12 Pro label printer comes with a 1-year manufacturer's warranty. Please retain your proof of purchase for warranty claims.
8.2 Customer Support
For any technical issues, questions, or support needs not covered in this manual, please visit the official Phomemo website or contact their customer service directly. Contact information can typically be found on the product packaging or the official website.