Product Overview
The Arti-Life Barn Door Hardware Kit is designed for installing a single sliding barn door. This heavy-duty kit provides a robust and smooth operating system for interior and exterior applications. It is suitable for door panels with a width of 28 to 30 inches and a thickness ranging from 1 3/8 to 1 3/4 inches, supporting up to 380 lbs. The design ensures stable and quiet operation, making it a versatile solution for various rooms.
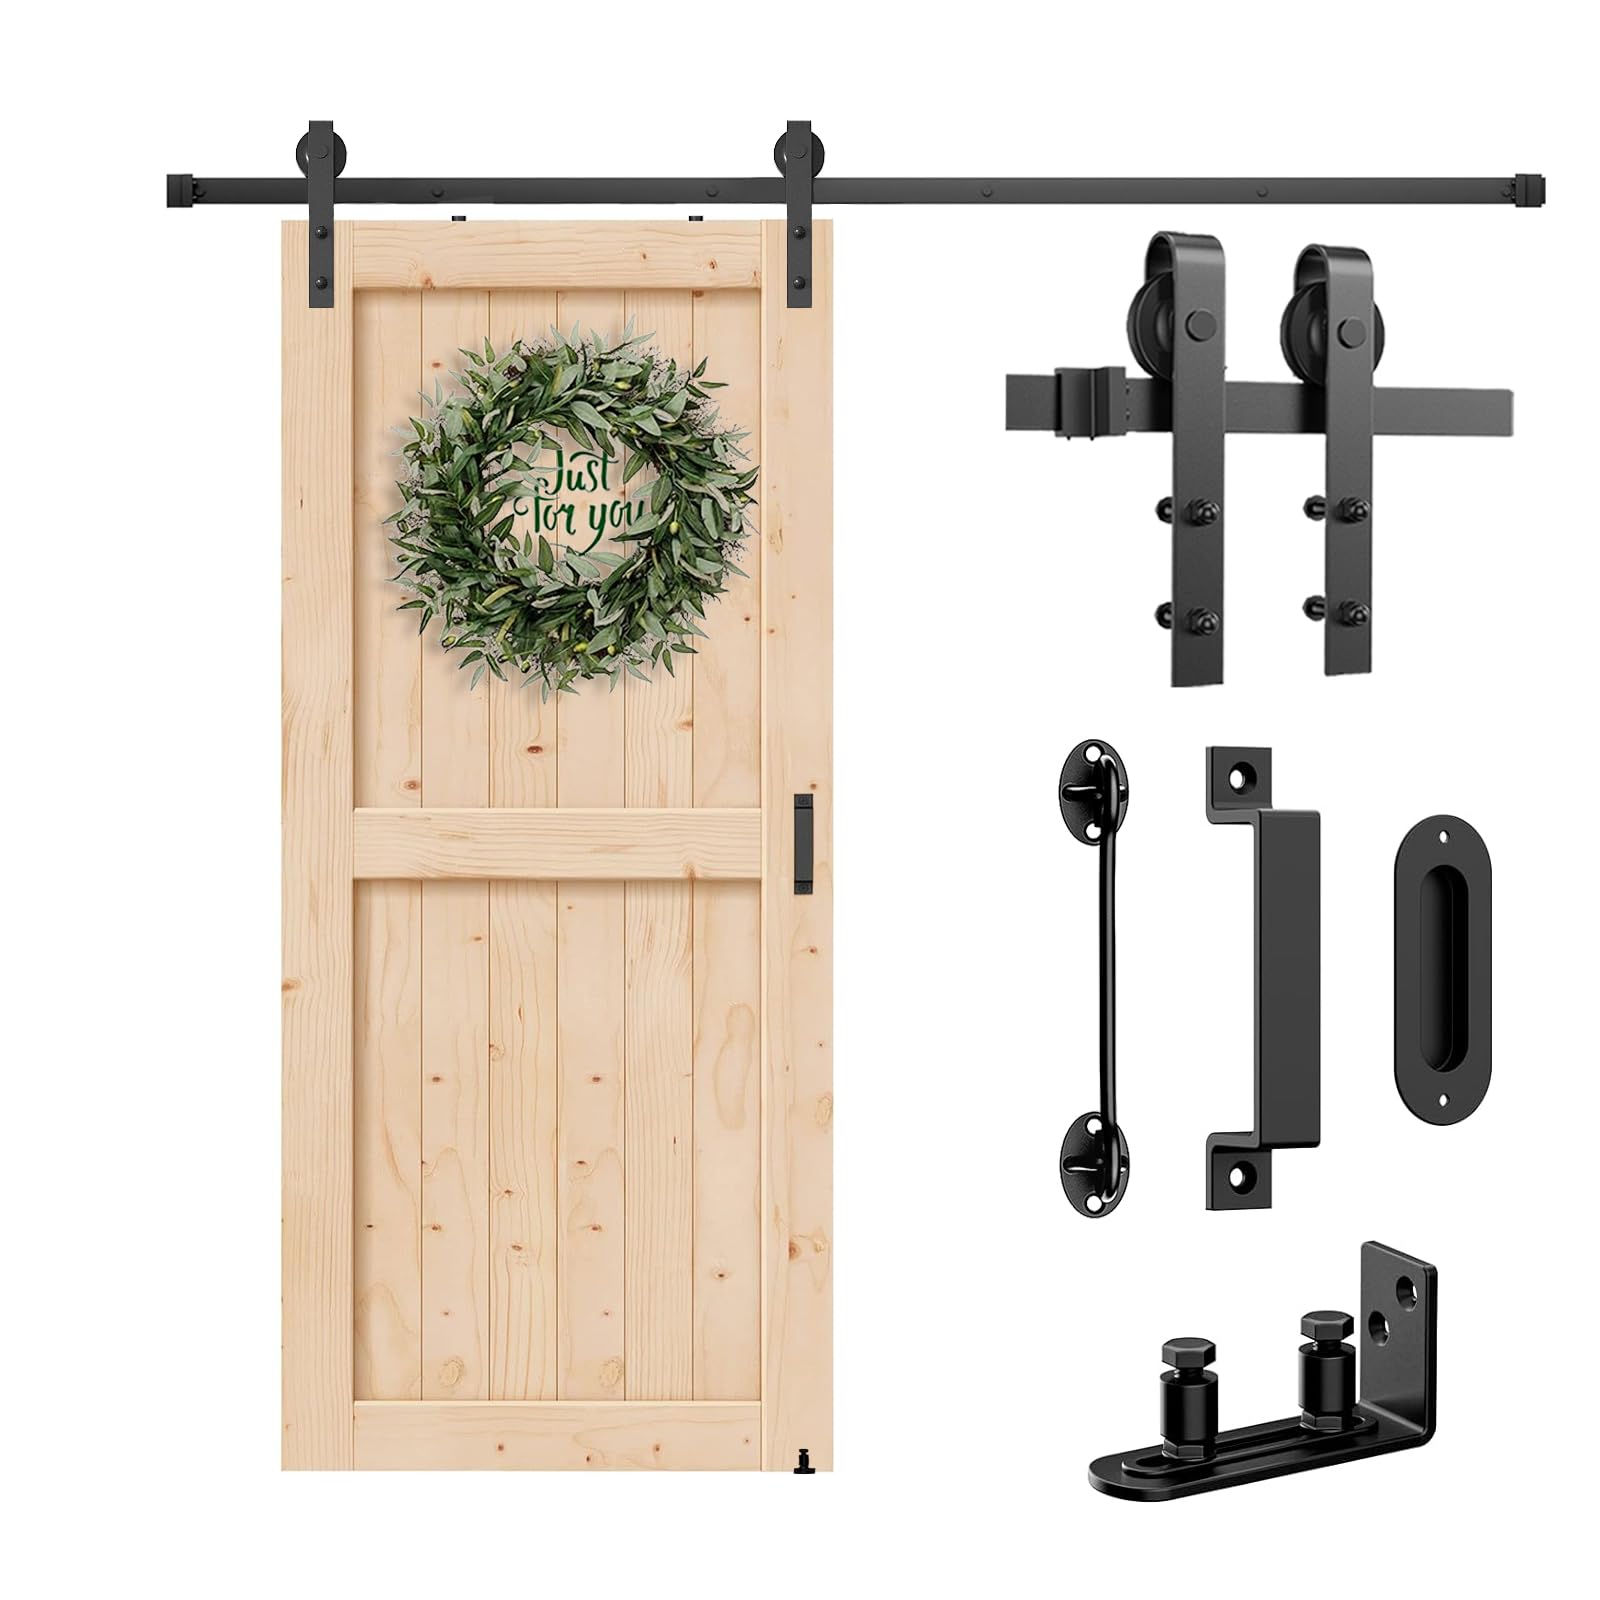
Image: Overview of the Arti-Life Barn Door Hardware Kit, illustrating key dimensions such as 5FT track length, 5-inch clearance needed from door to ceiling, fit for 28-30 inch wide door panels, 1 3/8 - 1 3/4 inch door thickness, and a maximum door weight capacity of 380 lbs. The image also highlights its wide applicability for all rooms.
Product Components
The Arti-Life Barn Door Hardware Kit includes all necessary components for installation. Please verify all parts are present before beginning assembly.
- Sliding Track (multiple pieces for assembly)
- J-Shape Hangers (2 units)
- Door Stoppers (2 units)
- Floor Guides (2 types: T-shaped and adjustable roller)
- Door Handles (2 types: surface mount and recessed)
- Lock Hook
- Wall Spacers
- Mounting Hardware (screws, bolts, hex key)

Image: A detailed view of all components included in the Arti-Life Barn Door Hardware Kit, laid out neatly. This includes the track, J-shape hangers, various screws and bolts, wall spacers, two types of floor guides, and door handles.
Video: An unboxing and overview of the Arti-Life Sliding Door Track Kit and Hardware Kit, demonstrating each component and its basic function. This video provides a visual guide to the parts included in your package.
Setup and Installation
Careful measurement and preparation are crucial for a successful installation. Ensure your door panel meets the specified dimensions and weight capacity. The track length should be twice the width of your door opening for optimal functionality.

Image: This image illustrates the necessary clearance of 5 inches from the door to the ceiling and the compatible door panel width of 28-30 inches. It also shows the required door thickness of 1 3/8 - 1 3/4 inches for proper installation of the J-shape hangers.
Video: This video demonstrates the step-by-step installation process of the Arti-Life Barn Door Hardware Kit, including mounting the track, attaching the hangers to the door, and installing the floor guide and door stoppers. It provides practical visual guidance for assembly.
Step-by-Step Installation Guide
- Measure and Mark: Determine the desired height for your track. Ensure at least 5 inches of clearance above the door opening. Mark the positions for the track mounting holes on the wall, ensuring they align with wall studs for secure fastening.
- Install Track: Assemble the track pieces if necessary. Attach the wall spacers to the wall at the marked points, then secure the track to the spacers using the provided bolts. Ensure the track is level.
- Attach Hangers to Door: Position the J-shape hangers on the top edge of your door panel. Mark and drill holes for the hanger bolts. Securely fasten the hangers to the door using the provided hardware.
- Hang Door: Carefully lift the door and hook the rollers of the hangers onto the installed track.
- Install Floor Guide: Choose the appropriate floor guide for your installation. The T-shaped guide requires a slot cut into the bottom of the door, while the adjustable roller guide can be surface-mounted. Position the guide to prevent the door from swinging out from the wall and secure it to the floor.
- Install Door Stoppers: Slide the door stoppers onto the track at both ends. Adjust their positions to control the door's travel distance and prevent it from rolling off the track. Tighten the stoppers securely.
- Install Handles: Attach the chosen door handle(s) to your door panel. If using the recessed handle, cut a corresponding recess into the door.
- Install Lock (Optional): If desired, install the provided lock hook and latch mechanism for added privacy or security.
Operation
Once installed, your Arti-Life barn door should slide smoothly and quietly along the track. To open or close the door, simply grasp the handle and gently push or pull. The J-shape hangers and floor guide work in conjunction to ensure stable movement and prevent the door from derailing or swinging.
Maintenance
Regular maintenance will ensure the longevity and smooth operation of your barn door hardware.
- Cleaning: Periodically wipe down the track and hardware components with a soft, damp cloth to remove dust and debris. Avoid abrasive cleaners.
- Lubrication: Apply a silicone-based lubricant to the roller wheels and track surface every 6-12 months to maintain smooth gliding.
- Hardware Check: Routinely inspect all screws, bolts, and fasteners to ensure they are tight. Re-tighten any loose components to prevent wobbling or instability.
Troubleshooting
If you encounter any issues with your barn door hardware, refer to the following common troubleshooting tips:
- Door is Sticking/Rough: Check the track for any obstructions or debris. Ensure the rollers are clean and properly lubricated. Verify that the track is level and all mounting bolts are tight.
- Door is Wobbling: Confirm that the floor guide is securely installed and properly adjusted to the bottom of the door. Check all track and hanger fasteners for tightness.
- Door Not Stopping Correctly: Adjust the position of the door stoppers on the track to ensure they are set at the desired open and closed positions.
Product Specifications
| Feature | Specification |
|---|---|
| Brand | Arti-Life |
| Model | 5FT SINGLE SET |
| Color | Black |
| Material | Iron |
| Item Weight | 12 Pounds |
| Product Dimensions | 17.3 x 5.1 x 2.1 inches |
| Maximum Weight Capacity | 350 Pounds |
| Assembly Required | Yes |
| Compatible Door Panel Width | 28"-30" |
| Compatible Door Panel Thickness | 1 3/8" - 1 3/4" |
Warranty and Support
For warranty information or technical support, please refer to the documentation included with your product or contact Arti-Life customer service directly. Keep your purchase receipt for any warranty claims.