1. Introduction
This manual provides comprehensive instructions for the installation, operation, and maintenance of the Topyond Electric Bike Controller Kit. This kit includes a 36V/48V 500W brushless motor controller, an 805 half throttle handle with an integrated LCD panel, and a lock. Please read this manual thoroughly before installation and use to ensure proper function and safety.
2. Safety Information
- Always disconnect the battery before performing any installation, maintenance, or repair work on the electric bike system.
- Ensure all connections are secure and properly insulated to prevent short circuits.
- Do not attempt to modify the controller or any components of the kit. Unauthorized modifications can lead to malfunction, damage, or injury.
- Keep the controller and electrical components away from water and excessive moisture.
- If you are unsure about any installation steps, consult a qualified technician.
3. Package Contents
Verify that all components listed below are present in your package:
- 1 x 36V/48V 500W Brushless Motor Controller
- 1 x 805 Half Throttle Handle with LCD Panel and Lock
- 2 x Keys for Throttle Lock
- 2 x Handlebar Grips
- Wiring Harnesses and Connectors

Figure 3.1: Overview of the Topyond Electric Bike Controller Kit components.

Figure 3.2: Another view of the complete kit contents.
4. Setup and Installation
Follow these steps for installing the electric bike controller kit. Ensure the bike's power is off and the battery is disconnected before starting.
- Mount the Controller: Secure the brushless motor controller to a suitable location on your electric bike frame. The metal housing features a notch design for heat dissipation, so ensure adequate airflow around it.
- Install the Throttle Handle: The 805 half throttle handle is designed to fit a standard 22.5mm handlebar. Slide the throttle onto the right side of the handlebar and secure it. Install the accompanying grip on the left side.
- Connect the Wiring: Carefully connect the wiring harness from the throttle to the controller. The controller has various color-coded connectors for the motor, battery, throttle, and other accessories. Match the connectors according to their type and color. Refer to the wiring diagram provided with your motor or bike for specific connections.
- Battery Connection: Connect the controller to your electric bike's 36V or 48V battery. Ensure correct polarity.
- Final Checks: Before powering on, double-check all connections for security and proper insulation. Ensure no wires are pinched or exposed.

Figure 4.1: The 805 half throttle handle with LCD display and key lock.
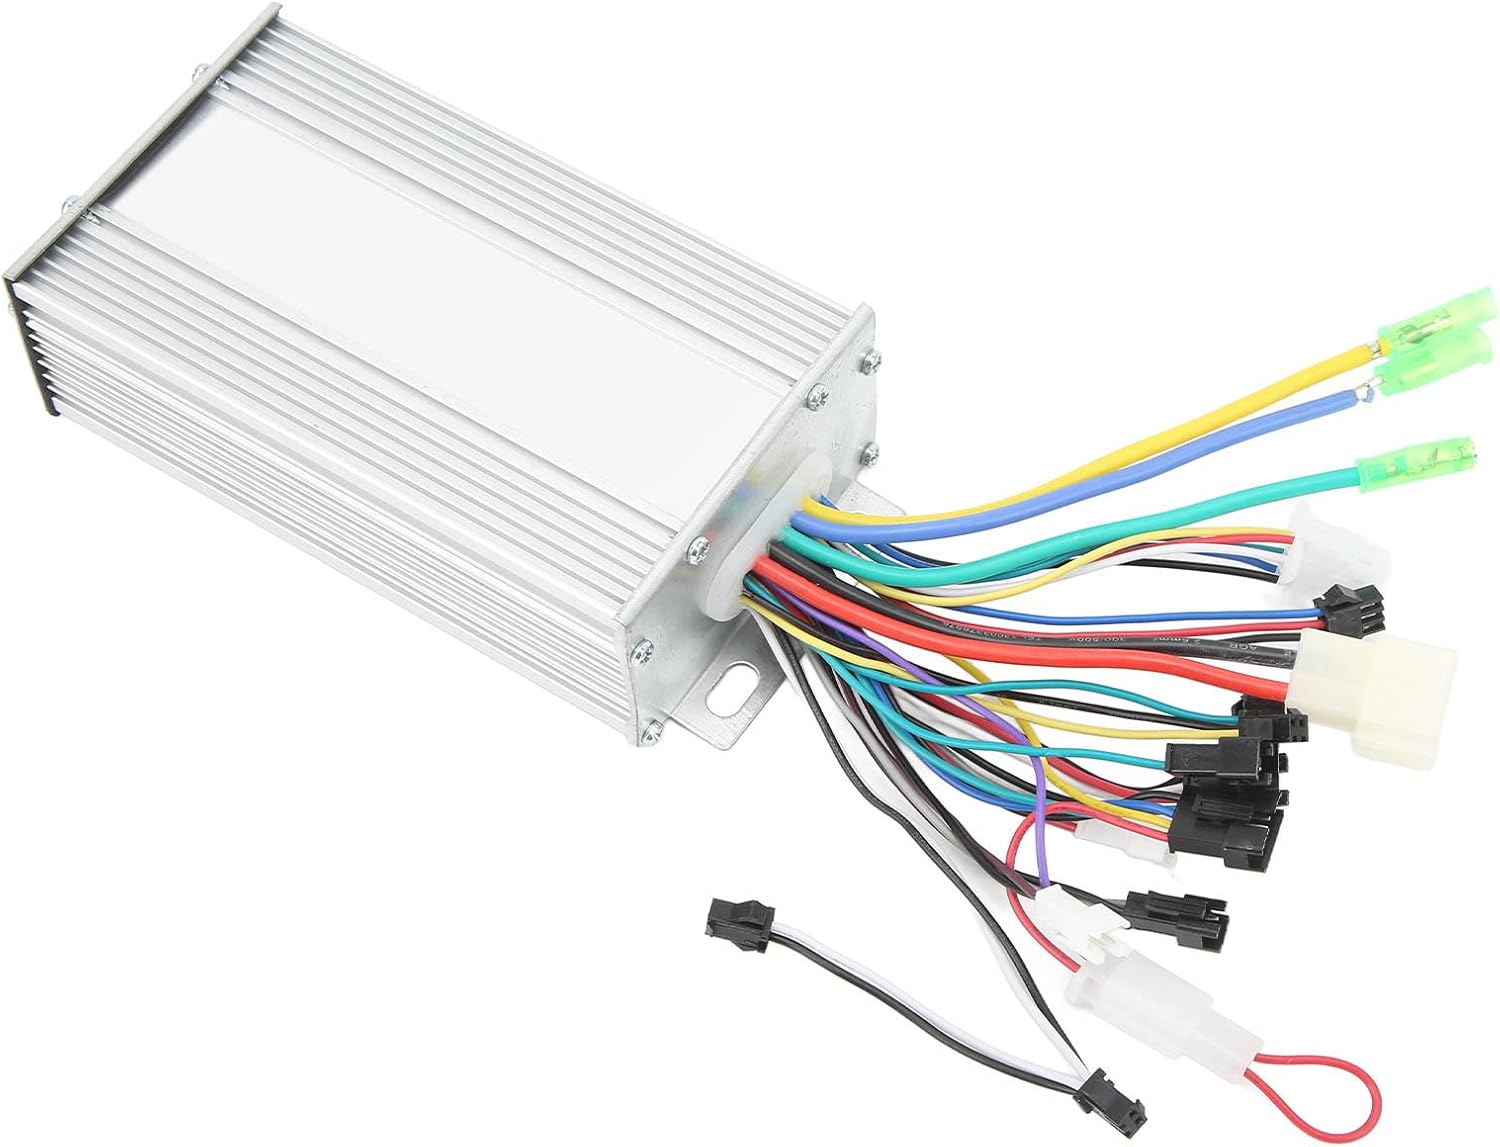
Figure 4.2: The controller showing its multiple wiring connections.
5. Operating Instructions
Once installed, operate the electric bike controller kit as follows:
- Power On: Insert the key into the lock on the throttle handle and turn it to the 'ON' position. The LCD panel will illuminate.
- Throttle Control: Gently twist the half throttle handle to engage the motor and control your speed. The controller provides stable speed regulation and sensitive response.
- Braking: The system is designed for sensitive response to braking. Apply brakes as usual; the motor will disengage.
- Power Off: Turn the key to the 'OFF' position to power down the system. Remove the key for security.

Figure 5.1: Illuminated LCD display on the throttle handle.
6. LCD Display Functions
The integrated LCD panel provides essential riding information:
- Real-time Speed: Displays your current riding speed.
- Single Run Mileage: Shows the distance covered in the current trip.
- Total Mileage: Accumulates the total distance traveled by the bike.
- Battery Power Level: Indicates the remaining battery charge.
- Voltage Levels: Displays the current battery voltage.
- Low Battery Alerts: Notifies you when the battery charge is critically low.
- Gear Indication: Shows the current assist level or gear.
- Fault Coding: Displays error codes if a system malfunction occurs. Refer to the troubleshooting section for common codes.
Use the buttons on the LCD panel to navigate through different display modes and settings.
7. Maintenance
Regular maintenance ensures the longevity and optimal performance of your controller kit:
- Heat Dissipation: The controller's metal housing is designed for efficient heat dissipation. Ensure it remains free from obstructions and dirt to maintain proper cooling.
- Cleaning: Periodically clean the controller and throttle handle with a soft, dry cloth. Avoid using harsh chemicals or excessive moisture.
- Connection Checks: Regularly inspect all electrical connections for tightness and signs of wear or corrosion. Re-secure any loose connections.
- Cable Integrity: Check all cables for cuts, fraying, or damage. Replace damaged cables immediately to prevent electrical hazards.
8. Troubleshooting
If you encounter issues, refer to the following common troubleshooting steps:
| Problem | Possible Cause | Solution |
|---|---|---|
| LCD display does not power on | Battery disconnected, key not in 'ON' position, loose wiring. | Check battery connection, ensure key is turned on, inspect wiring harness connections. |
| Motor does not respond to throttle | Throttle cable disconnected, motor cable disconnected, fault code displayed. | Verify throttle and motor connections, check LCD for fault codes and consult their meaning. |
| Inconsistent speed control | Loose throttle connection, motor or controller issue. | Check throttle wiring. If problem persists, professional inspection may be required. |
| Overheating of controller | Insufficient airflow, excessive load. | Ensure controller is not covered, reduce prolonged heavy load, check for proper mounting. |
For fault codes displayed on the LCD, refer to the specific error code definitions provided by the manufacturer or contact customer support.
9. Specifications
Key specifications for the Topyond Electric Bike Controller Kit:
| Feature | Detail |
|---|---|
| Brand Name | Topyond |
| Model Number | Topyondgi9kqp1s67 |
| Controller Voltage | 36V/48V (Compatible) |
| Motor Power | 500W |
| Throttle Type | 805 Half Throttle Handle |
| Handlebar Diameter | 22.5mm (for throttle) |
| Display Type | LCD Panel |
| Item Weight | 1.07 Kilograms |
| Package Dimensions | 11.02 x 8.66 x 2.76 inches |
10. Warranty and Support
For warranty information and technical support, please refer to the documentation provided at the time of purchase or contact your retailer. Keep your purchase receipt as proof of purchase.