1. Introduction
This manual provides detailed instructions for the assembly, operation, and maintenance of your Outsunny Barbecue Shelter, model 84C-219. Please read this manual thoroughly before assembly and use to ensure safe and correct operation.

Image 1.1: The Outsunny Barbecue Shelter providing shade for a grill in a garden.
2. Safety Information
Important Safety Precautions:
- Ensure the shelter is securely fixed to the ground using the pre-drilled holes and appropriate anchoring hardware (screws not included). This prevents tipping or movement due to wind.
- During assembly and disassembly, carefully follow all instructions in this manual. Take necessary precautions to avoid personal injury or damage to the product.
- Do not use the shelter in extreme weather conditions, such as strong winds, heavy snow, or thunderstorms. Disassemble and store the shelter if severe weather is anticipated.
- Keep all open flames and heat sources, including barbecue grills, at a safe distance from the shelter's fabric and frame to prevent fire hazards. Ensure adequate ventilation when grilling.
- Regularly inspect all components for wear, damage, or loose connections. Replace damaged parts immediately.
3. Package Contents
Before beginning assembly, verify that all components listed below are present and undamaged. If any parts are missing or damaged, contact customer support.
- Gazebo frame components (aluminum and metal)
- Polycarbonate roof panels
- 2 x Side shelves
- Assembly hardware (bolts, nuts, washers)
- Illustrated assembly instructions

Image 3.1: The product is typically shipped in two packages.
4. Setup and Assembly
Follow the step-by-step illustrated instructions provided in the package for detailed assembly. Below are general guidelines:
- Unpack Components: Carefully remove all parts from the packaging and lay them out on a clean, flat surface. Verify against the package contents list.
- Assemble Frame: Begin by assembling the main aluminum and metal frame structure. Ensure all connections are secure but do not fully tighten bolts until the entire frame is assembled.
- Attach Roof Panels: Install the polycarbonate roof panels onto the assembled frame. The double-layer roof design provides optimal protection and air circulation.
- Install Side Shelves: Attach the two side shelves to the designated points on the frame. These shelves are designed for convenience during use.
- Secure to Ground: Once fully assembled, position the shelter in its desired location. Use the pre-drilled holes in the feet to anchor the shelter securely to the ground. This is crucial for stability.
- Final Tightening: Once the entire structure is assembled and positioned, fully tighten all bolts and connections.

Image 4.1: Detail of the double-layer polycarbonate roof, designed for shade and air circulation.
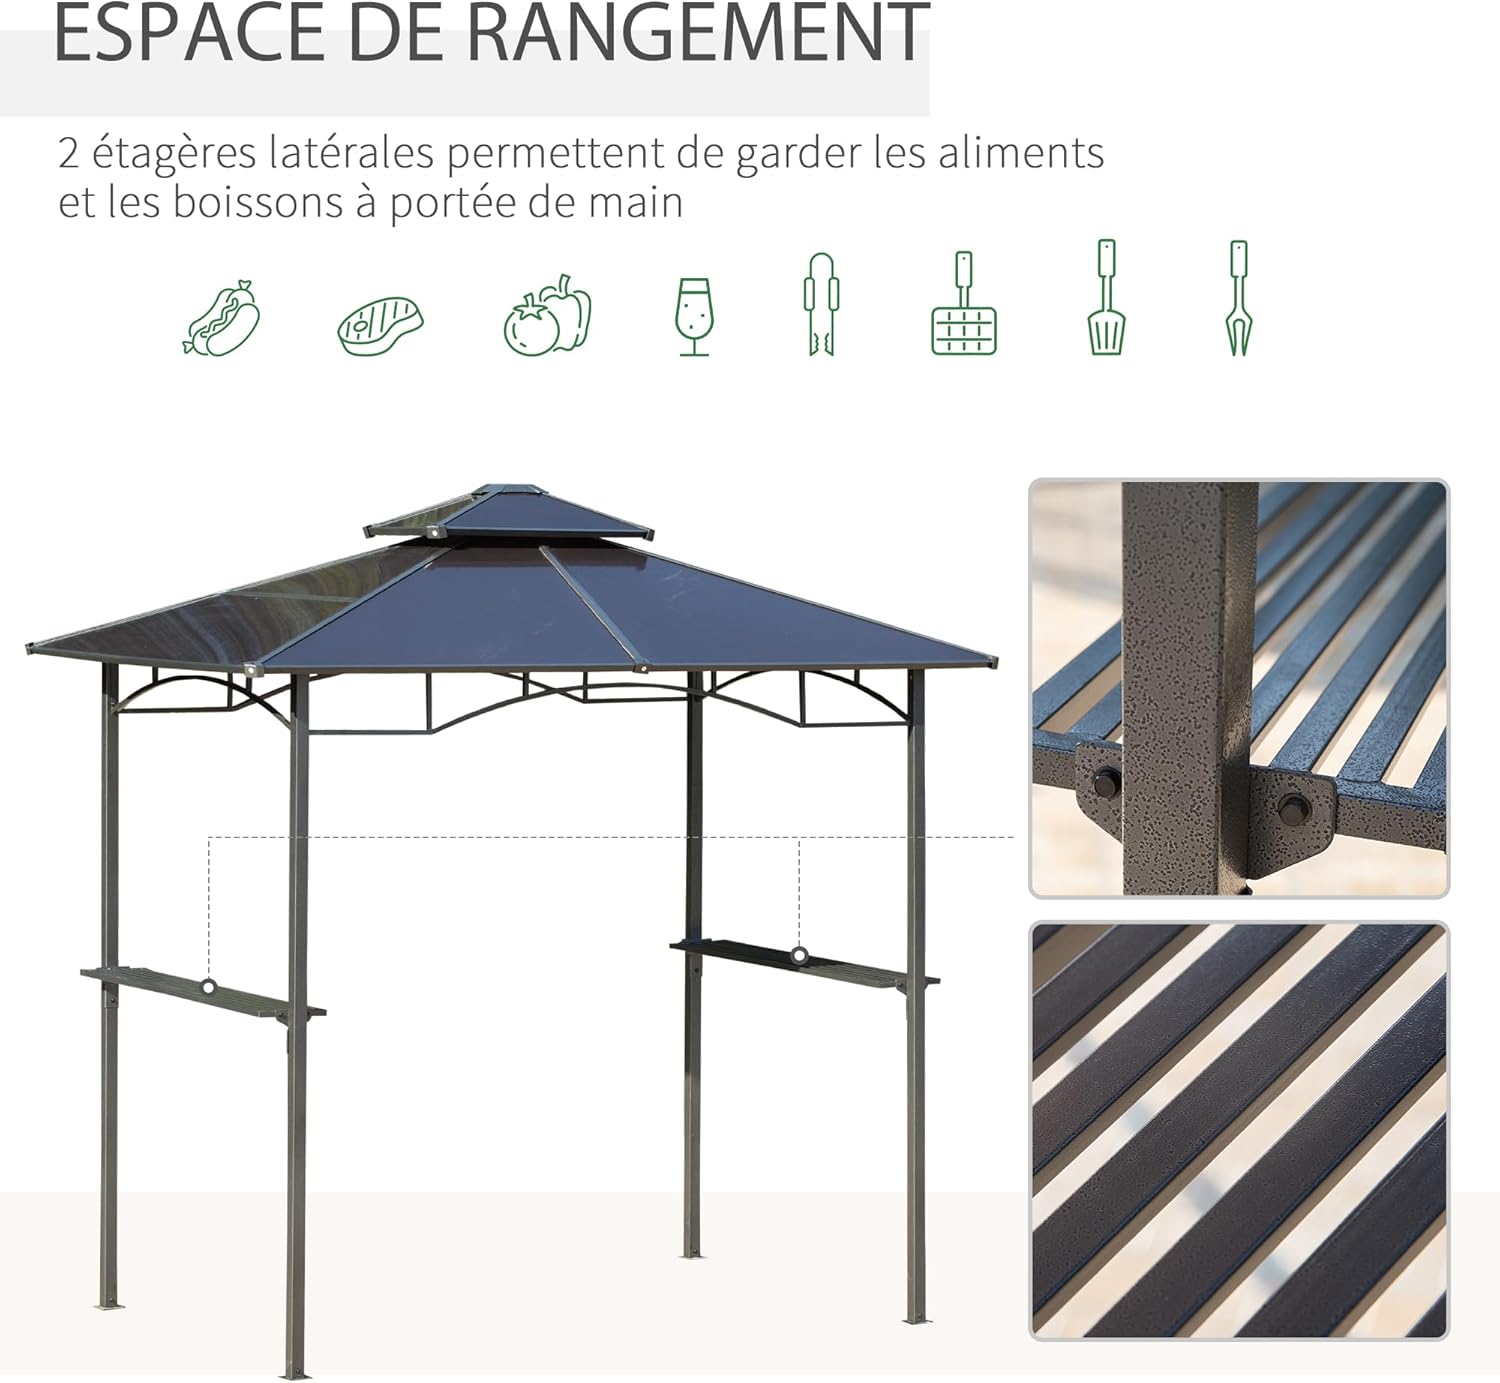
Image 4.2: The shelter features two practical side shelves for storage.

Image 4.3: Details of the solid construction, including pre-drilled holes for secure ground fixing and reinforced frame elements.
Total Dimensions: 240 cm (Length) x 150 cm (Width) x 245 cm (Height). Eave height: 193 cm.

Image 4.4: Key dimensions of the barbecue shelter.
5. Operating Instructions
The Outsunny Barbecue Shelter is designed to provide a protected area for outdoor grilling and dining. Its double polycarbonate roof offers shade and UV protection while allowing for air circulation.
- Positioning: Place your barbecue grill centrally under the shelter to maximize protection from sun and light rain. Ensure sufficient clearance around the grill for safety and ventilation.
- Using Side Shelves: Utilize the two integrated side shelves for convenient placement of cooking utensils, plates, condiments, and food items.
- Ventilation: The double-layer roof design aids in air circulation, helping to dissipate heat and smoke from your barbecue. Always ensure good airflow around your grilling area.
- Weather Protection: The waterproof polycarbonate roof provides protection against light rain and harmful UV rays, making your outdoor grilling experience more comfortable.
6. Maintenance
Regular maintenance will extend the life and appearance of your barbecue shelter.
- Cleaning: Clean the aluminum frame and polycarbonate roof panels with mild soap and water. Avoid abrasive cleaners or harsh chemicals that could damage the finish or material. Rinse thoroughly with clean water.
- Inspection: Periodically check all bolts and connections to ensure they remain tight. Re-tighten if necessary. Inspect the frame for any signs of rust or damage, and the roof panels for cracks or discoloration.
- Winter Storage: While the shelter is designed for outdoor use, consider disassembling and storing it in a dry, protected area during winter months or periods of prolonged severe weather to prevent damage.
- Anchoring: Regularly check the ground anchors for stability, especially after strong winds. Re-secure if they become loose.
7. Troubleshooting
- Issue: Shelter feels unstable or wobbly.
- Solution: Ensure all frame bolts are fully tightened. Verify that the shelter is securely anchored to the ground using appropriate screws or stakes through the pre-drilled holes in the feet. Check the ground surface for levelness.
- Issue: Water pooling on the roof.
- Solution: The polycarbonate roof is designed to shed water. Ensure the roof panels are correctly installed and aligned according to the assembly instructions. Check for any obstructions that might prevent water runoff.
- Issue: Difficulty assembling parts.
- Solution: Refer to the detailed illustrated assembly instructions. Ensure you are using the correct parts for each step. Do not force components together; if parts do not fit, re-check the instructions and part numbers. Sometimes, leaving bolts slightly loose until the entire section is assembled can help with alignment.
8. Specifications
| Brand | Outsunny |
| Model Number | 84C-219 |
| Product Dimensions (L x W x H) | 2.4 m x 1.5 m x 2.45 m |
| Eave Height | 1.93 m |
| Item Weight | 28.6 Kilograms |
| Frame Material | Aluminum, Metal |
| Roof Material | Polycarbonate |
| Water Resistance Level | Waterproof |
| UV Protection | Yes |
| Assembly Required | Yes |
| Components Included | Gazebo frame, Roof, 2 Side Shelves |
9. Warranty and Support
For warranty information or technical support, please refer to the documentation included with your purchase or visit the official Outsunny website. Keep your purchase receipt as proof of purchase for any warranty claims.
Contact Information: Please refer to the seller's contact details provided at the time of purchase for customer service inquiries.