1. Introduction
This user manual provides comprehensive instructions for the operation and maintenance of your DETODDA Egg Incubator. This device is designed for hatching various poultry eggs, including chicken, duck, goose, quail, and pigeon eggs, by providing a controlled environment with automatic temperature, humidity, and egg-turning features. Please read this manual thoroughly before initial use to ensure proper function and optimal hatching results.
2. Safety Instructions
- Always connect the incubator to a grounded power outlet.
- Do not immerse the incubator or its electrical components in water or any other liquid.
- Keep the incubator away from direct sunlight, drafts, and extreme temperature fluctuations.
- Ensure proper ventilation around the incubator during operation.
- Unplug the incubator from the power source before cleaning or performing any maintenance.
- Keep out of reach of children and pets.
- Use only the provided power adapter and accessories.
3. Product Overview and Components
Familiarize yourself with the main components of your DETODDA Egg Incubator.

Figure 3.1: Incubator Components Diagram. This diagram illustrates the key parts of the incubator, including the LED display, egg candler, fan thermostat, temperature probe, gear egg tray, egg turning motor, egg turning gear, and water inlet. Understanding these components is crucial for proper setup and operation.
- LED Digital Display: Shows current temperature and humidity.
- Control Panel: Buttons for setting temperature, humidity, and other functions.
- Automatic Egg Turning Mechanism: Rotates eggs periodically for even heating.
- External Water Inlet: Allows for easy water addition without opening the lid.
- Built-in Egg Candler: LED light for observing embryo development.
- Circulation Fan: Ensures uniform air distribution and temperature.
- Temperature Probe: Accurately measures internal temperature.
- Water Bottles: Provided for external water supply.
- Small Egg Tray: Included for smaller egg sizes like quail.

Figure 3.2: Package Contents. The package includes the incubator host, a user manual, external battery cable, power supply, small egg tray, and water bottles. Ensure all components are present upon unboxing.
4. Setup
- Unpacking: Carefully remove all components from the packaging. Inspect for any damage.
- Placement: Place the incubator on a stable, level surface in a room with a consistent ambient temperature (ideally between 68°F - 77°F / 20°C - 25°C). Avoid direct sunlight, drafts, and areas with significant temperature fluctuations.
- Assembly:
- Ensure the egg turning gear is properly seated in the base.
- Place the egg tray onto the turning mechanism.
- Attach the water bottles to the external water adding system if not already connected.
- Power Connection: Connect the power supply to the incubator and then plug it into a suitable electrical outlet. The LED display will illuminate.

Figure 4.1: Power Input Connection. Connect the power adapter securely to the designated port on the incubator. The unit supports dual power supply (household electricity or 12V DC battery, battery not included).
- Pre-heating and Stabilization: Allow the incubator to run for at least 2-4 hours empty to stabilize the internal temperature and humidity before placing eggs inside. This allows you to verify settings and ensure stable operation.
5. Operating Instructions
5.1 Control Panel Overview

Figure 5.1: Digital Control Panel. The control panel features a temperature display, humidity display, set button, plus/minus buttons for adjustments, and an egg candling button. These controls allow for precise management of the incubation environment.
- SET Button: Press to enter temperature/humidity setting mode.
- +/- Buttons: Adjust values up or down.
- Egg Candling Button: Activates the built-in LED egg candler.
- WORK/SET Indicator: Shows current operating mode.
5.2 Setting Temperature and Humidity
The incubator features an LED digital display for easy setting and monitoring of temperature and humidity.
- Press the SET button once to enter temperature setting mode. The temperature display will flash.
- Use the + or - buttons to adjust the desired temperature.
- Press the SET button again to confirm the temperature and enter humidity setting mode. The humidity display will flash.
- Use the + or - buttons to adjust the desired humidity.
- Press the SET button a third time to save settings and exit.
Refer to the "Incubation Parameters" table below for recommended settings for different poultry types.
5.3 Incubation Parameters (Reference Only)
The following table provides general guidelines for incubation. Optimal conditions may vary slightly based on specific egg types and environmental factors.

Figure 5.2: Incubation Parameters Table. This table outlines recommended incubation periods, temperatures, and humidity levels for various poultry, including chicken, quail, duck, goose, and pigeon eggs. Note the different settings for the main incubation period versus the last 3 days (lockdown).
| Poultry | Days | Temp (°F) | Humidity (%RH) | Water Set (Level 1) | Temp (°F) (Last 3 Days) | Humidity (%RH) (Last 3 Days) | Water Set (Level 2) (Last 3 Days) |
|---|---|---|---|---|---|---|---|
| Chicken | 21 | 100 | 50-70 | 1 | 100 | 70+ | 2 |
| Quail | 17 | 100 | 50-70 | 1 | 100 | 70+ | 2 |
| Duck | 28 | 100.4 | 50-70 | 1 | 99 | 70+ | 2 |
| Goose | 30 | 100 | 50-70 | 1 | 100 | 70+ | 2 |
| Pigeon | 18 | 100.4 | 50-70 | 1 | 99 | 70+ | 2 |
5.4 Automatic Egg Turning
The incubator is equipped with an automatic egg-turning function to ensure even heat distribution and improve hatching rates. Eggs are automatically turned every 120 minutes (2 hours).
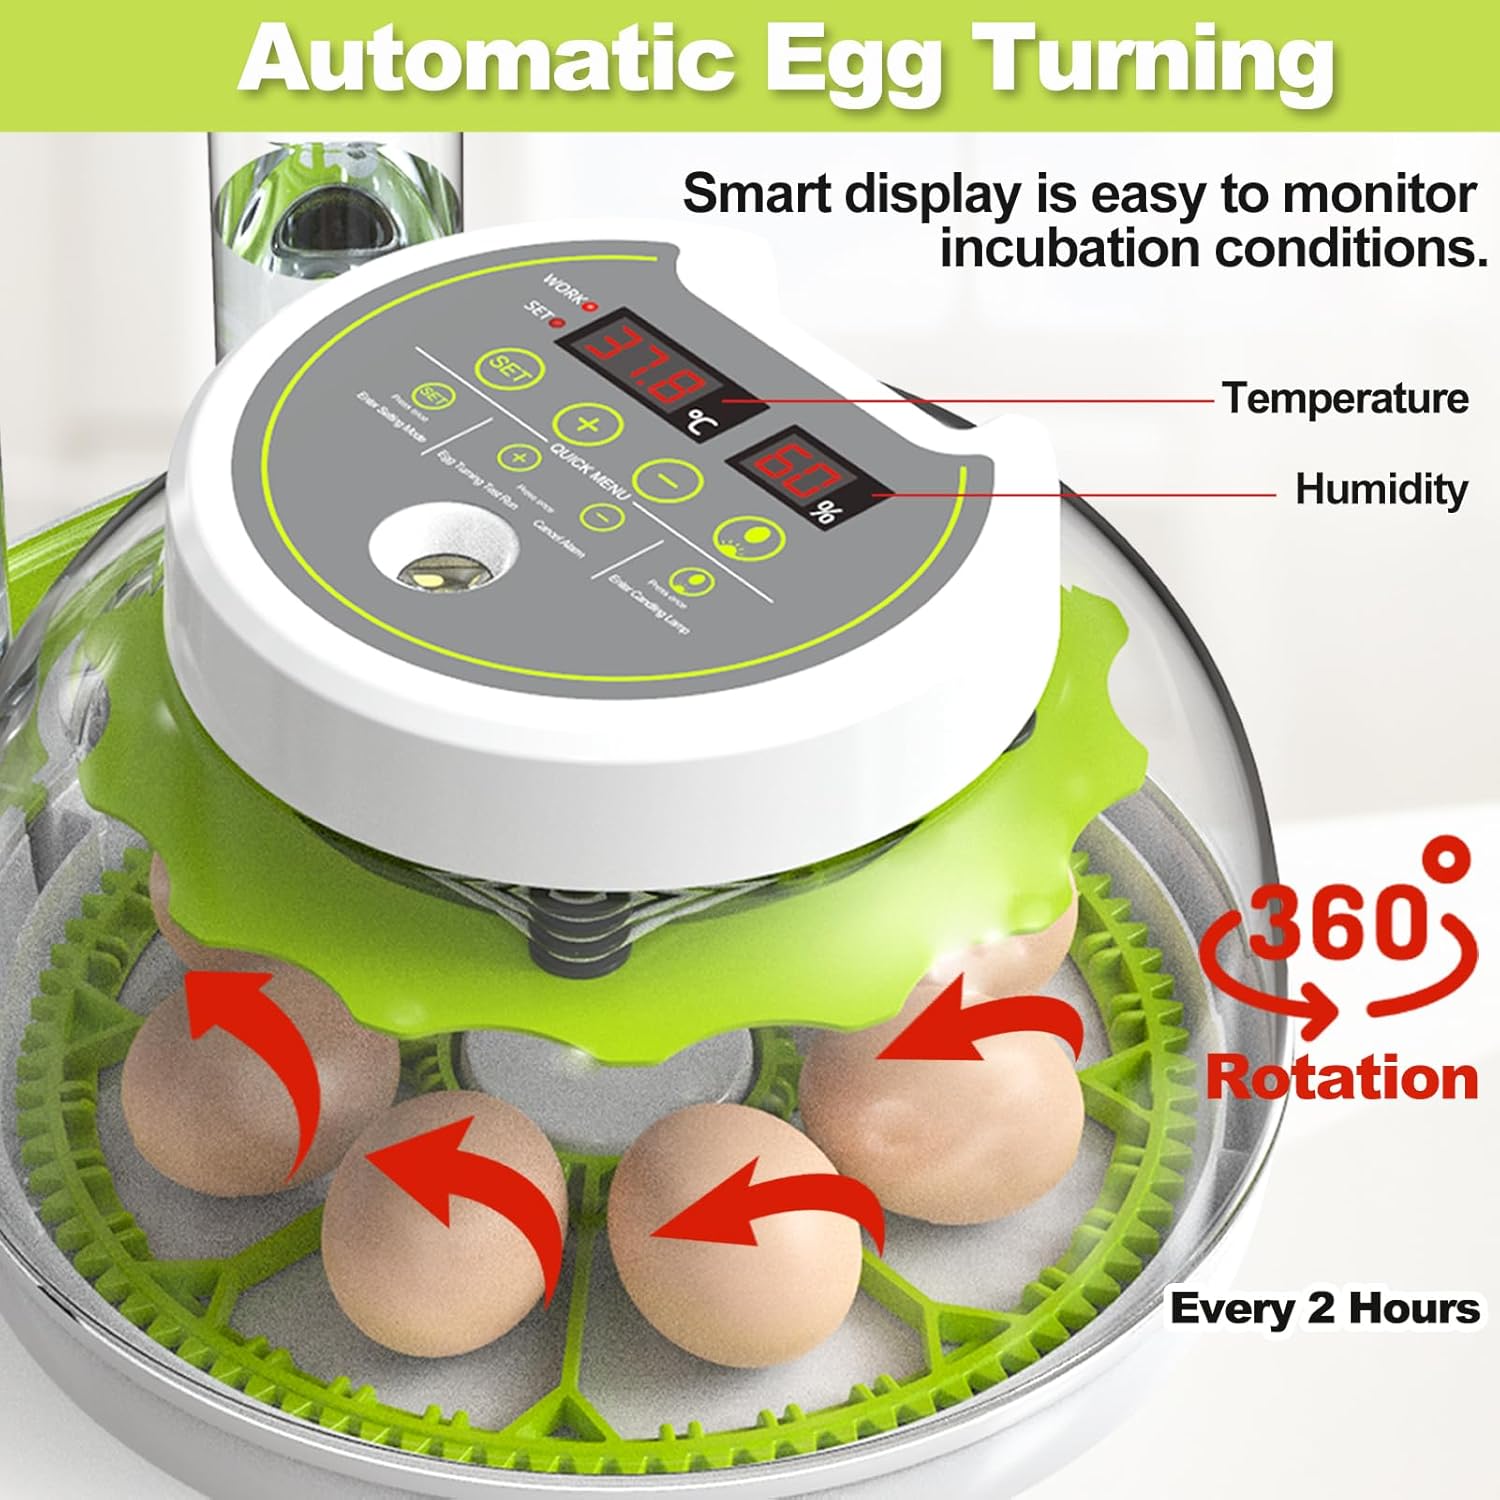
Figure 5.3: Automatic Egg Turning. The incubator automatically rotates the eggs 360 degrees every two hours. This continuous movement prevents the embryo from sticking to the shell and promotes healthy development.
It is generally recommended to disable the automatic egg turning for the last 3 days of incubation (the "lockdown" period) to allow chicks to position themselves for hatching. Consult specific guidelines for the type of poultry you are incubating.
5.5 Humidity Control and External Water Adding
Maintaining proper humidity is critical for successful hatching. The incubator features an external water supply system to facilitate humidity control without opening the lid, thus avoiding temperature fluctuations.

Figure 5.4: Automatic Water Adding. This image shows the external water bottles and how water is drawn into the incubator. This system allows for automatic external water top-up, preventing the need to open the lid and maintaining stable internal temperature and humidity.
- Fill the provided water bottles with clean, distilled water.
- Attach the bottles to the designated external water inlet ports.
- The incubator will automatically draw water as needed to maintain the set humidity level.
- Monitor the water levels in the bottles and refill as necessary.

Figure 5.5: Water Adding Mechanism Detail. A closer look at how the water bottle connects to the incubator's external water supply system, ensuring a continuous and controlled water flow for humidity regulation.
5.6 Built-in Egg Candling
The built-in egg candler allows you to observe the development of embryos and identify infertile or non-viable eggs without disturbing the incubation process.

Figure 5.6: Built-in Egg Candler. This feature allows users to shine a light through the egg to observe the embryo's development. The image shows different stages of embryo growth visible through candling, from early development to a fully formed chick.
- In a dark environment, place an egg directly over the built-in LED candler light on the incubator's top panel.
- Press the Egg Candling Button on the control panel to activate the light.
- Observe the contents of the egg. Fertilized eggs will show veins and a developing embryo. Infertile eggs will appear clear.
- Turn off the candler light after use.
6. Maintenance
- Cleaning: After each hatch, unplug the incubator and allow it to cool. Clean all surfaces with a damp cloth and a mild disinfectant. Ensure all parts are completely dry before storage or next use. Do not use abrasive cleaners.
- Water Tray: Regularly clean the water channels and trays to prevent mold or bacterial growth.
- Storage: Store the incubator in a clean, dry place away from direct sunlight and extreme temperatures when not in use.
7. Troubleshooting
| Problem | Possible Cause | Solution |
|---|---|---|
| Incubator not powering on. | Power cord not connected; power outlet issue. | Check power connections; try a different outlet. |
| Temperature too high/low. | Incorrect temperature setting; poor room ventilation; faulty sensor. | Adjust temperature settings; ensure proper room temperature and ventilation; contact support if sensor suspected. |
| Humidity too high/low. | Insufficient water; too much water; water channels blocked. | Add water to bottles; remove excess water; clean water channels. |
| Eggs not turning automatically. | Egg turning motor issue; mechanism jammed. | Check for obstructions; ensure motor is connected; contact support. |
| Poor hatch rate. | Incorrect temperature/humidity; infertile eggs; improper egg handling. | Verify settings against recommended parameters; ensure eggs are fresh and fertile; follow proper egg handling procedures. |
8. Specifications
- Model Number: 1000000G
- Brand: DETODDA
- ASIN: B0CSYR2DLJ
- Color: Green
- Power Source: Electric (Supports household electricity and 12V DC battery)
- Item Weight: 1.67 Kilograms (3.68 Pounds)
- Package Dimensions: 12.44 x 10.71 x 7.48 inches
- Manufacturer: DETODDA
- First Available Date: April 13, 2024
9. Warranty and Support
Specific warranty information for your DETODDA Egg Incubator is typically provided with the product packaging or can be found on the manufacturer's official website. For technical support, troubleshooting assistance beyond this manual, or warranty claims, please refer to the contact information provided in your product documentation or visit the official DETODDA website.
For additional resources and product information, you may visit the DETODDA Store on Amazon.