FDUCE W13 Dual Wireless Microphone System
Instruction Manual
Introduction
This manual provides detailed instructions for the setup, operation, and maintenance of your FDUCE W13 Dual Wireless Microphone System. Please read this manual thoroughly before using the product to ensure proper function and longevity. This system is designed for various audio applications, including karaoke, parties, weddings, and outdoor events, offering clear sound and reliable wireless performance.
Package Contents
Verify that all items listed below are included in your package:
- 2 x Handheld Microphones
- 1 x Wireless Receiver
- 1 x Power Cord
- 2 x Anti-slip Rings
- 2 x Foam Covers
- 1 x Instruction Manual (this document)
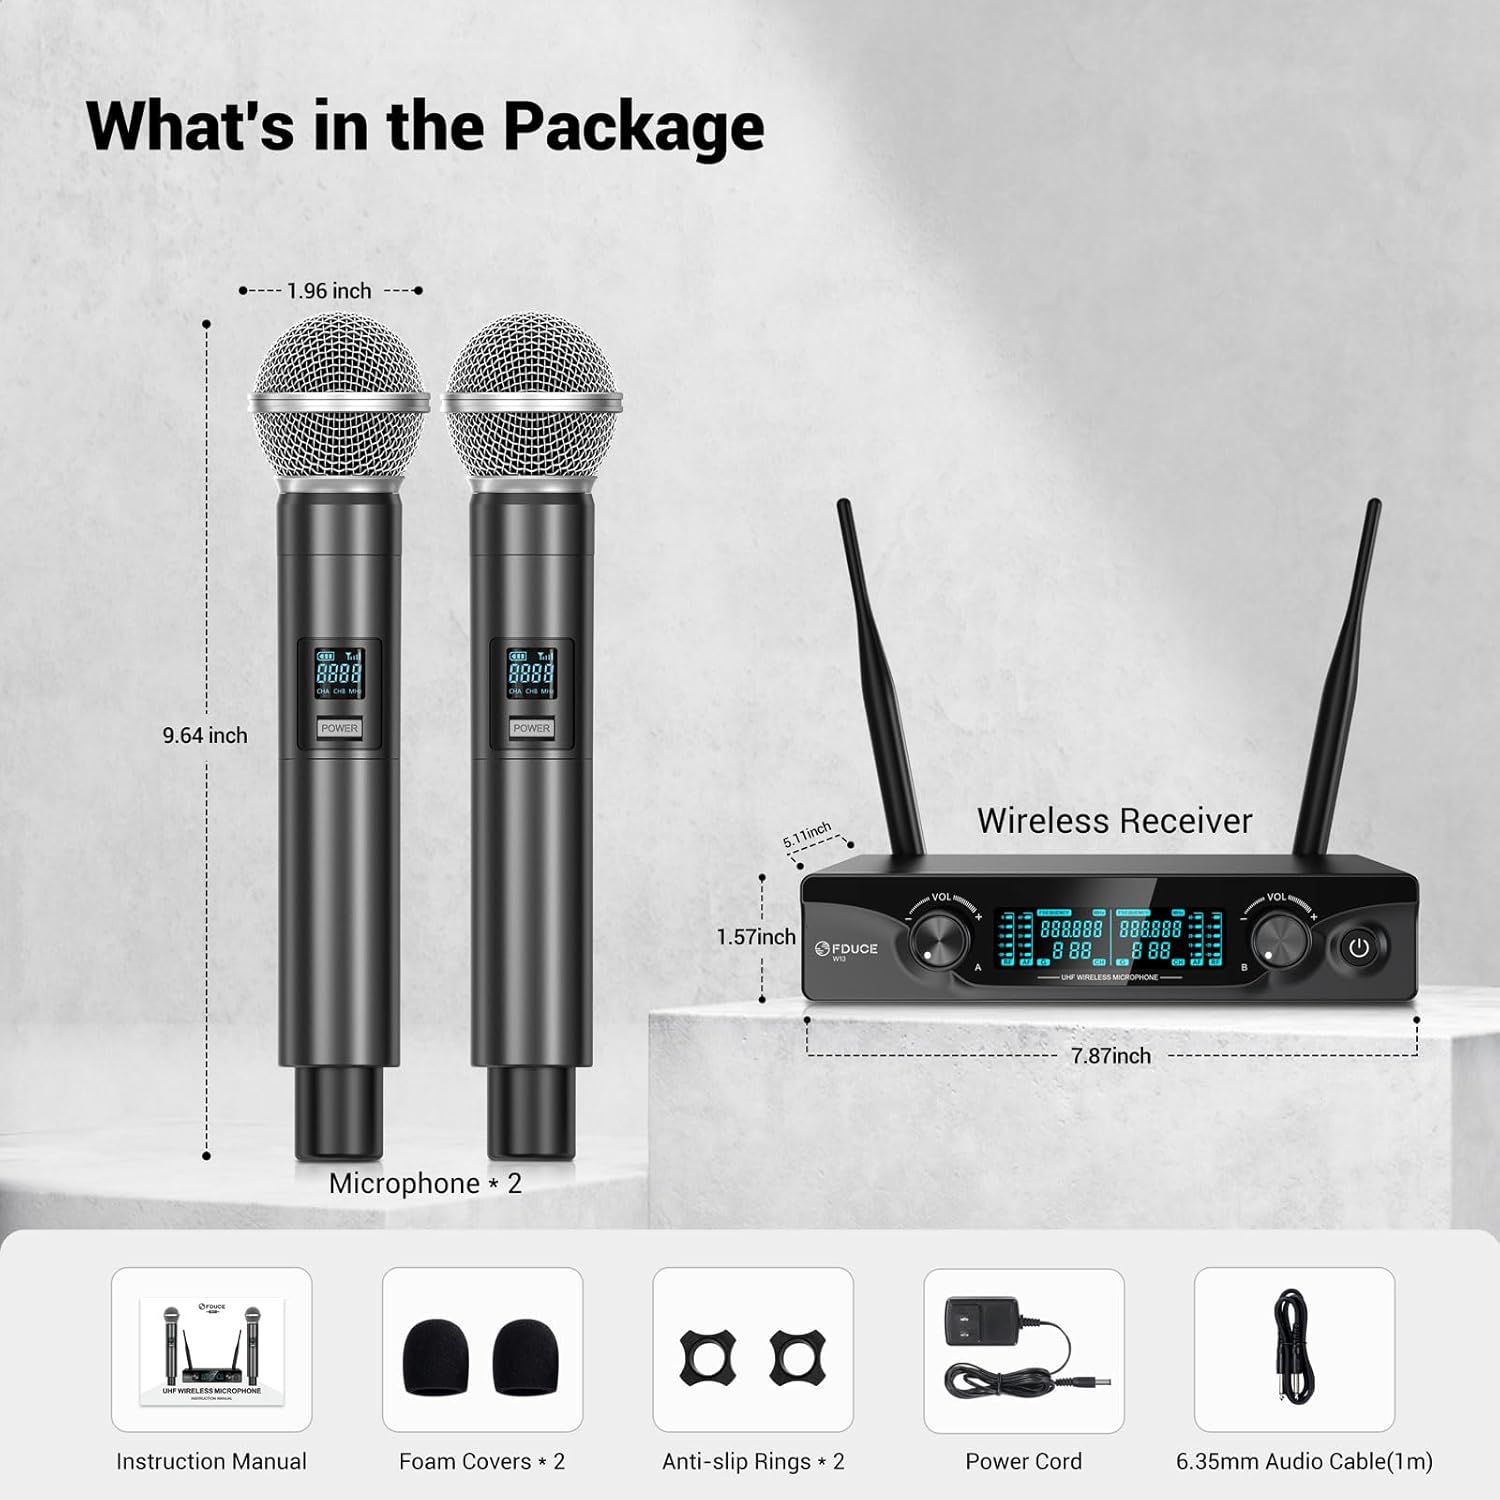
Image: Contents of the FDUCE W13 Dual Wireless Microphone System package.
Product Overview
Receiver Components

Image: Detailed view of the FDUCE W13 Wireless Receiver, highlighting its components.
- Antenna A/B: For wireless signal reception.
- Balanced XLR Output (CHB/A): Professional audio output connections.
- DC Power Input: Connects to the power adapter.
- LCD Display: Shows channel and frequency information.
- CHA/CHB Volume Control: Adjusts the output volume for each microphone channel.
- Power Button: Turns the receiver on/off.
- 6.35mm (1/4") Audio Output Jack: Standard audio output connection.
Microphone Components

Image: Detailed view of the FDUCE W13 Handheld Microphone, highlighting its features.
- Battery Indicator: Displays current battery level.
- Signal Indicator: Shows wireless signal strength.
- Channel Display: Indicates the current channel (CHA 1-15, CHB 16-30).
- Power Button: Long press to turn on/off the microphone.
- Channel Switch Button: Press to change the UHF channel.
- Battery Compartment: Requires 2 AA batteries (not included).
Setup Instructions
- Connect the Receiver:
Connect the power cord to the DC Power Input on the receiver and plug it into a power outlet. Press and hold the power button on the receiver to turn it on. The LCD display will illuminate.
- Connect to Audio System:
Connect the receiver to your amplifier, karaoke machine, or speakers using either the 6.35mm audio output jack or the balanced XLR output jacks. Ensure the connection is made to the "MIC IN" input on your audio device.

Image: Connection diagram for XLR audio output.

Image: Connection diagram for 6.35mm audio output.
- Install Microphone Batteries:
Unscrew the bottom part of each microphone and insert 2 AA batteries (not included), observing the correct polarity. Screw the bottom part back on securely.
- Power On Microphones:
Press and hold the power button on each microphone to turn it on. The microphone and receiver will automatically match and connect. The microphone's display will show its channel and battery status.
- Optimal Boot Order:
For best performance, follow this sequence when powering on your system: Audio Mixer → Audio Amplifier → Speaker → Receiver → Microphone.
- Optimal Shutdown Order:
To prevent unexpected noise, follow this sequence when powering off: Microphone → Receiver → Speaker → Audio Amplifier → Audio Mixer.

Image: Visual guide for quick setup steps.
Operating Instructions
Adjusting Volume
Use the individual CHA and CHB volume control knobs on the receiver to adjust the output level of each microphone. Start with the volume low and gradually increase it to avoid feedback or distortion.
Changing Channels
Each microphone has 15 UHF adjustable channels, allowing for a total of 30 channels (1-15 for CHA, 16-30 for CHB). To change a microphone's channel, press the 'Channel Switch Button' on the microphone. The receiver's display will update to show the new channel. This feature helps avoid radio interference, especially when using multiple wireless systems.

Image: Receiver LCD display showing channel information.

Image: Microphone LCD display and channel switch button.
Wireless Range
The system offers a wireless transmission range of up to 200 feet (60 meters) in optimal conditions. Ensure a clear line of sight between the microphones and the receiver for the best signal stability and to minimize interference.
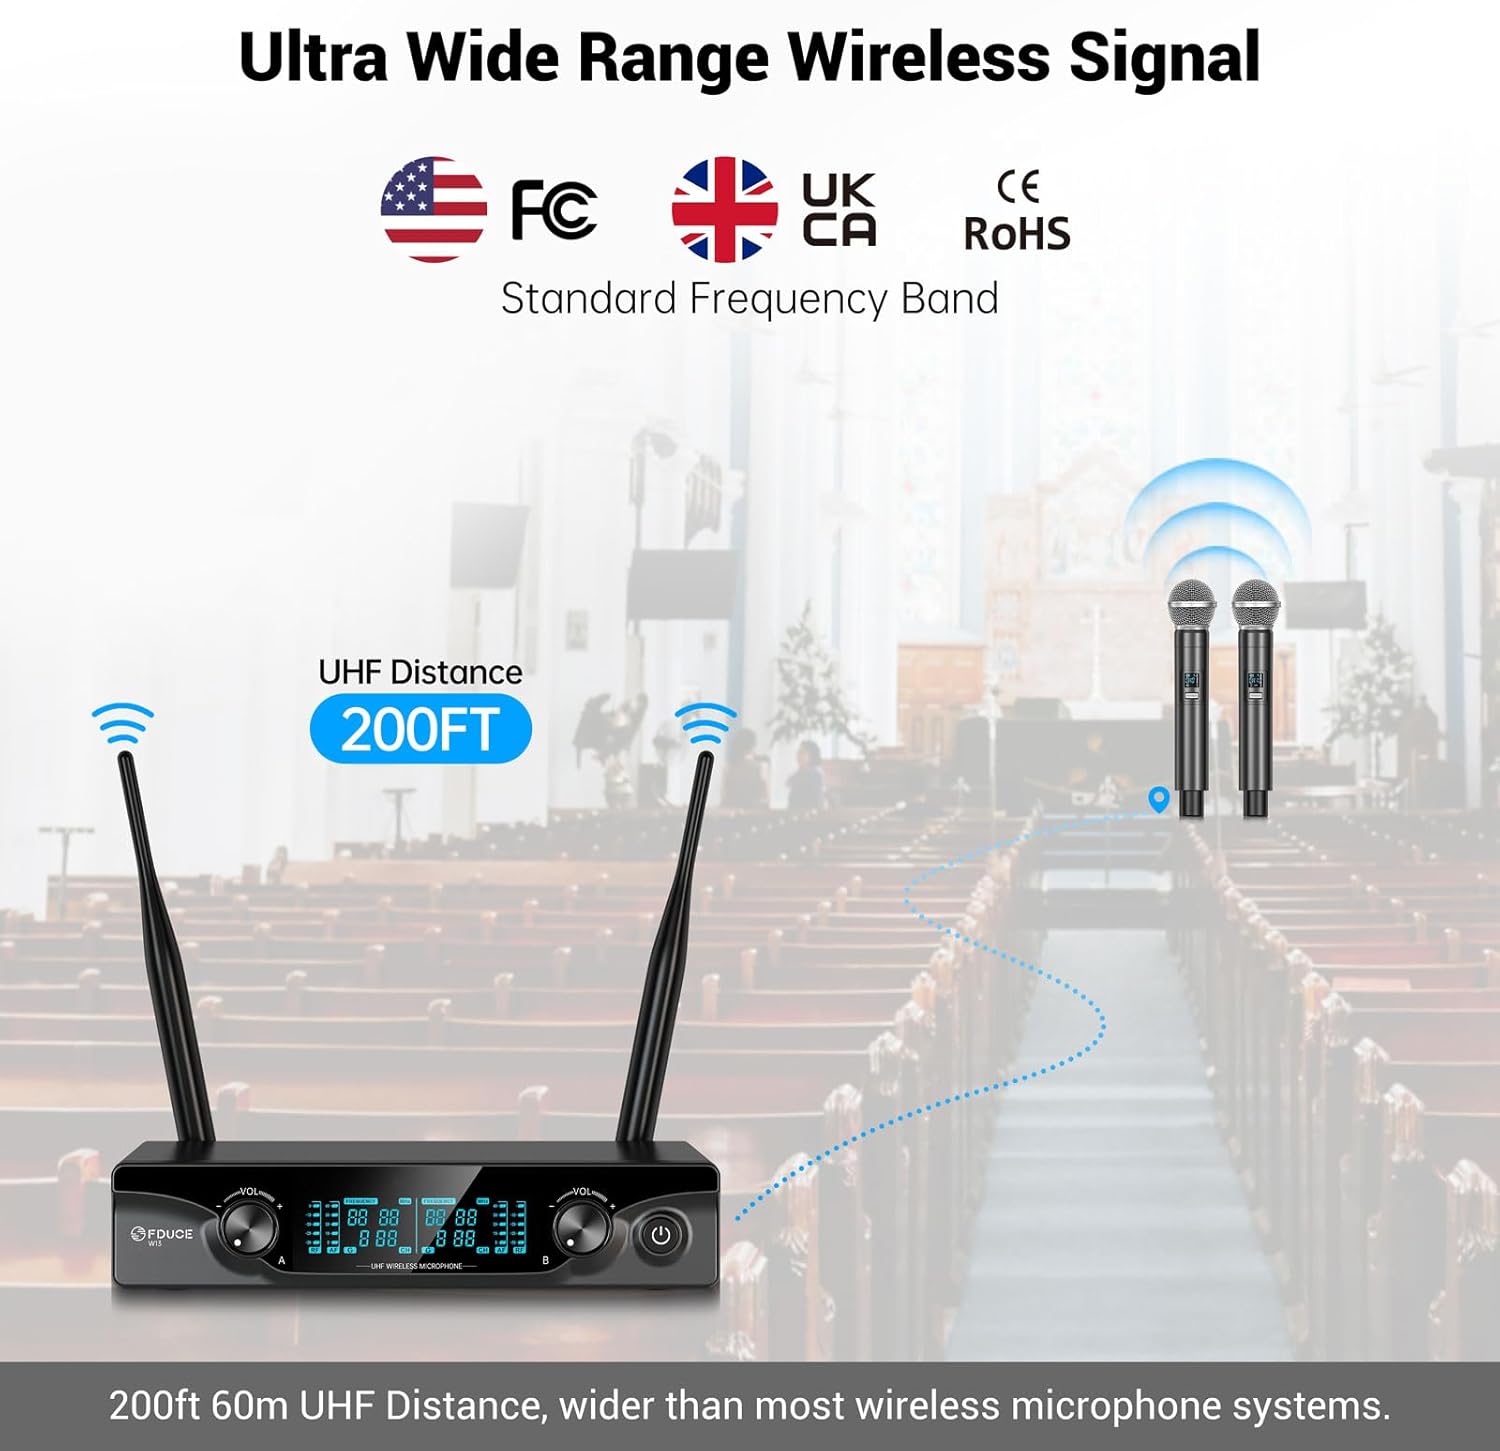
Image: Illustration of the 200ft wireless range.
Maintenance
- Cleaning: Use a soft, dry cloth to clean the microphones and receiver. Do not use liquid cleaners or solvents.
- Battery Care: Remove batteries from the microphones if they will not be used for an extended period to prevent leakage.
- Storage: Store the system in a cool, dry place away from direct sunlight and extreme temperatures.
- Handling: Handle microphones and receiver with care to avoid physical damage.
Troubleshooting
| Problem | Possible Cause | Solution |
|---|---|---|
| No sound output | Microphone/Receiver off; Low batteries; Incorrect connection; Volume too low. | Ensure all devices are powered on. Replace microphone batteries. Check all audio cable connections. Increase receiver and speaker volume. |
| Interference/Static | Other wireless devices; Obstructions; Channel conflict. | Move away from other electronic devices. Ensure clear line of sight. Change microphone channel. |
| Microphone not pairing | Microphone/Receiver not powered on; Out of range. | Ensure both are powered on. Bring microphone closer to receiver. |
| Short transmission range | Obstructions; Environmental interference. | Ensure clear line of sight. Avoid dense objects or walls between microphone and receiver. |
Specifications
| Model Name | W13 |
| Brand | FDUCE |
| Connectivity Technology | Auxiliary, UHF |
| Connector Type | 6.35 mm Jack, XLR |
| Special Feature | Volume Control |
| Compatible Devices | Amplifier, Audio Interface, Audio Mixer, Karaoke Machine, PA System |
| Color | Gray |
| Material | Plastic |
| Recommended Uses | Karaoke, Singing |
| Polar Pattern | Unidirectional (Cardioid) |
| Audio Sensitivity | 96 Decibels |
| Impedance | 600 Ohm |
| Signal-to-Noise Ratio | 96 dB |
| Frequency Response | 902-928 MHz (UHF) |
| Number of Channels | 10 (2x5 adjustable channels per mic) |
| Item Weight | 1.96 pounds (0.89 Kilograms) |
| Product Dimensions (L x W x H) | 7.87 x 5.12 x 9.45 inches |
| Power Source | Battery Powered (2x AA per mic) |
Warranty and Support
FDUCE products are designed for reliability and performance. For warranty information or technical support, please refer to the contact details provided with your purchase documentation or visit the official FDUCE website. Keep your purchase receipt as proof of purchase for warranty claims.