Introduction
This manual provides instructions for the safe and effective use of your KISUFU 5V 2835 USB LED Strip Light. This flexible LED strip is designed for various decorative and accent lighting applications, powered conveniently via a 5V USB interface. Please read this manual thoroughly before installation and operation.
Safety Information
Observe the following safety precautions to prevent damage to the product or personal injury:
- Ensure the power source is 5V DC via a USB port. Do not connect to higher voltage power sources.
- Do not roll the LED strip up when it is powered on. This can lead to poor heat dissipation and potential damage to the strip. Always unroll completely before lighting.
- The LED strip is rated IP20, meaning it is not waterproof. Avoid exposure to water or high humidity.
- Do not bend the strip sharply or apply excessive force, as this may damage the internal circuitry.
- Keep out of reach of children.
- The LED strip is splash-free, UV-free, and mercury-free, designed to be safe for human contact and the environment.
Package Contents
Verify that all components are present in your package:
- KISUFU 5V 2835 USB LED Strip Light (Red, 2M)
- USB Power Cable with On/Off Switch (1.5m length)

Image: Overview of the KISUFU 5V 2835 USB LED Strip Light kit, including the LED strip reels and USB power cables with integrated on/off switches.
Product Features
- LED Type: 5V USB 2835 LED Strip Light
- LED Quantity: 60 LEDs per meter
- Operating Voltage: 5V DC (USB powered)
- Color Rendering Index (CRI): > 85Ra
- Power Consumption: 8-10 W/m
- Brightness: 900 lm/m
- Cuttable Design: Can be cut every 17mm along designated marks without damaging the rest of the strip.
- Flexible and Pliable: Easily shaped for various applications.
- Self-Adhesive Backing: Features double-sided tape for easy and secure installation.
- USB Interface: Compatible with TVs, laptops, power banks, USB wall chargers (5V 2.1A recommended), and other devices with a USB port.
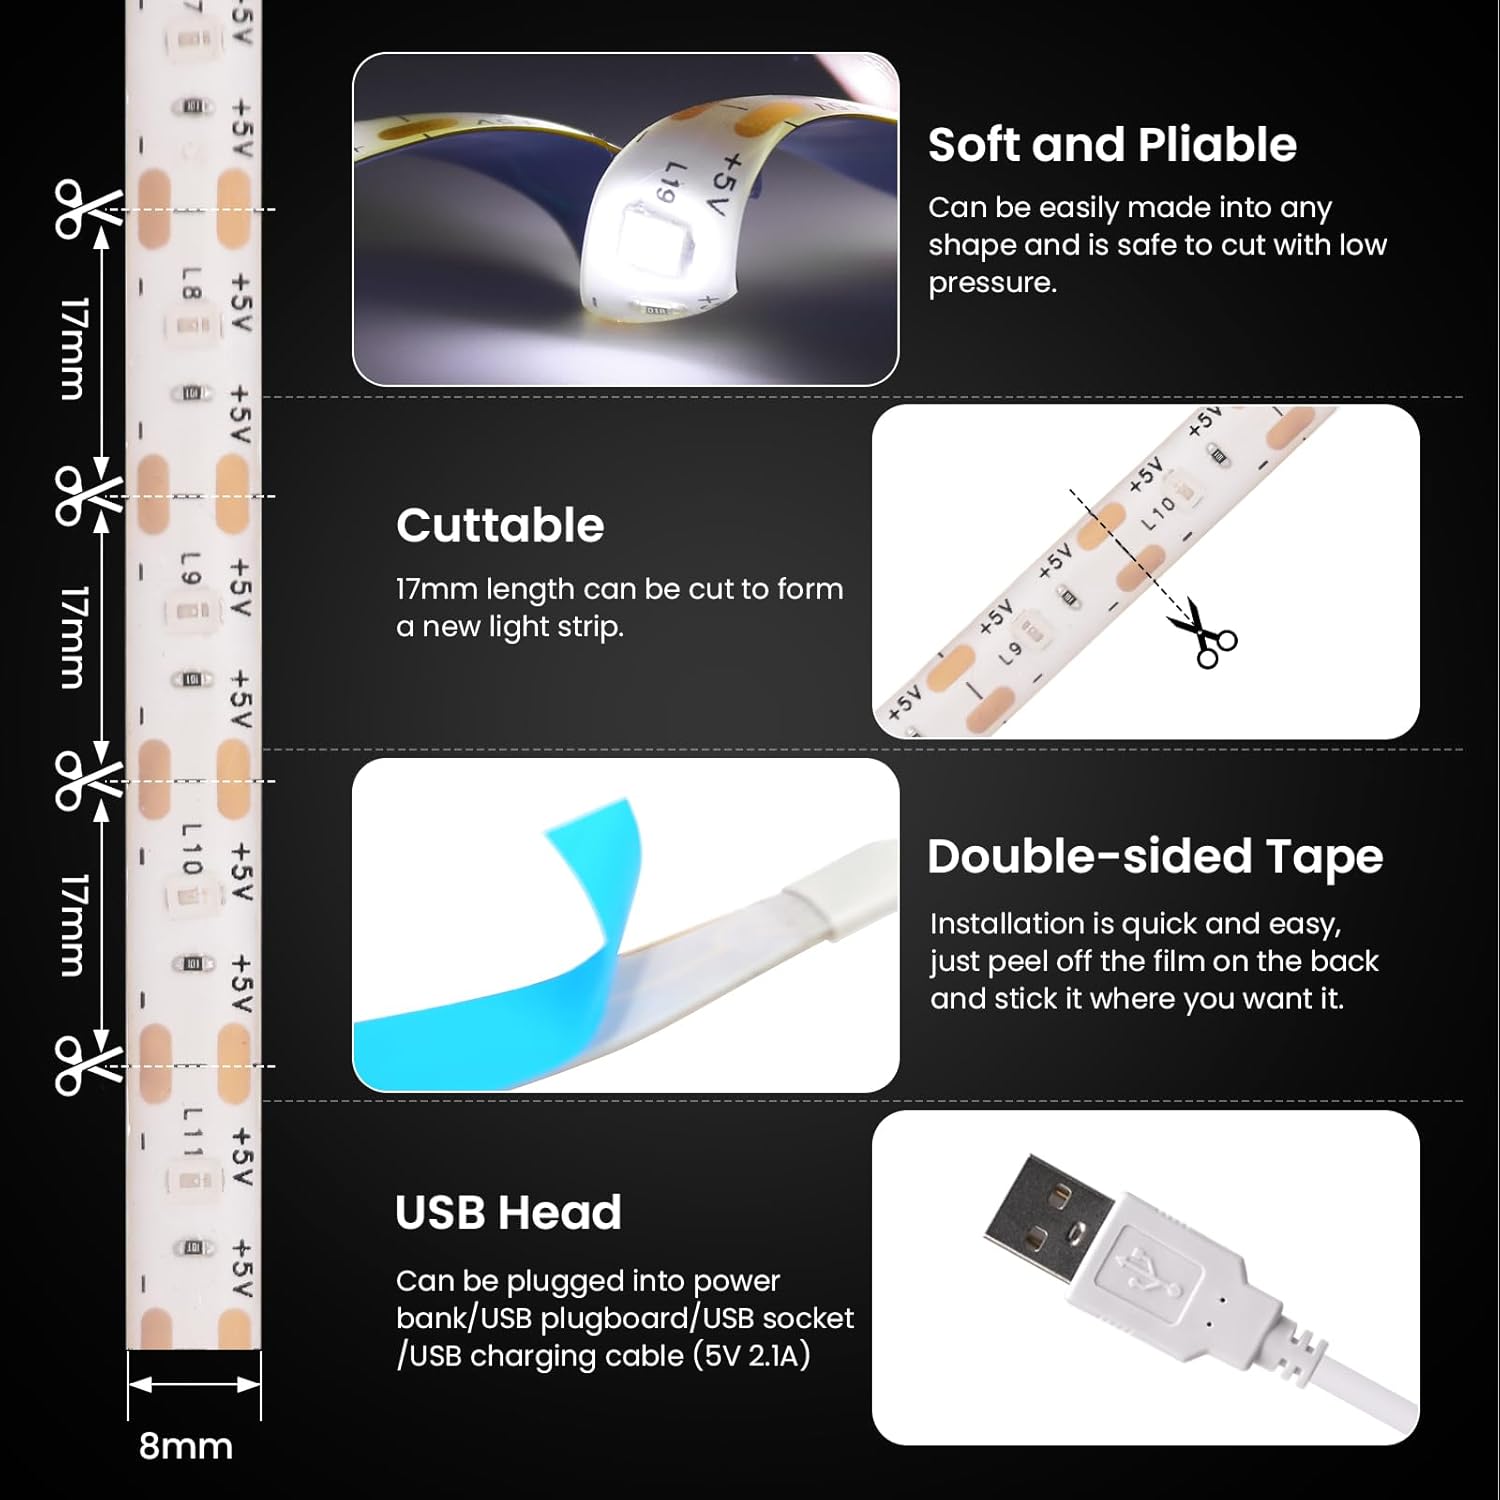
Image: Visual representation of the LED strip's key features, including its flexibility, cut points, adhesive backing, and USB connector.
Setup Instructions
- Prepare the Surface: Ensure the installation surface is clean, dry, and flat. Dust, dirt, or moisture can reduce the effectiveness of the adhesive tape.
- Measure and Cut (Optional): If a shorter length is required, measure the desired length. The LED strip can be cut every 17mm at the designated cutting marks (indicated by a scissor icon). Cut only at these marks to avoid damaging the circuit.
- Apply the Strip: Peel off the protective film from the double-sided adhesive tape on the back of the LED strip. Carefully press the strip onto the prepared surface, ensuring firm contact along its entire length.
- Connect Power: Plug the USB connector of the LED strip into a compatible 5V USB power source (e.g., TV USB port, laptop, power bank, or USB wall adapter).
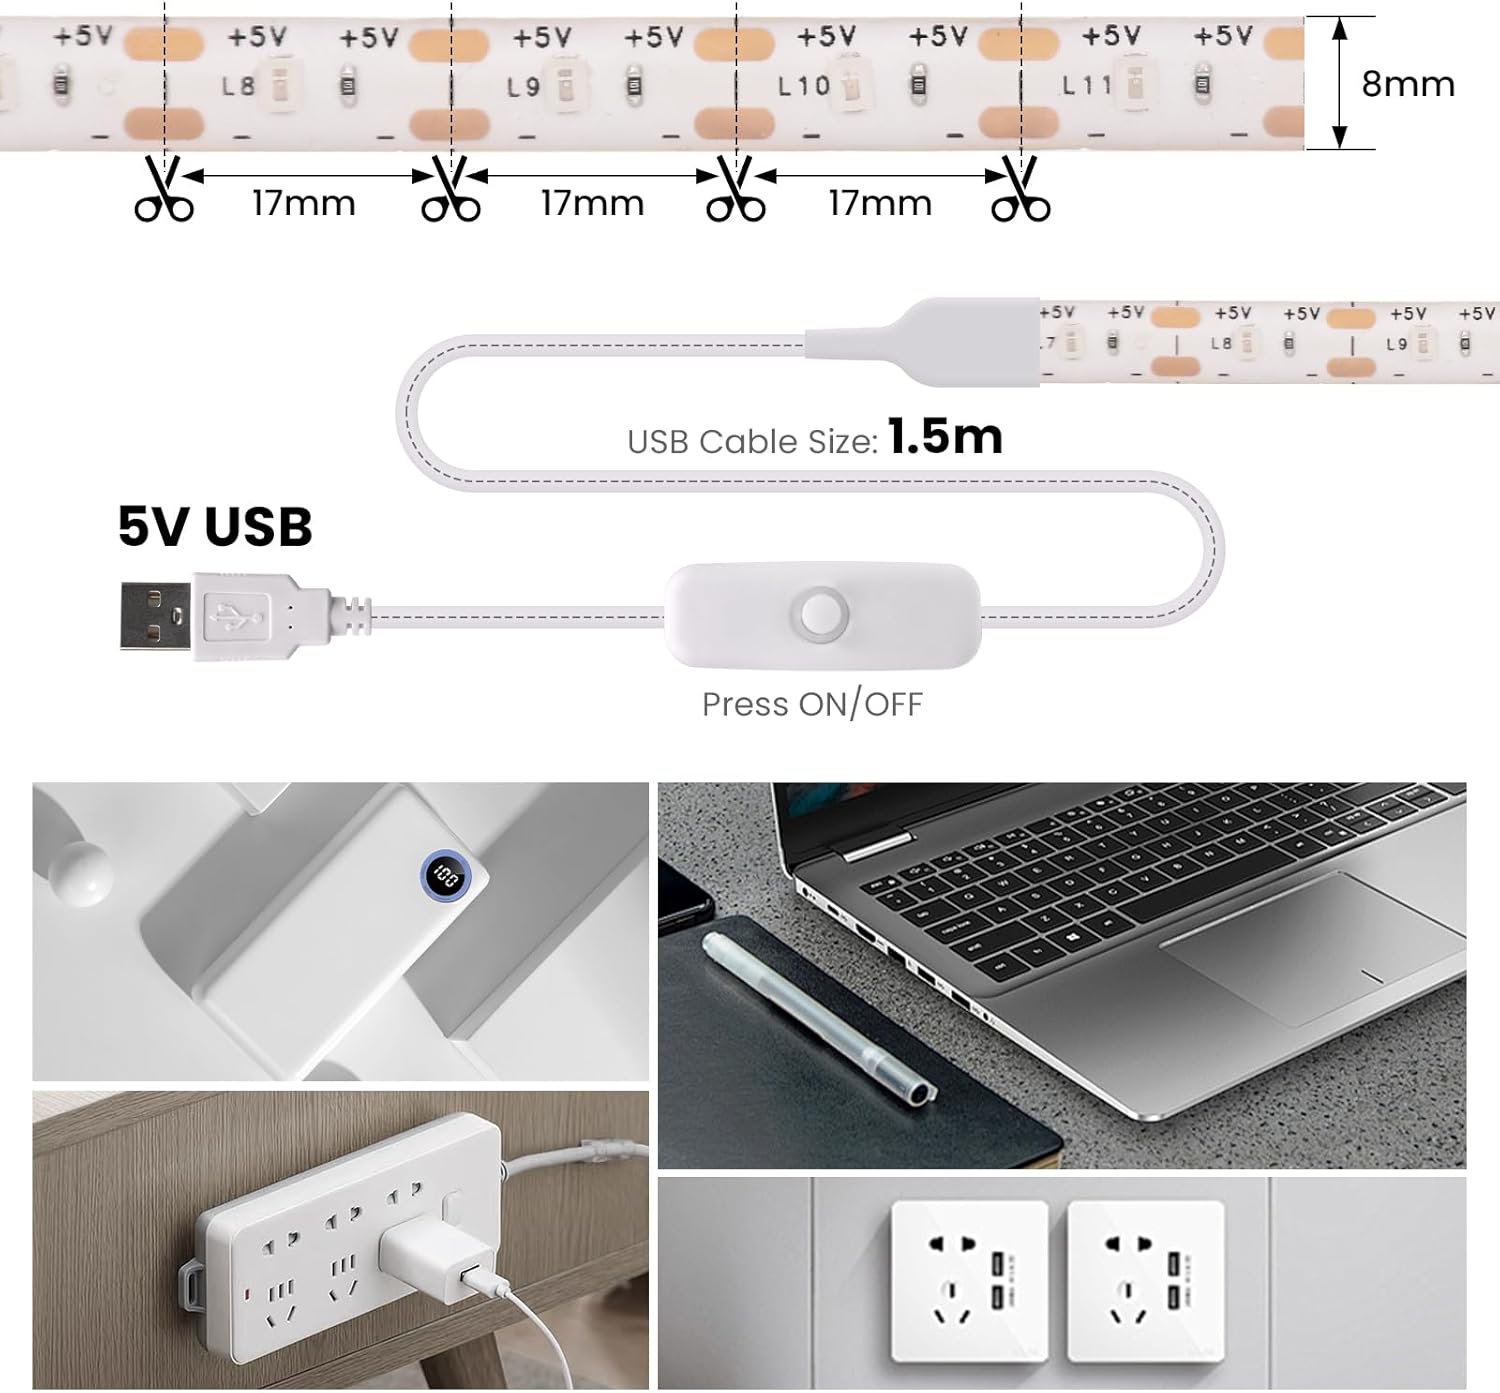
Image: Illustration demonstrating the 17mm cutting points on the LED strip and the 1.5-meter USB power cable with an integrated switch.

Image: Detailed view of the USB plug and the press-button on/off switch for controlling the light strip.
Operating Instructions
Once the LED strip is installed and connected to a 5V USB power source:
- Power On/Off: Press the button on the inline switch located on the USB power cable to turn the LED strip on or off.
- Brightness: This model provides a fixed brightness of 900 lm/m. There are no adjustable brightness settings.
Maintenance
- Cleaning: Gently wipe the LED strip with a dry, soft cloth to remove dust. Do not use liquid cleaners or abrasive materials.
- Storage: If storing the LED strip, ensure it is clean and dry. Roll it loosely onto a reel or coil to prevent kinks or damage. Store in a cool, dry place away from direct sunlight.
- Adhesive Longevity: The adhesive tape is designed for a single application. Repeated removal and reapplication may reduce its stickiness.
Troubleshooting
| Problem | Possible Cause | Solution |
|---|---|---|
| LED strip does not light up. |
|
|
| LED strip lights flicker or are dim. |
|
|
| Adhesive tape is not sticking. |
|
|
Specifications
- Brand: KISUFU
- Model Number: MGC-LL433-US
- Color: Red
- Length: 2M
- LED Type: 2835
- LEDs per Meter: 60
- Input Voltage: 5V DC
- Power Source: USB (Corded Electric)
- Power Consumption: 8-10 W/m
- Brightness: 900 lm/m
- Working Temperature: -20°C to 40°C (-4°F to 104°F)
- Waterproof Level: IP20 (Indoor Use Only)
- Special Feature: Cuttable every 17mm
- Indoor/Outdoor Usage: Indoor
Warranty and Support
For warranty information or technical support, please refer to the seller's return policy or contact the seller directly through the platform where the product was purchased. Keep your purchase receipt for any warranty claims.