1. Introduction
This manual provides instructions for the safe and effective use of your WEST Biking Bicycle Floor Pump. Please read this manual thoroughly before operating the pump and retain it for future reference.
2. Product Overview and Components
The WEST Biking Bicycle Floor Pump is designed for efficient inflation of various tires and inflatable items. It features a high-pressure capacity, an integrated pressure gauge, and a versatile valve head.
Key Features:
- High Pressure Capacity: Achieves up to 260 PSI, suitable for road bikes and other high-pressure tires.
- Accurate Pressure Gauge: Equipped with a metal HD pressure gauge (0-140 PSI) for precise inflation control.
- T-Shaped Dual Nozzle: Compatible with both Presta and Schrader valves without requiring additional adapters.
- Extended Hose: An 86cm (34.65 inches) long, wear-resistant, and frost-proof hose for comfortable inflation.
- Self-Rebound Design: After reaching 10 PSI, the pump automatically rebounds, reducing effort during inflation.
- Compact Storage: Features a bottom buckle design for secure storage of the valve head and hose.
- Versatile Use: Includes a ball needle and inflation cone for sports balls, swimming rings, and other inflatables.
Components Diagram:
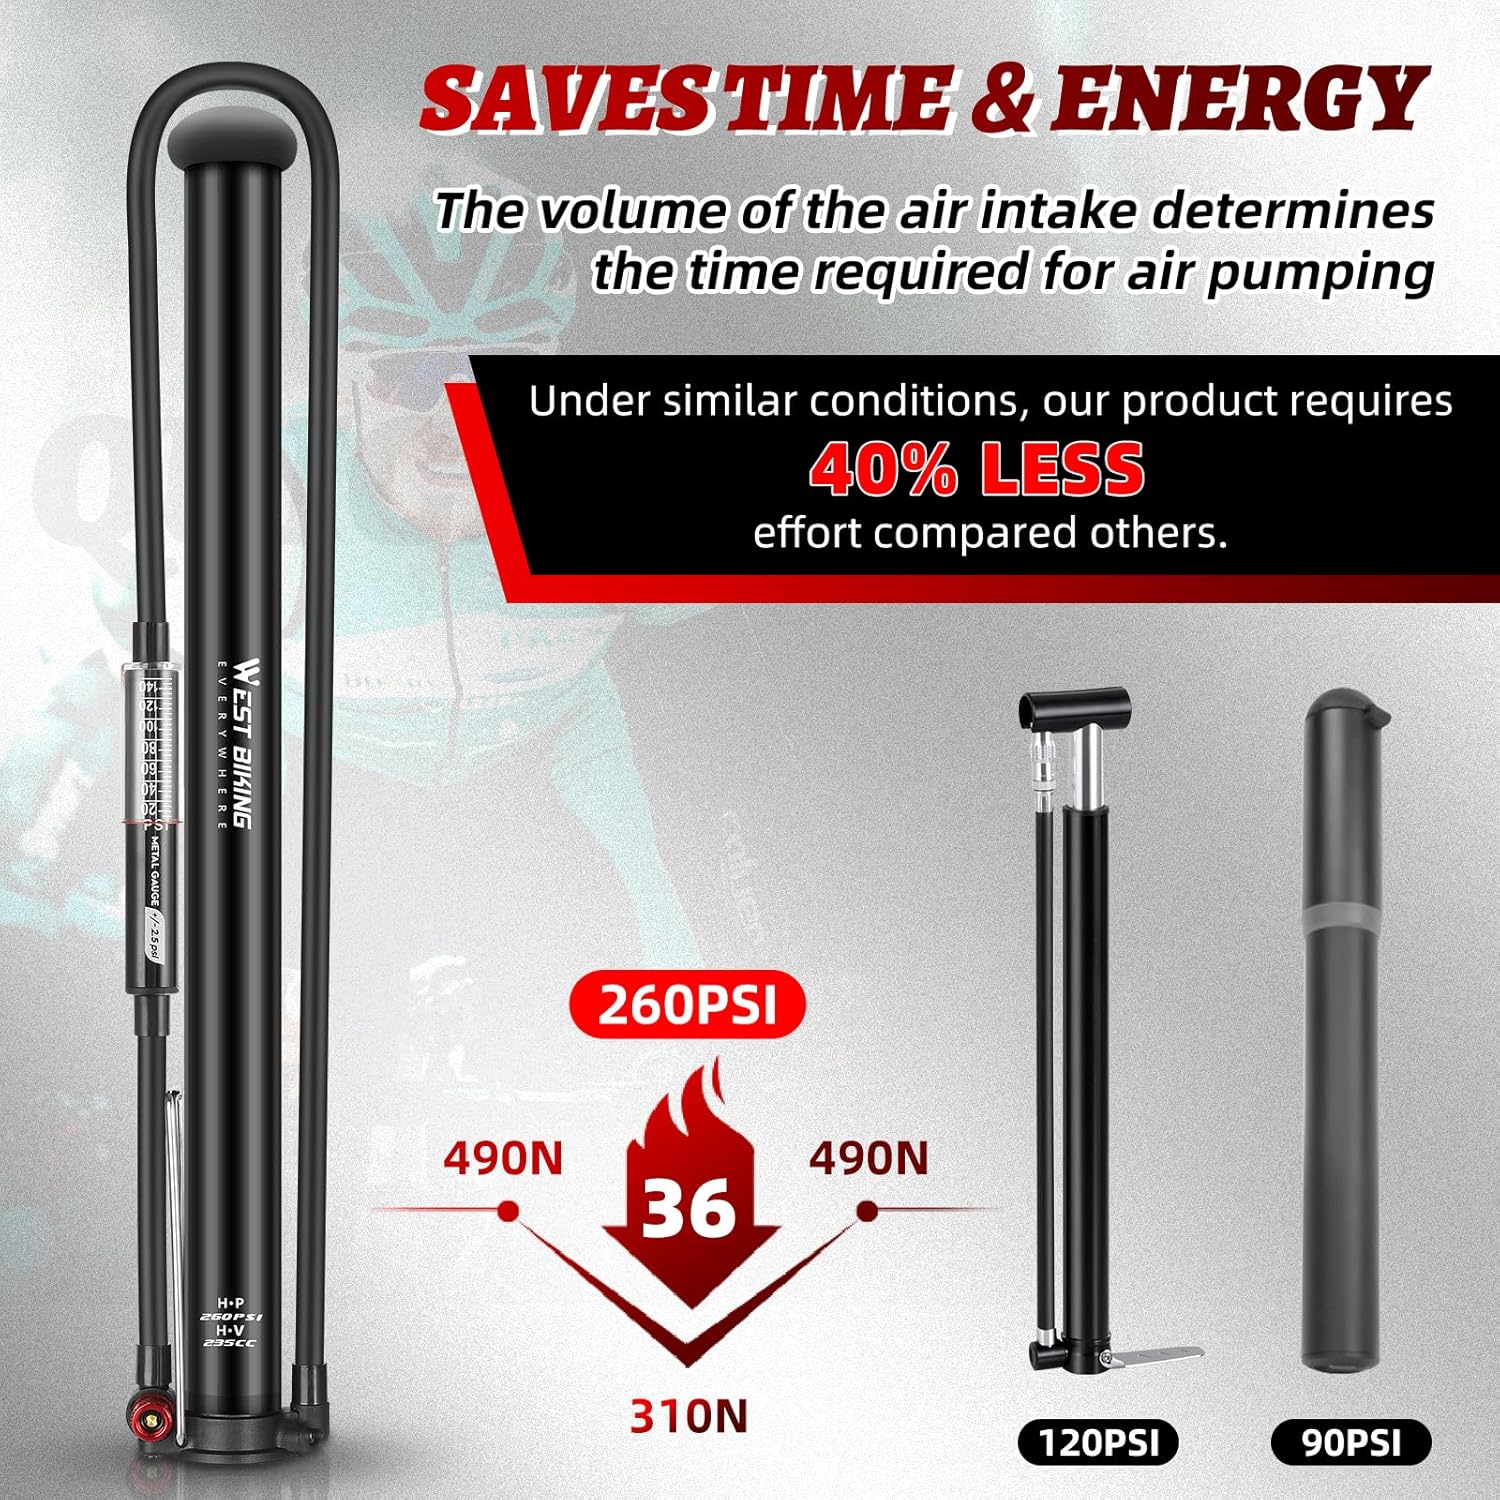
Figure 2.1: Overview of the WEST Biking Bicycle Floor Pump, showing the main body, hose, pressure gauge, and foot pedal.

Figure 2.2: Detailed view of the pump's metal pressure gauge, indicating PSI measurements.
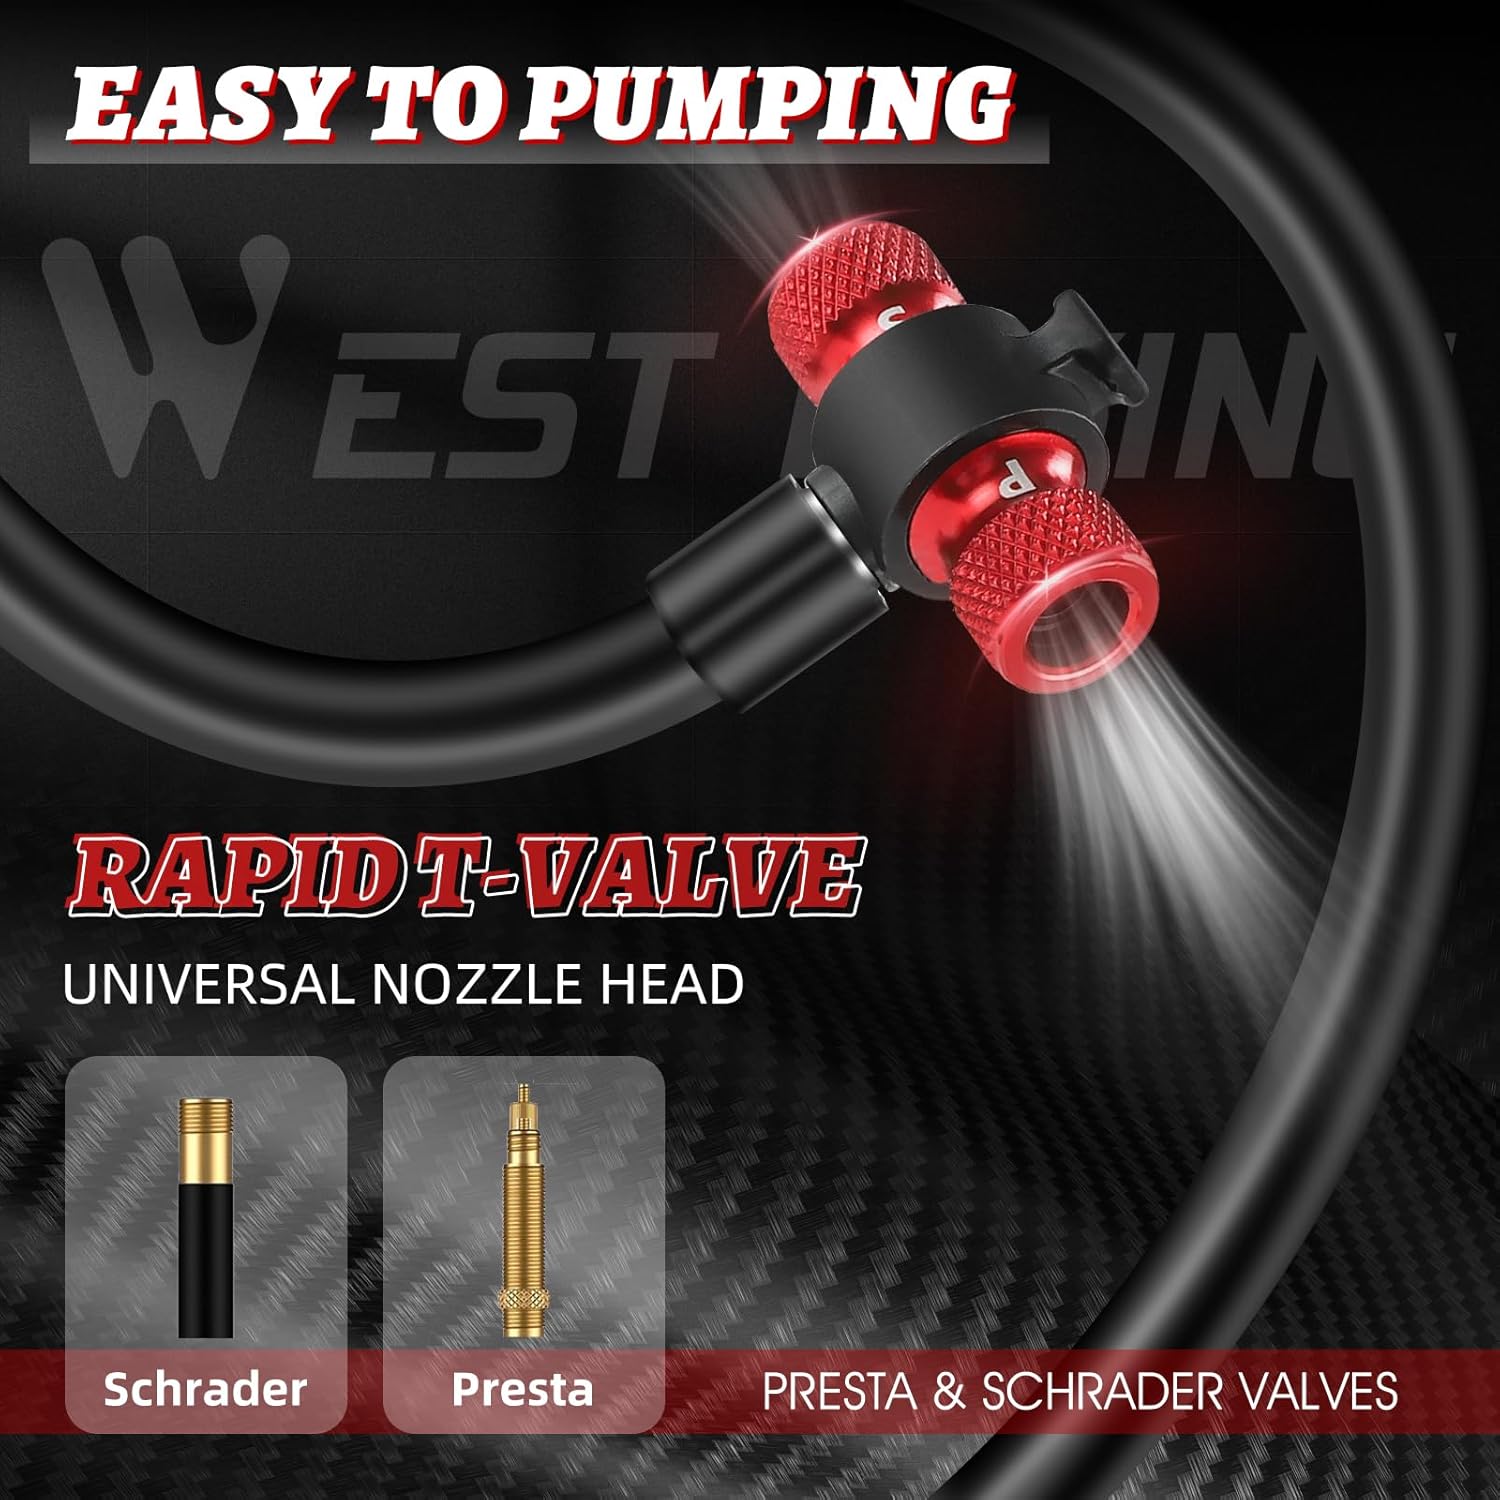
Figure 2.3: The T-shaped dual nozzle, compatible with both Presta and Schrader valve types.

Figure 2.4: The pump's versatility, demonstrating its use for various inflatables and showing the included inflation cone and ball needle.
3. Setup and Preparation
- Unpack: Carefully remove the pump and all accessories from the packaging.
- Inspect: Check for any visible damage to the pump or hose. Do not use if damaged.
- Prepare for Use:
- Unclip the hose from the bottom buckle design.
- Extend the foot pedal (if applicable) for stability during pumping.
4. Operating Instructions
Follow these steps to inflate your bicycle tires or other items:
4.1. Inflating Bicycle Tires (Presta & Schrader Valves)
- Identify Valve Type: The pump's T-shaped nozzle is compatible with both Presta and Schrader valves. No adapters are needed.
- Attach Nozzle:
- For Schrader valves, screw the larger opening of the T-nozzle onto the valve stem.
- For Presta valves, unscrew the Presta valve cap, then screw the smaller opening of the T-nozzle onto the valve stem.
- Ensure a tight seal to prevent air leakage.
- Position Pump: Place the pump on a flat, stable surface. Use the foot pedal to stabilize the pump with your foot.
- Inflate: Begin pumping the handle up and down. The integrated pressure gauge will display the current tire pressure.
- Monitor Pressure: Continue pumping until the desired pressure (PSI) is reached, as indicated on the gauge. Refer to your tire's sidewall for recommended pressure.
- Remove Nozzle: Once the desired pressure is achieved, carefully unscrew the nozzle from the valve stem. For Presta valves, remember to tighten the valve cap.

Figure 4.1: Step-by-step guide for attaching the valve and inflating a bicycle tire.
4.2. Inflating Other Items (Balls, Swimming Rings, etc.)
- Select Adapter: Choose the appropriate adapter (ball needle or inflation cone) from the included accessories.
- Attach Adapter: Screw the chosen adapter into the appropriate opening of the T-shaped nozzle.
- Insert Adapter: Insert the adapter into the item's inflation port.
- Inflate: Pump until the item is firm. Use caution to avoid over-inflation.
- Remove Adapter: Carefully remove the adapter and store it with the pump.
Demonstration Video:
Video 4.2: Official product video demonstrating the features and operation of the WEST Biking Bicycle Floor Pump, including its self-rebound design and T-shaped valve compatibility.
5. Maintenance
- Cleaning: Wipe the pump body and hose with a damp cloth after use. Avoid harsh chemicals.
- Storage: Store the pump in a dry, cool place, away from direct sunlight and extreme temperatures. Use the bottom buckle to secure the hose and valve head for compact storage.
- Lubrication: Periodically check the pump's piston for smooth operation. If resistance is felt, a small amount of silicone-based lubricant can be applied to the piston rod.
- Hose Inspection: Regularly inspect the hose for cracks or damage. Replace if necessary to maintain optimal performance.
6. Troubleshooting
| Problem | Possible Cause | Solution |
|---|---|---|
| Air leaks from valve connection. | Nozzle not securely attached or valve stem damaged. | Ensure the nozzle is tightly screwed onto the valve stem. Check the valve stem for damage. |
| Pump feels stiff or difficult to operate. | Lack of lubrication or internal debris. | Apply a small amount of silicone-based lubricant to the piston rod. Clean any visible debris. |
| Pressure gauge not showing reading. | Nozzle not properly sealed or gauge malfunction. | Re-attach the nozzle securely. If the problem persists, contact customer support. |
| Pump not inflating. | Valve not open (Presta) or internal seal issue. | For Presta valves, ensure the valve cap is unscrewed and the valve is open. Check for any blockages in the hose or nozzle. |
7. Specifications
- Brand: West Biking
- Model Number: LZJYP0711023-JYO2
- Material: Aluminum Alloy
- Maximum Pressure: 260 PSI (Pound per Square Inch)
- Air Flow Capacity: 235 Cubic Centimeters Per Minute
- Pressure Gauge Range: 0-140 PSI (Metal HD Gauge)
- Hose Length: 86cm (34.65 Inches)
- Valve Compatibility: Presta & Schrader (T-shaped dual nozzle)
- Item Weight: 332 Grams
- Power Source: Manual
8. Warranty and Support
For warranty information or technical support, please contact WEST Biking customer service through their official website or the retailer where the product was purchased. Please have your model number (LZJYP0711023-JYO2) and purchase date available when contacting support.
For more information, visit the official West Biking Store.