ENRIPRT M03-16
ENRIPRT 16 Lines Laser 360 Level User Manual
Model: M03-16
1. Introduction
The ENRIPRT 16 Lines Laser 360 Level is a professional-grade 4D green cross line laser designed for precise leveling and alignment in various construction and home improvement projects. It features 2x360° horizontal and 2x360° vertical planes, offering comprehensive coverage for floors, walls, and ceilings. This manual provides essential information for safe and effective operation of your laser level.

Image: The ENRIPRT 16 Lines Laser 360 Level, showcasing its compact design and the various accessories included in the package, such as the magnetic bracket, mini tripod, and remote control.
2. Product Features
- 4x360° Full Layout: Two 360° horizontal and two 360° vertical laser planes provide complete room coverage for precise alignment.
- High Visibility Green Laser: Utilizes green diode technology, offering 4x brightness compared to red beams for enhanced visibility indoors and outdoors.
- High Accuracy: Achieves an accuracy of ±1/10 inch at 8 feet, with a maximum working distance of up to 100 feet.
- Self-Leveling Mode: Automatically levels within ±4° when the pendulum is unlocked. The laser will flash if out of self-leveling range.
- Manual Mode: Allows projection of laser lines at any angle by holding the "OUTDOOR" button for 3 seconds, suitable for sloped applications.
- Remote Control: Enables convenient operation and adjustment of laser lines from a distance.
- Multiple Installation Methods: Equipped with 1/4" mounting thread for tripods, and includes a magnetic bracket, mini tripod, lifting base, and 3/8" adapter for versatile placement.
- Dual Rechargeable Batteries: Comes with two 2400mAh Li-ion batteries, providing up to 8 hours of continuous operation with all 16 lines active.
- Durable Design: IP54 waterproof and dustproof rating ensures reliable performance in challenging working conditions.

Image: Close-up view highlighting the green laser technology, which provides superior brightness and visibility compared to traditional red lasers.

Image: The laser level demonstrating its IP54 rating, indicating resistance to water splashes and dust, suitable for various job site environments.
3. Safety Information
Please read and understand all safety instructions before operating the device. Failure to follow these instructions may result in laser radiation exposure, electric shock, fire, and/or serious injury.
- Laser Safety: This product is a Class 2 laser product (<1mW power output). Do not stare directly into the laser beam. Avoid direct eye exposure.
- Children: Keep the device out of reach of children.
- Operating Environment: Do not operate the laser level in explosive atmospheres, such as in the presence of flammable liquids, gases, or dust.
- Maintenance: Do not attempt to modify or disassemble the laser level. Repairs should only be performed by qualified personnel.
- Battery Safety: Use only the specified charger and batteries. Do not short-circuit, incinerate, or expose batteries to high temperatures.
4. Package Contents
Verify that all items listed below are present and in good condition upon opening the package:
- 1x 16 Lines Laser Level Tool
- 1x Carry Bag
- 1x Power Charger
- 2x 2400mAh Li-ion Batteries
- 1x 1/4" Thread Mount
- 1x 5/8-20" Thread Mount
- 1x Wall Panel
- 1x User Manual (this document)
- 1x Remote Control
- 1x Green Target Plate
- 1x Wall Bracket
- 1x Lifting Platform
- 1x Mini Tripod
- 1x 3/8" Adapter

Image: A visual representation of all items included in the product package, neatly arranged, confirming the complete set of accessories.
5. Setup and Installation
5.1 Battery Installation
- Locate the battery compartment on the laser level.
- Insert one of the provided 2400mAh Li-ion batteries, ensuring correct polarity.
- Close the battery compartment securely.
- Charge the battery using the provided charger before first use.
5.2 Mounting Options
The laser level offers several mounting options for various applications:
- Mini Tripod: Attach the laser level to the included mini tripod for stable placement on flat surfaces.
- Lifting Platform: Use the lifting platform for fine height adjustments when placing the laser level on the floor or a workbench.
- Magnetic Bracket: Secure the laser level to metallic surfaces using the magnetic bracket. This bracket also allows for precise rotational and vertical adjustments.
- Wall Panel: Mount the wall panel to a non-metallic surface, then attach the magnetic bracket to the panel.
- Standard Tripod: The laser level features a 1/4" mounting thread, compatible with most standard camera or laser tripods (not included). Use the 3/8" adapter if your tripod requires it.

Image: Demonstrates various ways to mount the laser level, including attachment to a wall using the magnetic bracket for accurate adjustment, and placement on a mini tripod.
6. Operating Instructions
6.1 Powering On/Off
- To power on, slide the main switch to the "ON" position.
- To power off, slide the main switch to the "OFF" position.
6.2 Self-Leveling Mode
This mode is ideal for applications requiring perfectly level or plumb lines.
- Ensure the laser level is placed on a relatively flat surface.
- Slide the main switch to the "ON" position. The pendulum will unlock, and the device will self-level within ±4°.
- If the device is outside its self-leveling range, the laser lines will flash continuously, indicating it needs to be adjusted to a more level position.
- Press the "H" button on the device or remote control to toggle horizontal lines.
- Press the "V" button on the device or remote control to toggle vertical lines.

Image: The laser level projecting horizontal and vertical lines in self-leveling mode, demonstrating its use for accurately hanging pictures on a wall.
6.3 Manual Mode (Tilt Mode)
Use this mode when you need to project lines at a specific angle, such as for stair railings or decorative patterns.
- With the device powered on, press and hold the "OUTDOOR" button (middle button) for 3 seconds. The laser lines will stop flashing (if they were) and will be locked, allowing you to tilt the device to any desired angle.
- The laser lines will remain active at the set angle.
- To exit manual mode, press and hold the "OUTDOOR" button again for 3 seconds, or power off the device.

Image: The laser level mounted on a tripod and tilted, demonstrating its manual mode capability to project angled lines, useful for applications like stair railings.
6.4 Brightness Adjustment
The laser level features stepless dimming for adjusting the brightness of the laser lines.
- While the laser is active, use the brightness adjustment controls (refer to the device's interface or remote control) to increase or decrease the intensity of the laser lines. This helps optimize visibility in different lighting conditions.
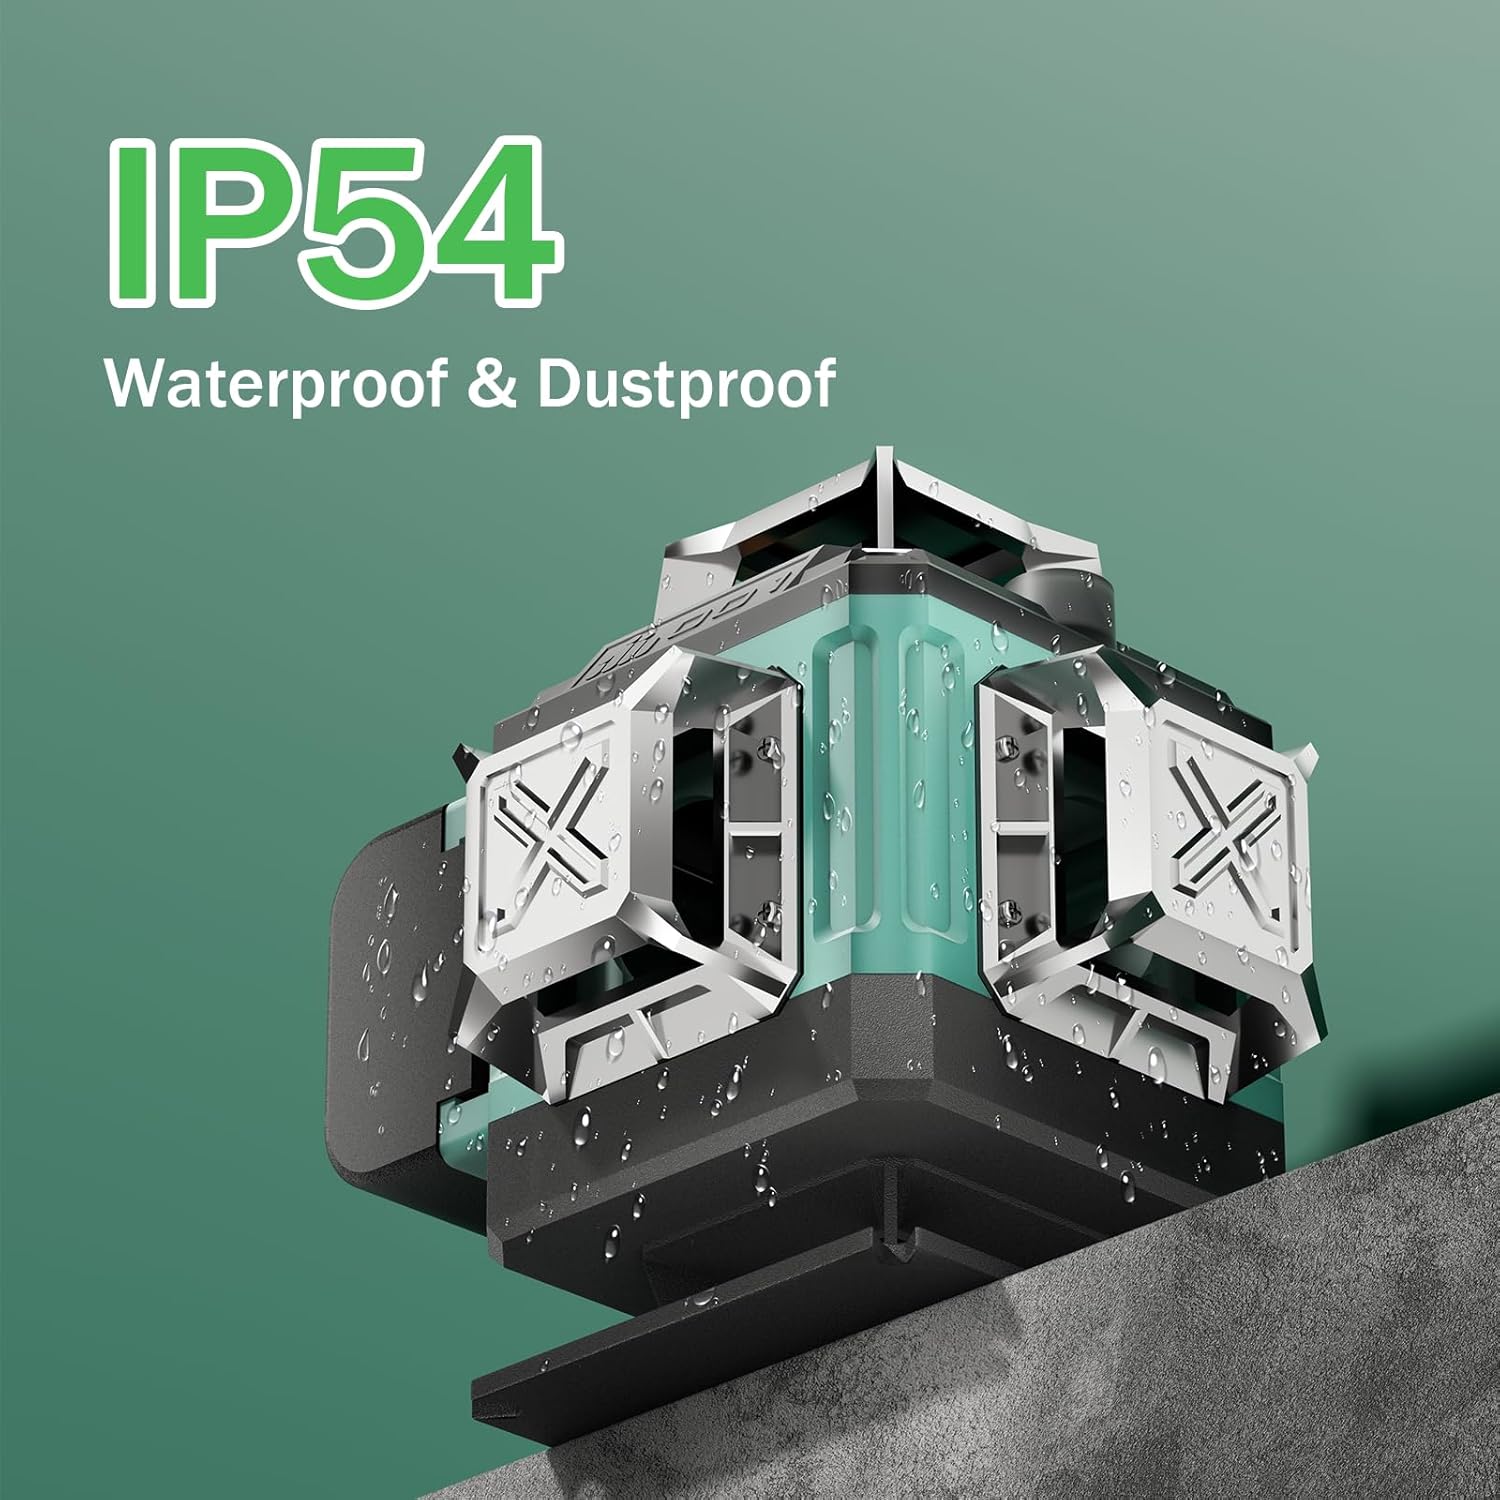
Image: The laser level with its remote control, illustrating the ability to adjust laser line brightness for optimal visibility in various indoor and outdoor settings.
6.5 Remote Control Operation
The remote control allows for convenient operation from a distance.
- H/A Button: Toggles horizontal laser lines.
- V/L Button: Toggles vertical laser lines.
- */U Button: Activates manual mode (hold for 3 seconds) or outdoor mode.
Image: A close-up of the remote control, showing its buttons for controlling horizontal and vertical laser lines, and activating special modes.
7. Maintenance
- Cleaning: Clean the laser level with a soft, damp cloth. Do not use harsh chemicals or abrasive cleaners. Ensure the laser windows are clean for optimal performance.
- Storage: When not in use, store the laser level in its carry bag in a dry, cool place, away from direct sunlight and extreme temperatures.
- Battery Care: If storing for extended periods, remove the batteries. Recharge batteries periodically to maintain their lifespan.
- Calibration: While the device is self-calibrating within its range, if you suspect a significant deviation, consult professional calibration services.
8. Troubleshooting
| Problem | Possible Cause | Solution |
|---|---|---|
| Laser lines are flashing rapidly. | The device is outside its self-leveling range (more than ±4° tilt). | Place the laser level on a more level surface or adjust its position until the flashing stops. |
| No laser lines are projected. | Battery is low or depleted; Device is not powered on; Laser lines are turned off. | Charge or replace the battery; Ensure the main switch is "ON"; Press "H" or "V" buttons to activate lines. |
| Laser lines are dim or hard to see. | Low brightness setting; Bright ambient light; Dirty laser window. | Adjust brightness using controls; Use the green target plate; Clean the laser window with a soft cloth. |
| Remote control is not working. | Remote control battery is low; Obstruction between remote and device; Remote is too far. | Replace remote control battery; Ensure clear line of sight; Operate within effective range. |
| Inaccurate measurements. | Device is not properly leveled (in self-leveling mode); Device is in manual mode when self-leveling is required. | Ensure the device is within self-leveling range (no flashing); Switch to self-leveling mode if needed. |
9. Specifications
| Brand | ENRIPRT |
| Model Number | M03-16 |
| Laser Class | Class 2 (<1mW) |
| Laser Color | Green |
| Laser Lines | 16 Lines (2 Horizontal, 2 Vertical 360°) |
| Accuracy | ±1/10 inch at 8 feet |
| Working Distance | Up to 100 feet |
| Self-Leveling Range | ±4° |
| IP Rating | IP54 (Waterproof/Dustproof) |
| Power Source | 2x 2400mAh Li-ion Batteries (included) |
| Operation Mode | Automatic (Self-Leveling) / Manual |
| Material | Alloy Steel, Aluminum, Metal |
| Item Weight | 4.16 pounds (1.89 Kilograms) |
| Package Dimensions | 10.79 x 9.88 x 6.57 inches |
10. Warranty and Support
For warranty information, technical support, or service inquiries, please refer to the contact information provided with your product packaging or visit the official ENRIPRT website. Keep your purchase receipt as proof of purchase for warranty claims.
Related Documents - M03-16
 |
HILDA Laser Level Instruction Manual - Green Beam, Self-Leveling Comprehensive user manual for HILDA laser levels, detailing features, operation, and safety for 12 and 16-line green beam self-leveling models. |
 |
LASER LEVEL METER 3D-4D MAX LIGHT User Manual and Instructions Comprehensive user manual and instructions for the LASER LEVEL METER 3D-4D MAX LIGHT, detailing specifications, operation, safety precautions, maintenance, and troubleshooting. |
 |
Elikliv 16 Lines Laser Level User Manual - Operation and Calibration Guide Comprehensive user manual for the Elikliv 16 Lines Laser Level. Covers device composition, line control, self-leveling and manual modes, battery charging, technical specifications, safety warnings, daily maintenance, troubleshooting common problems, and detailed accuracy calibration methods. |
 |
HIPROLEVEL MG30-4D Mini Laser Level User Manual User manual for the HIPROLEVEL MG30-4D Professional Mini Laser Level, detailing product introduction, operation guides, technical parameters, features, and safety warnings. |
 |
Shenjiang FC-818G 4D Laser Level: Professional Instruction Manual This manual provides detailed instructions for the Shenjiang FC-818G 4D Laser Level, a professional tool featuring 360° high precision, 16 lines, and automatic leveling. Learn about product specifications, operation, maintenance, safety guidelines, and troubleshooting. Includes FCC compliance information. |
 |
iKOVWUK B1-16 Laser Level User Manual This user manual provides comprehensive instructions for the iKOVWUK B1-16 Laser Level. It covers essential safety precautions, detailed product information, operating modes, maintenance guidelines, technical specifications, package contents, and warranty details to ensure proper and safe use of the device. |
Ask a question about this manual
Ask about setup, troubleshooting, compatibility, parts, safety, or missing instructions. Manuals+ will review the question and use this page’s manual context to help answer it.