1. Introduction
Thank you for choosing the LENVII R800 Portable 2D Barcode Scanner. This device is designed for efficient and versatile barcode scanning, supporting both 1D and 2D barcodes. It offers multiple connection options including Bluetooth, 2.4G wireless, and wired USB, making it compatible with a wide range of devices and operating systems. This manual provides detailed instructions for setup, operation, and maintenance to ensure optimal performance.

Image 1.1: LENVII R800 Barcode Scanner and included accessories (USB cable, 2.4G wireless receiver).
2. Product Overview
Familiarize yourself with the components and features of your LENVII R800 scanner.
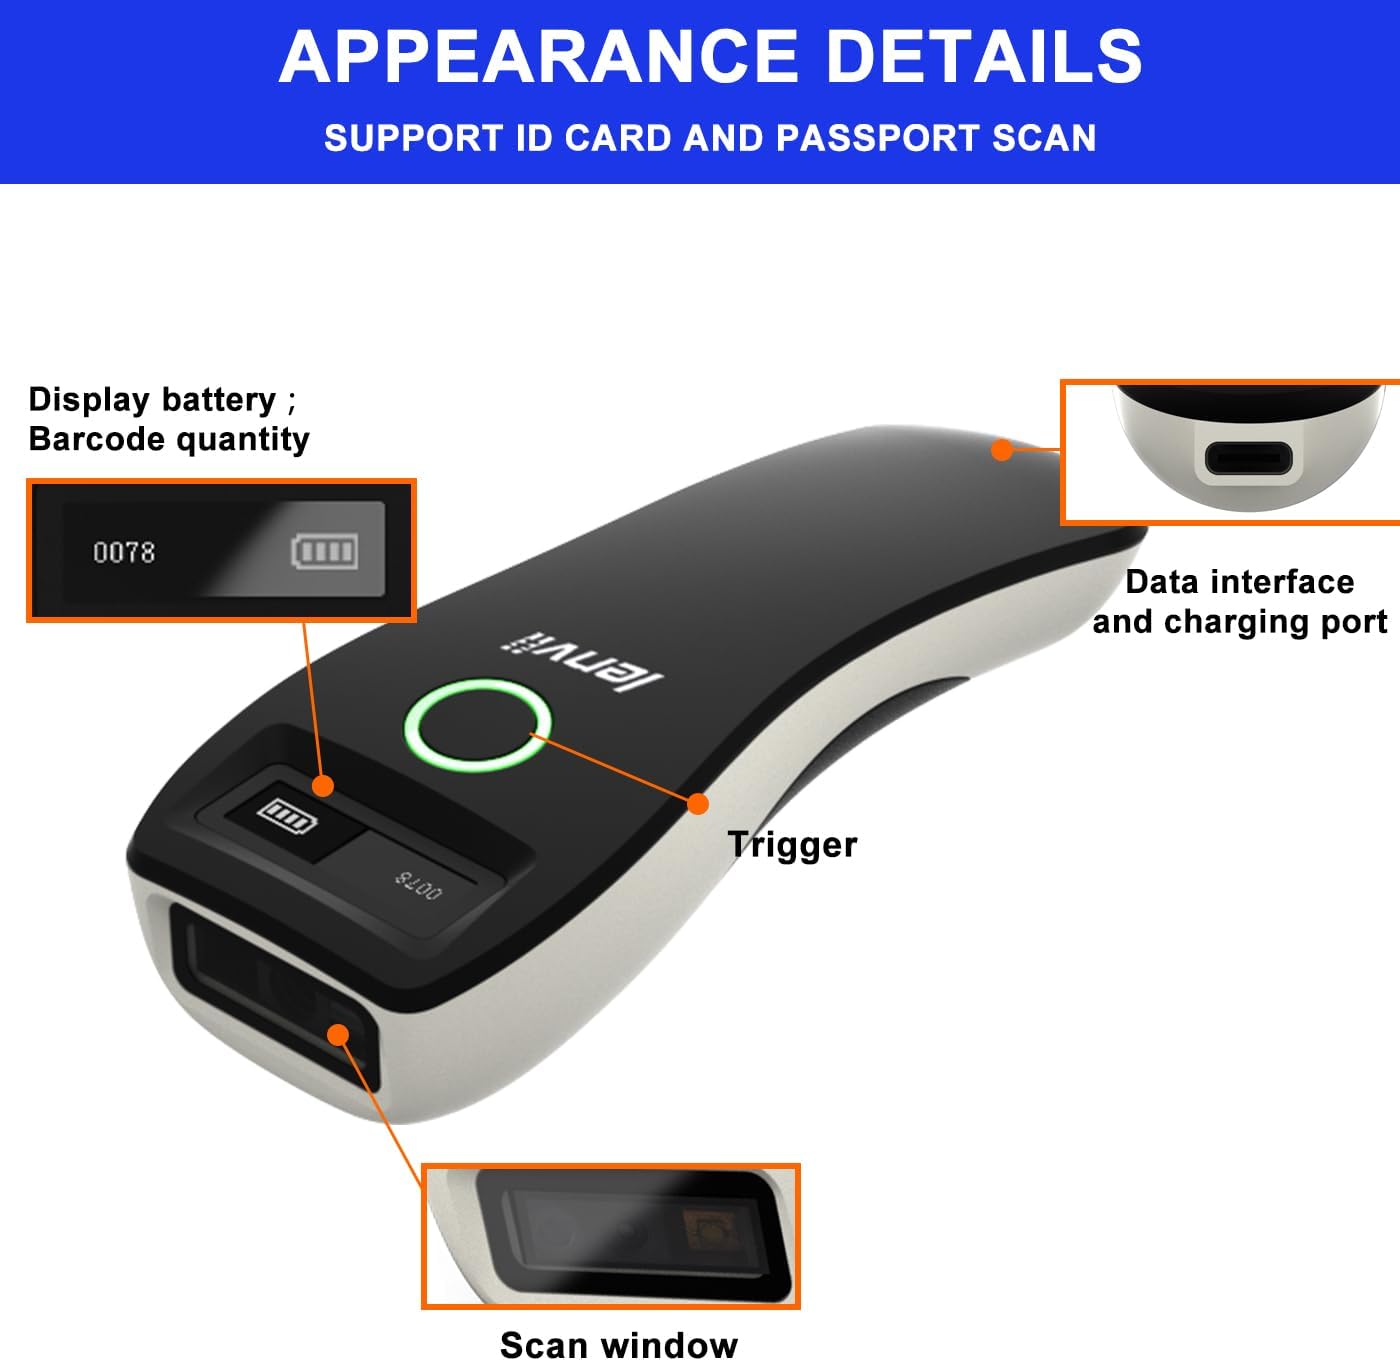
Image 2.1: Detailed view of the LENVII R800 scanner, highlighting the display (battery, barcode quantity), data interface/charging port, trigger button, and scan window.
- Display: Shows battery level and scanned barcode quantity.
- Data Interface/Charging Port: Type-C port for wired connection and charging.
- Trigger: Button to initiate scanning.
- Scan Window: Area through which barcodes are read.
3. Setup
3.1 Charging the Scanner
Before first use, fully charge the scanner. Connect the provided Type-C USB cable to the scanner's charging port and the other end to a USB power source (e.g., computer USB port, USB wall adapter). The charging indicator light will show the charging status.
The scanner is equipped with a 1500mAh rechargeable lithium battery.
3.2 Connection Modes
The LENVII R800 offers three connection methods:

Image 3.1: Illustration of the three connection modes: 2.4GHz Wireless, USB Wired, and Bluetooth.
3.2.1 2.4G Wireless Connection
- Insert the 2.4G wireless receiver into a USB port on your computer or host device.
- Turn on the scanner. It should automatically connect to the receiver.
- A successful connection is indicated by a specific sound or light on the scanner.
3.2.2 Bluetooth Connection
- Turn on the scanner.
- Activate Bluetooth on your host device (e.g., smartphone, tablet, laptop).
- Scan the Bluetooth pairing barcode (usually found in the full manual or quick start guide). The scanner will enter pairing mode.
- On your host device, search for Bluetooth devices and select "LENVII R800" (or similar name) to pair.
- A successful connection is indicated by a specific sound or light on the scanner.
3.2.3 Wired Connection
- Connect the scanner to your computer using the provided Type-C USB cable.
- The scanner will function as a wired device and also charge simultaneously.
- No additional drivers are typically required for this plug-and-play connection.
3.3 Compatibility
The LENVII R800 scanner is compatible with various operating systems and devices:
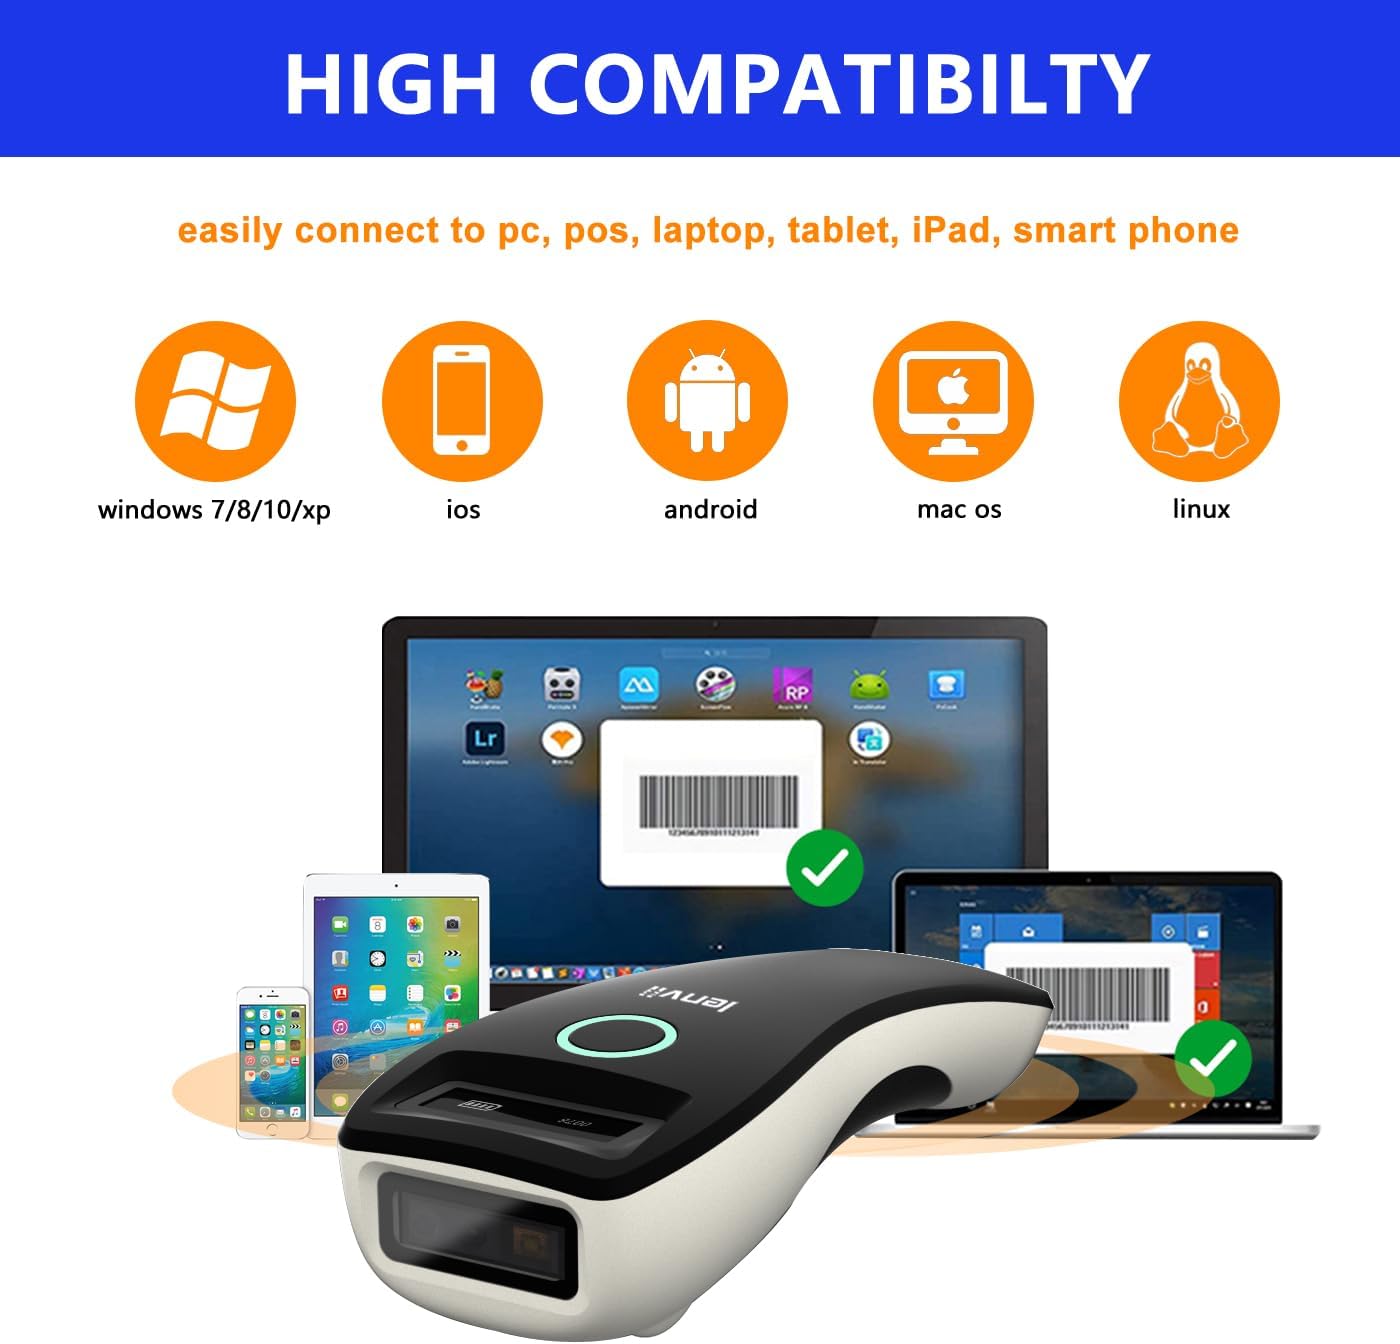
Image 3.2: Compatibility icons for Windows, iOS, Android, Mac OS, and Linux, indicating broad device support.
- Operating Systems: Windows XP/7/8/10, Mac OS, Windows Mobile, Android OS, iOS, Linux.
- Devices: Laptops, PCs, mobile phones, tablets, iPhones, iPads, POS systems.
4. Operating Instructions
4.1 Basic Scanning
- Ensure the scanner is powered on and connected to your host device via your preferred method.
- Open an application on your host device where you want the scanned data to appear (e.g., a text editor, spreadsheet, or inventory software).
- Point the scan window of the scanner at the barcode.
- Press the trigger button. A successful scan will be indicated by a beep and/or a light confirmation.
- The scanned data will be transmitted to your host device.
4.2 Data Transfer Modes
The scanner supports two data upload modes:

Image 4.1: Depiction of Instant Upload Mode (data sent immediately) and Offline Storage Mode (data stored for later upload).
- Instant Upload Mode: Barcodes are transmitted to the connected device immediately after scanning. This is the default mode.
- Storage Mode (Offline Mode): Barcodes are stored in the scanner's internal memory (up to 35,000 EAN 13 codes) and can be uploaded later. This mode is useful when working out of range of the host device. To switch to storage mode and upload data, refer to the full programming manual for specific barcode commands.
4.3 Supported Barcode Types
The LENVII R800 is capable of scanning a wide array of 1D and 2D barcode symbologies:
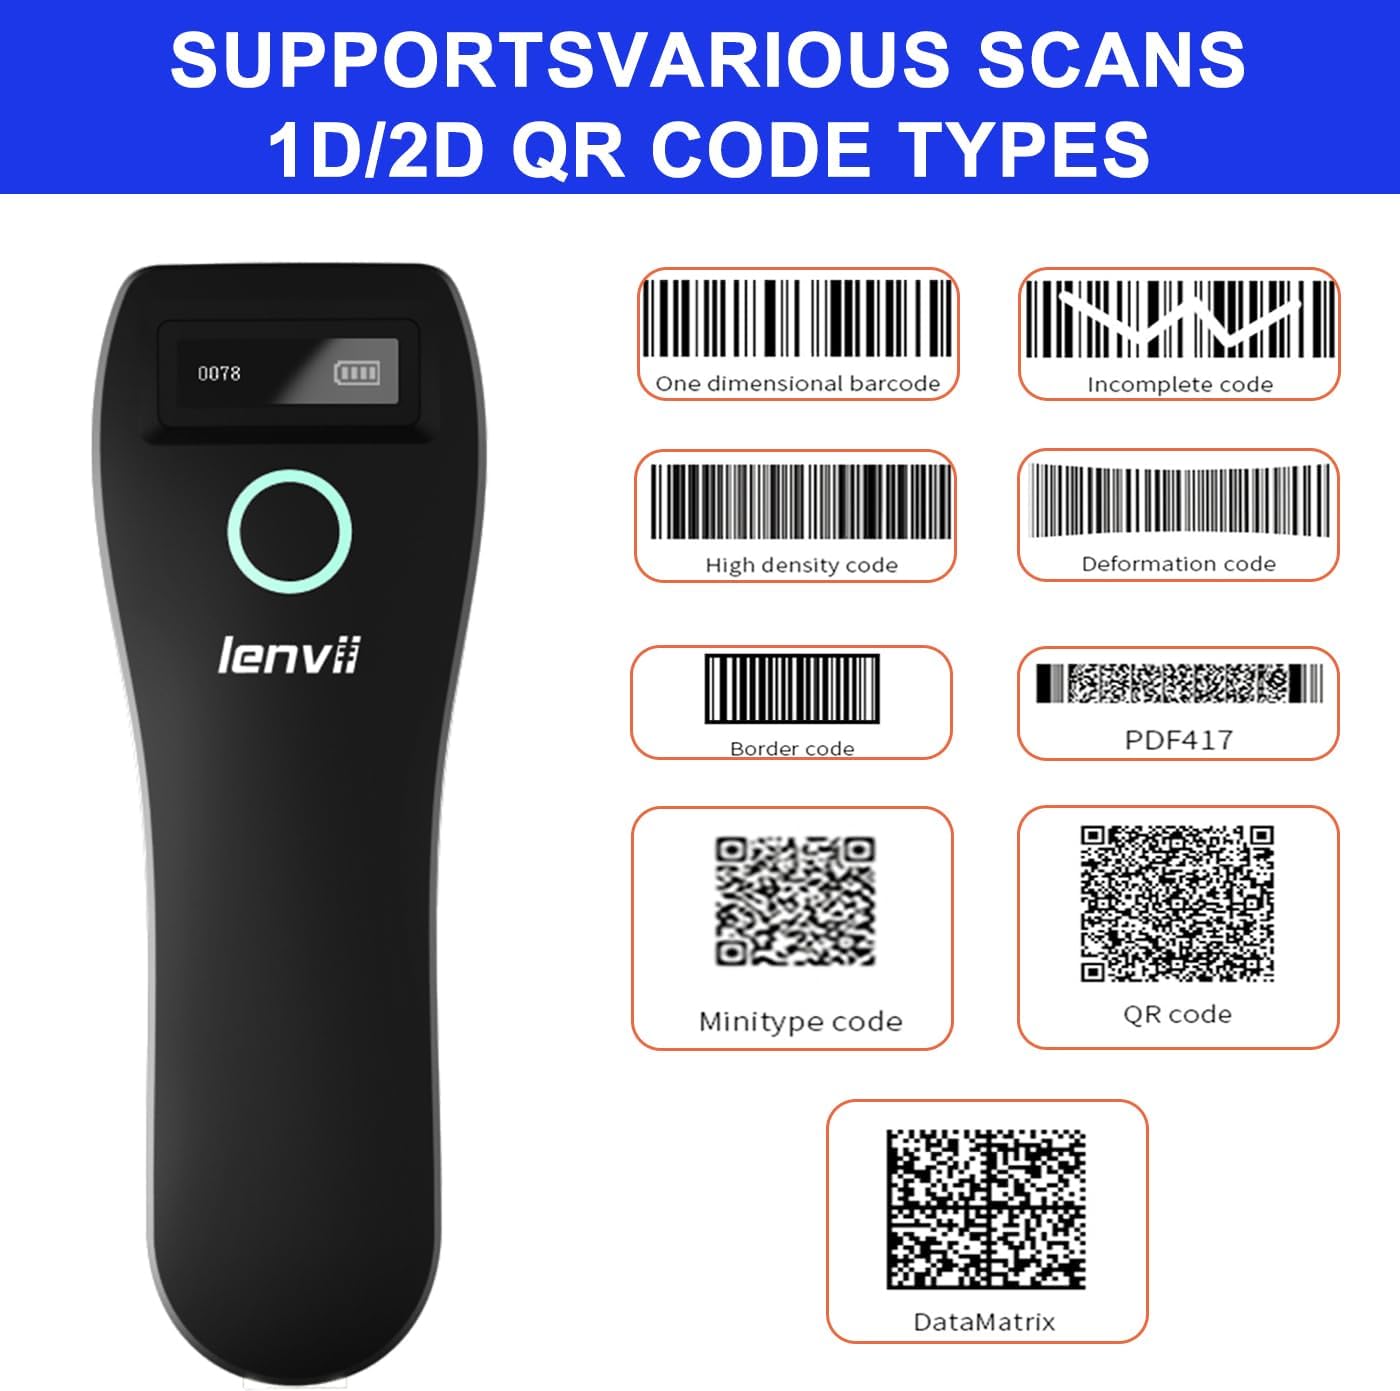
Image 4.2: Examples of supported barcode types including 1D (e.g., Code 39, Code 128) and 2D (e.g., QR Code, Data Matrix, PDF417).
- 1D Barcodes: UPC/EAN/JAN, UPC-A, UPC-E, EAN-8, EAN-13, JAN-8, JAN-13, ISBN/ISSN, Code 39 (with full ASCII), Codabar (NW7), Code 128 & EAN 128, Code 93, Interleaved 2 of 5 (ITF), Appendix 2 of 5 IATA code, MSI/Plessy, Chinese postal code, Code 32 (Italian Pharmacopoeia), RSS 14, RSS Limited, RSS Extension.
- 2D Barcodes: QR Code, Data Matrix, PDF417, Aztec, Maxicode, GS1 DataBar Stack.
4.4 Ergonomics and Portability
The LENVII R800 is designed for comfortable, one-handed operation and easy portability, making it suitable for various mobile business applications.
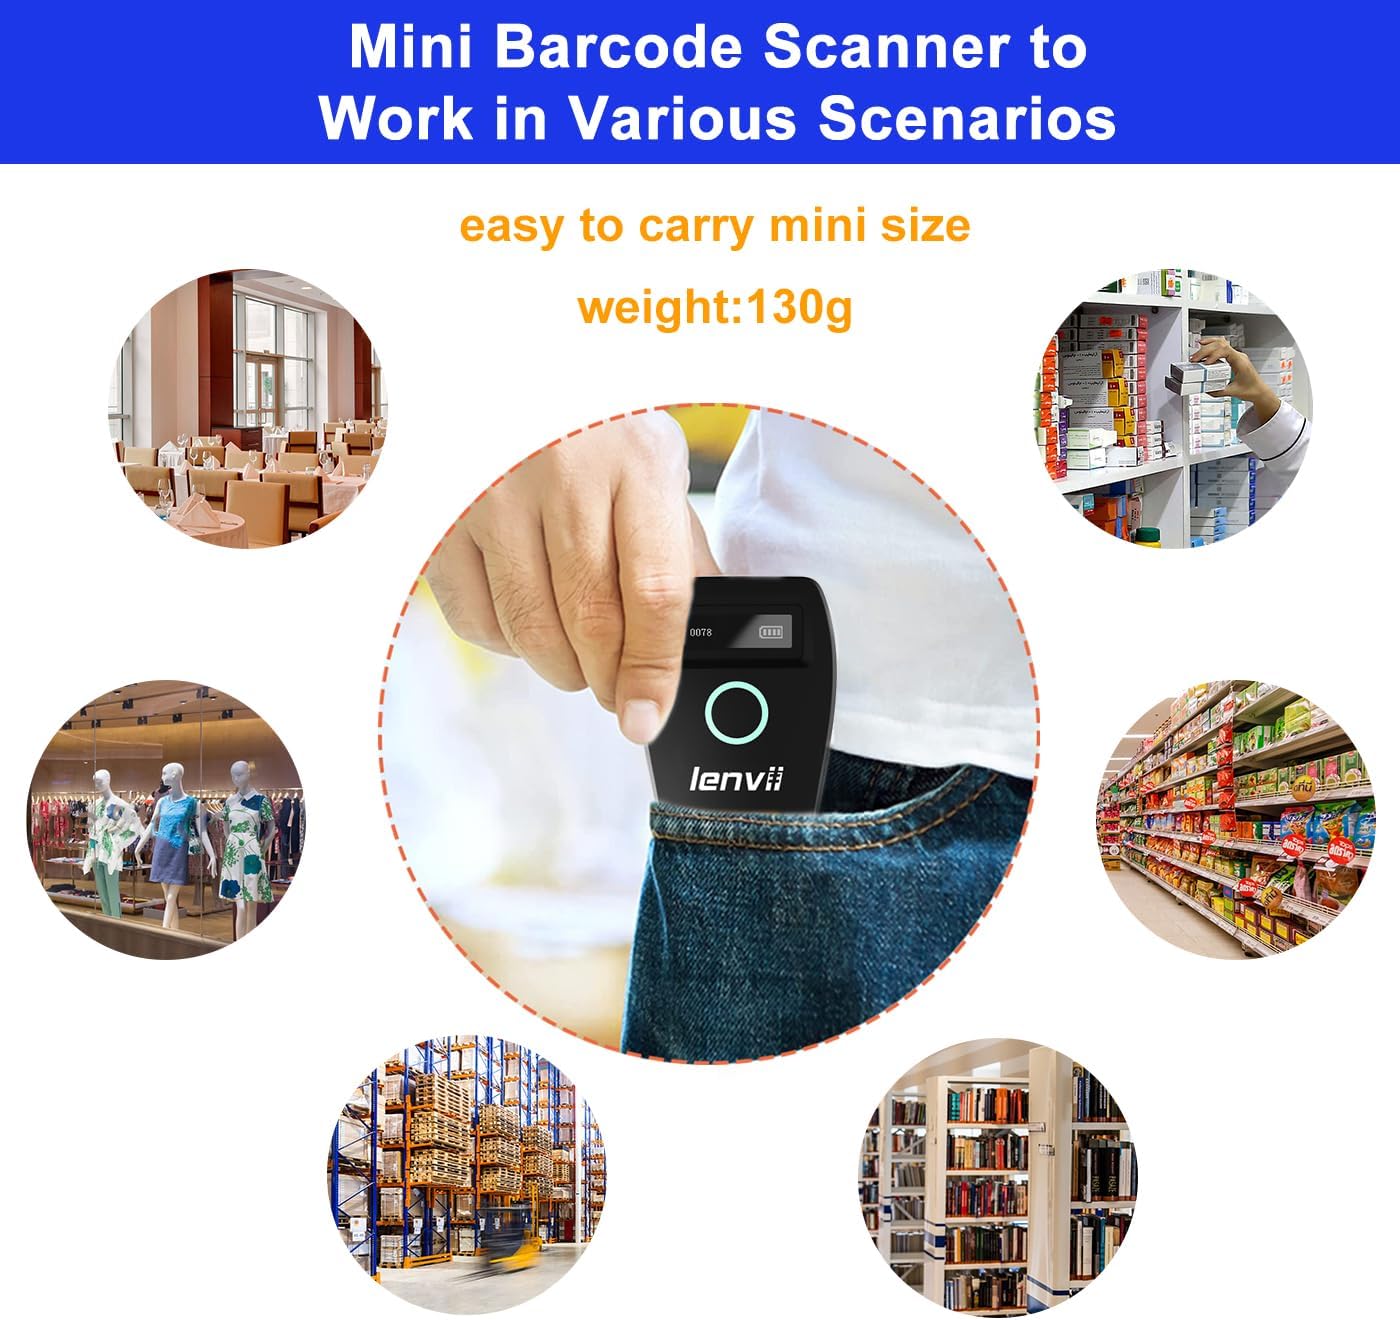
Image 4.3: The compact LENVII R800 scanner shown in different environments, emphasizing its portability and suitability for retail, inventory, and field service.
5. Maintenance
- Cleaning: Use a soft, dry cloth to clean the scanner's exterior. For the scan window, use a soft, lint-free cloth lightly dampened with a mild, non-abrasive cleaner. Avoid harsh chemicals or abrasive materials.
- Storage: Store the scanner in a cool, dry place away from direct sunlight and extreme temperatures.
- Battery Care: To prolong battery life, avoid fully discharging the battery frequently. If storing for an extended period, charge the battery to about 50% and recharge every few months.
- Physical Protection: While designed to withstand drops from 2 meters, avoid unnecessary impacts.
6. Troubleshooting
-
Scanner not powering on:
- Ensure the battery is charged. Connect the scanner to a power source using the Type-C cable.
-
Scanner not connecting to device:
- For 2.4G Wireless: Ensure the USB receiver is properly inserted and the scanner is within range.
- For Bluetooth: Ensure Bluetooth is enabled on your host device, the scanner is in pairing mode, and you have selected the correct device from the Bluetooth list.
- For Wired: Check the USB cable connection. Try a different USB port or cable.
-
Scanner not reading barcodes:
- Ensure the barcode is clean, undamaged, and within the scanner's reading range.
- Check if the barcode type is supported by the scanner.
- Ensure there is sufficient lighting on the barcode.
- Clean the scan window if it is dirty.
-
Scanned data not appearing on screen:
- Ensure the scanner is successfully connected to your host device.
- Verify that an active input field or application is open on your host device to receive the data.
- Check if the scanner is in 'Storage Mode'. If so, switch to 'Instant Upload Mode' or upload stored data.
7. Specifications
| Parameter | Detail |
|---|---|
| Image (pixels) | 640 pixels (horizontal) * 480 pixels (vertical) |
| Light Source | Aiming: 617 nm LED; Illumination: 4000K LED |
| Image Sensor | CMOS |
| Scanning Speed | 30 frames per second |
| Filling Depth | 40-200mm @ UPC / EAN13mil PCS = 90%; 20-250mm @ QR 20mil PCS = 100% |
| Scanning Angle | Elevation angle 65°, Tilt angle 30°, Deflection angle 55° |
| Field of View | Horizontal 34°, Vertical 28° |
| Reading Resolution | Exceeds 5 million |
| Print Contrast | Exceeds 25% |
| Visual Indicator | Blue LED light, Red charging light, and Buzzer |
| Communication Modes | 2.4G, Bluetooth BLE4.0, and Type-C (Wired) |
| Communication Distance | 2.4G: 100 meters (open air), Bluetooth: 40 meters (open air) |
| Memory Capacity | Up to 512,000 bits (approx. 35,000 EAN 13 codes) |
| Dimensions (L*W*H) | 135mm * 51mm * 40mm |
| Weight | 104 grams |
| Material | ABS + PC |
| Cable | Type-C cable |
| Input Voltage | 5VDC ±10% |
| Working Current | 400mA |
| Battery | Rechargeable lithium battery 1500mAh |
| Charging Method | Type-C cable charging |
| Drop Durability | Can withstand a drop of 2 meters |
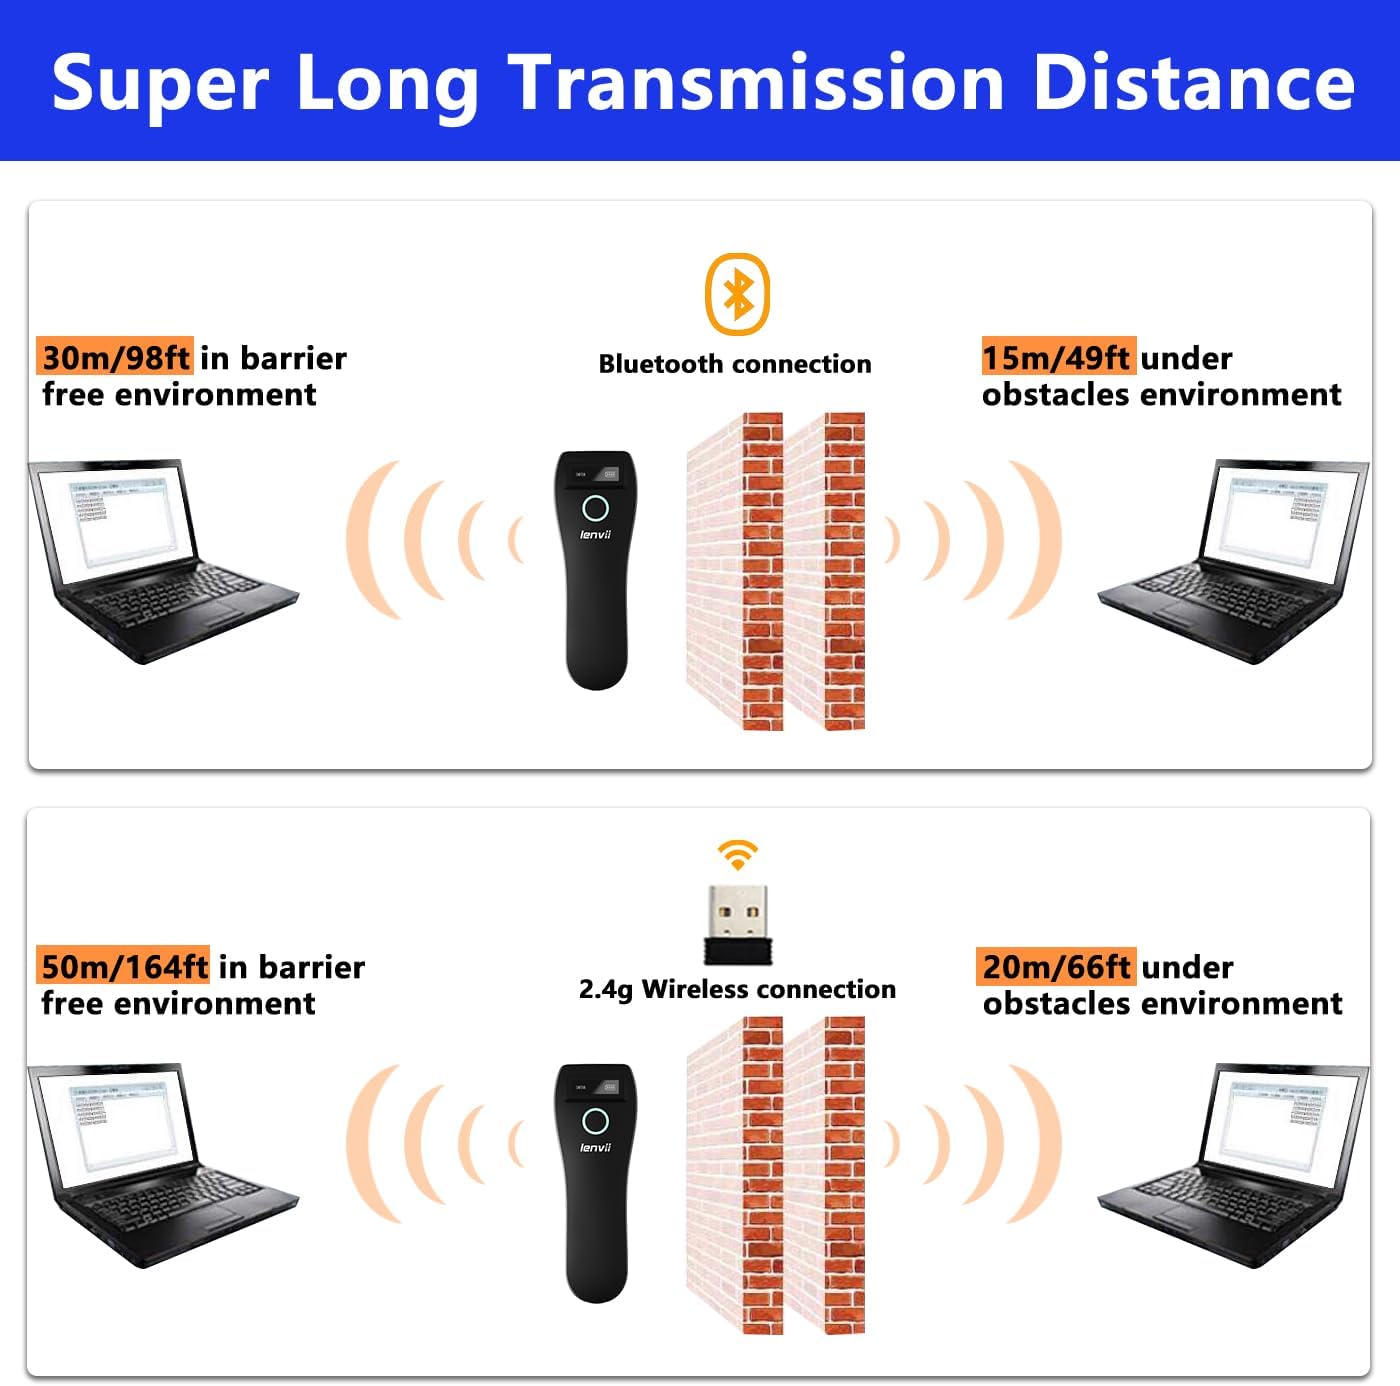
Image 7.1: Comparison of Bluetooth and 2.4G wireless transmission distances in barrier-free and obstacle environments.
8. Warranty and Support
LENVII products are manufactured to high-quality standards. For warranty information, please refer to the documentation included with your purchase or contact your retailer. For technical support or inquiries, please visit the official LENVII website or contact their customer service department.
You can find more information and support resources by visiting the LENVII Store on Amazon.