
1. Introduction and Safety Information
This manual provides essential instructions for the safe and efficient operation, maintenance, and troubleshooting of your Pomya 800-1 Laboratory Centrifuge. Please read this manual thoroughly before operating the device and retain it for future reference.
1.1 Intended Use
The Pomya 800-1 Centrifuge is designed for separating suspensions and liquids, or two liquids with different densities and mutual solubility in emulsions. It is suitable for use in scientific research, educational institutions, and production departments in fields such as biology, chemistry, and medicine, particularly for radioimmunoassay control and the separation of cells and large particles.
1.2 Safety Precautions
- Always operate the centrifuge on a flat, firm, and stable workbench.
- Ensure the work area is clean, dry, and well-ventilated.
- Maintain an ambient temperature between 5°C and 32°C during operation.
- Do not open the centrifuge lid while the rotor is spinning. Wait until the rotor has come to a complete stop.
- Always balance samples evenly in the rotor to prevent vibration and potential damage to the unit or injury.
- Do not operate the centrifuge if it shows any signs of damage or malfunction.
- Ensure the power supply matches the specified voltage (110V for US Plug models).
- Keep hands and loose clothing away from moving parts.
- Disconnect the power cord before cleaning or maintenance.
2. Product Overview
The Pomya 800-1 is a compact benchtop centrifuge featuring intuitive knob controls for time and speed settings. It is designed for small-volume sample separation with a capacity of 6 x 20ml tubes.
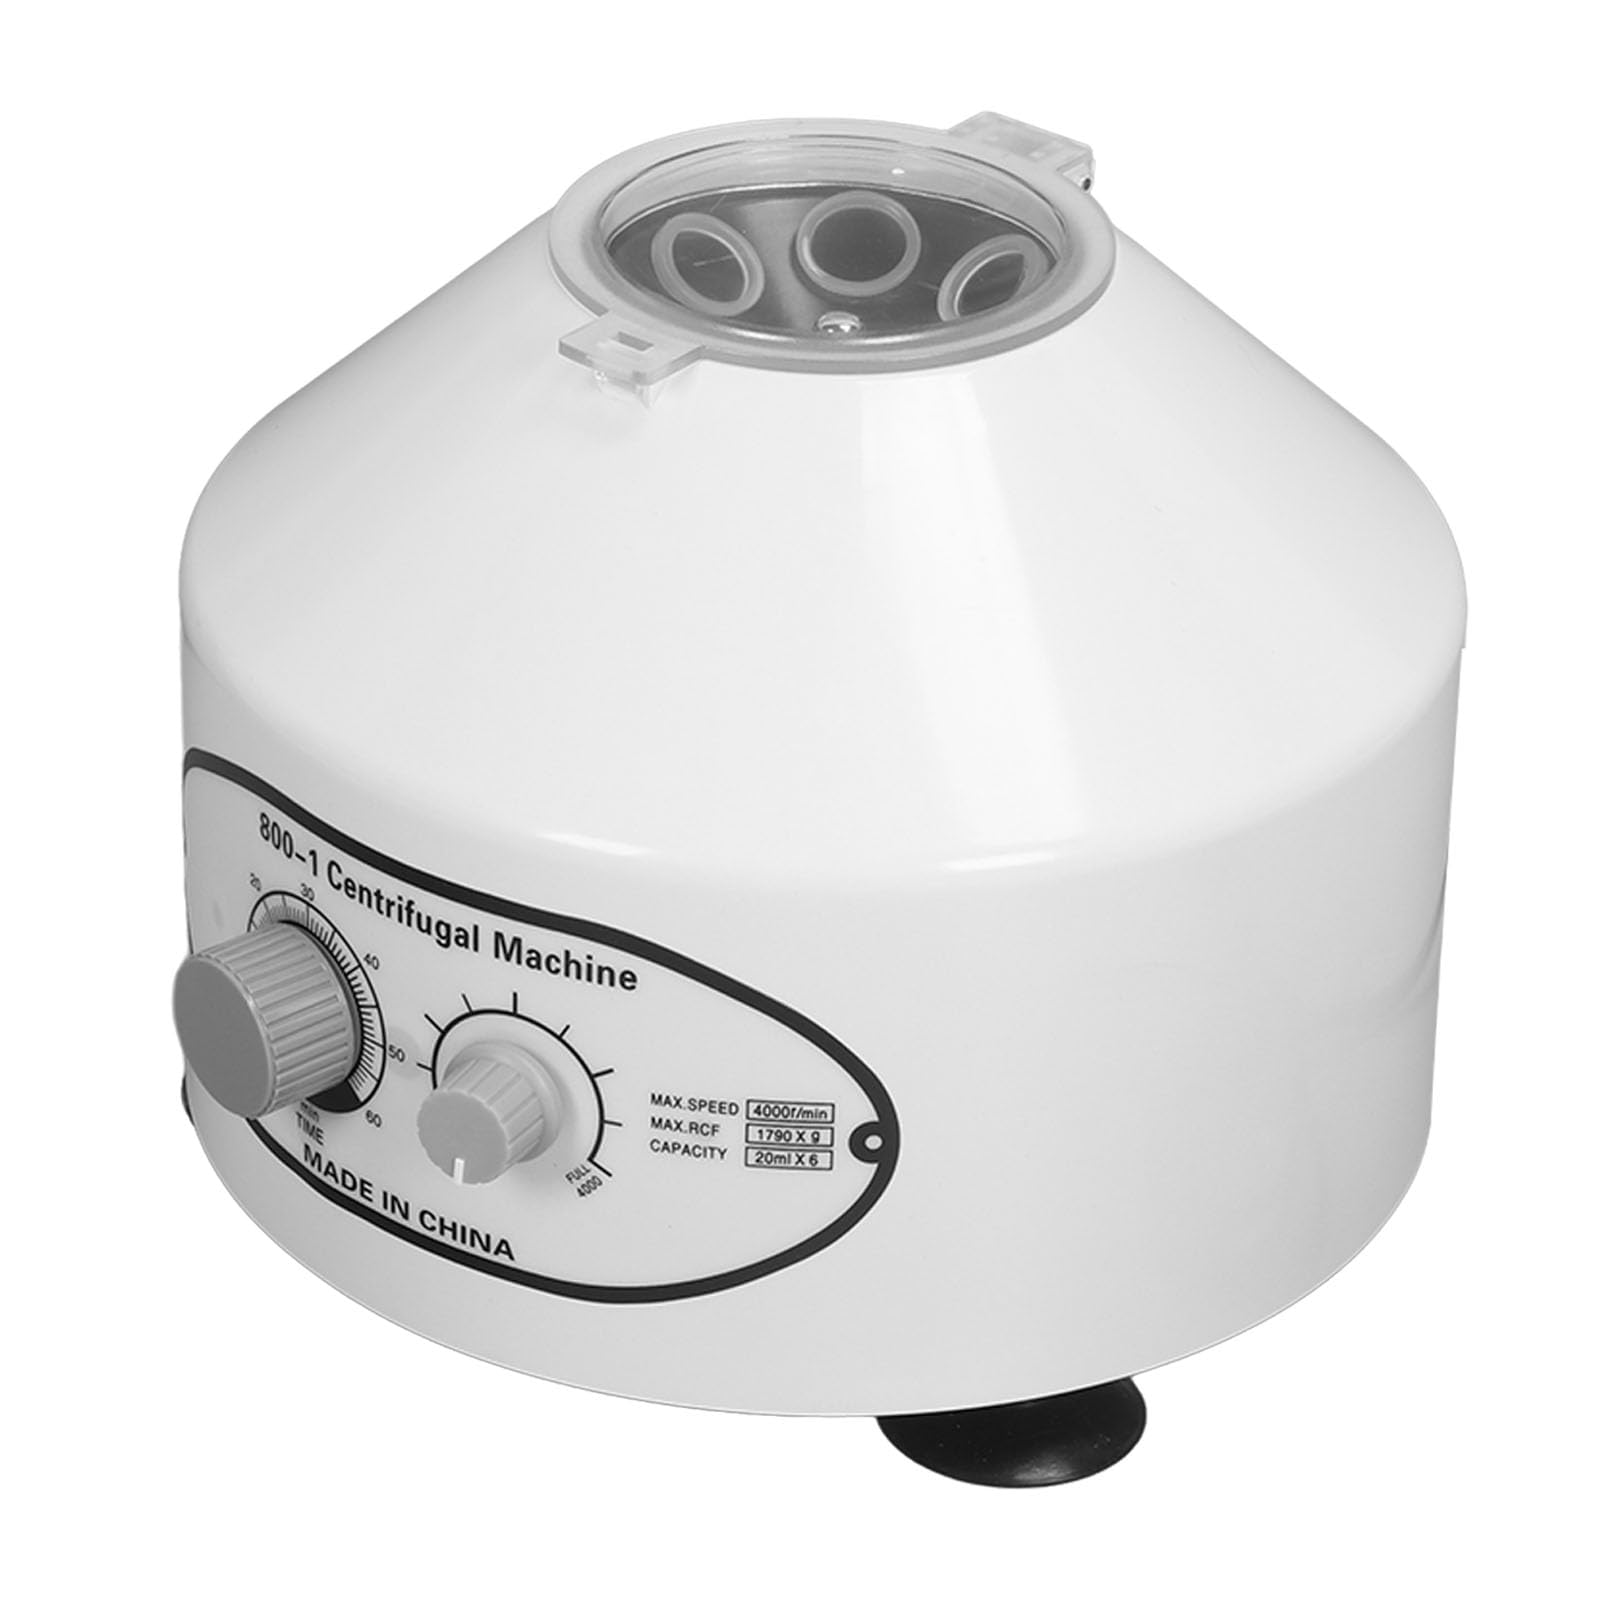
Figure 2.1: Front view of the Pomya 800-1 Laboratory Centrifuge, showing the main unit and control panel.
2.1 Components
- Main Unit: The primary housing containing the motor and control electronics.
- Rotor: Holds up to six 20ml sample tubes.
- Lid: Transparent lid for observing the rotor, with a safety interlock.
- Control Panel: Features two rotating knobs for setting time and speed.
- Non-slip Pads: Three rubber pads on the bottom for stability and vibration reduction.

Figure 2.2: Top view of the centrifuge with the lid open, revealing the 6-place rotor for 20ml tubes.

Figure 2.3: Side view highlighting the control panel with the time (min) and speed (rpm) adjustment knobs.
3. Setup
- Unpacking: Carefully remove the centrifuge from its packaging. Inspect the unit for any signs of damage incurred during transit. Report any damage to your supplier immediately.
- Placement: Place the centrifuge on a flat, firm, and stable workbench. Ensure there is adequate clearance around the unit for ventilation. The work area should be clean, dry, and well-ventilated, with an ambient temperature between 5°C and 32°C.
- Power Connection: Connect the power cord to the centrifuge's power inlet at the rear of the unit. Then, plug the power cord into a grounded 110V AC power outlet. Ensure the power outlet meets the electrical requirements of the centrifuge.

Figure 3.1: Rear view of the centrifuge, illustrating the power cord connection point.
4. Operating Instructions
Follow these steps for safe and effective operation of the centrifuge.
- Prepare Samples: Ensure your samples are in appropriate 20ml centrifuge tubes.
- Load Rotor: Open the centrifuge lid. Carefully place the sample tubes into the rotor slots. It is crucial to balance the rotor by placing tubes of equal weight directly opposite each other. An unbalanced rotor can cause excessive vibration, noise, and potential damage.
- Close Lid: Securely close the centrifuge lid. The centrifuge will not operate if the lid is not properly closed.
- Set Time: Use the 'MIN TIME' knob on the control panel to set the desired centrifugation duration. The timer range is 0-60 minutes. For continuous operation, set the knob to the 'Normally Open' position (often indicated by 'ON' or a similar symbol beyond 60 minutes).
- Set Speed: Use the 'MAX SPEED' knob to set the desired rotational speed. The speed range is 0-4000 rpm.
- Start Centrifugation: The centrifuge will start automatically once the time and speed are set and the lid is closed.
- Monitor Operation: Observe the centrifuge during operation for any unusual vibrations or noises. If any occur, stop the unit immediately.
- Stop and Unload: Once the set time has elapsed, the centrifuge will automatically stop. Wait for the rotor to come to a complete standstill before opening the lid. Carefully remove your samples.
5. Maintenance
Regular maintenance ensures the longevity and optimal performance of your centrifuge.
- Cleaning: Disconnect the power cord before cleaning. Wipe the exterior surfaces of the centrifuge with a soft, damp cloth. For spills, use a mild detergent solution. Do not use abrasive cleaners or solvents that could damage the plastic or painted surfaces. Ensure no liquid enters the motor or electrical components.
- Rotor Care: Clean the rotor and tube slots regularly to prevent accumulation of dust or sample residue. Ensure the rotor is dry before reuse.
- Inspection: Periodically inspect the power cord for any signs of damage. Check the non-slip pads for wear. Ensure the lid closes securely.
- Storage: When not in use for extended periods, store the centrifuge in a clean, dry, and dust-free environment.
6. Troubleshooting
If you encounter issues with your centrifuge, refer to the following common problems and solutions.
| Problem | Possible Cause | Solution |
|---|---|---|
| Centrifuge does not start |
|
|
| Excessive vibration or noise |
|
|
| Rotor does not reach set speed |
|
|
| Timer not functioning correctly |
|
|
If the problem persists after attempting these solutions, please contact customer support.
7. Specifications
| Model Number | 800-1 |
| Motor Power | 25W |
| Speed Range | 0-4000 rpm |
| Rotor Capacity | 6 x 20ml |
| Time Range | 0-60 minutes (with normally open option) |
| Maximum Relative Centrifugal Force (RCF) | 1790xg |
| Product Dimensions (L x W x H) | 11.42 x 11.42 x 10.24 inches (29 x 29 x 26 cm) |
| Power Supply | 110V (US Plug) |
| Structure Type | Desktop |
| Layout | Vertical |
| Automation | Fully Automatic |
8. Warranty and Support
For warranty information or technical support, please refer to the documentation provided at the time of purchase or contact your supplier. Ensure you have your product model number (800-1) and purchase details available when seeking assistance.