
1. Introduction
The ESSISH XH-W3002 is a versatile digital thermostat designed for precise temperature control across various applications. It features a clear LED display and simple button controls for setting desired temperature parameters. This manual provides detailed instructions for its installation, operation, and maintenance.

Figure 1: Various applications for the XH-W3002 Digital Thermostat, including industrial heating systems, chick incubators, plant seedling cultivation, and refrigeration units.
2. Product Overview
The XH-W3002 is a compact temperature controller with an integrated LED display, control buttons, and a waterproof NTC temperature probe. It is available in different voltage versions to suit various power requirements.
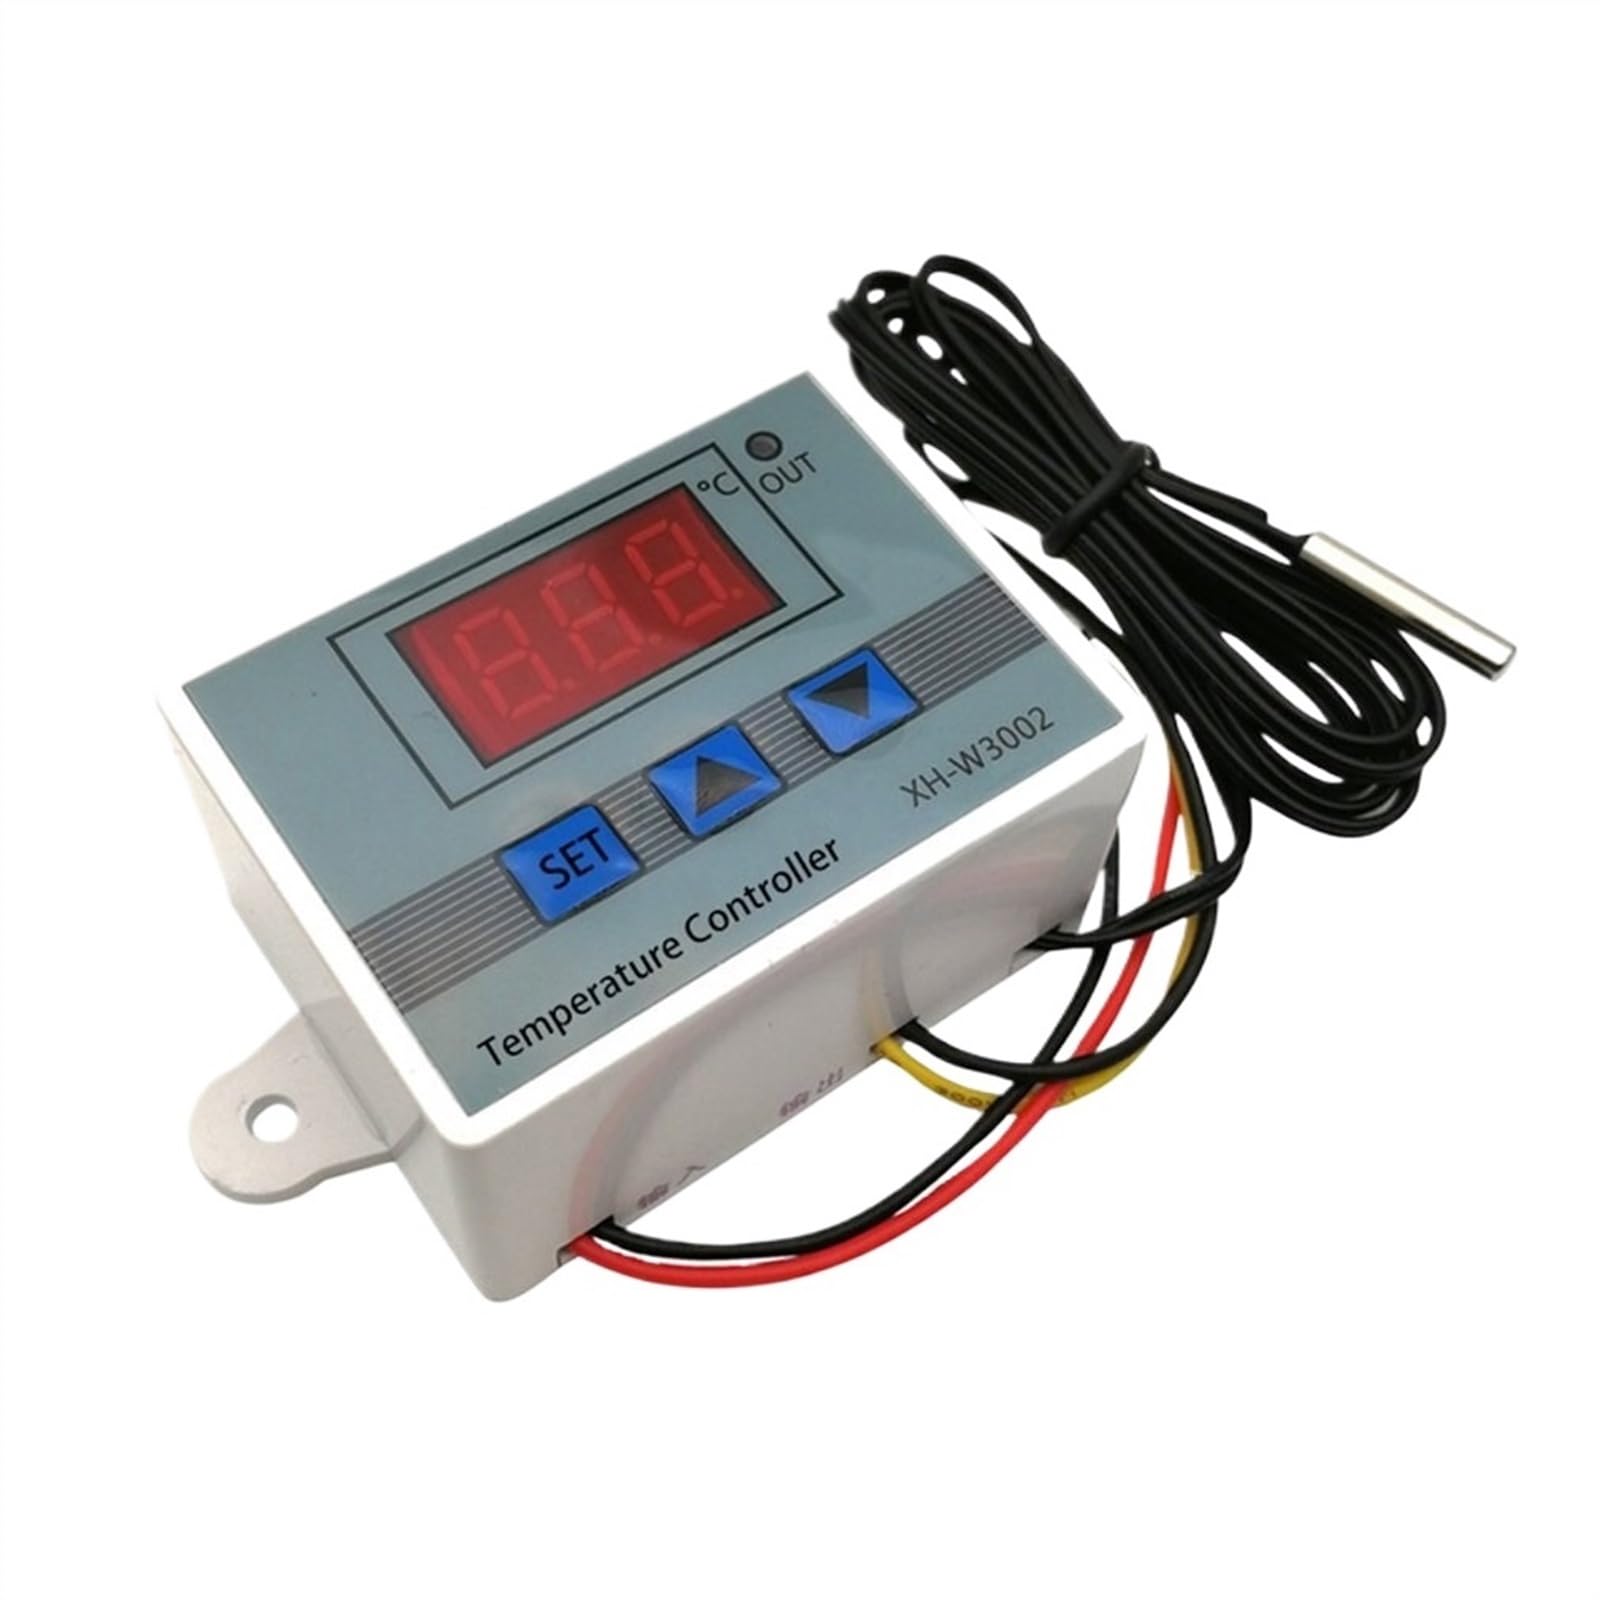
Figure 2: Front view of the XH-W3002 Digital Thermostat, showing the LED display, 'SET' button, and up/down adjustment buttons.
3. Installation and Wiring
Proper installation and wiring are crucial for the safe and correct operation of the XH-W3002 thermostat. Ensure the power supply matches the specific model (DC12V, DC24V, or AC110V-220V) before connecting.
3.1 Wiring Diagram (AC 110V-220V Model)

Figure 3: Wiring diagram for the AC 110V-220V model. Connect the power supply to the input terminals (N, L) and the load (e.g., heating element or fan) to the output terminals (N, L). The sensor connects separately.
General Wiring Steps:
- Power Input: Connect the appropriate power supply (DC12V, DC24V, or AC110V-220V) to the designated input terminals. Refer to the label on the device for correct polarity/live and neutral connections.
- Load Output: Connect the device you wish to control (e.g., heater, fan, pump) to the output terminals. Ensure the load's power requirements do not exceed the thermostat's maximum output capacity.
- Temperature Probe: Insert the NTC waterproof probe into the environment where temperature measurement is required. Ensure the probe is securely placed and not exposed to direct heat sources that could skew readings.
Warning: Always disconnect power before performing any wiring to prevent electric shock. If you are unsure about electrical connections, consult a qualified electrician.
4. Operating Instructions
The XH-W3002 uses a simple three-button interface for setting parameters: 'SET', 'Up', and 'Down'.
4.1 Setting Parameters
Press the 'SET' button to enter the internal menu. Use the 'Up' and 'Down' buttons to navigate between parameters (P0, P1, P2, P3) and to adjust their values.
- P0: Start Temperature Setting
Press 'SET' to enter the menu. The default display is P0. Press 'SET' again to adjust the start temperature using the 'Up' and 'Down' buttons. This is the temperature at which the output will activate. - P1: Stop Temperature Setting
From the menu, use 'Up'/'Down' to select P1. Press 'SET' to adjust the stop temperature using the 'Up' and 'Down' buttons. This is the temperature at which the output will deactivate. - P2: Temperature Correction
From the menu, use 'Up'/'Down' to select P2. Press 'SET' to adjust the temperature correction value. This allows for fine-tuning the measured temperature if there is a discrepancy with a reference thermometer. - P3: Delay Start Setting
From the menu, use 'Up'/'Down' to select P3. Press 'SET' to adjust the delay start time (in minutes). This sets a delay before the output activates after the start temperature is reached, useful for compressor protection in refrigeration systems.
4.2 Heating and Refrigeration Modes
- Heating Pattern: If the Start Temperature < Stop Temperature, the thermostat operates in heating mode. The output will turn on when the temperature drops to the start temperature and turn off when it reaches the stop temperature.
- Refrigeration Pattern: If the Start Temperature > Stop Temperature, the thermostat operates in refrigeration (cooling) mode. The output will turn on when the temperature rises to the start temperature and turn off when it drops to the stop temperature.

Figure 4: Back label of the XH-W3002, showing parameter settings (P0, P1, P2, P3) and power ratings for different voltage models.
5. Troubleshooting
- Output Indicator Not Lit / Load Not Working: If the output indicator does not light up and the connected load does not operate after setup, check if the start and stop temperature values are set correctly. Ensure that for heating mode, Start Temperature < Stop Temperature, and for refrigeration mode, Start Temperature > Stop Temperature.
- Incorrect Temperature Reading: Verify that the temperature probe is correctly installed and not damaged. Use the P2 (Temperature Correction) setting to calibrate the reading if necessary.
- No Power: Check all power connections and ensure the input voltage matches the thermostat's specifications. Verify that the power source is active.
- Intermittent Operation: Ensure all wiring connections are secure and free from corrosion. Check for any loose components or signs of damage on the circuit board.
6. Specifications
| Feature | Specification |
|---|---|
| Model | XH-W3002 |
| Temperature Measurement Range | -50°C to 110°C |
| Temperature Control Range | -50°C to 110°C |
| Temperature Measurement Accuracy | ±0.2°C |
| Temperature Control Accuracy | ±0.1°C |
| Measurement Input | NTC10K L=1m waterproof probe |
| Input Power (Optional) | DC12V / DC24V / AC110V~220V |
| Output Power (Max) | 12V/120W, 24V/240W, 220V/1500W (depending on model) |
| Control Type | Button Control |
| Backlight | Yes |
| Item Weight | 50 Grams |
7. Maintenance
- Cleaning: Gently wipe the device with a dry, soft cloth. Do not use abrasive cleaners or solvents.
- Environment: Ensure the thermostat is operated within its specified temperature and humidity ranges. Avoid exposure to direct sunlight, excessive moisture, or corrosive environments.
- Probe Care: Periodically inspect the temperature probe for any signs of damage or wear. Ensure its connection to the main unit is secure.
8. Warranty Information
Specific warranty details for the ESSISH XH-W3002 Digital Thermostat are not provided in the product information. Please refer to your purchase documentation or contact the seller for warranty terms and conditions.
9. Customer Support
For technical assistance, troubleshooting beyond this manual, or inquiries regarding your ESSISH XH-W3002 Digital Thermostat, please contact the seller or manufacturer directly. Contact information may be available on your product packaging or purchase receipt.