
1. Introduction
This manual provides instructions for the OUPARY 61-Key Wired RGB Gaming Mechanical Keyboard. This compact keyboard features mechanical red switches for a linear key feel, vibrant RGB backlighting, and a detachable USB-C cable for portability. It is designed for efficient operation and a responsive typing experience.
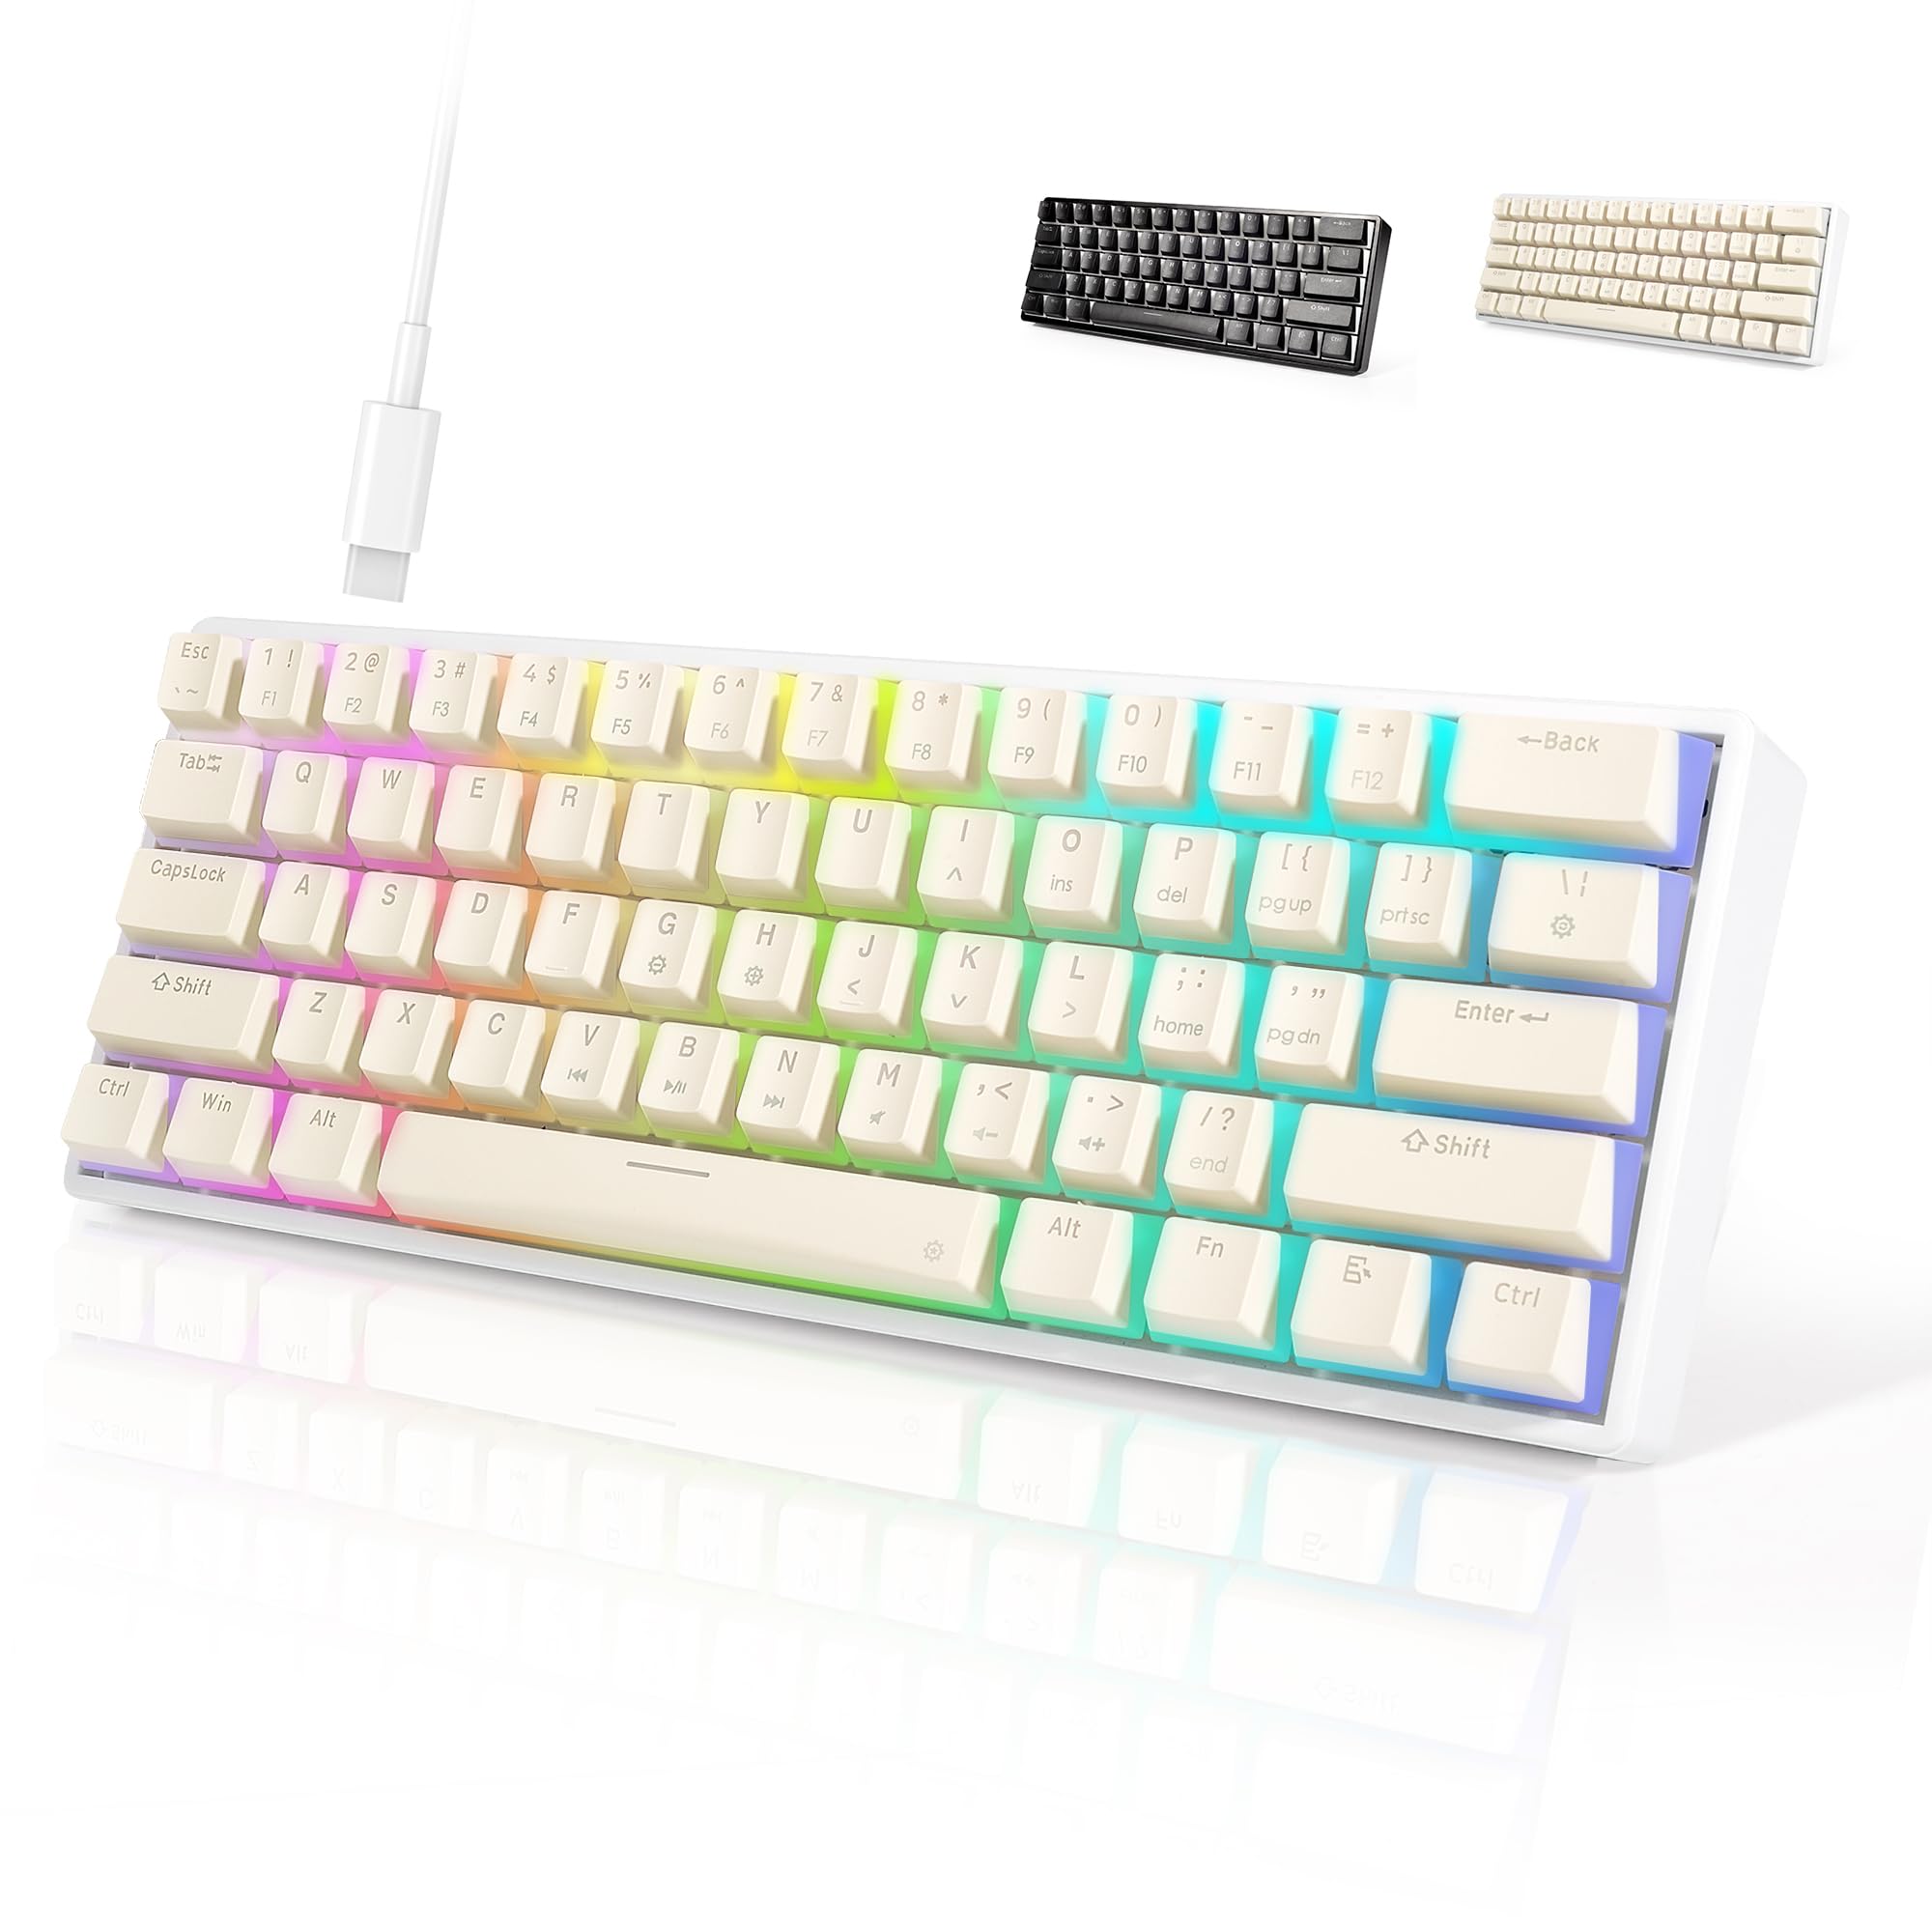
Image 1.1: The OUPARY 61-Key Wired RGB Gaming Mechanical Keyboard in a typical desktop setup.
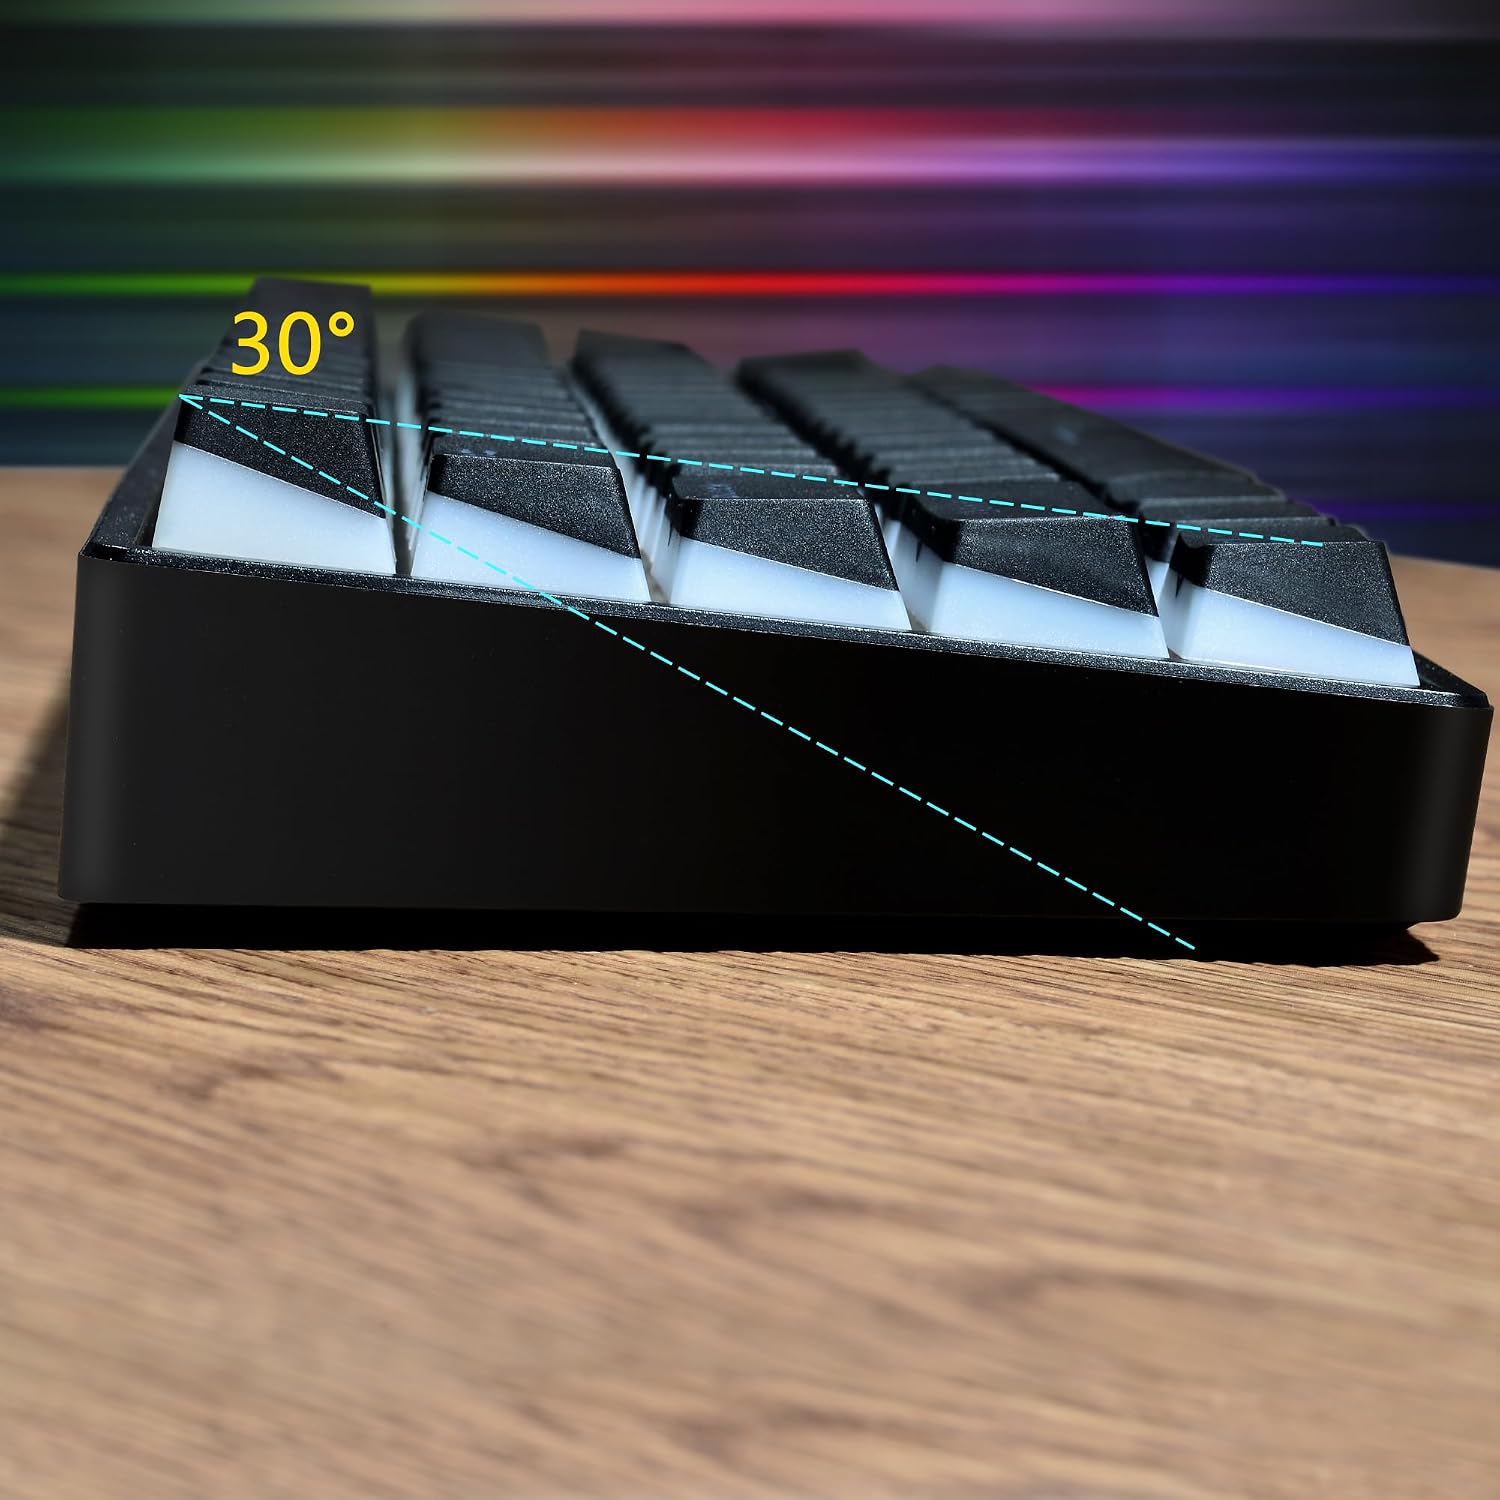
Image 1.2: Side profile illustrating the ergonomic angle of the keyboard.
2. Package Contents
Verify that all items are present in your package:
- OUPARY 61-Key Mechanical Keyboard
- USB-C Cable
- Keycap Puller
- 4 Replacement Red Dot Switches
3. Setup
3.1 Connecting the Keyboard
The OUPARY 61-Key Mechanical Keyboard connects via a detachable USB-C cable. Follow these steps to connect your keyboard:
- Locate the USB-C port on the back or side of the keyboard.
- Connect one end of the provided USB-C cable to the keyboard's USB-C port.
- Connect the other end of the USB-C cable to an available USB port on your computer.
- The keyboard will automatically be recognized by your operating system.

Image 3.1: Detachable USB-C cable connection for enhanced portability and stability.
3.2 Driver Support
This keyboard supports professional driver software for advanced customization. Please refer to the manufacturer's website for the latest driver downloads and instructions on how to install and use the software to configure macros, key assignments, and advanced RGB lighting effects.
4. Operating Instructions
4.1 Basic Key Functions (61-Key Layout)
The 61-key layout is compact, utilizing the Fn (Function) key to access secondary functions. Common Fn key combinations include:
- Fn + [Number Row]: Accesses F1-F12 keys (e.g., Fn + 1 = F1, Fn + 2 = F2).
- Fn + [P, L, ;, /]: Often used for arrow keys (e.g., Fn + P = Up Arrow). Specific key mappings may vary; refer to keycap legends.
- Fn + [U, I, O, J, K, L]: Often used for Home, End, Page Up, Page Down, Insert, Delete. Specific key mappings may vary; refer to keycap legends.
- Fn + Backspace: May function as Delete.
4.2 RGB Backlight Customization
The keyboard features a vibrant RGB backlight with multiple effects. You can customize colors, speed, and brightness using shortcut keys:
- Fn + [Key]: Specific keys are designated for changing lighting modes, colors, brightness levels, and effect speeds. Consult the keycap legends for specific symbols or refer to the full driver software for detailed control.
- Common combinations include:
- Fn + \|: Cycle through lighting effects.
- Fn + [{ or }]: Adjust brightness.
- Fn + [; or ']: Adjust effect speed.
- Fn + [., /]: Change lighting direction or color.
4.3 Anti-Ghosting
The keyboard incorporates a full anti-ghosting mechanism. This ensures that every keypress is registered accurately, even when multiple keys are pressed simultaneously, which is beneficial for fast typing and intense gaming sessions.
5. Maintenance
5.1 Cleaning the Keyboard
To maintain optimal performance and appearance, clean your keyboard regularly:
- Disconnect the keyboard from your computer before cleaning.
- Use a can of compressed air to remove dust and debris from between the keycaps.
- Wipe the keycaps and keyboard surface with a soft, slightly damp cloth. Avoid excessive moisture.
- Do not use harsh chemicals or abrasive cleaners.
5.2 Keycap and Switch Replacement
This keyboard features hot-swappable mechanical switches, allowing for easy replacement without soldering. Use the included keycap puller and switch puller for these procedures:
- Removing Keycaps: Use the keycap puller to gently grip and pull keycaps straight up.
- Removing Switches: After removing the keycap, use the switch puller to grasp the clips on the top and bottom of the switch. Gently rock and pull the switch straight up to remove it from the PCB.
- Installing Switches: Align the pins of the new switch with the holes on the PCB. Press the switch firmly until it clicks into place. Ensure pins are not bent.
- Installing Keycaps: Place the keycap over the switch stem and press down firmly until it is seated.
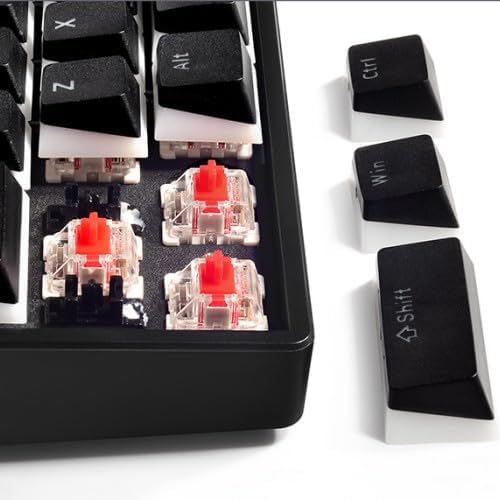
Image 5.1: Close-up view of the mechanical red switches and removable keycaps.
Note: This keyboard supports 3-pin mechanical switches. Ensure any replacement switches are compatible.
6. Troubleshooting
If you encounter issues with your keyboard, refer to the following common solutions:
- Keyboard Not Responding:
- Ensure the USB-C cable is securely connected to both the keyboard and the computer.
- Try connecting the keyboard to a different USB port on your computer.
- Test the keyboard on another computer to rule out system-specific issues.
- RGB Lights Not Working or Shut Off:
- Check the cable connection.
- Try unplugging and re-plugging the keyboard.
- Ensure no lighting effects are set to 'off' or minimum brightness via shortcut keys or driver software.
- Perform a factory reset if available (consult driver software or manufacturer support for specific instructions).
- Keys Are Stuck or Not Registering:
- Unplug and re-plug the keyboard.
- Remove the keycap and inspect the switch for any debris or damage. Clean if necessary.
- If a switch is faulty, replace it using the included spare switches and tools (refer to Section 5.2).
- Driver Software Issues:
- Ensure you have downloaded the correct and latest version of the driver software from the official OUPARY website.
- Temporarily disable any antivirus or firewall software during installation if issues persist.
- Restart your computer after driver installation.
7. Specifications

Image 7.1: Product dimensions of the OUPARY 61-Key Mechanical Keyboard.
| Feature | Detail |
|---|---|
| Brand | OUPARY |
| Model | B0CSSZQFTX |
| Connectivity Technology | USB-C (Wired) |
| Keyboard Description | Mechanical |
| Switch Type | Linear (Red Switches) |
| Number of Keys | 61 |
| Keyboard Backlight Color Support | RGB |
| Special Features | Ergonomic, Anti-Ghosting, Detachable USB-C Cable, Hot-Swappable Switches |
| Compatible Devices | PC |
| Color | White |
| Material | Plastic (ABS/PBT possible) |
8. Warranty and Support
For warranty information, technical support, or further assistance, please refer to the documentation included with your purchase or visit the official OUPARY website. Keep your proof of purchase for warranty claims.