1. Introduction
Thank you for choosing the Heylo KT 20 Dehumidifier. This lightweight and compact device is designed for efficient moisture removal in various environments, including new constructions, basements, and after water damage. Please read this manual carefully before operating the device to ensure safe and optimal performance.
The Heylo KT 20 features a maximum dehumidification capacity of 24 liters per day, providing a reliable solution for reducing humidity levels in enclosed spaces.
2. Safety Instructions
WARNING: Failure to follow these safety instructions may result in electric shock, fire, or serious injury.
- Always connect the dehumidifier to a grounded power outlet with the correct voltage.
- Do not operate the unit with a damaged power cord or plug.
- Keep the unit away from water and other liquids. Do not immerse the unit in water.
- Ensure proper ventilation around the unit. Do not block air inlets or outlets.
- Do not insert fingers or foreign objects into the air inlets or outlets.
- Unplug the unit before cleaning, maintenance, or moving.
- This appliance is not intended for use by persons (including children) with reduced physical, sensory or mental capabilities, or lack of experience and knowledge, unless they have been given supervision or instruction concerning use of the appliance by a person responsible for their safety.
- Children should be supervised to ensure that they do not play with the appliance.
3. Product Overview and Components
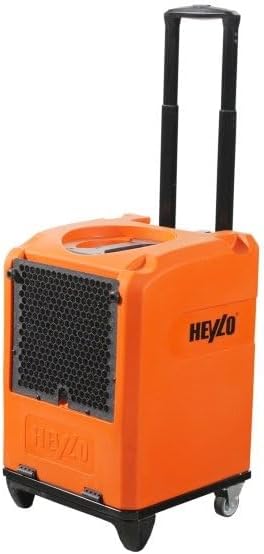
Figure 1: Heylo KT 20 Dehumidifier. This image shows the compact orange dehumidifier with its extendable black handle, black air intake grille on the side, and sturdy wheels for easy portability.
The Heylo KT 20 Dehumidifier is designed for portability and ease of use. Key components include:
- Control Panel: For setting operation modes and monitoring status.
- Air Inlet Grille: Where humid air enters the unit.
- Air Outlet: Where dry air is expelled.
- Water Tank: Collects condensed water.
- Drainage Outlet: For continuous drainage option.
- Extendable Handle: For easy transport.
- Wheels: For mobility.
4. Setup
- Unpacking: Carefully remove the dehumidifier from its packaging. Retain packaging for future storage or transport.
- Placement: Place the unit on a firm, level surface in the area requiring dehumidification. Ensure there is at least 20 cm (8 inches) of clear space around all sides of the unit for proper airflow.
- Power Connection: Plug the power cord into a suitable grounded electrical outlet.
- Water Tank: Ensure the water tank is correctly inserted into the unit. If using continuous drainage, connect a suitable hose to the drainage outlet (hose not included).
5. Operation
5.1 Starting the Dehumidifier
- Press the Power button on the control panel to turn the unit ON.
- The unit will typically start in continuous dehumidification mode (as per specifications).
- Adjust desired humidity levels or fan speed using the control panel buttons, if available. Refer to the specific control panel layout on your unit.
5.2 Water Tank Management
- Manual Drainage: When the water tank is full, the unit will automatically shut off and an indicator light will illuminate. Carefully remove the water tank, empty it, and reinsert it firmly. The unit will resume operation.
- Continuous Drainage: For continuous operation without manual emptying, connect a standard garden hose (or similar) to the drainage outlet. Ensure the hose is sloped downwards to allow gravity drainage into a floor drain or larger container.
5.3 Stopping the Dehumidifier
Press the Power button to turn the unit OFF. Unplug the unit from the power outlet if it will not be used for an extended period.
6. Maintenance
Regular maintenance ensures the longevity and efficiency of your dehumidifier.
6.1 Cleaning the Air Filter
- The air filter should be cleaned every two weeks or more frequently depending on usage and air quality.
- Turn off and unplug the unit.
- Locate and remove the air filter (usually behind the air inlet grille).
- Wash the filter with warm, soapy water. Rinse thoroughly and allow it to air dry completely before reinserting. Do not use a dishwasher.
6.2 Cleaning the Unit Exterior
- Wipe the exterior of the unit with a soft, damp cloth.
- Do not use harsh chemicals, abrasive cleaners, or solvents.
6.3 Storage
- If storing the unit for an extended period, ensure the water tank is empty and clean.
- Clean the air filter.
- Store the unit upright in a cool, dry place, away from direct sunlight and extreme temperatures.
7. Troubleshooting
| Problem | Possible Cause | Solution |
|---|---|---|
| Unit does not turn on. | No power; Power cord not plugged in; Power outlet faulty. | Check power connection; Try a different outlet; Check circuit breaker. |
| Unit runs but no water collects. | Humidity level too low; Room temperature too low; Air filter clogged. | Increase target humidity (if adjustable); Ensure room temperature is above 5°C (41°F); Clean air filter. |
| Unit stops operating. | Water tank full; Unit has reached desired humidity level; Frost build-up on coils. | Empty water tank; Unit will restart when humidity rises; Allow unit to defrost naturally (do not use sharp objects). |
| Unit is noisy. | Unit not on a level surface; Air filter clogged; Obstruction in fan. | Place on a level surface; Clean air filter; Check for obstructions (unplug first). |
If the problem persists after trying these solutions, please contact customer support.
8. Technical Specifications
| Feature | Specification |
|---|---|
| Model Name | Heylo KT 20 |
| Manufacturer | Heylo |
| Item Number | 1110579 |
| Dehumidification Capacity | Up to 24 Liters per day |
| Water Tank Volume | 24 Liters |
| Operating Mode | Continuous Mode |
| Color | Orange |
9. Warranty Information
Please refer to the warranty card included with your product for detailed warranty terms and conditions. Typically, Heylo products come with a standard manufacturer's warranty covering defects in materials and workmanship from the date of purchase. Keep your proof of purchase for warranty claims.
This warranty does not cover damage caused by misuse, neglect, unauthorized repairs, or normal wear and tear.
10. Customer Support
For technical assistance, troubleshooting beyond this manual, or warranty inquiries, please contact Heylo customer support:
- Website: www.heylo.de (Please check the official Heylo website for the most current contact information.)
- Email: Refer to the website for specific contact emails.
- Phone: Refer to the website for specific contact phone numbers.
When contacting support, please have your model number (KT 20) and item number (1110579) ready.