1. Important Safety Instructions
Please read and understand all safety instructions before operating this electric sharpening machine. Failure to follow these instructions may result in electric shock, fire, or serious injury.
- Eye Protection: Always wear safety goggles or glasses with side shields when operating the sharpener to protect against flying debris.
- Electrical Safety: Ensure the power supply matches the machine's requirements (110V). Do not operate in wet conditions or with wet hands. Unplug the machine when not in use or before cleaning.
- Keep Clear: Keep hands, hair, and loose clothing away from moving parts and the grinding wheel during operation.
- Stable Surface: Always operate the sharpener on a stable, flat, and secure surface.
- Proper Use: This machine is designed for sharpening drill bits, knives, scissors, and chisels. It is not recommended for sharpening kitchen knives.
- Children and Pets: Keep the sharpener out of reach of children and pets.
- Ventilation: Ensure adequate ventilation when operating to prevent dust accumulation.
2. Product Overview
The RudiUsoy Multifunctional Electric Sharpening Machine is designed for efficient and precise sharpening of various tools. It features a high-speed motor and multiple workbenches for different sharpening tasks.
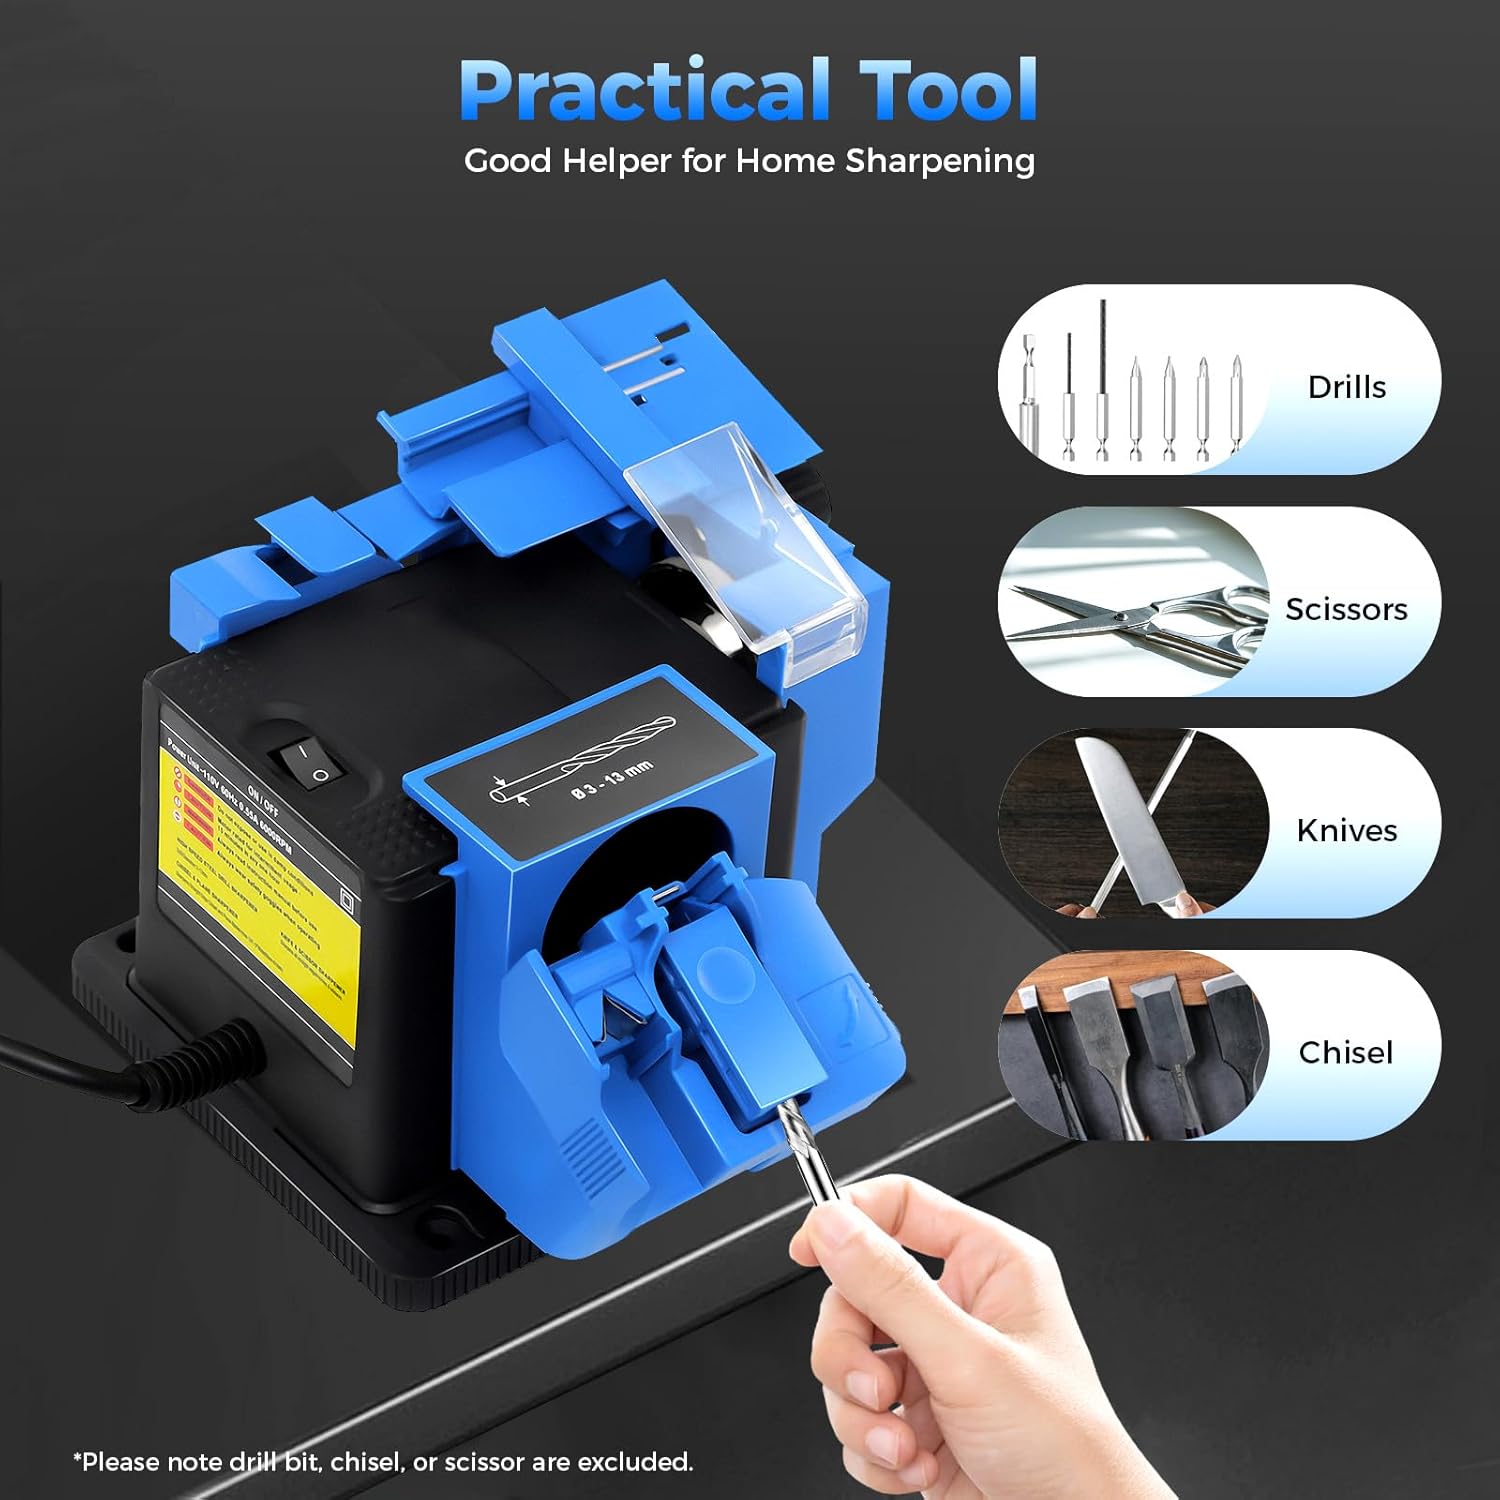
Figure 2.1: Overview of the RudiUsoy Electric Sharpening Machine, highlighting its versatility for sharpening drills, scissors, knives, and chisels.
Package Contents:
- 1 x Electric Sharpener (includes a grinding wheel)
- 3 x Workbenches (for drill bits, knives/scissors, chisels/plane cutters)
- 1 x User Manual
Key Features:
- Powerful Motor: 96W motor with a rated speed of 1350rpm for efficient sharpening.
- Versatile: Capable of sharpening drill bits, scissors, knives, and chisels/plane cutters.
- Adjustable Angle: Chisel/plane sharpener features an adjustable angle from 15° to 50°.
- Compact Design: Lightweight and portable for easy storage and use.

Figure 2.2: The sharpener's performance specifications, including 96W power and 1350rpm speed, ensuring an excellent grinding effect.
3. Setup
Before first use, ensure all components are present and the machine is placed on a stable surface.
- Unpack: Carefully remove all items from the packaging.
- Identify Workbenches: The sharpener comes with three distinct workbenches: one for drill bits, one for knives and scissors, and one for chisels and plane cutters.
- Attach Workbench: Select the appropriate workbench for the tool you intend to sharpen. Align the workbench with the corresponding slot on the main unit and slide it into place until it clicks securely.
- Power Connection: Plug the power cord into a standard 110V electrical outlet.
Video 3.1: This video demonstrates the assembly and attachment of the different sharpening workbenches to the main unit of the Electric Drill Bit Sharpener.
4. Operating Instructions
Always ensure the correct workbench is attached and the machine is securely plugged in before operation. Wear safety goggles.
4.1. Sharpening Drill Bits
Use the workbench designed for drill bits. This sharpener is suitable for drill diameters from 3mm to 13mm. The vertex angle is approximately 130 degrees; the back angle cannot be ground.
- Attach the drill bit workbench.
- Turn on the sharpener using the ON/OFF switch.
- Insert the drill bit into the appropriate slot on the workbench.
- Gently press the drill bit against the grinding wheel, rotating it slightly to ensure even sharpening.
- Sharpen each side of the drill bit evenly until the desired sharpness is achieved.
- Remove the drill bit and turn off the sharpener.
4.2. Sharpening Knives and Scissors
Use the workbench designed for knives and scissors. This is suitable for straight-edge knives and scissors. Do not use for kitchen knives. Scissor notch grinding thickness is less than 5mm.
- Attach the knife and scissor workbench.
- Turn on the sharpener.
- For scissors, insert one blade into the scissor slot and pull it through gently. Repeat for the other blade.
- For knives, insert the blade into the knife slot at the base of the workbench and pull it through with light, consistent pressure, from heel to tip. Repeat several times on each side until sharp.
- Remove the tool and turn off the sharpener.
Video 4.1: This video demonstrates the process of sharpening scissors and knives using the RudiUsoy Multifunctional Electric Sharpener.
4.3. Sharpening Chisels and Plane Cutters
Use the workbench designed for chisels and plane cutters. This is suitable for widths from 6mm to 51mm, with an adjustable angle from 15° to 50°.
- Attach the chisel and plane cutter workbench.
- Adjust the sharpening angle using the knob on the side of the workbench (15° to 50°).
- Turn on the sharpener.
- Insert the chisel or plane cutter into the slot, ensuring it rests firmly against the guide.
- Gently push the tool forward and backward across the grinding wheel with even pressure.
- Check the edge frequently and continue until the desired sharpness is achieved.
- Remove the tool and turn off the sharpener.
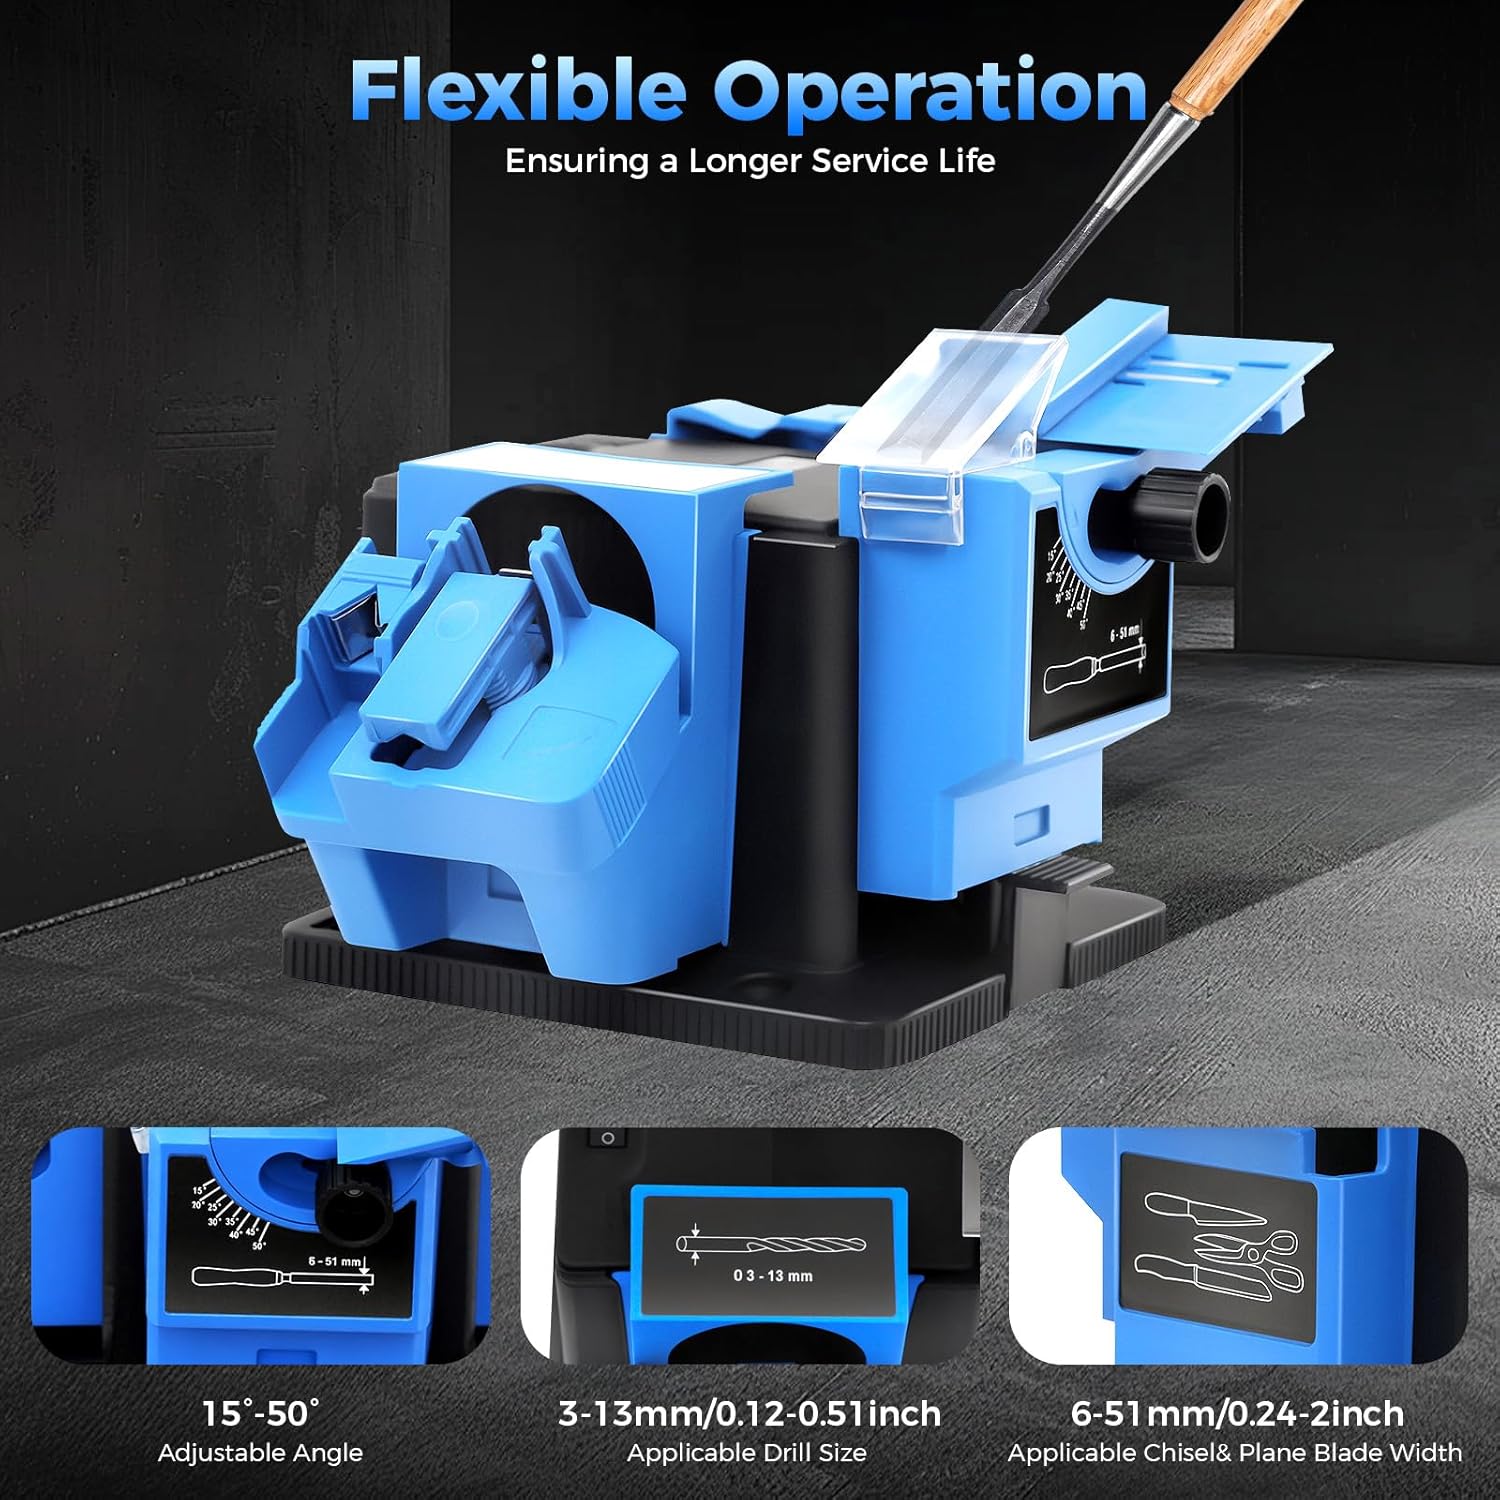
Figure 4.1: Detailed view of the sharpening capabilities, including the adjustable angle for chisels and the applicable sizes for drill bits and plane blades.
5. Maintenance
Regular maintenance ensures optimal performance and extends the lifespan of your sharpener.
5.1. Cleaning
- Always unplug the sharpener before cleaning.
- Use a soft, dry cloth to wipe down the exterior of the machine.
- Use a small brush or compressed air to remove any metal dust or debris from the grinding wheel area and workbenches.
- Do not use water or abrasive cleaners, as this can damage the electrical components or the grinding wheel.
5.2. Grinding Wheel Replacement
The grinding wheel is a consumable part and will wear down over time. Replace it when sharpening performance decreases.
- The included grinding wheel has a 10mm diameter, 56mm diameter, and 180 mesh.
- You can replace the grinding wheel with different meshes according to the aperture and diameter.
- Refer to the product diagram or contact customer support for specific instructions on replacing the grinding wheel.
6. Troubleshooting
If you encounter issues with your sharpener, refer to the following common problems and solutions:
- Machine does not turn on:
- Check if the power cord is securely plugged into a working 110V outlet.
- Ensure the ON/OFF switch is in the 'ON' position.
- Verify there is power to the outlet by testing with another appliance.
- Tools are not sharpening effectively:
- Ensure the correct workbench is attached for the tool being sharpened.
- Check if the grinding wheel is worn out and needs replacement.
- Apply consistent, light pressure and ensure the tool is guided correctly through the sharpening slot.
- For chisels/plane cutters, verify the angle adjustment is set correctly for the tool.
- Excessive vibration or noise:
- Ensure the sharpener is on a stable and level surface.
- Check if the grinding wheel is properly installed and not loose.
- Inspect for any foreign objects or debris inside the machine.
7. Specifications
| Feature | Specification |
|---|---|
| Motor Voltage | 110V |
| Power | 96W |
| Rated Speed | 1350rpm |
| Motor Materials | Copper |
| Body Materials | Plastic |
| Product Dimensions (L x W x H) | 9.25" x 7.87" x 6.1" (25cm x 21.5cm x 17cm) |
| Grinding Wheel (Diameter, Mesh) | 10mm diameter, 56mm diameter, 180 mesh (replaceable) |
| Grindable Drill Diameter | 3mm ~ 13mm (vertex angle approx. 130°) |
| Sharpening Planer Width | 6mm ~ 51mm (angle adjustable: 15° ~ 50°) |
| Scissor Notch Grinding Thickness | < 5 mm |
| Color | Blue |
| Grit Type | Fine |
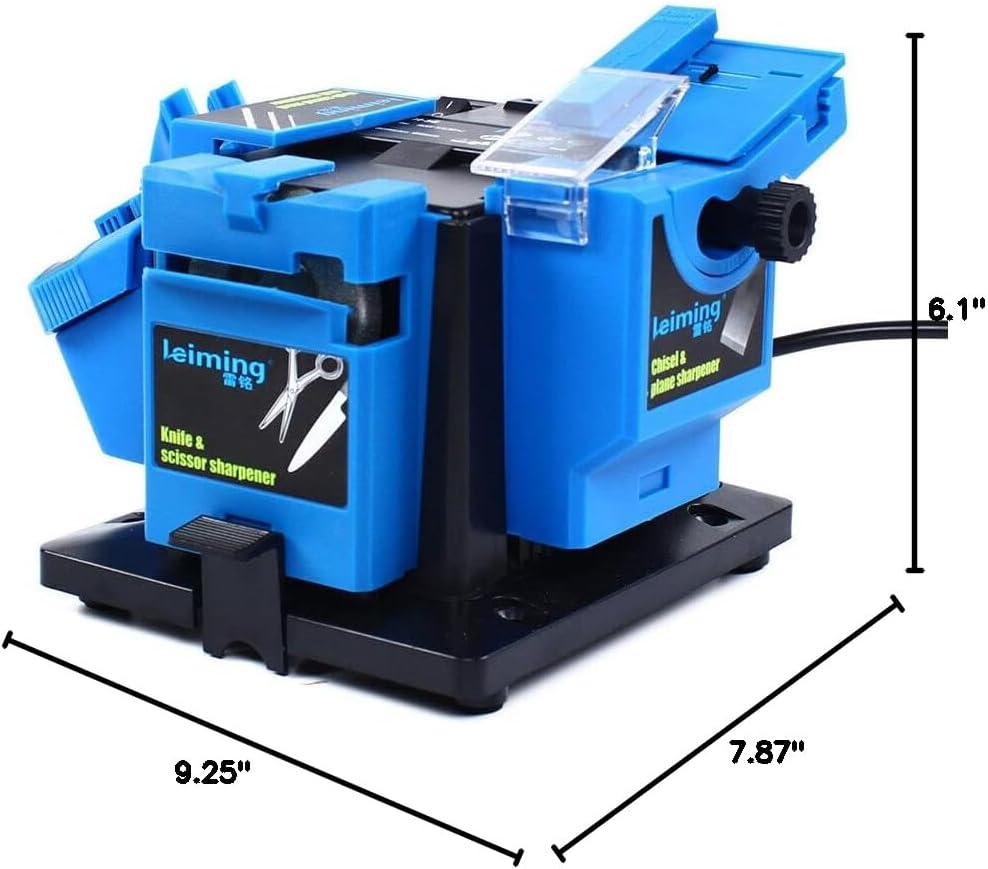
Figure 7.1: Physical dimensions of the sharpening machine.
8. Warranty and Support
RudiUsoy is committed to providing quality products and customer satisfaction.
- Service Guarantee: RudiUsoy products provide a free lifetime warranty and replacement parts policy.
- Customer Support: If you have any questions about the product, require assistance, or need to claim warranty service, please contact the customer service department. They will reply to you within 24 hours.