
1. Introduction and Product Overview
Thank you for choosing the Capapro Portable Car Jump Starter with Air Compressor. This versatile device combines a powerful jump starter, a digital tire inflator, a portable power bank, and an LED flashlight, making it an essential tool for automotive emergencies and daily use. This manual provides detailed instructions for safe and effective operation.

2. What's in the Box
Upon opening your Capapro Portable Car Jump Starter package, please verify that all the following components are included:
- 1 x Capapro Smart Air Pump (Main Unit)
- 1 x Air Tube (60cm/23.6in)
- 1 x Inflating Needle
- 1 x Inflatable Nozzle
- 1 x Presta Valve Adapter
- 1 x Emergency Start Power Clip (Smart Jumper Cables)
- 1 x Type-C Charging Cable
- 1 x User Manual (This document)

3. Setup and Initial Charging
Before first use, ensure the device is fully charged. Use the provided Type-C cable to connect the jump starter to a compatible USB power adapter (not included). The digital display will indicate the charging status. A full charge is recommended for optimal performance, especially for jump-starting.
Charging the Device
- Locate the Type-C input port on the device.
- Connect one end of the Type-C cable to the device and the other end to a USB power source (e.g., wall adapter, car charger).
- The battery indicator on the LCD screen will show charging progress.
- Once fully charged, disconnect the cable.
4. Operating Instructions
4.1. Jump Starting a Vehicle
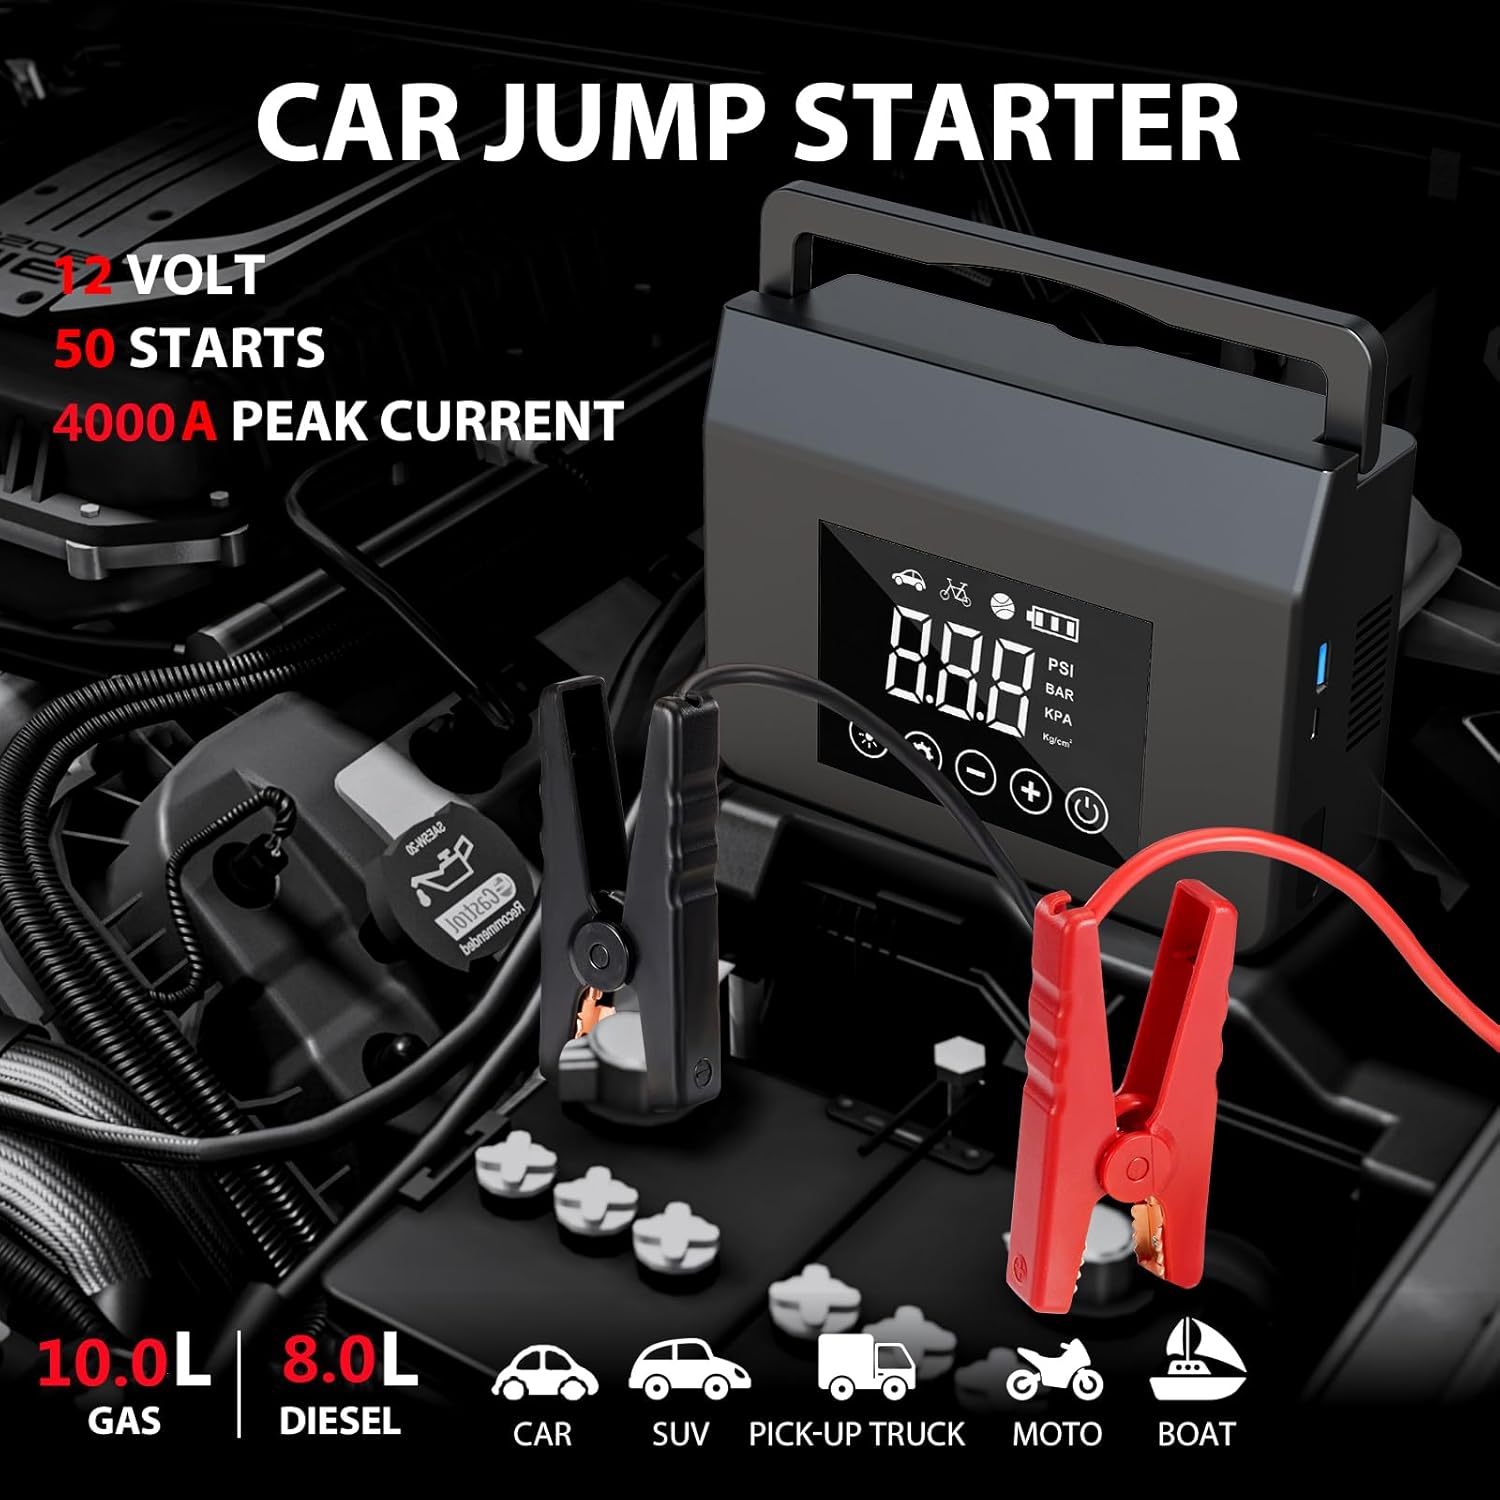
The Capapro jump starter is designed to start 12V vehicles with up to 10.0L gasoline or 8.0L diesel engines. Ensure the jump starter has at least 80% battery capacity for effective starting.
- Connect the Smart Jumper Cables: Insert the blue plug of the smart jumper cables into the jump start port on the device. Ensure a firm connection.
- Connect to Car Battery: Attach the red clamp (+) to the positive terminal of the car battery and the black clamp (-) to the negative terminal. The smart cable indicator light will turn solid green if connected correctly. If it flashes or turns red, check connections and battery voltage.
- Power On: Press the power button on the jump starter.
- Start Vehicle: Go into your vehicle and start the engine.
- Disconnect: Once the vehicle starts, immediately remove the jumper clamps from the car battery, then disconnect the smart cable from the jump starter.

4.2. Using the Air Compressor (Tire Inflator)
The built-in air compressor provides a maximum pressure of 150 PSI and an airflow of 8L/Min, suitable for various tires and inflatables. It features smart preset and auto shut-off functions.
- Connect Air Tube: Screw the air tube securely into the air outlet port on the device.
- Attach Nozzle: Select the appropriate nozzle (e.g., for car tire, bicycle, ball) and attach it to the other end of the air tube.
- Connect to Item: Connect the nozzle to the tire valve or inflatable item. The LCD display will show the current pressure.
- Set Desired Pressure: Use the '+' and '-' buttons to set the desired pressure. Press the 'M' button to cycle through units (PSI, BAR, KPA, Kg/cm²).
- Start Inflation: Press the power button to begin inflation. The compressor will automatically stop when the preset pressure is reached.
- Disconnect: Disconnect the nozzle from the item and the air tube from the device.
Note: Do not use the air pump function continuously for more than 6 minutes. If the device becomes hot, allow it to cool down for a few minutes before resuming inflation.


4.3. Using as a Portable Power Bank
The device features a 15,000mAh capacity and supports fast charging (QC3.0, USB, Type-C) to power your smartphones, tablets, and other USB devices.
- Connect Device: Use your device's charging cable to connect it to the USB-A or Type-C output port on the jump starter.
- Begin Charging: The jump starter will automatically begin charging your connected device.

4.4. Using the LED Flashlight
The integrated 300-lumen LED flashlight offers 4 lighting modes: constant, slow flash, SOS, and warning.
- Constant Light: Press the flashlight button once to turn on the constant white light.
- Slow Flash: Press the button again for a slow red flashing light.
- SOS: Press the button a third time for a slow blue flashing light (SOS mode).
- Warning: Press the button a fourth time for both red and blue lights to flash quickly (warning mode).
- Turn Off: Press the button a fifth time to turn off the flashlight.

5. Safety Precautions
To ensure safe operation and prevent damage to the device or injury, please adhere to the following safety guidelines:
- Always read the user manual before operating the device.
- Do not attempt to jump start a frozen or severely damaged battery.
- Ensure proper polarity (+ to +, - to -) when connecting jumper cables. The smart cables provide reverse polarity protection.
- Do not connect the red and black clamps together.
- Keep the device away from children.
- Do not expose the device to extreme temperatures (above 70°C/158°F or below -20°C/-4°F) or direct sunlight for extended periods.
- Do not immerse the device in water or expose it to rain.
- Do not disassemble or modify the device. Servicing should only be performed by qualified personnel.
- Ensure adequate ventilation when using the air compressor.
- Disconnect the air tube and jumper cables when not in use.


6. Maintenance
Proper maintenance will extend the life of your Capapro device:
- Cleaning: Wipe the device with a soft, dry cloth. Do not use harsh chemicals or abrasive cleaners.
- Storage: Store the device in a cool, dry place, away from direct sunlight and moisture.
- Battery Care: For optimal battery life, recharge the device every 3-6 months, even if not in use. This prevents deep discharge and preserves battery capacity.
- Cable Inspection: Regularly inspect the jumper cables and air tube for any signs of wear, damage, or corrosion. Replace if necessary.
7. Troubleshooting
If you encounter issues with your Capapro device, refer to the following common problems and solutions:
| Problem | Possible Cause | Solution |
|---|---|---|
| Device does not turn on. | Battery is depleted. | Charge the device fully. |
| Vehicle does not jump start. | Incorrect cable connection; Battery too low; Vehicle battery severely damaged. | Ensure clamps are connected correctly (red to +, black to -). Check device battery level (must be >80%). Consult a mechanic if vehicle battery is beyond jump-starting. |
| Air compressor not inflating. | Air tube or nozzle not securely connected; Preset pressure already reached; Device overheated. | Check all connections. Verify preset pressure. Allow device to cool down if it has been running continuously for over 6 minutes. |
| LCD display not working. | Device off; Malfunction. | Press the power button. If issue persists, contact customer support. |
If the problem persists after trying these solutions, please contact Capapro customer support for assistance.
8. Specifications
| Feature | Specification |
|---|---|
| Brand | Capapro |
| Model | L8 |
| Peak Output Current | 4000 Amps |
| Battery Capacity | 15,000mAh (approx.) |
| Engine Compatibility | 12V vehicles (up to 10.0L Gasoline / 8.0L Diesel) |
| Air Compressor Max Pressure | 150 PSI |
| Airflow Rate | 8L/Min |
| LED Flashlight Brightness | 300 Lumens |
| Input | Type-C (5V/1A) |
| Output | USB (5V/2.4A), Type-C (5V-9V/2A) |
| Operating Temperature | -20°F to 70°F (-29°C to 21°C) |
| Item Weight | 3.43 pounds |
| Package Dimensions | 10.51 x 8.7 x 3.11 inches |
| UPC | 198715052619, 791137582308 |
9. Warranty and Support
Capapro provides an 18-month warranty for this product, along with lifetime technical support. If you have any questions, concerns, or require assistance with your jump starter, please do not hesitate to contact our customer service team.
For support, please refer to the contact information provided on the product packaging or the official Capapro website.
