
1. Introduction
The JQKJCAM 150 FT Sewer Camera (Model JQ9600B-Y) is a professional inspection system designed for examining pipes, drains, and other inaccessible areas. It features a high-definition camera, a 9-inch monitor with DVR functionality, and a durable cable for reliable performance. This manual provides essential information for the safe and effective use of your sewer inspection camera.

Image 1.1: JQKJCAM Sewer Borescope Camera in operation.
2. Product Features
- HD Plumbing Camera: Features a 17mm stainless steel waterproof camera with 6 adjustable LED lights for clear visibility in dark environments. Designed to navigate 90° bends and pipes as small as 1 inch.
- 9-inch HD DVR Monitor: A larger display with a sun visor for comfortable viewing, even in bright conditions. Includes a 16GB SD card for recording videos and capturing images. Supports multiple languages.
- Big Tailor-made Spool & Length Marks: User-friendly cable spool for easy deployment and retrieval of the 150 ft (50m) cable. Integrated meter marks on the cable assist in precise location identification.
- Ultra-long Working Time & Portable Design: Equipped with a rechargeable 4500mA battery providing 5-6 hours of continuous operation. The entire system is housed in an ultra-durable, portable tool suitcase for easy transport.
- Wide Application: Suitable for various applications including inspecting pipes, drains, ducts, sewers, walls, and for car maintenance. Can be used underwater or underground. Includes a protective cover for 1-inch and 2-inch pipes, and a 90mm/3.5-inch guide wheel for 4-inch pipes.

Image 2.1: The 17mm waterproof camera head with adjustable LED lights.
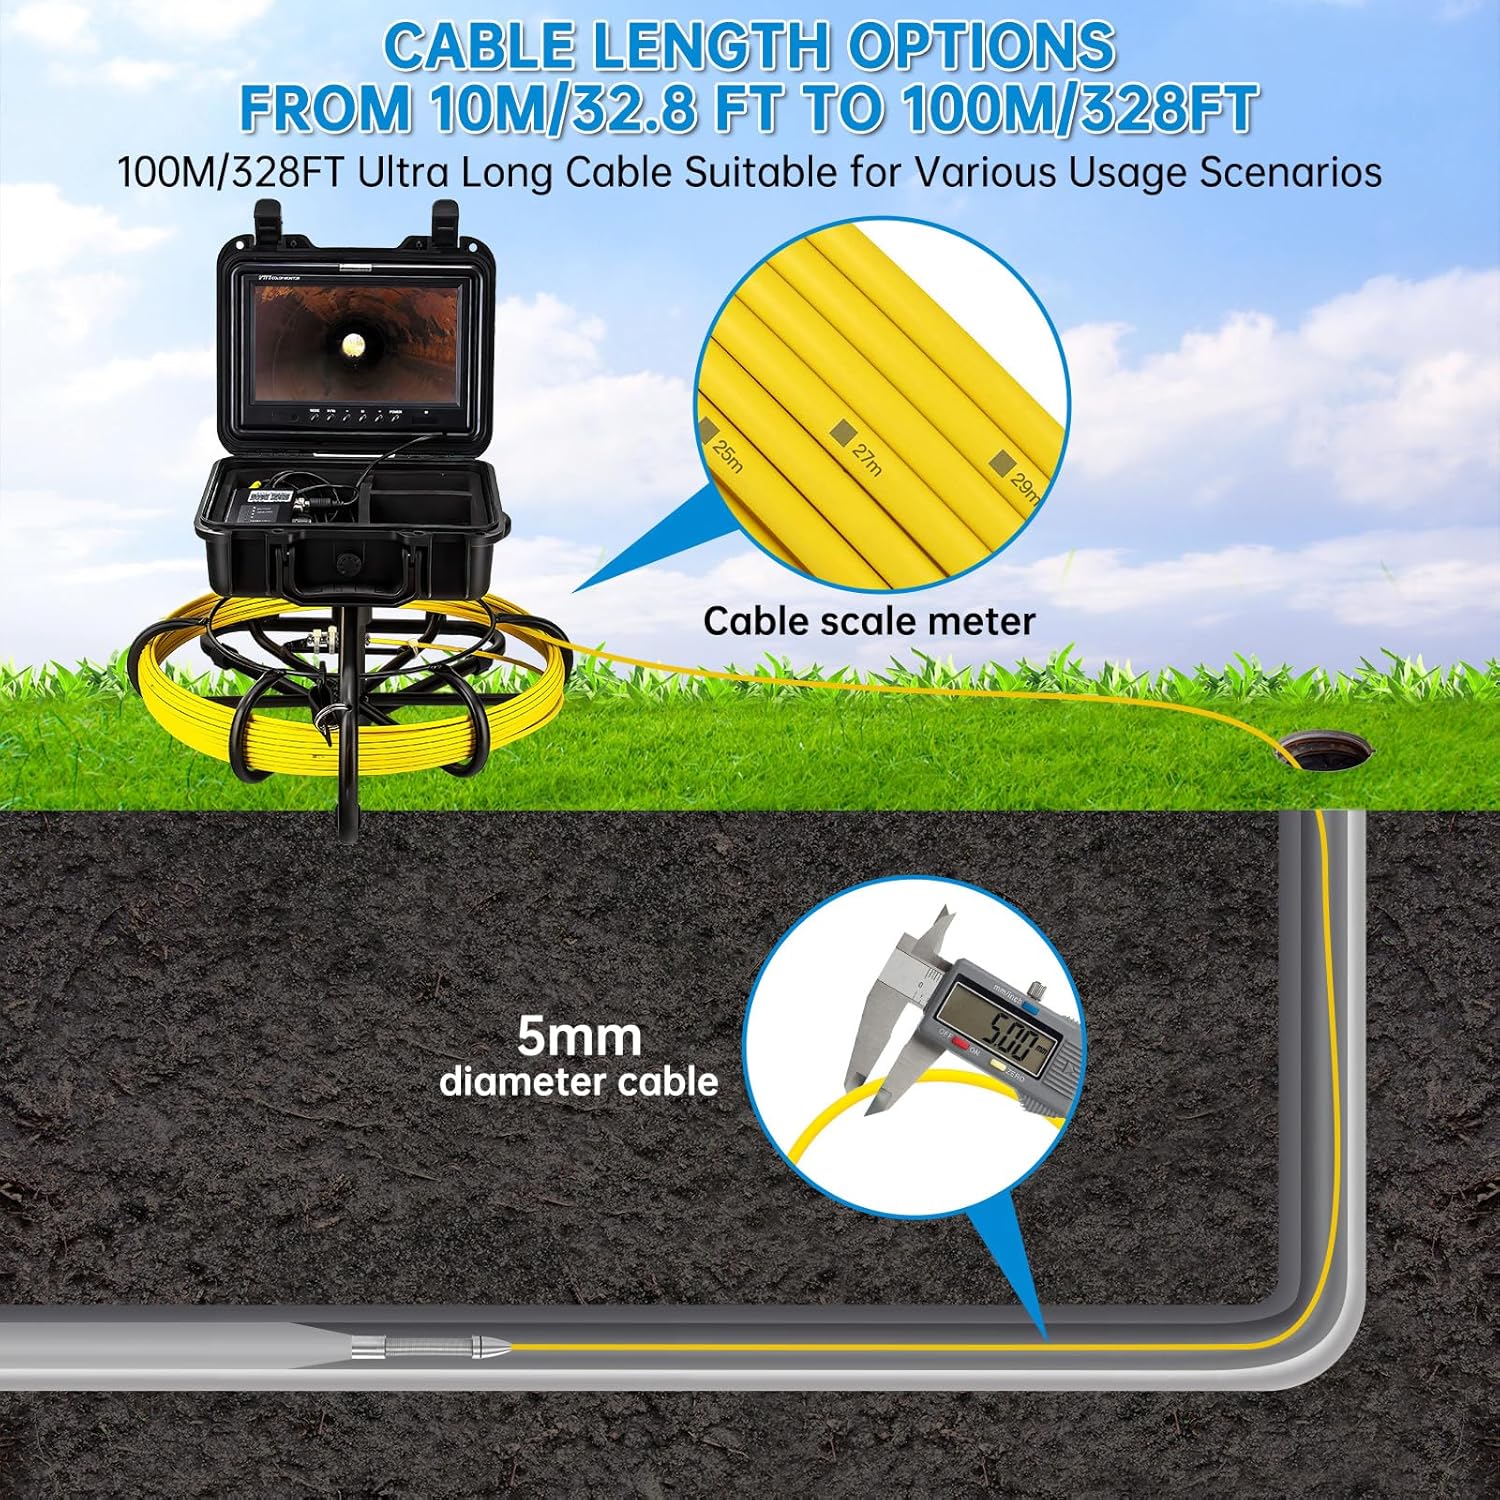
Image 2.2: The 9-inch HD monitor with DVR recording capability and 16GB storage.
3. Setup
Follow these steps for initial setup of your JQKJCAM Sewer Camera system:
- Unpacking: Carefully remove all components from the tool suitcase.
- Connecting the Camera: Attach the camera head to the flexible spring cable end. Ensure a secure, threaded connection. If inspecting larger pipes (4 inches or more), attach the 90mm guide wheel to the camera head using the provided screwdriver.
- Connecting the Monitor and Battery: Connect the camera cable to the designated input on the battery box. Then, connect the video output cable from the battery box to the video input on the 9-inch monitor. Finally, connect the power cable from the battery box to the monitor's power input.
- Powering On: Turn on the power switch on the battery box. The monitor should display the live camera feed.
Video 3.1: Demonstrates unboxing, component connection, and initial setup of the JQKJCAM Sewer Camera.
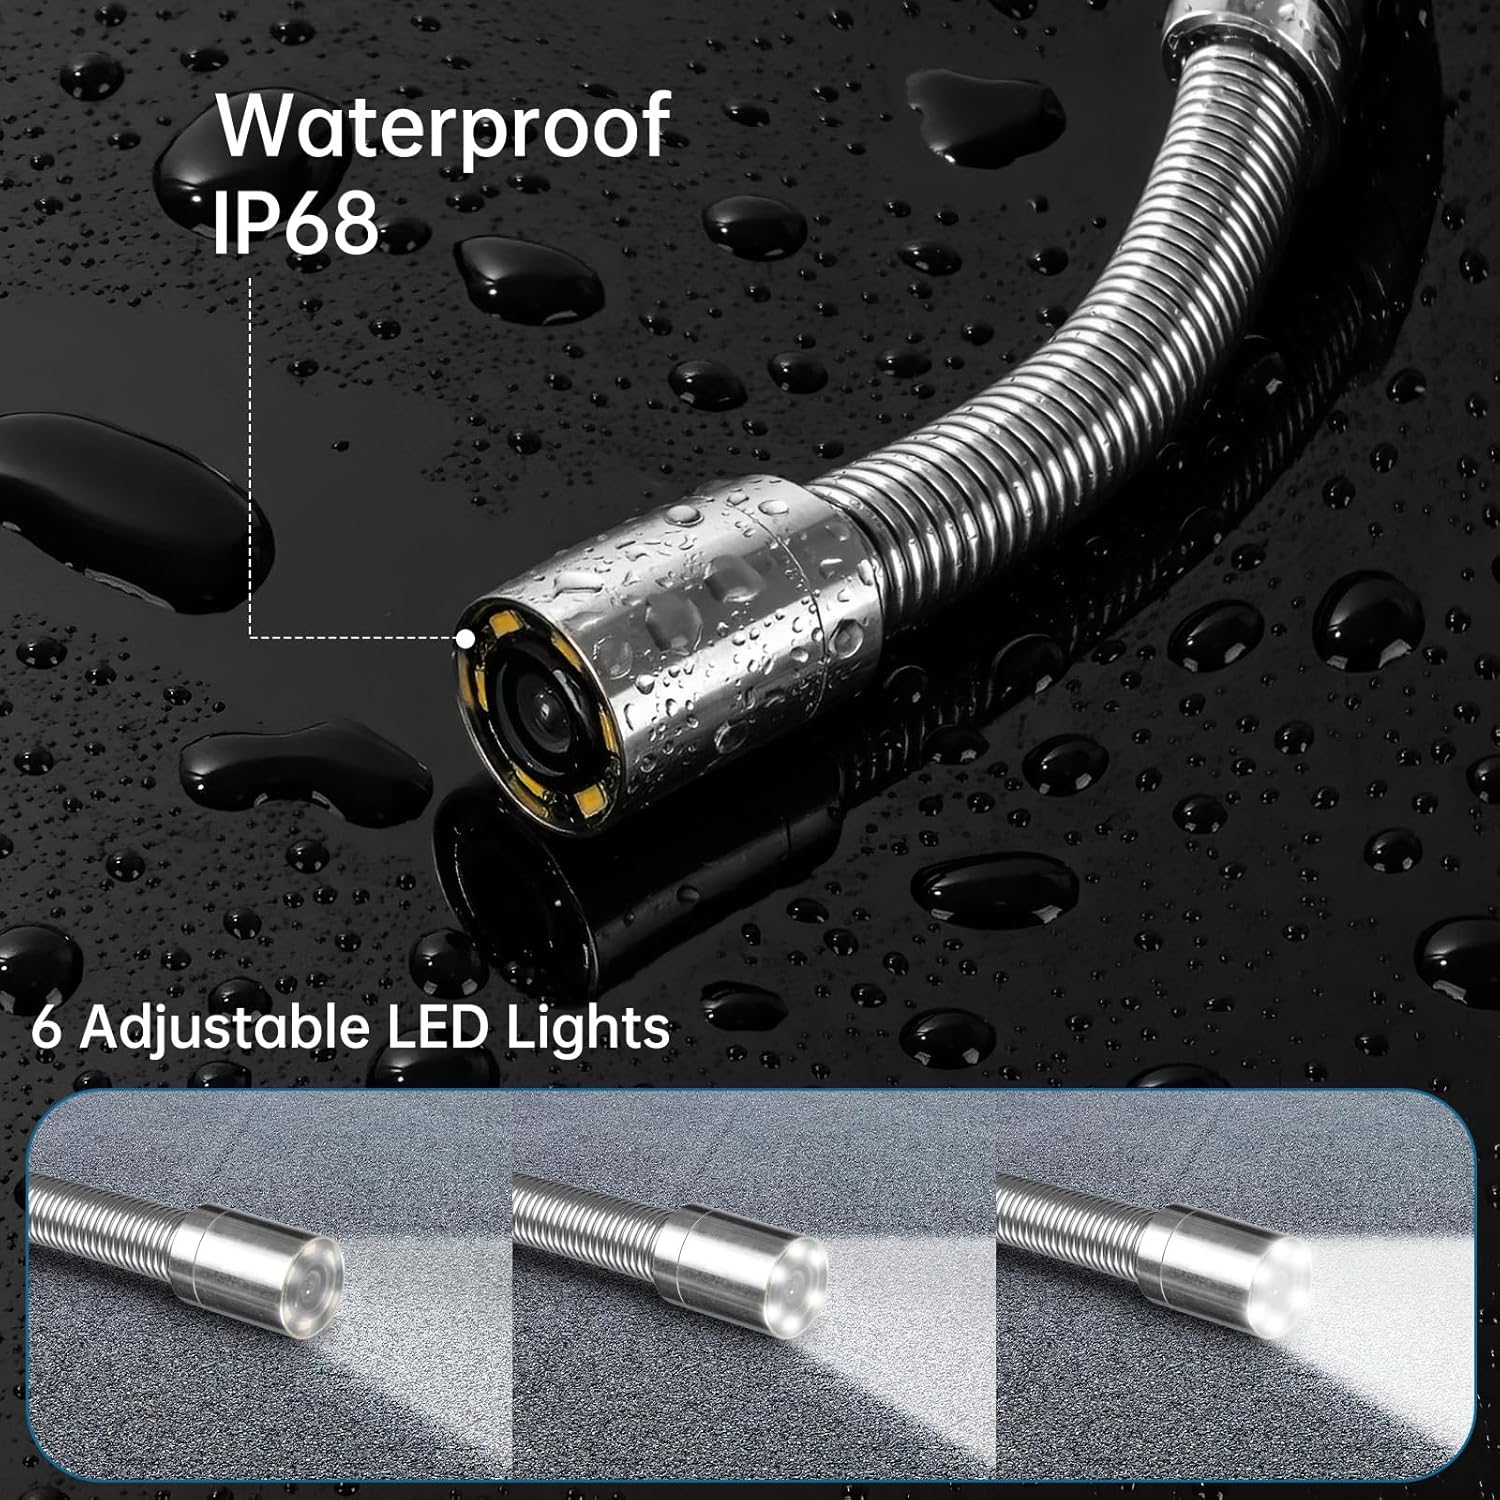
Image 3.1: All components of the JQKJCAM Sewer Camera system.

Image 3.2: Attaching the guide wheel to the camera head for larger pipes.
4. Operating Instructions
Once set up, operate your sewer camera system as follows:
- Power On/Off: Use the ON/OFF switch on the battery box to power the entire system.
- Adjusting Camera Lights: Rotate the knob on the battery box labeled "POWER LIGHT" to adjust the brightness of the camera's LED lights for optimal visibility in varying conditions.
- Inserting the Camera: Carefully feed the camera cable into the pipe or area to be inspected. Use the cable spool to manage the cable length. The meter marks on the cable indicate the current depth of the camera.
- Recording Video: Press the "REC" button on the monitor to start recording. Press "REC" again to stop recording. Recorded footage is saved to the inserted 16GB TF card.
- Capturing Images: While viewing the live feed, press the appropriate button (usually indicated by a camera icon or "SNAP") to capture a still image.
- Playback: Press the "PLAY" button to access recorded videos and images. Use the arrow buttons to navigate through files. Press "PLAY" again to start or pause playback.
- Menu Navigation: Press the "MENU/EXIT" button to access the monitor's settings. Use the arrow buttons to navigate options such as brightness, chroma, contrast, and system version. Press "MENU/EXIT" to exit the menu.

Image 4.1: Adjusting the camera light intensity using the control knob.

Image 4.2: Examples of the sewer camera in various inspection applications.
5. Maintenance
Proper maintenance ensures the longevity and optimal performance of your sewer camera system.
- Cleaning: After each use, clean the camera head and cable with a damp cloth to remove any debris or residue. Ensure no water enters the monitor or battery box.
- Storage: Store the system in its original tool suitcase in a dry, cool place away from direct sunlight and extreme temperatures.
- Battery Care: Recharge the 4500mA battery regularly, even if the unit is not in frequent use, to maintain its lifespan. Avoid fully discharging the battery for extended periods.
- Cable Inspection: Periodically inspect the cable for any signs of wear, cuts, or damage. Replace if necessary to prevent operational issues.
6. Troubleshooting
If you encounter issues with your JQKJCAM Sewer Camera, refer to the following common problems and solutions:
- No Image on Screen:
- Check all cable connections between the camera, battery box, and monitor.
- Ensure the battery is charged and the power switch is in the ON position.
- Verify the camera lights are illuminated.
- Poor Image Quality:
- Adjust the camera's LED lights for better illumination using the power light knob.
- Clean the camera lens if it appears dirty or smudged.
- Check monitor settings (brightness, contrast, chroma) via the menu.
- Cannot Record or Save Files:
- Ensure the 16GB TF card is properly inserted into its slot.
- Check if the TF card has sufficient free space. Delete old files if necessary.
- Format the TF card if issues persist (Note: This will erase all data on the card).
- Cable Difficult to Push/Pull:
- Ensure the cable is not kinked or obstructed within the pipe.
- For smaller pipes, ensure the protective cover is correctly installed on the camera head.
- For larger pipes, ensure the guide wheel is properly attached to facilitate movement.
7. Specifications
Key technical specifications for the JQKJCAM 150 FT Sewer Camera (Model JQ9600B-Y):
| Feature | Specification |
|---|---|
| Model Number | JQ9600B-Y |
| Cable Length | 150 FT (50M) |
| Camera Diameter | 17mm (0.67 inches) |
| Monitor Size | 9 inches HD |
| Storage | 16GB TF Card (included) |
| Battery Capacity | 4500mA Lithium Ion |
| Working Time | Approx. 5-6 hours |
| Water Resistance Level | Waterproof (IP68 for camera head) |
| Item Weight | 16.5 pounds |
| Package Dimensions | 20.04 x 17.63 x 12.24 inches |
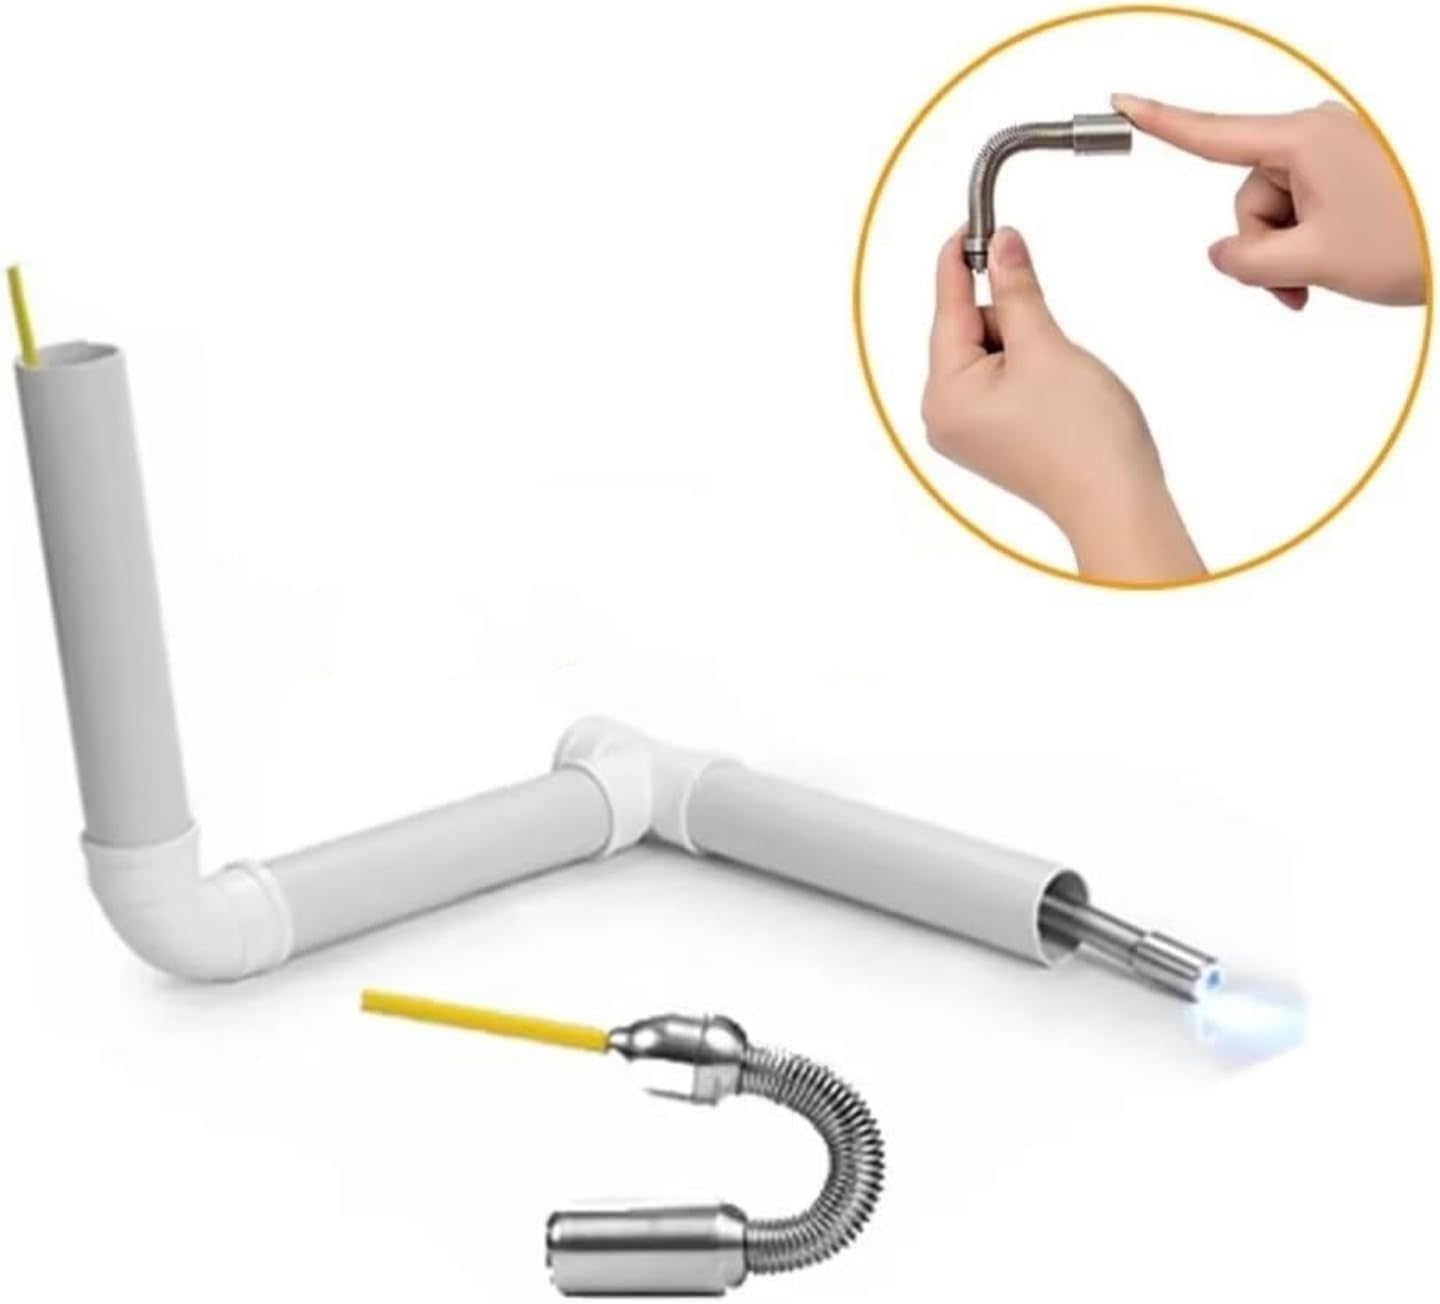
Image 7.1: Dimensions of the JQKJCAM Sewer Camera system.
8. Warranty and Support
This JQKJCAM product comes with a standard manufacturer's warranty. For detailed warranty terms, technical support, or service inquiries, please refer to the contact information provided in your product packaging or visit the official JQKJCAM website. Please retain your proof of purchase for any warranty claims.