1. Introduction
This manual provides comprehensive instructions for the proper use and maintenance of your KitchenTour CaféMetric Coffee Scale with Timer (Model K112). Please read this manual thoroughly before operating the device to ensure optimal performance and longevity. This scale is designed for precise measurement of coffee beans, grounds, and liquids, featuring a built-in timer and specialized modes for espresso and pour-over brewing.
2. Product Overview
2.1 Key Features
- High Precision: Measures with an accuracy of 0.1g.
- Capacity: Supports weights up to 2000g.
- Integrated Timer: For precise brewing control.
- Specialized Modes: Includes Water Flow Speed Mode and Coffee Powder-to-Liquid Ratio Mode.
- Rechargeable Battery: Built-in Lithium Polymer battery, rechargeable via Micro-USB/USB-C.
- Durable Surface: Premium tempered glass weighing platform.
- Compact Design: Suitable for various brewing setups, including espresso machines.
- LCD Display: Clear and easy-to-read digital display.
2.2 Components
The KitchenTour CaféMetric Coffee Scale consists of the following main components:
- Weighing Platform (Tempered Glass)
- LCD Display
- Power Button
- Tare/Zero Button
- Timer Button
- Mode/Unit Button
- Micro-USB/USB-C Charging Port
- Non-slip Silicone Mat

Figure 1: KitchenTour CaféMetric Coffee Scale

Figure 2: Scale Dimensions
3. Setup
3.1 Initial Charging
Before first use, fully charge the scale. Connect the included USB-C cable to the charging port on the side of the scale and plug the other end into a standard USB power adapter (not included). The charging indicator on the display will show charging status. A full charge typically takes approximately 2 hours.
3.2 Placement
Place the scale on a flat, stable, and level surface to ensure accurate readings. Avoid placing it near strong electromagnetic fields or vibrating equipment.
3.3 Power On/Off
- To power on, press the Power button (U).
- To power off, press and hold the Power button (U) for a few seconds until the display turns off.
3.4 Calibration
The scale is factory calibrated. If you experience consistent inaccuracies, manual calibration may be performed. To enter calibration mode, press and hold all four buttons simultaneously when turning the scale on. Follow the on-screen prompts to use calibration weights (not included). It is recommended to use 500g and 2000g calibration weights for best results. Note that calibration settings may not be saved if the power is turned off or reset.
4. Operating Instructions
4.1 Basic Weighing
- Power on the scale.
- Place the item directly onto the weighing platform or use a container.
- Read the weight displayed on the LCD screen.
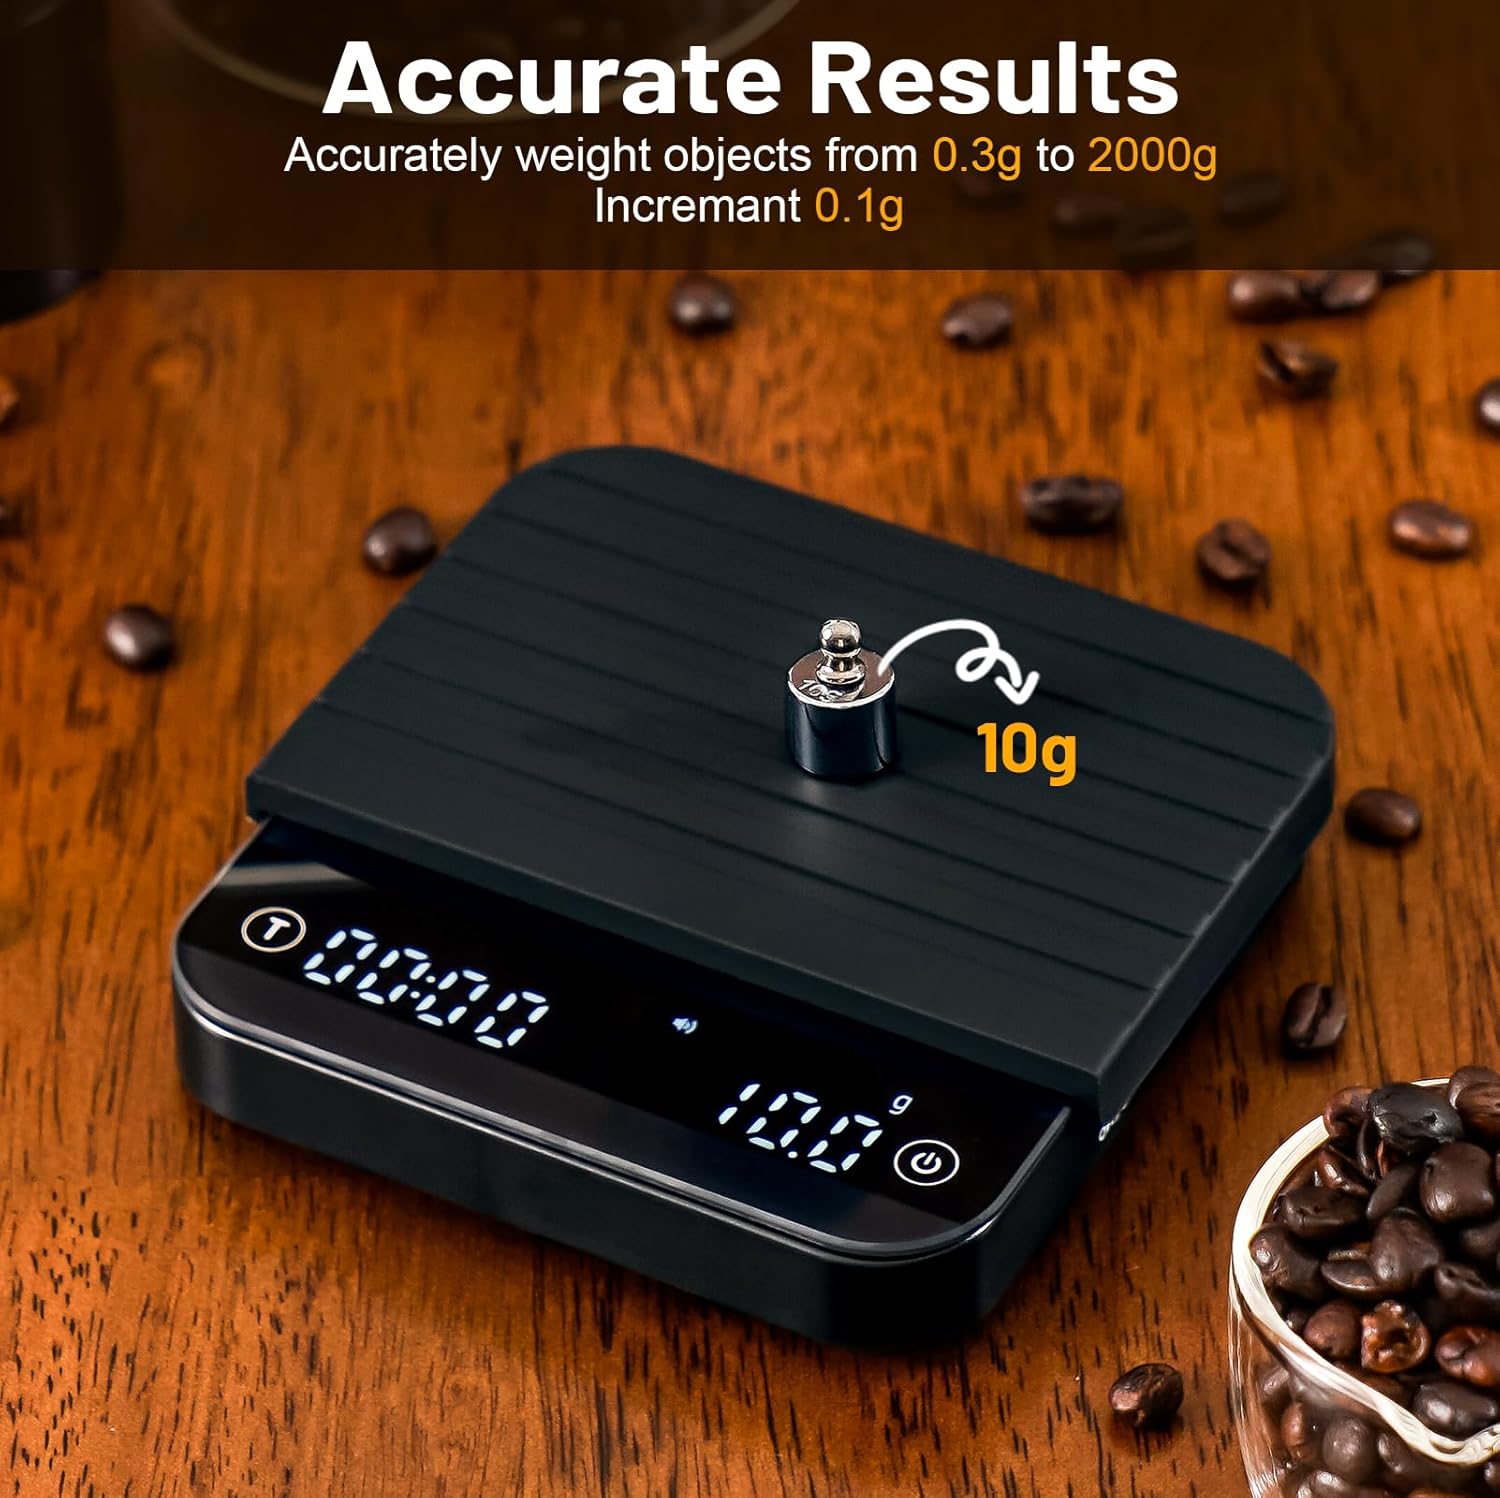
Figure 3: Accurate Weighing
4.2 Tare Function
The tare function allows you to subtract the weight of a container, so only the contents are measured.
- Place an empty container on the weighing platform.
- Press the Tare/Zero button (T). The display will reset to zero.
- Add items to the container. The display will show the net weight of the items.
4.3 Unit Conversion
To switch between weighing units (e.g., grams), press the Mode/Unit button (M) repeatedly until the desired unit is displayed.
4.4 Timer Function
The built-in timer is useful for monitoring brewing times.
- To start the timer, press the Timer button (T).
- To pause/resume the timer, press the Timer button (T) again.
- To reset the timer, press and hold the Timer button (T) for a few seconds.
4.5 Water Flow Speed Mode (Pour Over)
This mode assists in achieving consistent pour-over brewing by displaying the real-time water flow rate.
- Place your pour-over setup (dripper, filter, server) on the scale.
- Tare the scale to zero.
- Activate the Water Flow Speed Mode (refer to specific button combination if available, otherwise typically by pressing the Mode button until 'flow' or similar indicator appears).
- Begin pouring water. The display will show the flow rate in addition to the total weight and timer.

Figure 4: Precision Water Flow Mode for Pour Over
4.6 Coffee Powder-to-Liquid Ratio Mode (Espresso)
This mode helps achieve desired espresso ratios by displaying the ratio of coffee powder to liquid output.
- Place your portafilter with ground coffee on the scale and tare it.
- Place your espresso cup on the scale and tare it.
- Activate the Coffee Powder-to-Liquid Ratio Mode (refer to specific button combination if available, otherwise typically by pressing the Mode button until 'ratio' or similar indicator appears).
- Begin brewing your espresso. The display will show the current ratio as the liquid is dispensed.
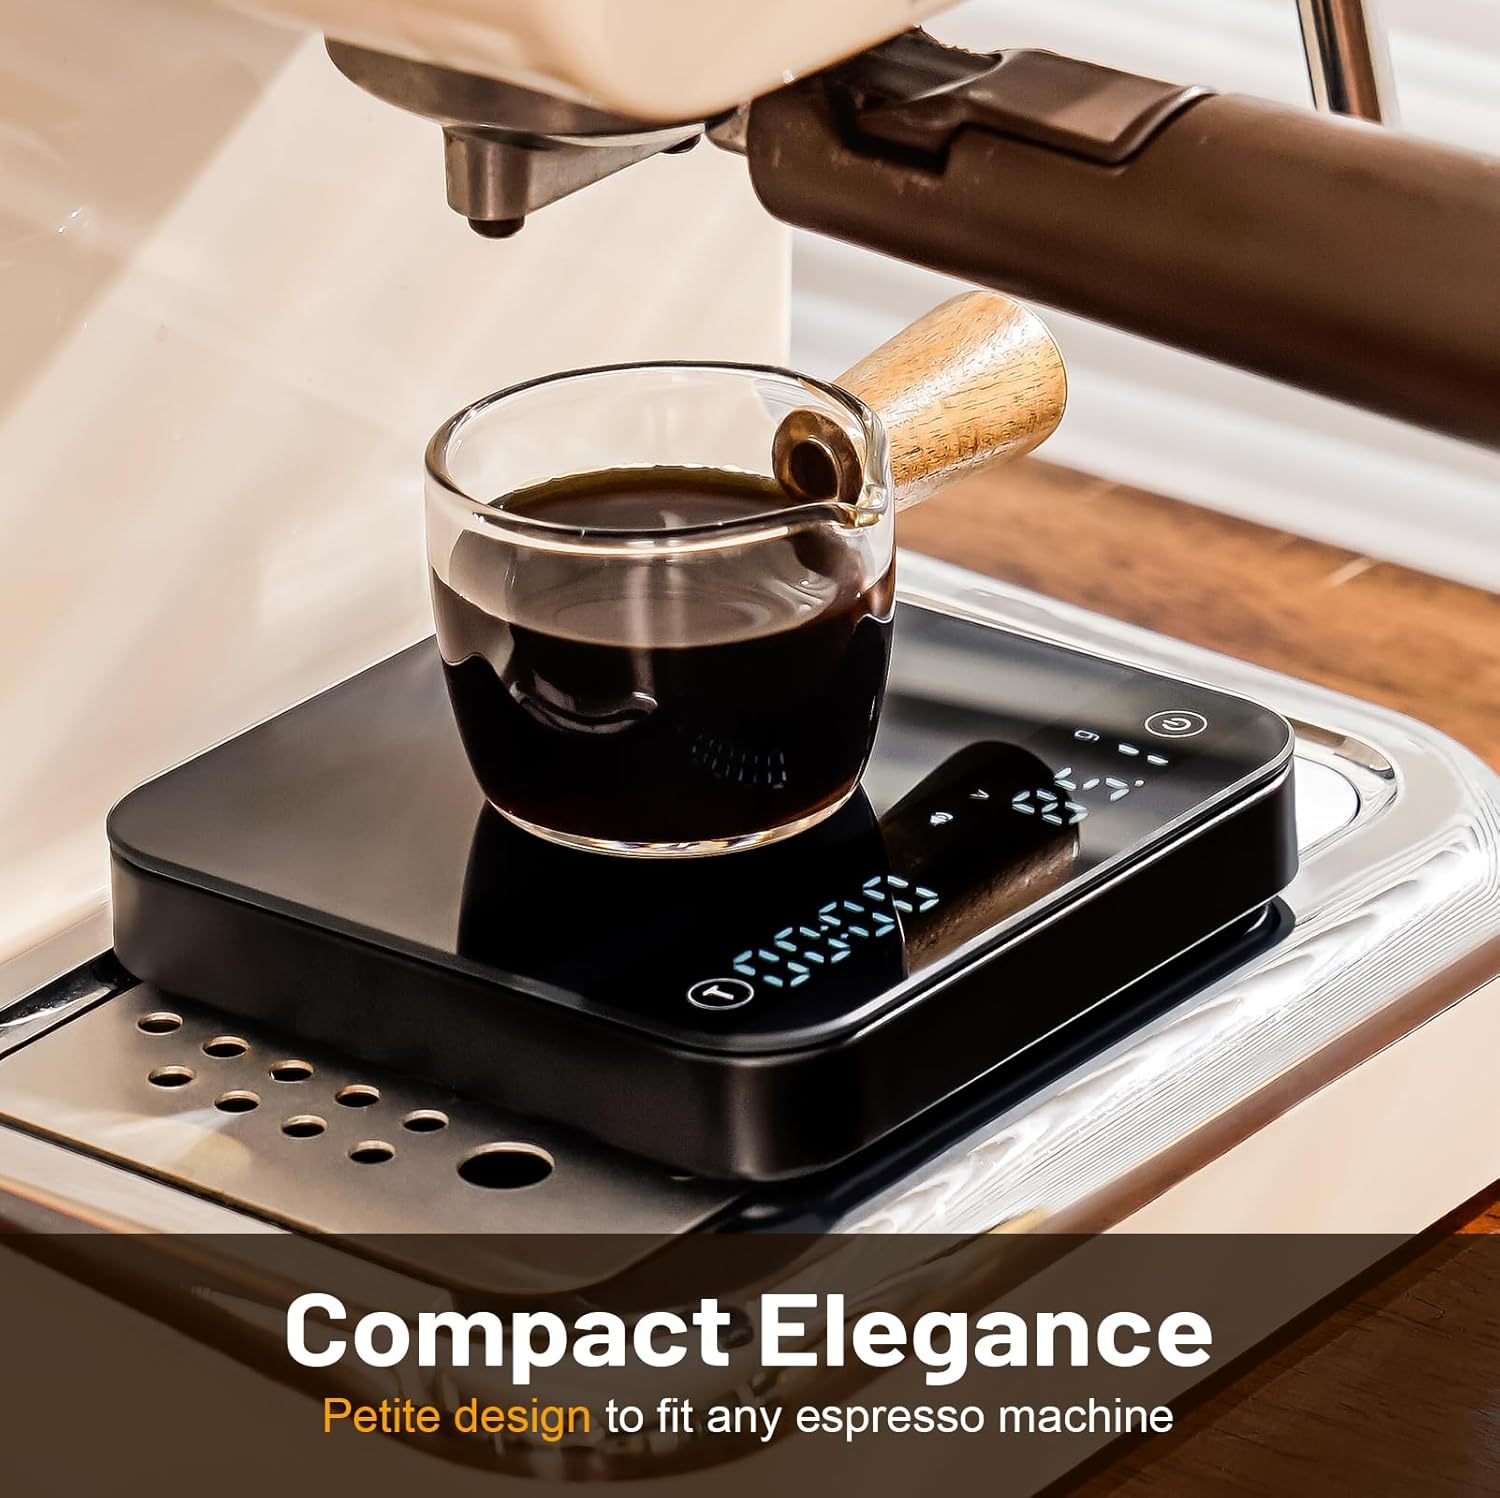
Figure 5: Compact Design for Espresso Machines
5. Charging
The KitchenTour CaféMetric Coffee Scale is equipped with a rechargeable Lithium Polymer battery. When the battery is low, the display will show a low battery indicator.
- Connect the provided USB-C cable to the charging port on the side of the scale.
- Connect the other end of the cable to a standard USB power source (e.g., computer USB port, wall adapter).
- A full charge takes approximately 2 hours.
- The scale is designed to provide up to 60 days of use with thrice-daily operation on a single charge.
- The battery supports 300-500 recharge cycles.

Figure 6: Charging Port and Battery Efficiency
6. Maintenance and Care
6.1 Cleaning
To maintain the accuracy and appearance of your scale:
- Wipe the tempered glass surface and body with a soft, damp cloth.
- Do not use abrasive cleaners or immerse the scale in water.
- The non-slip silicone mat is removable and washable.
- Avoid spilling liquids directly onto the control panel area to prevent damage.

Figure 7: Effortless Cleaning
6.2 Storage
Store the scale in a cool, dry place away from direct sunlight and extreme temperatures. Its compact design allows for easy storage.
7. Troubleshooting
If you encounter issues with your scale, refer to the following common problems and solutions:
| Problem | Possible Cause | Solution |
|---|---|---|
| Scale does not turn on. | Low battery or no power. | Charge the scale using the provided USB-C cable. Ensure the power button is pressed correctly. |
| Inaccurate readings. | Unstable surface, overload, or needs calibration. | Place the scale on a flat, stable surface. Ensure weight does not exceed 2000g. Perform calibration if necessary (refer to Section 3.4). |
| Display shows "Err". | Overload or internal error. | Remove items from the scale. If the error persists, power off and restart the scale. |
| Timer or other functions unresponsive. | Temporary software glitch or liquid damage. | Power off and restart the scale. Ensure the control panel is dry and clean. |
8. Specifications
- Model: K112
- Brand: K KitchenTour
- Product Dimensions: 6.8 x 6.29 x 2.55 inches
- Item Weight: 1.08 Pounds
- Weight Limit: 2000g (4.4 lbs)
- Accuracy: 0.1g (0-500g), 0.5g (501-1000g), 1g (1001-2000g)
- Display Type: LCD
- Battery: 1 Lithium Polymer battery (included)
- Charging Port: Micro-USB/USB-C
9. Warranty and Support
Your KitchenTour CaféMetric Coffee Scale is covered by a manufacturer's warranty against defects in materials and workmanship. For specific warranty details, support, or service inquiries, please refer to the product packaging or contact KitchenTour customer service directly. Keep your purchase receipt as proof of purchase.


