1. Important Safety Information
Your safety and the safety of others are paramount. Please read and understand all safety warnings and instructions before assembling and using the trampoline.
- This trampoline is designed for outdoor use.
- Always supervise children using the trampoline.
- Only one person should jump at a time to prevent collisions.
- Do not attempt somersaults or other dangerous maneuvers without proper training and supervision.
- Ensure the safety net is properly installed and secured before use.
- Keep clear of the area under and around the trampoline.
- Maximum weight recommendation: 150 kg (330 lbs).
- Devoko trampolines comply with safety standards EN71-1:2014+A1:2018, EN71-2:2020, EN71-3:2019+A1:2021, EN71-14:2018.
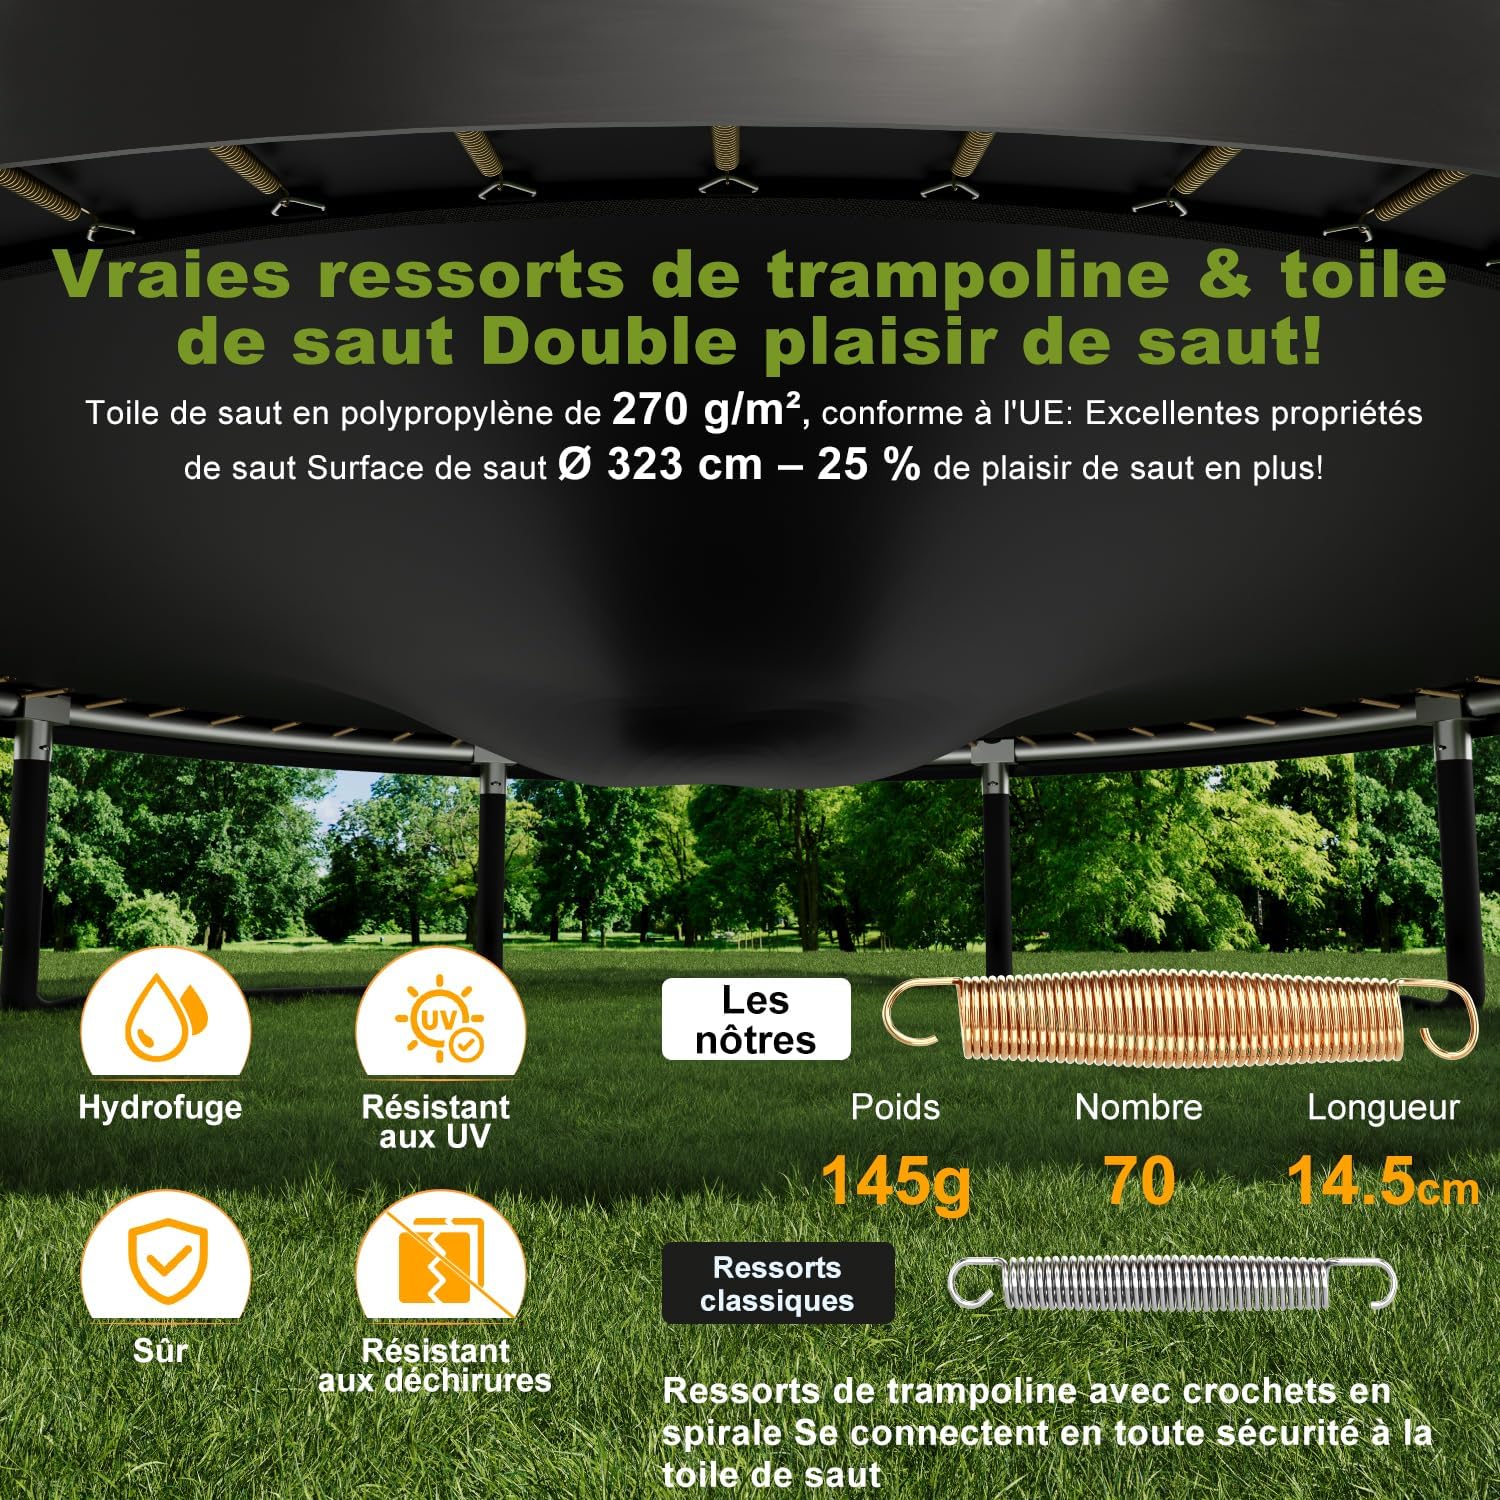
Figure 1: Seamless Safety Mat. This design eliminates gaps between the springs and safety pads, significantly reducing the risk of accidents and injuries.

Figure 2: L-Shaped Zipper Entry. The L-shaped zipper provides a wide and secure opening for easy access, featuring a double-ended zipper and triple locking mechanism for enhanced safety.
2. Assembly Instructions
Assembly requires at least two adults. Follow these steps carefully. A detailed installation manual and video are included in your package.
- Unpack Components: Carefully remove all parts from the packaging. Verify all components are present against the parts list provided in the separate manual. Gloves and spring tools are included.
- Assemble Frame: Connect the frame sections according to the diagram. Ensure all connections are secure. The galvanized frame interior and powder-coated legs provide rust prevention.
- Attach Legs: Securely attach the reinforced U-shaped legs to the main frame. The 5 reinforced U-feet ensure stable support.
- Install Jumping Mat: Attach the polypropylene (PP) jumping mat to the frame using the springs and the provided spring tool. Ensure all 72 springs are correctly installed and evenly tensioned.
- Erect Safety Net Poles: Install the improved trampoline poles. These poles feature a 25mm diameter for the upper section and 38mm for the lower section, creating a secure play area.
- Install Safety Net: Attach the 90 g/m² PET safety net to the poles and the jumping mat. Ensure the net is taut and the L-shaped zipper entry is functional.
- Attach Ladder: Secure the plastic-coated ladder for easy and safe access to the trampoline.
- Ground Anchors: Use the included ground anchors to secure the trampoline to the ground, especially in windy conditions.

Figure 3: Assembled Trampoline. A view of the Devoko trampoline with its safety enclosure and ladder, ready for use.

Figure 4: Improved Trampoline Poles. The enhanced pole design ensures greater stability and safety for the enclosure net.

Figure 5: Product Dimensions and Packaging. This diagram illustrates the overall dimensions of the 366 cm / 12 FT trampoline, its 150 kg weight capacity, and that it ships in 3 packages, including a ladder, storage bag, and gloves.
3. Operating Instructions
To ensure a safe and enjoyable experience, follow these operating guidelines:
- Entry and Exit: Always use the provided ladder to enter and exit the trampoline. Open and close the L-shaped zipper carefully.
- Jumping Technique: Jump in the center of the mat. Avoid jumping too high or attempting complex stunts without proper training.
- Supervision: Children must always be supervised by an adult.
- Weather Conditions: Do not use the trampoline during strong winds, rain, or thunderstorms. Secure it with ground anchors.
- Footwear: Remove shoes before using the trampoline.
- Objects: Do not bring sharp objects, toys, or food onto the trampoline.

Figure 6: Enjoying the Trampoline. The trampoline provides a fun and safe outdoor activity for families, promoting physical activity and interaction.
4. Maintenance
Regular maintenance ensures the longevity and safety of your Devoko trampoline.
- Regular Inspection: Periodically check all nuts, bolts, and connections for tightness. Ensure the frame, springs, jumping mat, and safety net are free from damage or wear.
- Cleaning: Clean the jumping mat and safety net with mild soap and water. Avoid harsh chemicals.
- Rust Prevention: The galvanized frame and powder-coated legs are designed to resist rust. However, inspect for any signs of rust and treat as necessary.
- Weather Protection: The thick foam padding is waterproof, and the jumping mat is UV-resistant. For prolonged periods of non-use or extreme weather, consider using a weather cover (not included) or disassembling the trampoline.
- Springs: The trampoline features durable, abrasion-resistant polypropylene (PP) jumping mat with good elasticity and rebound properties. The springs are designed for long-term use.

Figure 7: Weather Resistance. The trampoline is designed to be sun-resistant (5500-hour UV test) and rain-impermeable, ensuring durability in various outdoor conditions.

Figure 8: Double Rust Protection. The frame features 1.5mm galvanized steel and a polymer coating for enhanced rust resistance, ensuring a longer product lifespan.
5. Troubleshooting
This section addresses common issues you might encounter. For problems not listed here, please contact customer support.
| Problem | Possible Cause | Solution |
|---|---|---|
| Trampoline feels unstable. | Loose frame connections or uneven ground. | Check all frame connections and tighten bolts. Ensure the trampoline is placed on a flat, level surface. Use ground anchors. |
| Jumping mat has reduced bounce. | Damaged or stretched springs, or worn jumping mat. | Inspect all springs for damage or stretching. Replace any faulty springs. Check the jumping mat for tears or excessive wear. |
| Safety net is sagging or torn. | Loose net attachments or material damage. | Ensure the net is securely attached to all poles and the mat. Replace the safety net if it is torn or significantly damaged. |
| Difficulty with zipper. | Zipper obstruction or damage. | Clear any debris from the zipper path. If the zipper is damaged, contact customer support for replacement parts. |
6. Specifications
| Feature | Detail |
|---|---|
| Model Number | GSD12FTK |
| Frame Size | 366 cm / 12 FT |
| Product Dimensions (L x W x H) | 427 x 427 x 80 cm (excluding net height) |
| Weight | 55.6 kg |
| Maximum Weight Recommendation | 150 kg |
| Number of Springs | 72 |
| Frame Material | Metal (Galvanized Steel) |
| Jumping Mat Material | Polypropylene (PP) |
| Safety Net Material | 90 g/m² PET |
| Shape | Round |
| Color | Black |
| Included Components | Ladder, Gloves, Spring Tool |
| Certifications | EN71-1:2014+A1:2018, EN71-2:2020, EN71-3:2019+A1:2021, EN71-14:2018 |

Figure 9: Size Options. This diagram illustrates the different available sizes (8FT, 10FT, 12FT, 14FT) with their respective dimensions and maximum weight recommendations.
7. Warranty and Support
Devoko offers a comprehensive warranty and dedicated customer support for your trampoline.
- Warranty: This product comes with a three-year warranty.
- Return Policy: Enjoy a 30-day free return period from the date of purchase.
- Customer Support: If you encounter any issues or have questions, please contact Devoko customer service. We commit to responding within 24 hours.
- Contact Information: Refer to your purchase documentation or the Devoko brand store on Amazon for the most up-to-date contact details. You can visit the official Devoko store here.