vidaXL 3214385
vidaXL Shoe Cabinet User Manual
Model: 3214385 | Brand: vidaXL
1. Introduction
Thank you for purchasing the vidaXL Shoe Cabinet. This manual provides detailed instructions for the assembly, operation, and maintenance of your new shoe cabinet. Designed to keep your shoes tidy and easily accessible, this cabinet features a modern, minimalistic design that complements various home decors. Please read this manual thoroughly before assembly and use to ensure proper installation and safe operation.
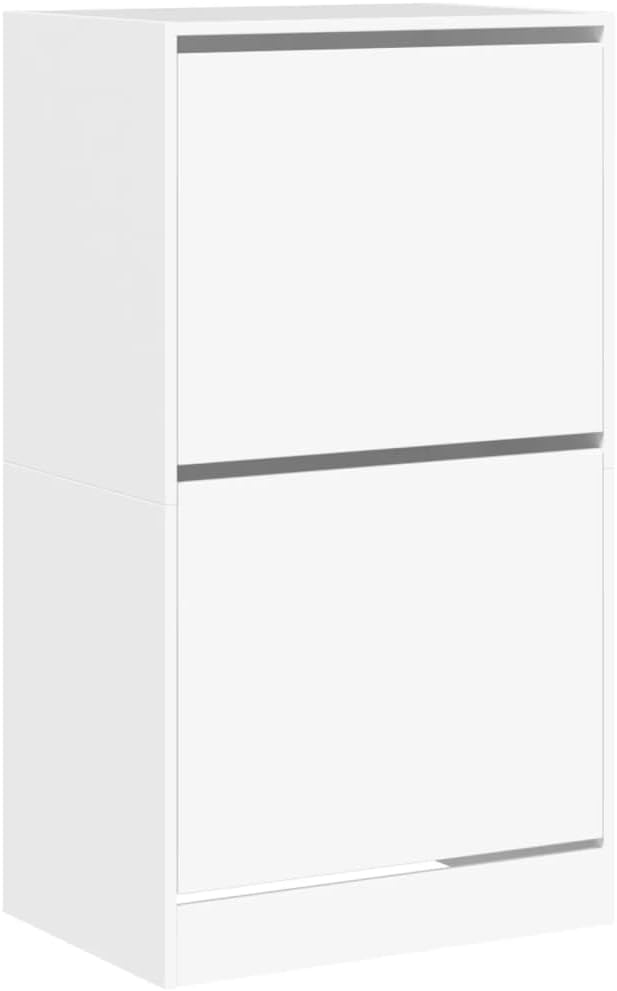
Image 1.1: Front view of the vidaXL Shoe Cabinet.
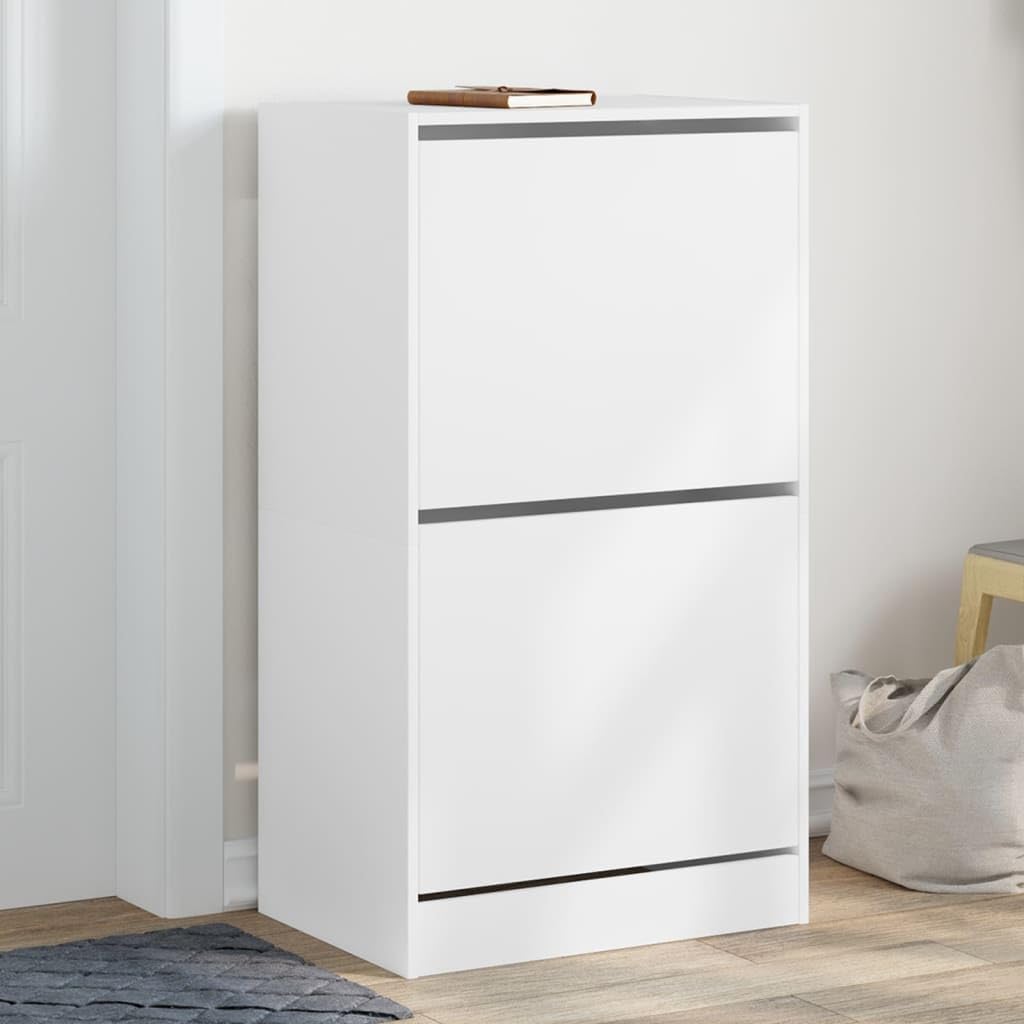
Image 1.2: The vidaXL Shoe Cabinet placed in a hallway, demonstrating its compact design and integration into a living space.
2. Safety Information
Your safety is paramount. Please adhere to the following safety guidelines during assembly and use:
- Wall Mounting is Required: To prevent tipping over, this product must be securely mounted to a wall using the supplied wall mount hardware. Failure to do so can result in serious injury, especially to children.
- Assembly by Adults: Assembly should be performed by competent adults. Keep small parts and assembly tools out of reach of children.
- Check All Parts: Before beginning assembly, ensure all parts are present and undamaged. Do not proceed with assembly if any parts are missing or broken.
- Use Correct Tools: Use appropriate tools as indicated in the assembly instructions. Do not overtighten screws, as this may damage the material.
- Stable Surface: Assemble the cabinet on a clean, flat, and stable surface to prevent scratching or damage to the product or your floor.
- Proposition 65 Warning: This product may expose you to chemicals known to the State of California to cause cancer or birth defects or other reproductive harm. For more information, go to www.P65Warnings.ca.gov.
3. Assembly Instructions
Assembly of the vidaXL Shoe Cabinet is required. While the instructions are designed to be straightforward, some users have noted that certain steps, particularly those involving hinge insertion, may require additional effort. We recommend reviewing all steps before starting.
3.1. Required Tools (Not Included)
- Screwdriver (Phillips head recommended)
- Hammer (potentially needed for hinge insertion, as noted by some users)
- Drill (for wall mounting)
- Level
- Pencil
3.2. Parts List
Please verify that all components are present before starting assembly. Refer to the included assembly diagram for specific part identification.
| Part | Description | Quantity |
|---|---|---|
| A | Side Panels | 2 |
| B | Top Panel | 1 |
| C | Bottom Panel | 1 |
| D | Back Panel | 1 |
| E | Flip-Down Drawers | 2 |
| F | Hinge Mechanisms | 2 sets |
| G | Internal Shoe Racks | 6 (3 per drawer) |
| H | Assembly Hardware (screws, dowels, etc.) | 1 set |
| I | Wall Mounting Hardware | 1 set |
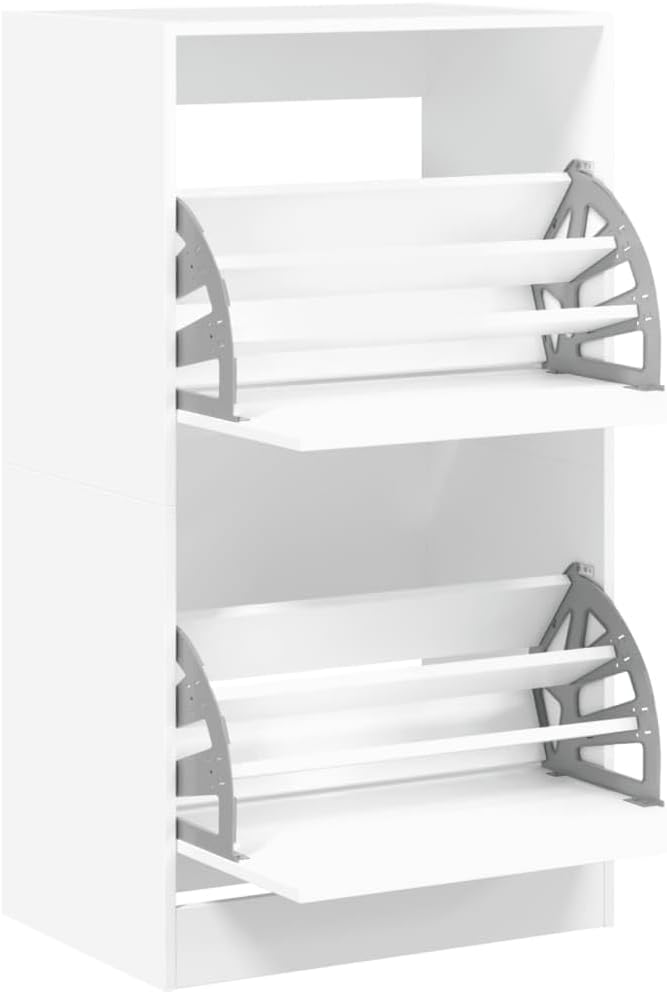
Image 3.1: View of the internal shoe racks and flip-down drawer mechanism.
3.3. Step-by-Step Assembly
- Unpack and Identify: Carefully unpack all components and lay them out on a soft, clean surface. Identify each part using the provided parts list and diagrams.
- Assemble the Main Frame: Attach the side panels (A) to the top (B) and bottom (C) panels using the provided hardware (H). Ensure all connections are secure.
- Install Back Panel: Slide or fasten the back panel (D) into the grooves or attach it to the rear of the assembled frame.
- Prepare Flip-Down Drawers: Attach the internal shoe racks (G) to the flip-down drawers (E) as per the diagram.
- Install Hinge Mechanisms: This step requires precision. Insert the hinge mechanisms (F) into the designated holes on the side panels and the flip-down drawers. Note: Some users have reported that the hinge holes may be tight, potentially requiring gentle tapping with a hammer to fully seat the mechanism. Exercise caution to avoid damage.
- Attach Flip-Down Drawers: Secure the assembled flip-down drawers (E) to the main cabinet frame using the hinge mechanisms. Test the smooth operation of the drawers.
- Wall Mounting: This is a critical safety step.
- Position the assembled shoe cabinet in its desired location.
- Mark the wall through the pre-drilled holes on the cabinet's back or top edge for the wall mounting hardware (I).
- Drill appropriate holes in the wall, ensuring they are suitable for your wall type (e.g., drywall anchors, concrete plugs).
- Securely fasten the cabinet to the wall using the provided wall mounting hardware. Ensure the cabinet is level and stable.
- Final Check: Verify that all screws are tightened, and the cabinet is stable and securely mounted to the wall.
4. Operation
The vidaXL Shoe Cabinet is designed for simple and efficient shoe storage.
4.1. Storing Shoes
- To access the storage compartments, gently pull the top edge of the flip-down drawer outwards. The drawer will pivot downwards, revealing the internal shoe racks.
- Place your shoes on the individual tiers within the drawer. The cabinet is designed to accommodate various shoe sizes.
- To close, push the drawer upwards until it clicks securely into its closed position. This keeps your shoes neatly concealed and your living area tidy.
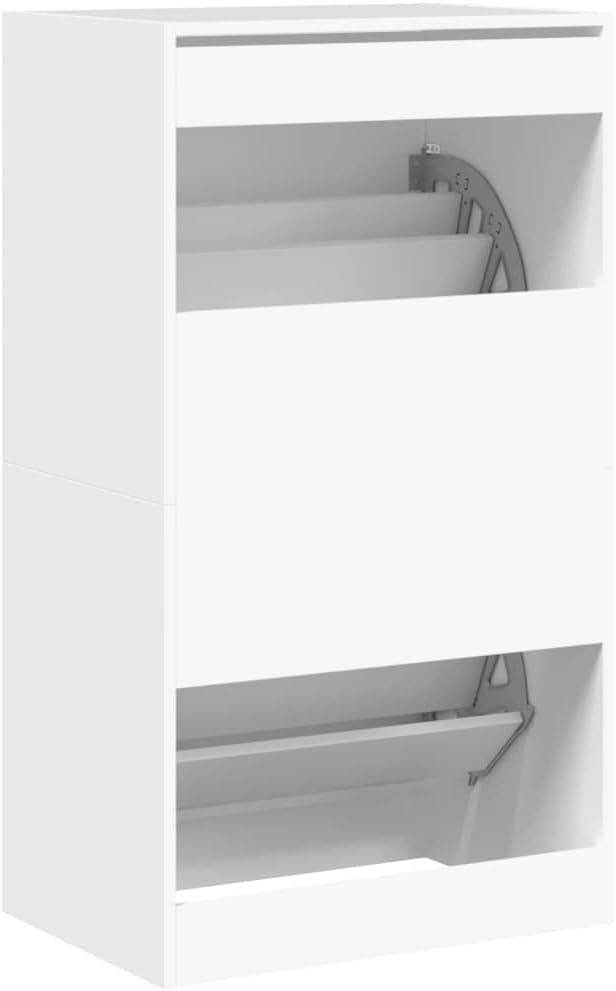
Image 4.1: The shoe cabinet with one flip-down drawer open, showing the internal storage.
5. Maintenance
Proper care will extend the life and appearance of your shoe cabinet.
- Cleaning: Wipe the surfaces with a soft, damp cloth. Avoid abrasive cleaners or harsh chemicals, as these can damage the engineered wood finish.
- Dusting: Regularly dust the cabinet with a dry, soft cloth to prevent dust buildup.
- Spills: Immediately wipe up any spills to prevent moisture damage to the engineered wood.
- Hardware Check: Periodically check all screws and connections to ensure they remain tight. Retighten if necessary.
- Wall Mount Check: Regularly inspect the wall mounting to ensure it remains secure.
6. Troubleshooting
If you encounter issues with your vidaXL Shoe Cabinet, refer to the following common problems and solutions:
| Problem | Possible Cause | Solution |
|---|---|---|
| Cabinet is wobbly or unstable. | Not securely wall-mounted; loose connections. | Ensure the cabinet is properly mounted to the wall using the provided hardware. Check and tighten all assembly screws. |
| Flip-down drawers do not open/close smoothly. | Hinges not fully seated; obstruction; incorrect assembly. | Verify that the hinge mechanisms are fully inserted and correctly aligned. Check for any objects obstructing the drawer's path. Review assembly steps for hinge installation. |
| Difficulty inserting hinge parts during assembly. | Tight manufacturing tolerances. | As noted in assembly, some hinge parts may require gentle, careful tapping with a hammer to fully seat them into the pre-drilled holes. Do not force excessively. |
| Scratches or damage during assembly. | Assembly on rough surface; improper handling. | Always assemble on a soft, clean surface (e.g., a blanket or cardboard). Handle parts carefully. Minor scratches can sometimes be touched up with furniture repair pens. |
7. Specifications
Key specifications for the vidaXL Shoe Cabinet (Model 3214385):
- Brand: vidaXL
- Model Number: 3214385
- ASIN: B0CSFR9NSW
- Color: White
- Material: Engineered Wood
- Dimensions (L x W x H): 60 x 42 x 108 cm (23.6" x 16.5" x 42.5")
- Weight: Approximately 77.2 pounds (35 kg)
- Drawers: 2 flip-down drawers, each with 3 tiers
- Mounting Type: Floor Mount (requires wall mounting for stability)
- Assembly Required: Yes
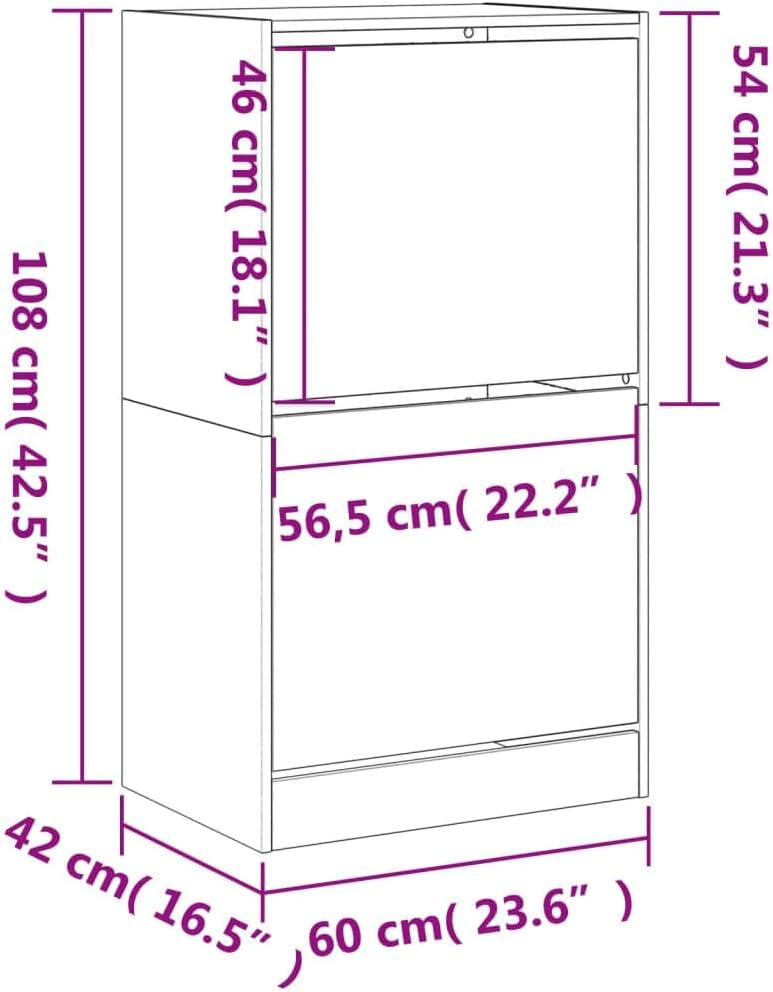
Image 7.1: Detailed dimensions of the vidaXL Shoe Cabinet.
8. Customer Support & Warranty
For any questions, missing parts, or assistance with assembly, please contact vidaXL customer support. Refer to your purchase documentation for specific warranty details.
- Manufacturer: vidaXL
- Online Support: Visit the official vidaXL website or the Amazon store page for the product for contact information and FAQs. You can find the vidaXL store at vidaXL Amazon Store.
- Returns: This product typically offers 30-day easy returns. Please check your purchase details for the exact return policy.
Ask a question about this manual
Ask about setup, troubleshooting, compatibility, parts, safety, or missing instructions. Manuals+ will review the question and use this page’s manual context to help answer it.