
1. Introduction
This manual provides detailed instructions for the installation, operation, and maintenance of your SOAJEE Carburetor Kit. This kit is designed to restore optimal performance to compatible small engines.
Package Contents
The SOAJEE Carburetor Kit includes the following components:
- 1 x Carburetor
- 1 x Carburetor Cleaning Brush
- 2 x Mounting Gaskets
- 2 x Fuel Filters
- 2 x Fuel Lines
- 4 x Primer Bulbs
- 1 x Spark Plug
- 1 x Adjusting Tool

Image 1.1: Complete SOAJEE Carburetor Kit showing all included parts: carburetor, gaskets, fuel filters, fuel lines, primer bulbs, spark plug, cleaning brush, and adjusting tool.
Compatibility
This carburetor kit is compatible with various Homelite and Ryobi 25cc, 26cc, and 30cc engines. Specific compatible models include:
- Homelite UT26HBV, UT26HBVEMC 26B Gas Blower Vacuum
- Homelite UT-26HBV, UT-26HBVEMC Blower Vacuum
- Homelite UT26BVL3VNM, UT26BVL3EMCVNM Blower Vacuum
- Homelite UT-33600A 26cc String Trimmer EHCPS 0264AT, 0264OF
- Homelite UT-32601A 26CS Weedeater

Image 1.2: The carburetor component, highlighting its compatibility with Ryobi and Homelite 25cc, 26cc, and 30cc engines.
2. Setup and Installation
Before beginning installation, ensure the engine is cool and disconnected from any power source (e.g., spark plug wire removed). Always wear appropriate safety gear, including gloves and eye protection.
General Installation Steps:
- Preparation: Drain any fuel from the tank. Remove the air filter cover and air filter.
- Disconnect: Carefully disconnect the fuel lines and throttle linkage from the old carburetor. Note their positions for reinstallation.
- Remove Old Carburetor: Unscrew the mounting bolts holding the old carburetor in place and remove it along with any old gaskets.
- Install New Gaskets: Place the new mounting gaskets provided in the kit onto the engine block and then onto the new carburetor. Ensure they are correctly aligned to prevent air leaks.
- Mount New Carburetor: Position the new carburetor onto the engine, aligning it with the mounting bolts. Secure it with the screws, tightening them evenly.
- Connect Fuel Lines: Attach the new fuel lines (if replacing) and the throttle linkage to the new carburetor. Refer to your equipment's specific diagram if unsure about fuel line routing.
- Install New Fuel Filters and Primer Bulbs: Replace the old fuel filters in the fuel tank and the primer bulbs on the carburetor as needed.
- Replace Spark Plug: Install the new spark plug provided in the kit.
- Final Checks: Reinstall the air filter and cover. Ensure all connections are secure and there are no fuel leaks.

Image 2.1: The carburetor's design ensures an exact fit for original equipment, facilitating easy replacement.
3. Operating and Adjustment
After installation, the carburetor may require minor adjustments to achieve optimal engine performance. The included adjusting tool can be used for this purpose.
Initial Start-up:
- Fill the fuel tank with the appropriate fuel mixture for your engine.
- Prime the carburetor by pressing the primer bulb until fuel is visible.
- Engage the choke (if applicable) and attempt to start the engine.
- Once the engine fires, disengage the choke and allow it to warm up.
Carburetor Adjustment:
Most small engine carburetors have two main adjustment screws: High (H) and Low (L) speed. Some may also have an idle speed screw (T).
- Low Speed (L) Adjustment: Controls the fuel mixture at idle and low RPMs. Adjust for smooth idling and good acceleration.
- High Speed (H) Adjustment: Controls the fuel mixture at full throttle. Adjust for maximum power without bogging down.
- Idle Speed (T) Adjustment: Sets the engine's idle RPM.
Refer to your specific equipment's service manual for precise adjustment procedures and recommended settings. Generally, adjustments are made in small increments (e.g., 1/8 turn) while the engine is running and warmed up.
4. Maintenance
Regular maintenance ensures the longevity and reliable performance of your carburetor and engine.
Carburetor Cleaning:
- Periodically clean the carburetor, especially if the equipment has been stored for an extended period or if fuel quality is a concern.
- Use the included carburetor cleaning brush to clear any blockages in the jets and passages.
- A carburetor cleaner spray (not included) can be used to dissolve varnish and fuel deposits.
Fuel Filter Replacement:
- Replace fuel filters regularly (e.g., annually or every 50 hours of operation) to prevent contaminants from reaching the carburetor.
- The kit includes two replacement fuel filters.
Spark Plug Replacement:
- Replace the spark plug as part of routine maintenance or if the engine experiences starting difficulties or misfires.
- The kit includes one replacement spark plug.
5. Troubleshooting
If you encounter issues after installing the carburetor, consider the following common problems and solutions:
| Problem | Possible Cause | Solution |
|---|---|---|
| Engine will not start | No fuel, clogged fuel filter, faulty spark plug, incorrect choke setting, carburetor adjustment needed. | Check fuel level, replace fuel filter, replace spark plug, ensure choke is set correctly, adjust carburetor. |
| Engine starts then dies | Improper carburetor adjustment (especially low speed), fuel delivery issue, air leak. | Adjust low-speed screw, check fuel lines for kinks or blockages, ensure gaskets are sealed properly. |
| Engine runs rough or lacks power | Incorrect carburetor adjustment (high speed), dirty air filter, old fuel. | Adjust high-speed screw, clean or replace air filter, use fresh fuel. |
| Fuel leaks | Loose fuel lines, damaged primer bulb, improperly seated gaskets. | Tighten fuel line clamps, replace primer bulb, re-seat or replace gaskets. |
6. Specifications
Key specifications for the SOAJEE Carburetor Kit:
- Brand: SOAJEE
- Manufacturer: SOAJEE
- Item Weight: 9.1 ounces
- Package Dimensions: 7.32 x 6.97 x 2.44 inches
- Manufacturer Part Number: UT26HBV UT26HBVEMC UT26BVL3VNM EHCPS
- Fuel Type: Gasoline
- Recommended Uses: Lawn Mower, Blower, Trimmer, Weedeater
Carburetor Dimensions:

Image 6.1: Carburetor dimensions, illustrating a 0.59 inch (15mm) inlet diameter and 1.22 inch (31mm) overall height.
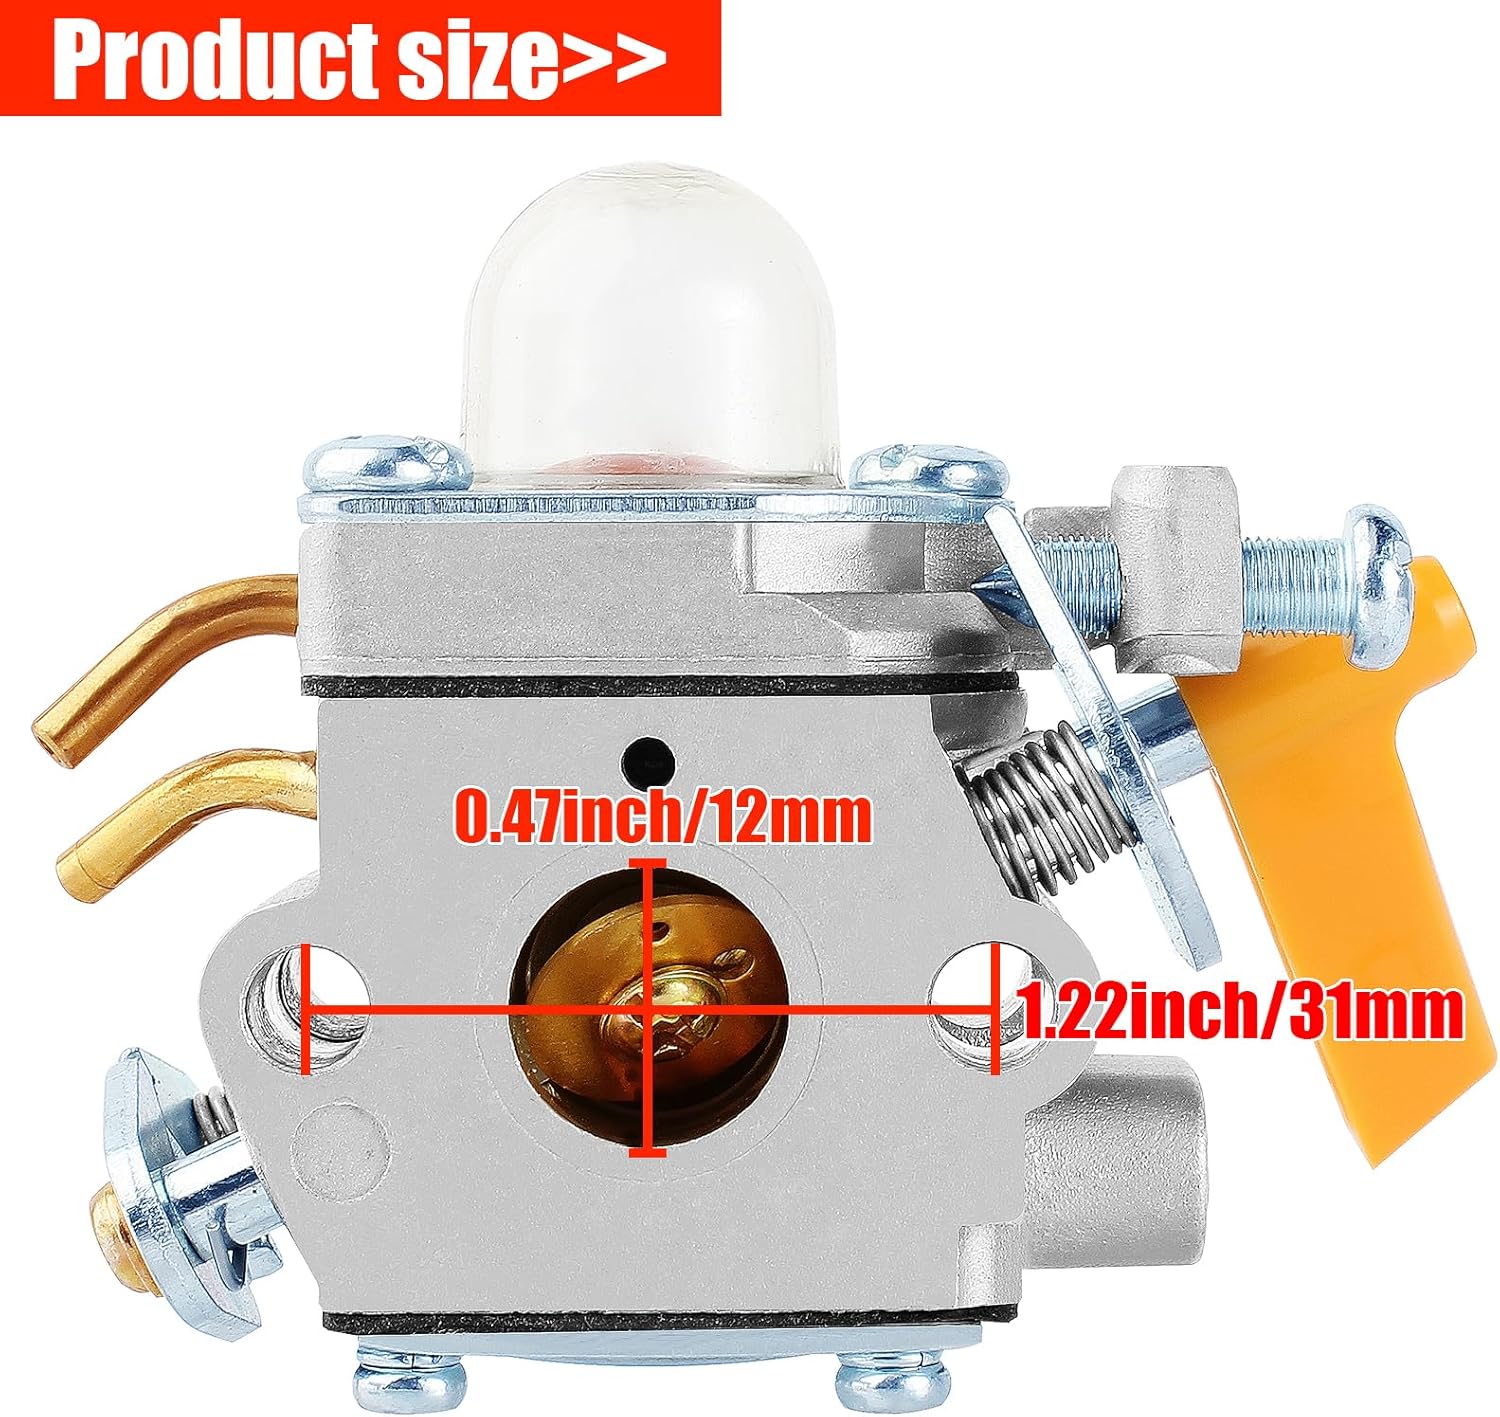
Image 6.2: Carburetor dimensions, illustrating a 0.47 inch (12mm) outlet diameter and 1.22 inch (31mm) overall height.
7. Warranty and Support
SOAJEE products are individually tested and backed by a strict quality control system. While no specific warranty period is stated, customer satisfaction is a priority.
Customer Support:
If you require assistance, have questions, or encounter any issues with your SOAJEE Carburetor Kit, please contact us through Amazon's message center. We are committed to providing satisfactory service and support.