Introduction
This manual provides comprehensive instructions for the setup, operation, and maintenance of your ANTDALIS Small Digital Alarm Clock. Please read this manual thoroughly before using the product to ensure proper function and longevity. This digital alarm clock features a mirror LED display, dual alarm settings, snooze function, and adjustable brightness levels, making it suitable for various environments.
Package Contents
- ANTDALIS Small Digital Alarm Clock (Model: AKVINE1)
- USB Power Cable (Note: USB A adapter not included)
- User Manual
Product Overview
The ANTDALIS Small Digital Alarm Clock features a sleek mirror design with a clear LED display. It is designed for ease of use and includes essential functions for timekeeping and alarming.

Figure 1: Front view of the ANTDALIS Digital Alarm Clock, displaying the time 08:00 with alarm indicators.

Figure 2: Close-up of the mirror LED display showing the time 22:08, indicating its clear visibility.
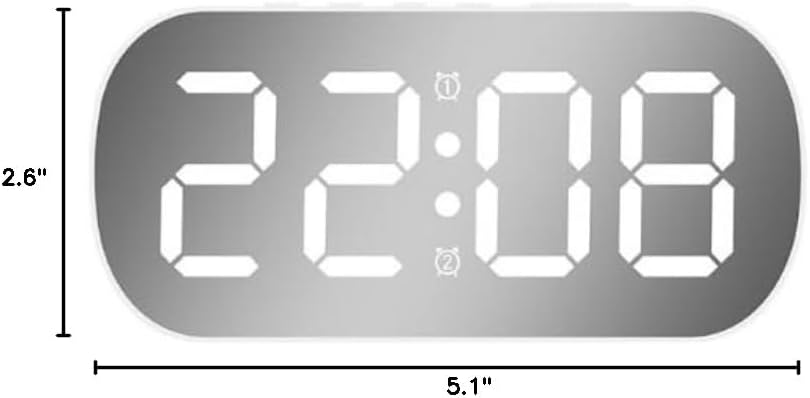
Figure 3: Dimensions of the alarm clock, measuring 5.1 inches in width and 2.6 inches in height.
Key Features:
- Mirror LED Display
- Dual Alarm Functionality
- Snooze Function
- 5 Levels of Adjustable Brightness
- Automatic Night Mode
- Time, Temperature, and Date Display
Setup Guide
1. Power Connection
Connect the provided USB power cable to the DC input port on the back of the alarm clock. Plug the other end into a USB A power adapter (not included) and then into a wall outlet. The clock requires continuous power for the display to remain constantly on.
For backup power during outages, you may install 3 AAA batteries (not included) into the battery compartment. Note that when operating on battery power alone, the display will turn off after a few seconds to conserve energy. Press any button to temporarily display the time.
2. Initial Time Setting
Upon first power-up or after a complete power loss without battery backup, the clock may require time setting. Refer to the "Setting Time and Date" section under Operating Instructions for detailed steps.
Operating Instructions
This section details how to use the various functions of your ANTDALIS Digital Alarm Clock. The clock is operated using buttons located on the top or back of the unit. Specific button labels may vary slightly.
1. Setting Time and Date
- Press and hold the MODE button (or similar button, e.g., "SET") for a few seconds until the time display starts flashing.
- Use the UP and DOWN buttons (or "+" and "-" buttons) to adjust the hour.
- Press MODE again to move to minutes, then adjust with UP/DOWN.
- Continue pressing MODE to cycle through year, month, and day settings, adjusting each with UP/DOWN.
- Press MODE one last time or wait a few seconds for the settings to save automatically.
2. Display Modes (Time, Temperature, Date)
The clock supports dual display modes: displaying only the time, or cycling through time, temperature, and date. Press the MODE button briefly to switch between these display modes.
3. Setting Alarms (Alarm 1 and Alarm 2)
The clock features two independent alarms. Each alarm can be set for specific days of the week.
- Press the ALARM 1 button (or similar, e.g., "AL1") once to view Alarm 1 time.
- Press and hold the ALARM 1 button until the alarm time starts flashing.
- Use UP/DOWN to set the hour, then press ALARM 1 to move to minutes and adjust.
- After setting minutes, press ALARM 1 again to select the alarm mode:
- 5 days: Alarm sounds Monday-Friday.
- 6 days: Alarm sounds Monday-Saturday.
- 7 days: Alarm sounds every day.
- Press ALARM 1 one last time or wait for settings to save.
- Repeat the process for ALARM 2 using the ALARM 2 button.
- To activate/deactivate an alarm, briefly press the corresponding ALARM button. An alarm icon (e.g., ① or ②) will appear on the display when active.
4. Snooze Function
When an alarm sounds, press the large SNOOZE button (often on top) to temporarily silence the alarm. The alarm will sound again after a set interval (typically 5-9 minutes). To turn off the alarm completely, press any other button.
5. Brightness Adjustment
The clock offers 5 levels of brightness. Briefly press the SNOOZE button (or a dedicated brightness button) to cycle through the brightness levels. Select the level that is most comfortable for your viewing environment.
Automatic Night Mode: The clock automatically reduces brightness to a soft, low level between 22:00 (10 PM) and 06:00 (6 AM) to ensure a comfortable sleep environment.
6. Alarm Volume
The alarm volume is fixed and cannot be adjusted. It is designed to be audible for waking purposes.
Maintenance
- Cleaning: Use a soft, dry cloth to clean the mirror display and the body of the clock. Avoid abrasive cleaners or solvents, as they may damage the surface.
- Fingerprints: Due to the mirror finish, fingerprints may accumulate. Regular gentle cleaning will maintain its appearance.
- Battery Replacement: If using battery backup, replace AAA batteries when the display no longer shows time during power outages or when the battery indicator (if present) suggests low power.
- Storage: If storing the clock for an extended period, remove the batteries to prevent leakage.
Troubleshooting
| Problem | Possible Cause | Solution |
|---|---|---|
| Display is off or only shows for a few seconds. | Clock is running on battery power only. | Connect the clock to a continuous power source using the USB cable and a USB A adapter. When on battery power, the display turns off to conserve energy; press any button to view the time temporarily. |
| Difficulty setting time/alarms. | Incorrect button sequence or unfamiliarity with controls. | Carefully follow the "Operating Instructions" section. The setup process may require precise button presses and holds. Refer to the manual for each step. |
| Alarm does not sound. | Alarm is not activated or set incorrectly. | Ensure the alarm icon (① or ②) is visible on the display, indicating the alarm is active. Verify the alarm time and day settings are correct. |
| Clock does not keep accurate time. | Power interruption or internal malfunction. | Ensure the clock is continuously powered via the USB cable. If the issue persists after resetting the time, contact customer support. |
Specifications
| Feature | Detail |
|---|---|
| Brand | ANTDALIS |
| Model Number | AKVINE1 |
| Display Type | Digital LED (Mirror Finish) |
| Color | White |
| Product Dimensions | 5.1"W x 2.6"H |
| Power Source | Corded Electric (USB A adapter not included) |
| Battery Backup | 3 x AAA batteries (not included) |
| Brightness Levels | 5 levels, plus automatic night mode |
| Alarm Function | Dual Alarms, Snooze Function, Weekday/Weekend modes |
| Material | Plastic |
| Mounting Type | Tabletop |
| Item Weight | 4.9 ounces |
| UPC | 797417179442 |
Warranty Information
The ANTDALIS Small Digital Alarm Clock comes with a Limited Warranty. Please retain your proof of purchase for warranty claims. For specific details regarding the warranty period and coverage, refer to the warranty card included in your product packaging or contact ANTDALIS customer support.
This warranty typically covers manufacturing defects and malfunctions under normal use. It does not cover damage caused by misuse, accidents, unauthorized modifications, or improper installation.
Customer Support
If you encounter any issues or have questions regarding your ANTDALIS Small Digital Alarm Clock that are not addressed in this manual, please contact our customer support team for assistance.
Please have your product model number (AKVINE1) and proof of purchase ready when contacting support.
Contact information (e.g., website, email, phone number) would typically be provided here by the manufacturer.