1. Introduction
Thank you for choosing the Jocca Electric Italian Coffee Maker Nature Line. This manual provides essential information for the safe and efficient use of your new appliance. Please read these instructions carefully before first use and keep them for future reference.
This coffee maker is designed to prepare up to 6 cups of authentic Italian-style coffee, featuring a 360° swivel base and automatic shut-off for convenience and safety.
2. Important Safety Instructions
When using electrical appliances, basic safety precautions should always be followed to reduce the risk of fire, electric shock, and/or injury to persons, including the following:
- Read all instructions.
- Do not touch hot surfaces. Use handles or knobs.
- To protect against electrical shock, do not immerse cord, plugs, or the coffee maker base in water or other liquid.
- Close supervision is necessary when any appliance is used by or near children.
- Unplug from outlet when not in use and before cleaning. Allow to cool before putting on or taking off parts, and before cleaning the appliance.
- Do not operate any appliance with a damaged cord or plug or after the appliance malfunctions, or has been damaged in any manner. Contact customer service for examination, repair, or adjustment.
- The use of accessory attachments not recommended by the appliance manufacturer may result in fire, electric shock, or injury to persons.
- Do not use outdoors.
- Do not let cord hang over edge of table or counter, or touch hot surfaces.
- Do not place on or near a hot gas or electric burner, or in a heated oven.
- Always attach plug to appliance first, then plug cord into the wall outlet. To disconnect, turn any control to "off", then remove plug from wall outlet.
- Do not use appliance for other than intended use.
- Exercise extreme caution when disposing of hot steam.
- The appliance features overheat protection. If the water chamber runs dry, the appliance will automatically shut off.
- The handle is thermally insulated for safe handling.
3. Product Overview
Familiarize yourself with the components of your Jocca Electric Italian Coffee Maker.

Figure 3.1: Front view of the Jocca Electric Italian Coffee Maker, showcasing its black finish and wooden handle and knob.
Components:
- Upper Chamber: Collects brewed coffee.
- Filter Funnel: Holds ground coffee.
- Lower Chamber (Water Reservoir): Holds water.
- Safety Valve: Releases excess pressure.
- Heating Base: Electric base with 360° swivel capability.
- Power Button: On/Off switch with indicator light.
- Handle: Thermally insulated for safe pouring.
- Lid: Transparent lid with wooden knob.
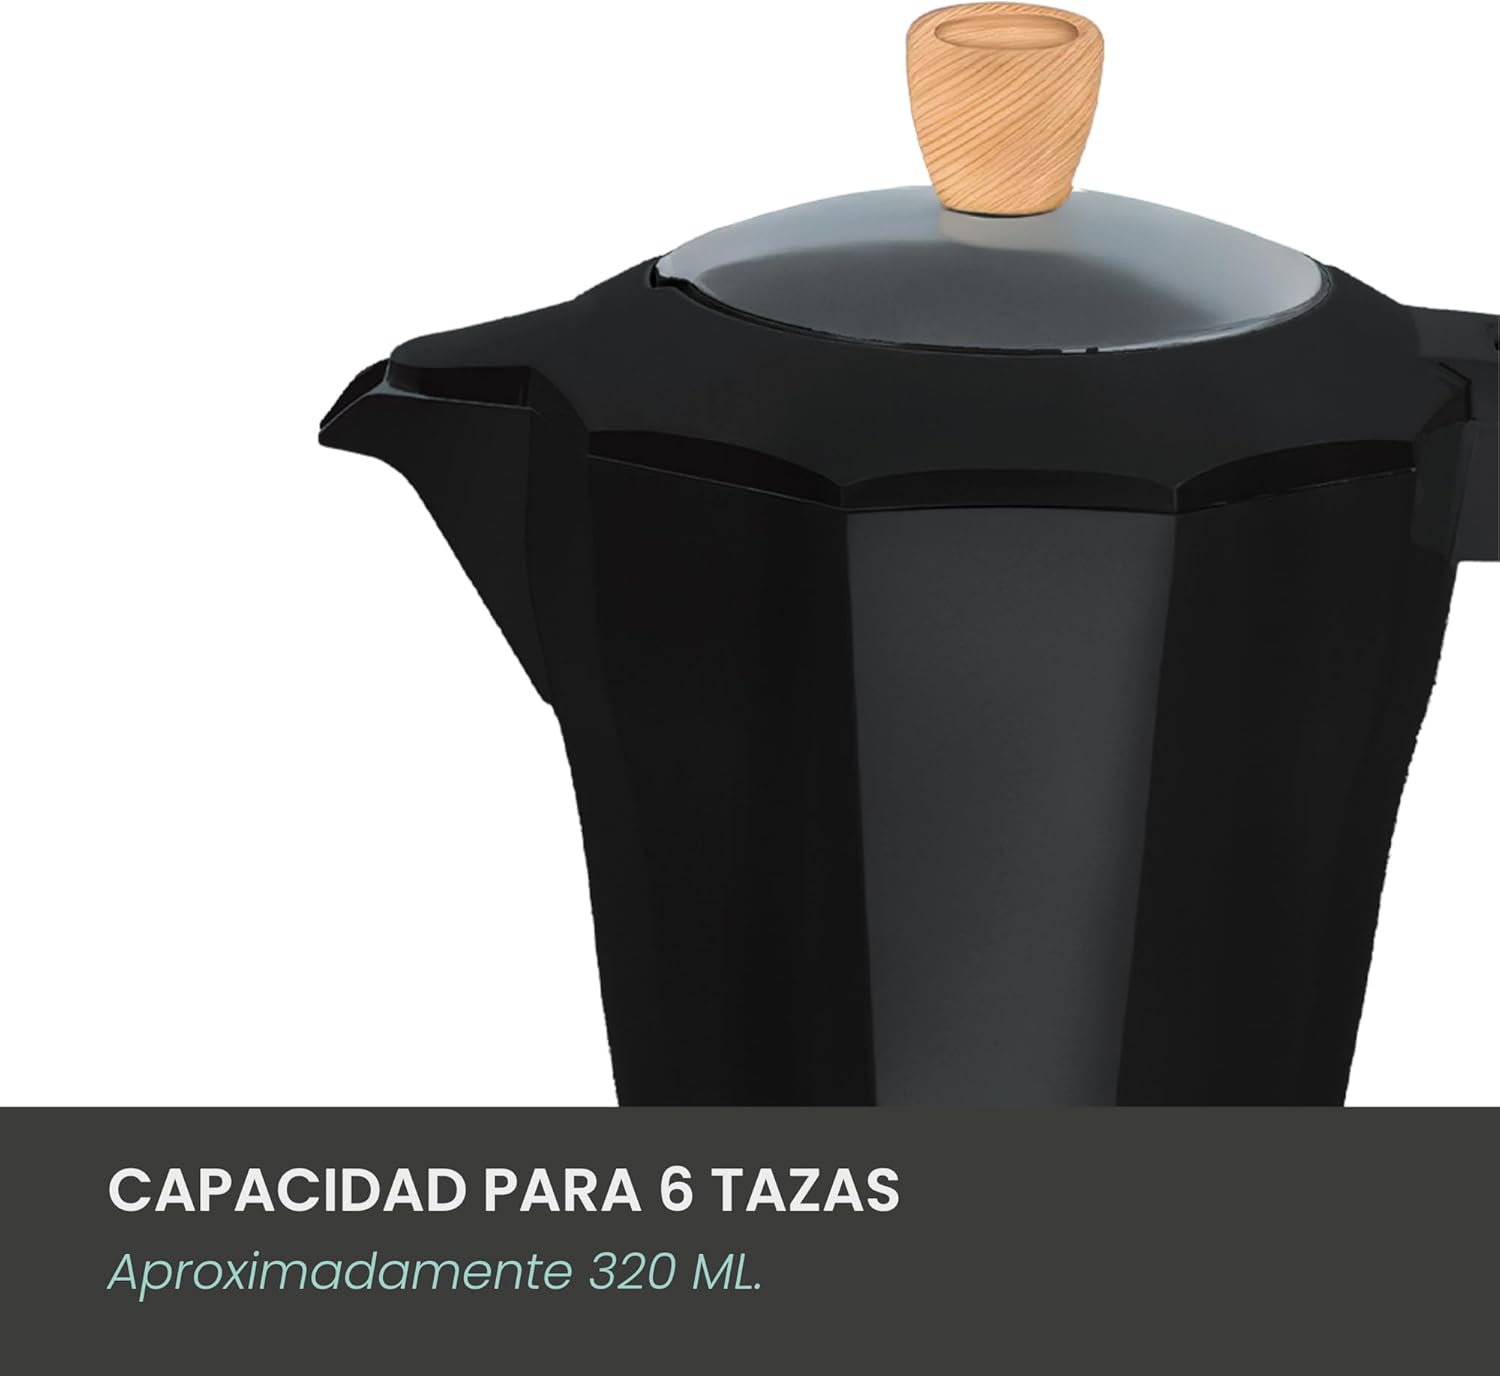
Figure 3.2: The coffee maker has a capacity for 6 cups, approximately 320 ml of brewed coffee.

Figure 3.3: The ergonomically designed wooden handle provides a comfortable and secure grip.

Figure 3.4: The power button with an indicator light for easy one-touch operation.
4. Setup and First Use
4.1 Unpacking
Carefully remove all packaging materials and ensure all components are present and undamaged. Keep packaging for future storage or disposal.
4.2 Initial Cleaning
Before first use, wash all removable parts (upper chamber, filter funnel, lower chamber) with warm soapy water. Rinse thoroughly and dry completely. Do not immerse the electric heating base in water.
4.3 First Brew Cycle (Conditioning)
To condition the coffee maker and remove any manufacturing residues, perform a few brew cycles using only water, or with a small amount of inexpensive coffee that will be discarded.
- Fill the lower chamber with cold water up to the level of the safety valve.
- Insert the filter funnel. You may add a small amount of ground coffee to the funnel for conditioning, or leave it empty.
- Screw the upper chamber firmly onto the lower chamber, ensuring a tight seal.
- Place the coffee maker onto the heating base and plug the base into a suitable power outlet (220V).
- Press the power button. The indicator light will illuminate.
- Allow the water to brew through completely. Once brewing stops, press the power button to turn off the appliance and unplug it.
- Discard the brewed water/coffee. Repeat this process 2-3 times.
Your coffee maker is now ready for regular use.
5. Operating Instructions
5.1 Preparing Coffee
- Unscrew the upper chamber from the lower chamber.
- Remove the filter funnel.
- Fill the lower chamber with cold water up to the level of the safety valve. Do not overfill.
- Insert the filter funnel into the lower chamber.
- Fill the filter funnel with medium-fine ground coffee. Do not tamp the coffee down. Level the surface gently.
- Screw the upper chamber firmly onto the lower chamber, ensuring a tight seal.
- Place the coffee maker onto the heating base. The 360° swivel base allows placement from any angle.
- Plug the heating base into a suitable 220V power outlet.
- Press the power button. The indicator light will illuminate, signifying that the brewing process has started.
- Once the coffee maker finishes brewing (you will hear a gurgling sound and see coffee filling the upper chamber), the appliance will automatically switch to the keep-warm function.
- To serve, carefully remove the coffee maker from the base using the insulated handle. Pour the coffee into cups.
- After serving, press the power button to turn off the appliance and unplug it from the wall outlet.

Figure 5.1: Pouring freshly brewed coffee from the upper chamber.
5.2 Keep Warm Function
After brewing, the coffee maker automatically enters a keep-warm mode to maintain the coffee's temperature. This function will keep the coffee warm for a limited time. For best flavor, serve coffee immediately after brewing.
6. Cleaning and Maintenance
Regular cleaning ensures optimal performance and extends the lifespan of your coffee maker.
6.1 Daily Cleaning
- Always unplug the appliance and allow it to cool completely before cleaning.
- Unscrew the upper chamber and remove the filter funnel. Discard used coffee grounds.
- Wash the upper chamber, filter funnel, and lower chamber with warm soapy water. The carafe (upper chamber) is dishwasher safe.
- Rinse all parts thoroughly with clean water.
- Dry all components completely before reassembling or storing.
- Wipe the exterior of the heating base with a damp cloth. Do not immerse the base in water or any other liquid.
6.2 Descaling
Over time, mineral deposits (limescale) can build up in the water chamber, affecting performance and taste. Descale your coffee maker every 2-4 weeks, depending on water hardness and frequency of use.
- Fill the lower chamber with a solution of equal parts white vinegar and water, up to the safety valve.
- Place the filter funnel (empty) and screw on the upper chamber.
- Place the coffee maker on the heating base and turn it on.
- Allow the solution to brew through completely.
- Turn off the appliance, unplug, and let it cool.
- Discard the vinegar solution and rinse all parts thoroughly.
- Perform 2-3 brew cycles with clean water only to remove any residual vinegar taste.
7. Troubleshooting
If you encounter issues with your coffee maker, refer to the following table for common problems and solutions.
| Problem | Possible Cause | Solution |
|---|---|---|
| Coffee does not brew or brews slowly. |
|
|
| Coffee tastes weak or watery. |
|
|
| Steam leaks from the side. |
|
|
| Appliance does not turn on. |
|
|
8. Specifications
| Feature | Detail |
|---|---|
| Brand | Jocca |
| Model Number | 89315 |
| Capacity | 6 Cups (275 ml water reservoir, 320 ml coffee reservoir) |
| Power | 450-480W |
| Voltage | 220V |
| Material | Aluminum |
| Color | Black Nature |
| Dimensions (L x W x H) | 13 x 19.5 x 24 cm |
| Item Weight | 1.2 Kilograms |
| Special Features | Automatic Shut-off, 360° Swivel Base, Keep Warm System, Thermally Insulated Handle, Overheat Protection, Cordless Carafe |
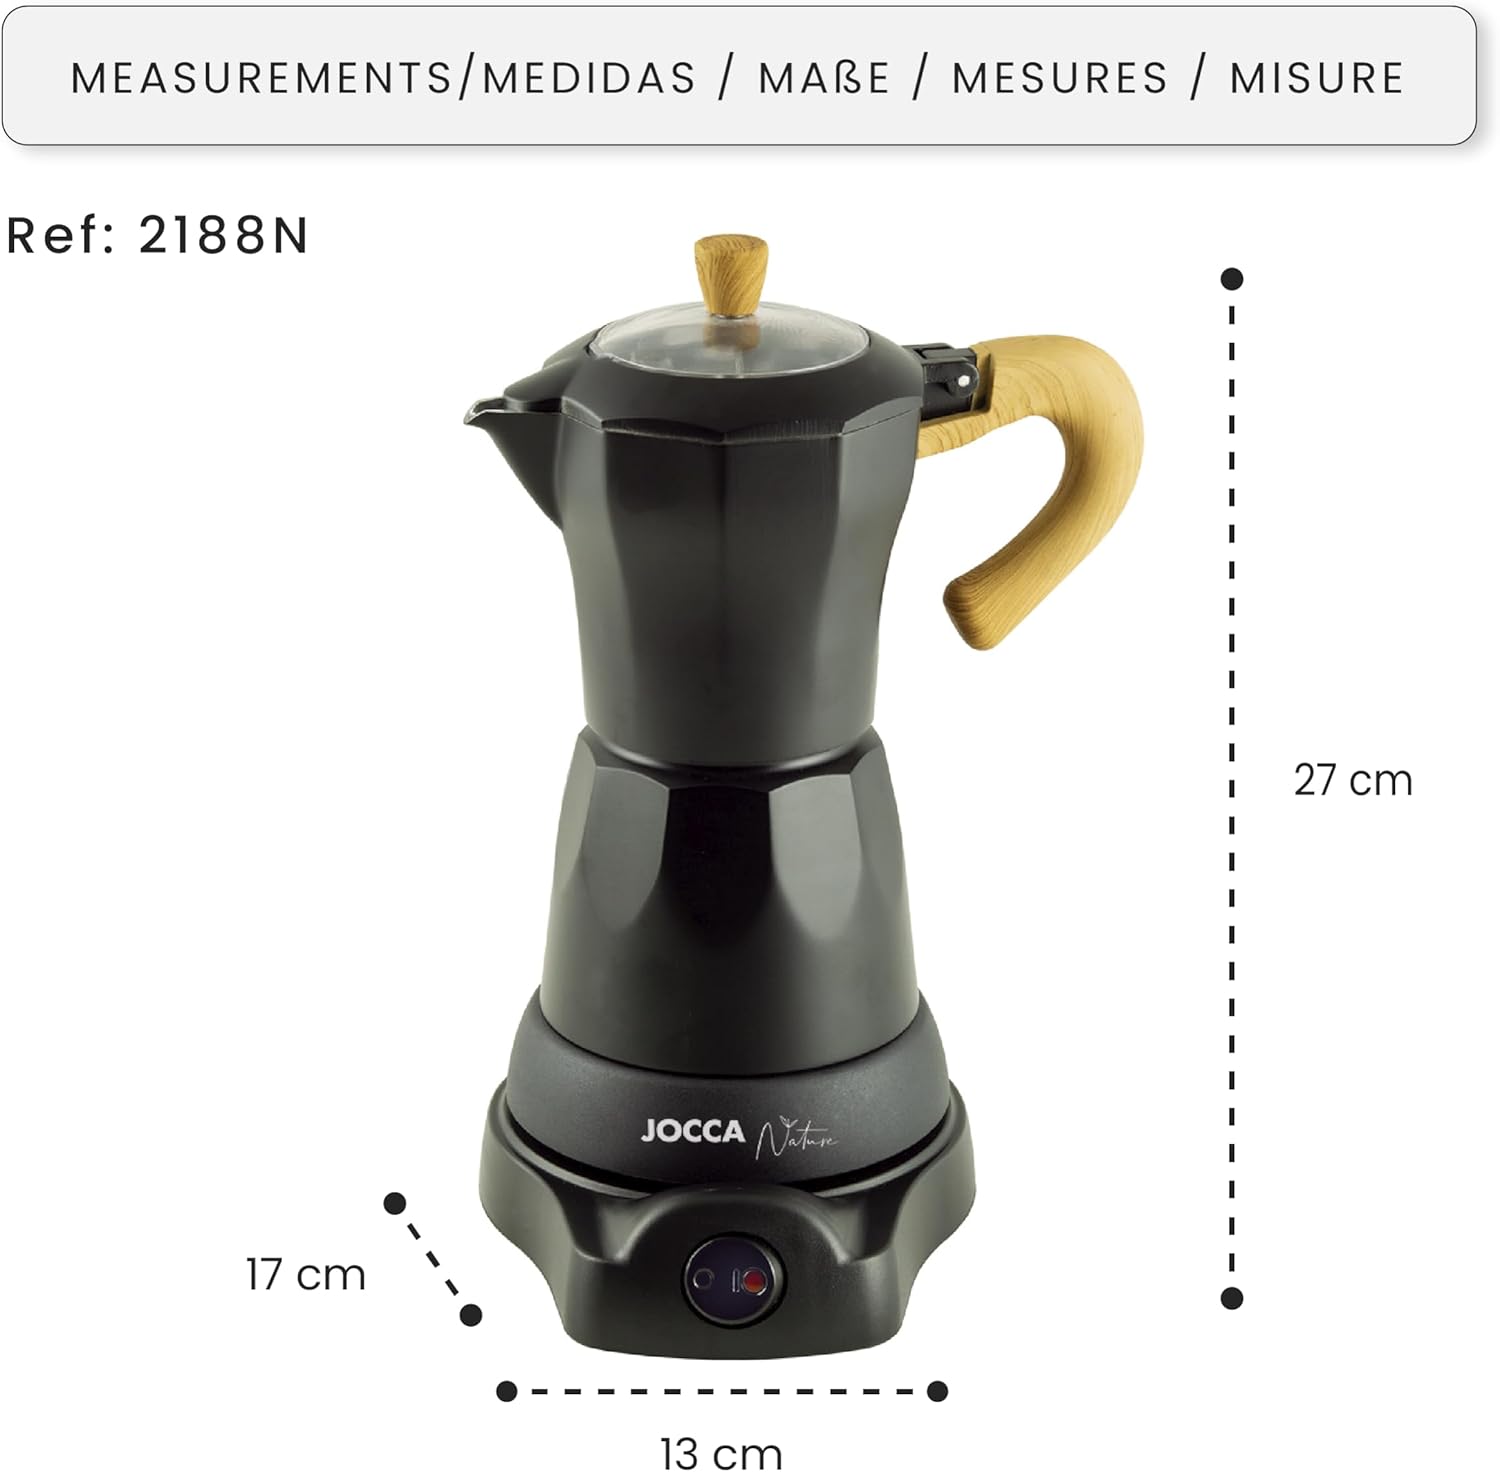
Figure 8.1: Product dimensions for the Jocca Electric Italian Coffee Maker, showing 13 cm width, 17 cm depth, and 27 cm height.
9. Warranty and Support
9.1 Warranty Information
Jocca products are manufactured to high-quality standards. This product is covered by a standard manufacturer's warranty against defects in materials and workmanship from the date of purchase. Please retain your proof of purchase for warranty claims. The warranty does not cover damage caused by misuse, neglect, accident, alteration, or unauthorized repair.
9.2 Customer Support
For technical assistance, spare parts, or warranty inquiries, please contact Jocca customer service. You can find contact information on the official Jocca website or through your retailer.
Website: www.jocca.es
Please have your model number (89315) and purchase date ready when contacting support.


