GOCHIFIX LG0102-R
GOCHIFIX LG0102-R 360 Self-Leveling Red Line Laser Level Instruction Manual
Model: LG0102-R | Brand: GOCHIFIX
1. Introduction
This instruction manual provides detailed guidance for the safe and effective use of your GOCHIFIX LG0102-R 360 Self-Leveling Red Line Laser Level. Please read this manual thoroughly before operating the device and retain it for future reference.

Image 1.1: The GOCHIFIX LG0102-R Red Line Laser Level with its magnetic L-bracket, projecting red laser lines.
2. Safety Guidelines
WARNING: This device emits a Class 2 laser. Avoid direct eye exposure to the laser beam. Do not stare into the beam or view directly with optical instruments.
- Do not attempt to disassemble or modify the laser level.
- Keep the device out of reach of children.
- Use the device only for its intended purpose as a leveling tool.
- Ensure the work area is clear of obstructions and potential hazards.
- Operate the laser level within its specified temperature and humidity ranges.
3. Package Contents
Verify that all items listed below are included in your package:
- Red Cross Laser Level (GOCHIFIX LG0102-R)
- Portable Storage Bag
- Magnetic L-shaped Bracket
- 2 x AA Batteries
- User Manual (this document)
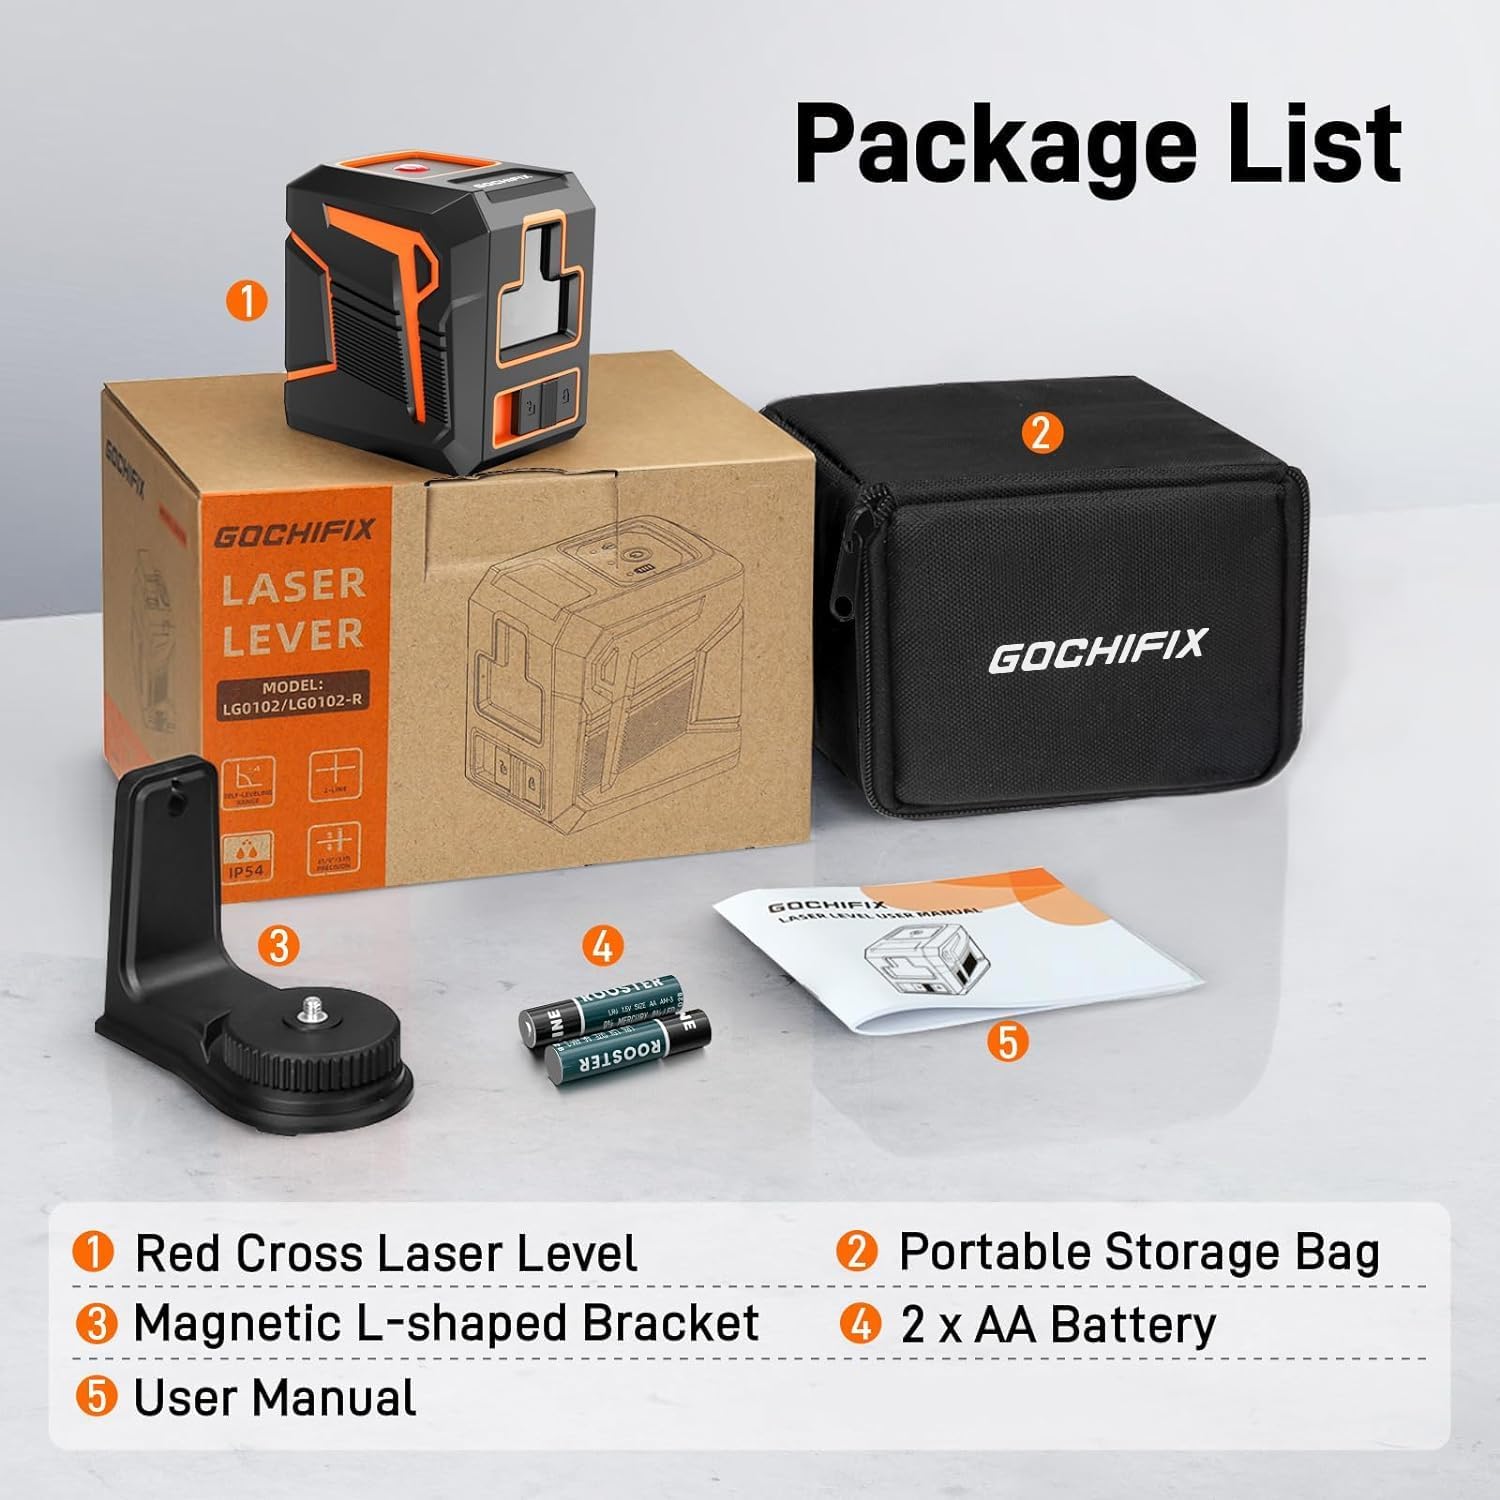
Image 3.1: Visual representation of the items included in the GOCHIFIX LG0102-R package.
4. Product Overview
Familiarize yourself with the components and controls of your laser level.

Image 4.1: Key components of the GOCHIFIX LG0102-R laser level, including the laser line switch, laser source, ON/OFF switch, 1/4" thread mount, and battery compartment.
- Laser Line Switch: Controls the laser line output and manual mode.
- Laser Source: Emits the red laser beams.
- ON/OFF Switch: Powers the device on and off.
- 1/4" Thread Mount: For attaching to tripods or other mounting accessories.
- Battery Compartment: Houses the 2xAA batteries.
5. Setup
5.1 Battery Installation
- Locate the battery compartment on the back of the laser level.
- Open the battery compartment cover.
- Insert two AA batteries, ensuring correct polarity (+/-).
- Close the battery compartment cover securely.
Image 5.1: The battery compartment and 1/4" thread mount on the GOCHIFIX LG0102-R.
5.2 Mounting Options
The GOCHIFIX LG0102-R offers versatile mounting for various applications:
- Magnetic L-shaped Bracket: Attach the laser level to the magnetic bracket. The bracket can then be affixed to metallic surfaces or hung from a screw/nail. It allows for 360° rotation for precise alignment.
- Tripod Mount: The device features a 1/4" threaded hole at its base, compatible with standard camera tripods or laser level tripods (not included).

Image 5.2: The 360° rotating magnetic bracket and the 1/4" threaded hole for tripod mounting.
6. Operation
6.1 Powering On/Off
Slide the ON/OFF switch to the "ON" position to power on the device. Slide it to the "OFF" position to power off.
6.2 Self-Leveling Mode
When the ON/OFF switch is in the "ON" position, the device automatically enters self-leveling mode. The laser will self-level within ±4° in approximately 5 seconds. If the device is tilted beyond 4°, the laser beams will flash, and an audible alarm will sound, indicating that the device is out of its self-leveling range. Adjust the position of the laser level until the beams stop flashing and the alarm ceases.

Image 6.1: Illustration of self-leveling mode (top) and manual mode (bottom) for the laser level.
6.3 Manual Mode (Lock Mode)
To project laser lines at any angle (e.g., for stair railings or decorative patterns), activate manual mode:
- Slide the ON/OFF switch to the "ON" position.
- Press and hold the power button (usually marked with a power symbol) for 3 seconds. The laser will lock, allowing you to tilt the device to project lines at desired angles without self-leveling.
- To exit manual mode, press and hold the power button again for 3 seconds, or turn the device off and then on again.
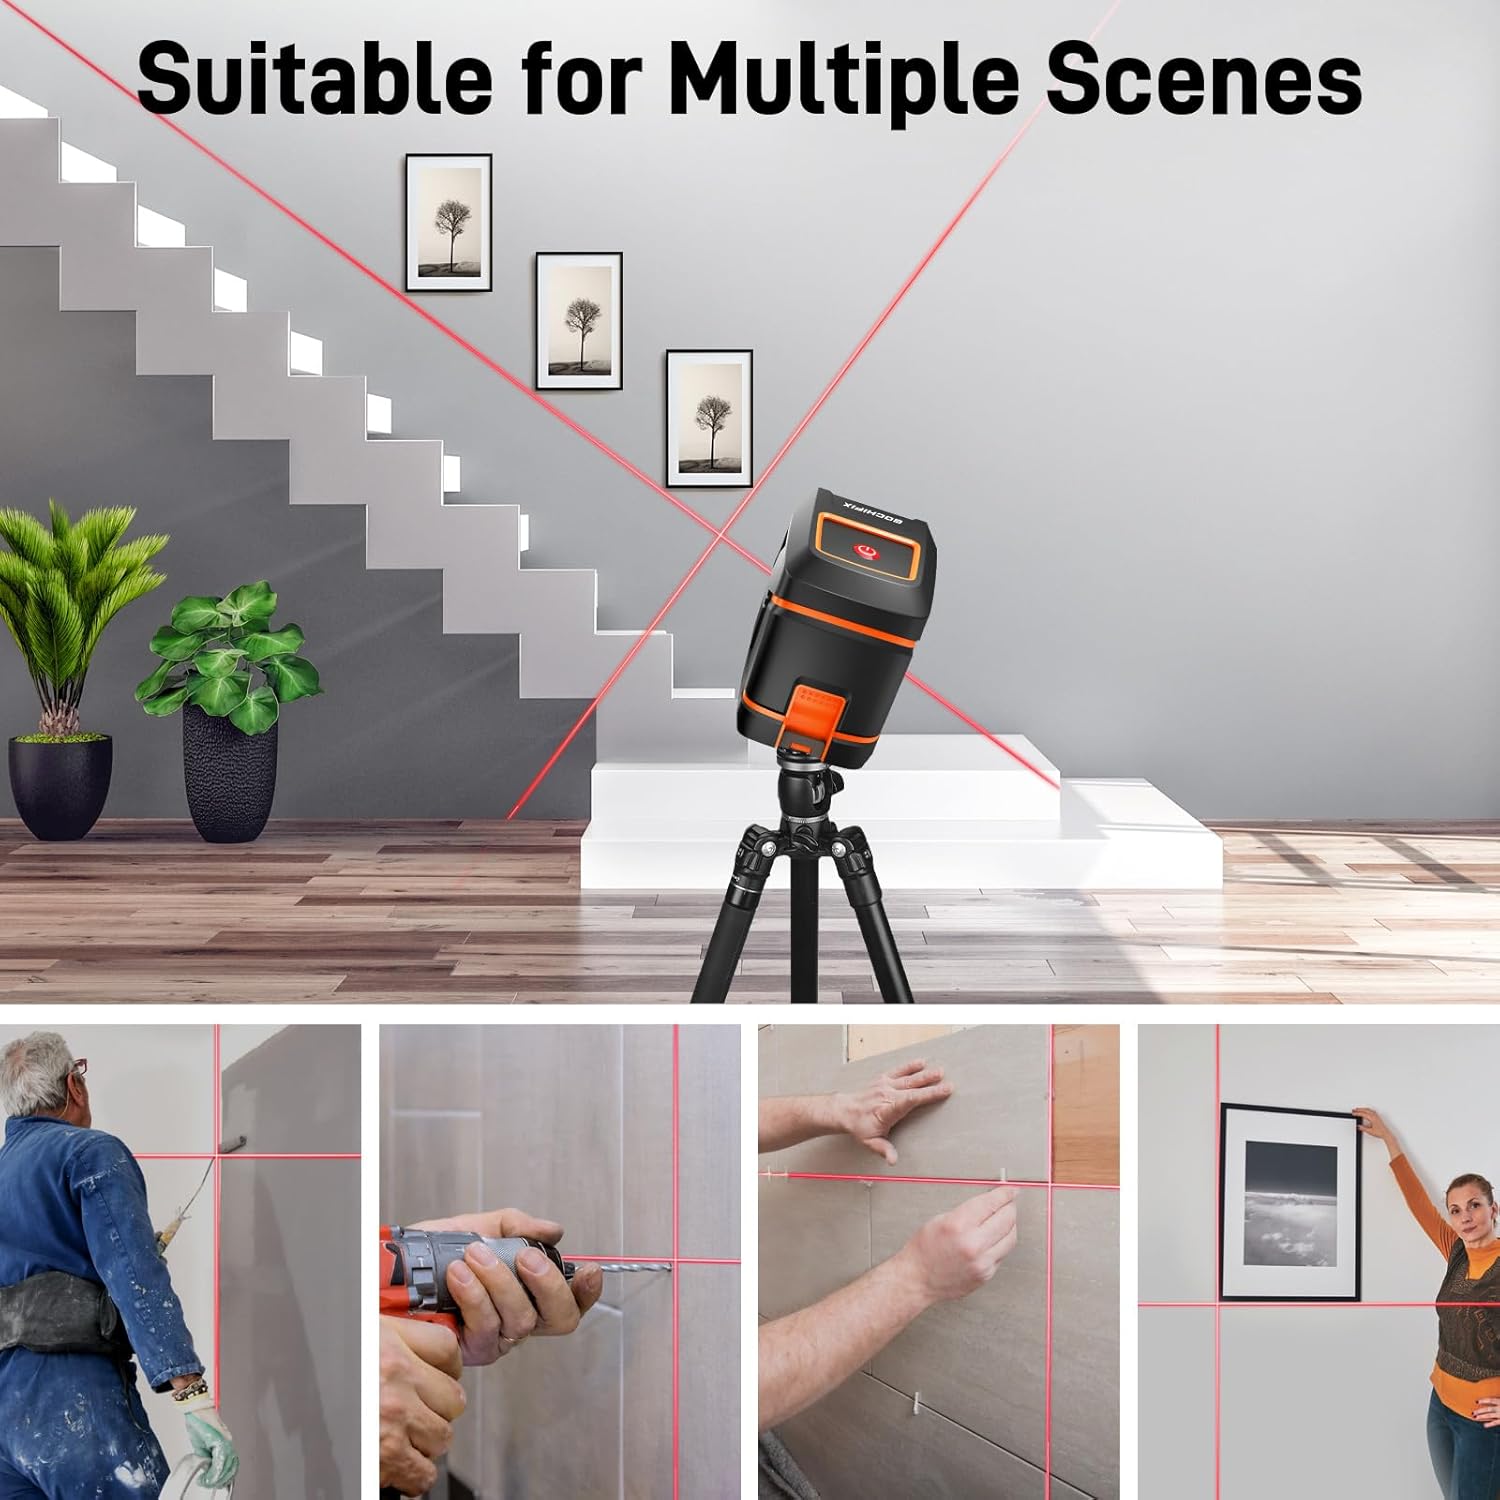
Image 6.2: Examples of the laser level being used for picture hanging, tile installation, and other tasks.
7. Maintenance
- Cleaning: Wipe the device with a soft, damp cloth. Do not use abrasive cleaners or solvents.
- Storage: When not in use, store the laser level in its portable storage bag in a dry, cool place, away from direct sunlight. Remove batteries if storing for extended periods to prevent leakage.
- Protection: The device features IP54 dustproof and waterproof rating, and is drop-resistant due to its ABS + TPU covered design. However, avoid intentional drops or exposure to excessive moisture.

Image 7.1: The robust design of the GOCHIFIX LG0102-R, highlighting its IP54 rating and drop resistance.
8. Troubleshooting
| Problem | Possible Cause | Solution |
|---|---|---|
| Laser does not turn on. | Batteries are dead or incorrectly inserted. | Check battery polarity and replace with new AA batteries. |
| Laser beams are flashing and alarm sounds. | Device is outside its self-leveling range (> ±4°). | Adjust the position of the laser level until it is within the self-leveling range. |
| Laser line is not straight in manual mode. | Manual mode is intended for angled lines; it does not self-level. | Ensure the device is physically positioned to achieve the desired angle. For level lines, use self-leveling mode. |
| Laser beam is dim. | Low battery power or bright ambient light. | Replace batteries. Use in environments with appropriate lighting conditions. |
9. Specifications
| Brand | GOCHIFIX |
| Model Number | LG0102-R |
| Laser Class | Class 2 (< 1mW) |
| Laser Wavelength | 660 nm (Red Laser) |
| Accuracy | ±1/9 inch at 32.8 feet |
| Self-Leveling Range | ±4° |
| Self-Leveling Time | 5 seconds |
| Working Range | Up to 100 feet |
| Power Source | 2 x AA Batteries (included) |
| Operation Mode | Self-Leveling, Manual |
| Mounting Thread | 1/4" |
| Product Dimensions | 3.15"L x 1.97"W |
| Item Weight | 10.6 ounces |
| Protection Rating | IP54 (Dustproof & Waterproof) |

Image 9.1: Key performance specifications of the GOCHIFIX LG0102-R laser level.
10. Warranty and Support
For warranty information or technical support, please refer to the contact details provided on the product packaging or contact GOCHIFIX customer service directly. Keep your purchase receipt as proof of purchase.
Ask a question about this manual
Ask about setup, troubleshooting, compatibility, parts, safety, or missing instructions. Manuals+ will review the question and use this page’s manual context to help answer it.