
1. Introduction
This instruction manual provides detailed guidance for the assembly, operation, and maintenance of your HAUSHECK Queen Bed Frame with Storage Headboard, 4 Drawers, and LED Lights. Please read this manual thoroughly before beginning assembly and retain it for future reference. Proper assembly and care will ensure the longevity and optimal performance of your bed frame.
2. Safety Information
- Ensure all parts are present and undamaged before assembly. Do not proceed with assembly if any parts are missing or damaged.
- Assemble the bed frame on a soft, clean surface (e.g., carpet) to prevent scratches or damage.
- Two adults are recommended for assembly to ensure safety and ease.
- Do not overtighten screws or bolts, as this may damage the components.
- Keep small parts and packaging materials away from children and pets to prevent choking hazards.
- Ensure the bed frame is placed on a level surface to prevent instability.
- Do not exceed the maximum weight capacity of 900 lbs.
- Periodically check all connections and fasteners to ensure they remain tight.
3. Package Contents
Your HAUSHECK Queen Bed Frame is shipped in two separate packages. Please verify that all components listed below are present before beginning assembly. Refer to the included installation manual for a detailed parts list and hardware count.

Figure 3.1: Exploded view of bed frame components, including headboard, frame, slats, and drawers.
- Upholstered Headboard with LED Lights and Storage Shelves
- Bed Frame Side Rails (Left and Right)
- Footboard
- Center Support Beam
- Wood Slats (for mattress support)
- 4 Storage Drawers (with wheels and fabric base)
- Hardware Pack (bolts, screws, Allen wrench, etc.)
- RF Remote Controller (for LED lights)
- Installation Manual
4. Setup and Assembly Instructions
Follow the step-by-step instructions provided in the separate Installation Manual included with your product. The assembly process utilizes a bolt-free quick-lock system for the wood slats, simplifying setup. Ensure all connections are secure before use.
- Unpack Components: Carefully remove all parts from the two packages and lay them out on a soft, clean surface. Verify against the parts list in the Installation Manual.
- Assemble Headboard: Attach any necessary support brackets or wings to the upholstered headboard as per the manual.
- Connect Side Rails and Footboard: Securely attach the side rails to the headboard and footboard using the provided hardware.
- Install Center Support: Place and secure the center support beam within the frame.
- Insert Wood Slats: Position the wood slats onto the frame. The bolt-free quick-lock system allows for easy installation. Ensure all slats are firmly seated.
- Assemble Drawers: Construct the four storage drawers. Attach the wheels to the bottom of each drawer.
- Insert Drawers: Slide the assembled drawers into their designated spaces under the bed frame.
- Final Check: Double-check all connections for tightness and stability.

Figure 4.1: Assembled bed frame structure, showcasing the LED headboard and wood slat support system.

Figure 4.2: Detail of the wood slats and metal frame, illustrating the mattress support system.
5. Operating Instructions
5.1 LED Lights Operation
The integrated RGB LED lights on the headboard and footboard are controlled by the included RF remote controller. Ensure the LED power adapter is plugged into a functional power outlet.
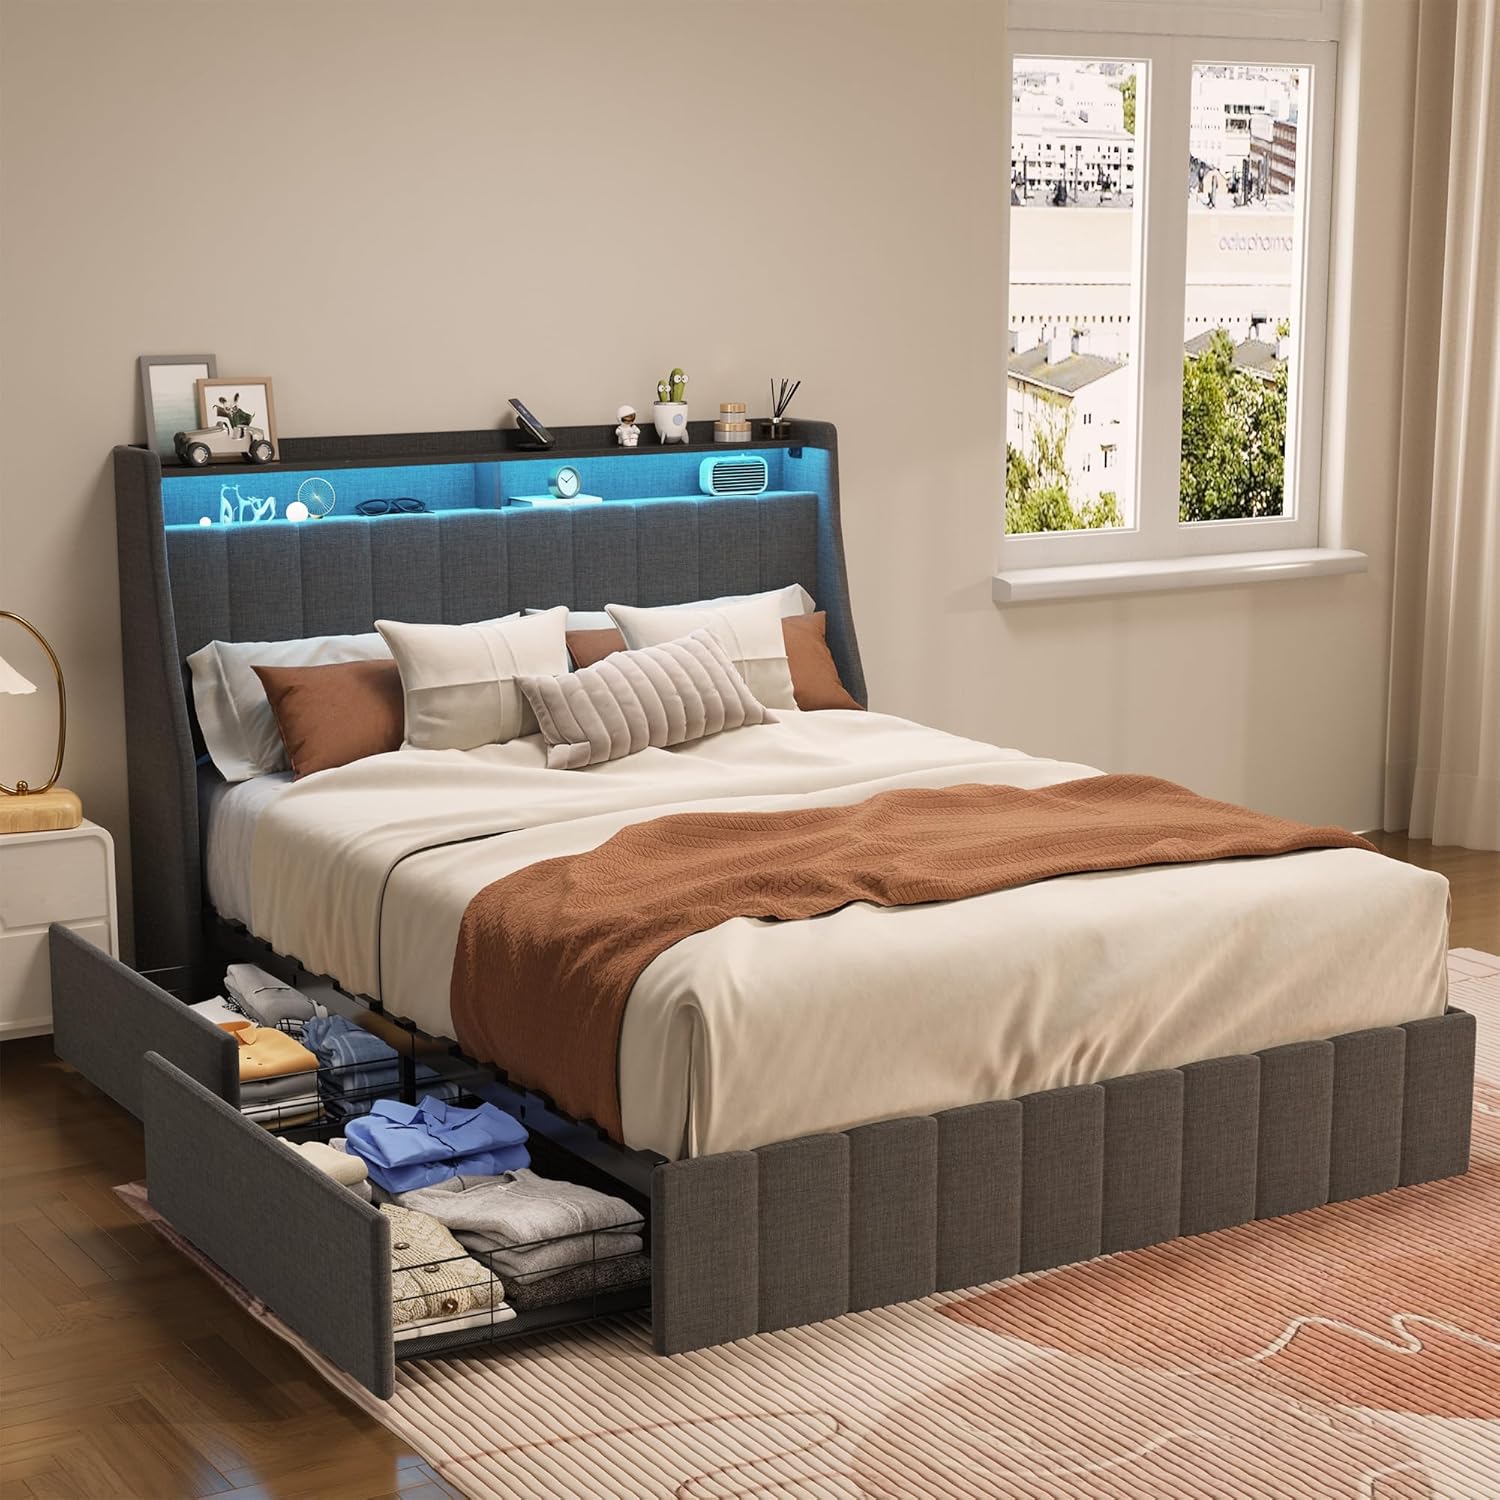
Figure 5.1: Bed frame with LED lights illuminated in blue, demonstrating ambient lighting.
- Power On/Off: Press the Power button on the remote to turn the lights on or off.
- Scene Modes: Select from 12 pre-programmed scene modes to create different ambiances. Refer to the remote's specific buttons for scene selection.
- Light Speed Adjustment: Adjust the speed of dynamic light effects across 3 levels using the designated speed buttons.
- Brightness Control: Fine-tune the brightness of the lights with 3 available modes.
- Color Selection: Use the color buttons on the remote to choose static colors.

Figure 5.2: Bed frame with LED lights illuminated in warm yellow, highlighting the headboard storage shelves.
5.2 Storage Drawers
The four large capacity sliding drawers are designed for convenient storage of linens, clothing, and other items. Each drawer is equipped with wheels for smooth operation.

Figure 5.3: An open storage drawer, demonstrating its capacity for organizing clothes and linens.
- Opening/Closing: Gently pull the drawer handle to open and push to close. The wheels ensure smooth movement.
- Capacity: Utilize the spacious interior for various items. Avoid overloading to ensure smooth operation and prevent damage.

Figure 5.4: Detail of the drawer wheel, designed for easy gliding on various floor surfaces.
5.3 Headboard Storage Shelves
The two-tier storage shelves on the headboard provide convenient space for small personal items.
- Placement: Use these shelves for phones, clocks, tablets, glasses, or decorative items.
- Weight Limit: Avoid placing excessively heavy items on the shelves to prevent damage.
6. Maintenance
- Upholstery Cleaning: For general cleaning, gently vacuum the linen fabric upholstery with a soft brush attachment. For spills, blot immediately with a clean, dry cloth. For stubborn stains, consult a professional upholstery cleaner or use a mild fabric cleaner suitable for linen, testing on an inconspicuous area first.
- Frame Cleaning: Wipe the metal and wood components with a damp cloth and mild detergent if necessary. Dry immediately with a clean cloth.
- LED Lights: Keep the LED strip and remote clean and dry. Avoid direct contact with water.
- Hardware Check: Periodically (every 3-6 months) inspect all bolts, screws, and connections to ensure they are tight. Retighten if necessary to maintain stability.
- Drawer Maintenance: Keep the drawer tracks and wheels free of dust and debris to ensure smooth operation.
7. Troubleshooting
| Problem | Possible Cause | Solution |
|---|---|---|
| LED lights not turning on. | Power adapter unplugged; remote battery dead; remote not paired. | Ensure power adapter is securely plugged in. Replace remote battery. Refer to LED light instructions for remote pairing. |
| Drawers are difficult to open/close. | Overloaded drawer; debris in tracks; misaligned drawer. | Reduce drawer contents. Clean tracks and wheels. Re-align drawer or re-assemble if necessary. |
| Bed frame feels unstable or wobbly. | Loose bolts/screws; uneven floor. | Check and tighten all assembly hardware. Ensure the bed is on a level surface. |
| Missing parts during assembly. | Packaging error. | Contact HAUSHECK customer support immediately with your purchase details and the specific missing parts. |
8. Specifications
| Feature | Detail |
|---|---|
| Brand | HAUSHECK |
| Model Name | Queen Bed Frame |
| Size | Queen |
| Product Dimensions | 84.2"L x 62.6"W x 41.3"H |
| Color | Dark Grey |
| Material | Linen Fabric, Solid Steel Framework, Wood Slats |
| Special Features | Storage Headboard, 4 Storage Drawers, RGB LED Lights, No Box Spring Needed |
| Weight Capacity | Up to 900 lbs |
| Assembly Required | Yes |
| Item Weight | 80 pounds |
| UPC | 764921734856 |

Figure 8.1: Detailed dimensions of the HAUSHECK Queen Bed Frame and its components.
9. Warranty and Customer Support
For warranty information, missing parts, or any questions regarding your HAUSHECK Queen Bed Frame, please refer to the contact information provided in your purchase documentation or contact the seller directly. Please have your purchase receipt and model number ready when contacting support.
Manufacturer: HAUSHECK