1. Introduction
This manual provides detailed instructions for the safe and effective operation of your Huepar 901CG Green Laser Level and TPD05 Lightweight Aluminum Tripod. Please read this manual thoroughly before using the product to ensure proper functionality and to prevent damage or injury.
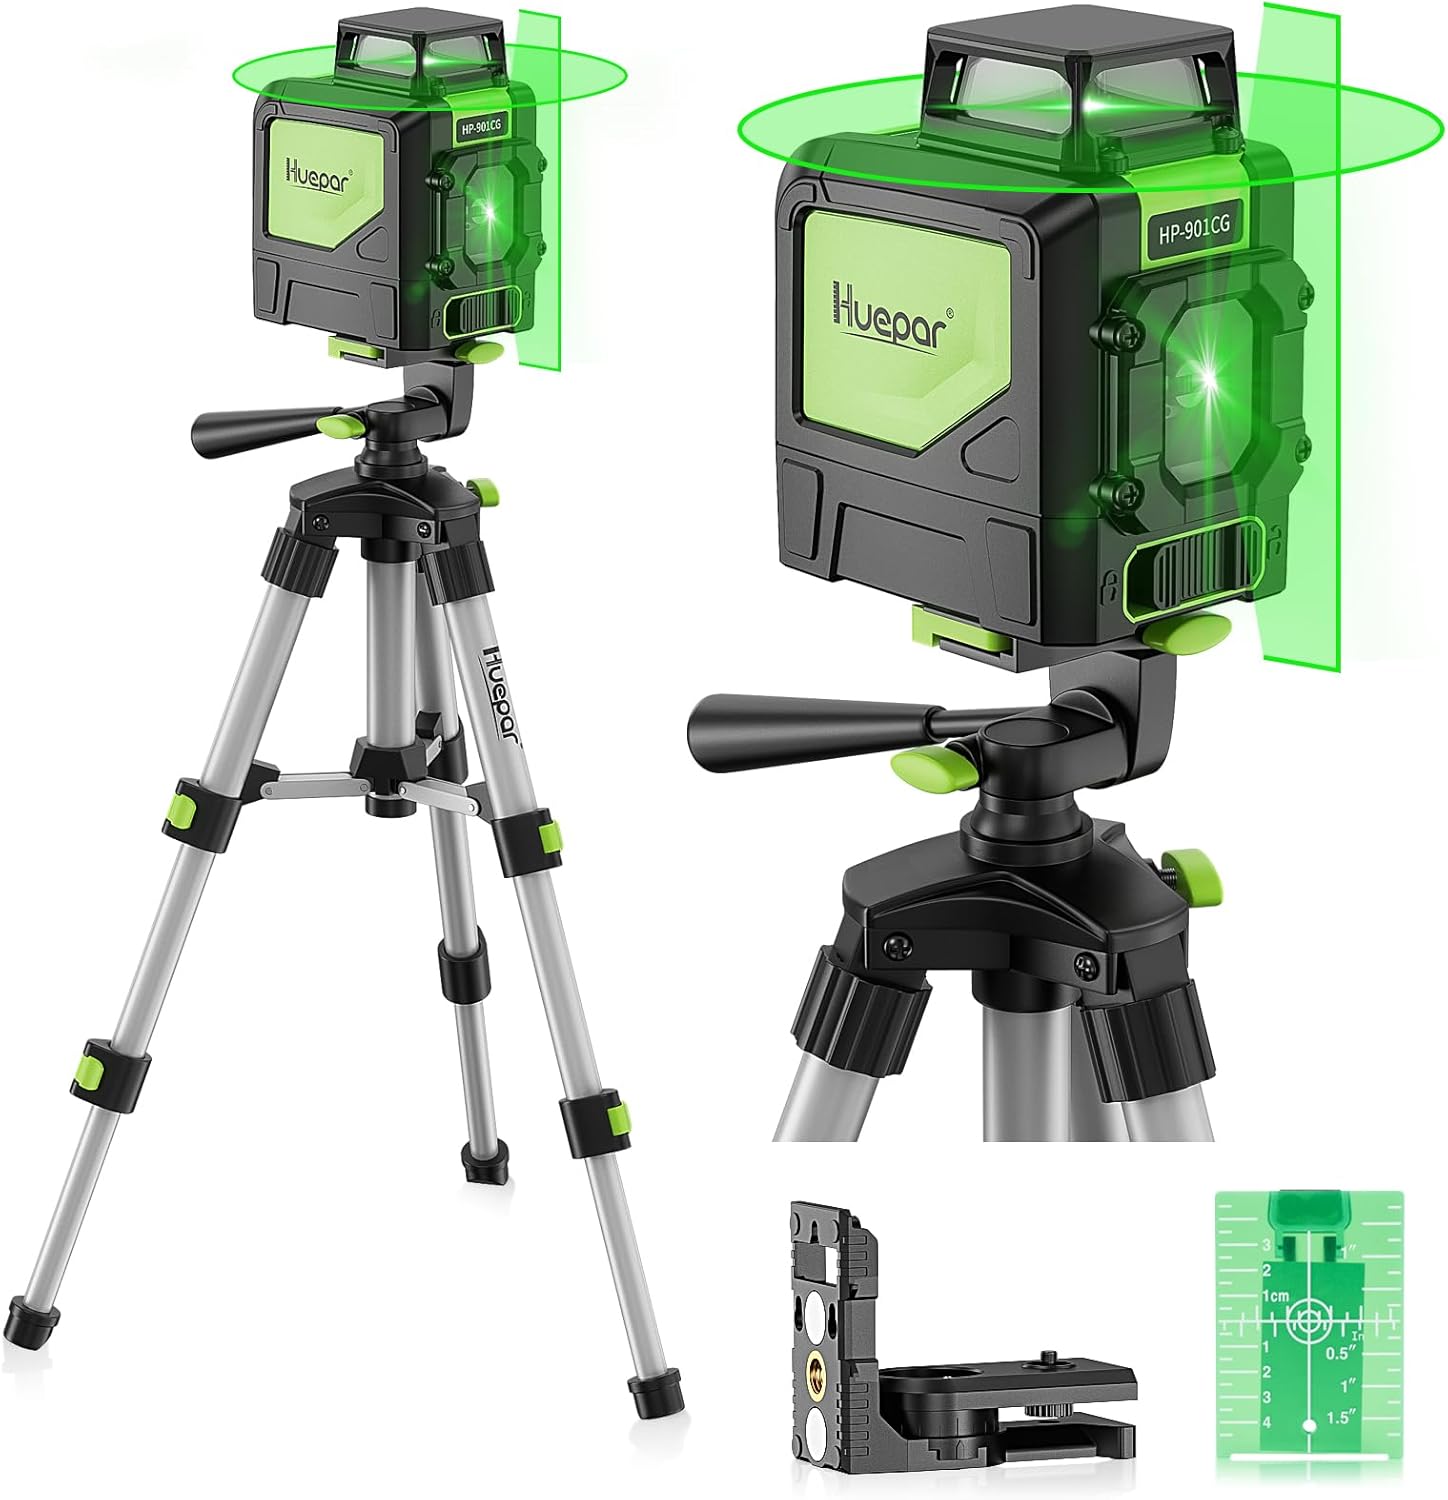
Figure 1.1: Huepar 901CG Green Laser Level mounted on the TPD05 Tripod, showing both horizontal and vertical green laser lines.
2. Safety Information
WARNING: Avoid direct exposure of the laser beam to the eyes. Laser radiation can cause eye injury.
- Do not stare directly into the laser beam.
- Do not aim the laser beam at people or animals.
- Use the laser level only for its intended purpose.
- Keep the device out of reach of children.
- Ensure the work area is clear of obstructions and hazards.
- Always turn off the laser level when not in use.
3. Package Contents
Verify that all items listed below are included in your package:
- 1 X Levelsure 901CG laser level
- 1 X Magnetic pivoting Base
- 1 X Laser target
- 4 X AA Batteries
- 1 X Cloth case
- 1 X English User's Manual
- 1 X Huepar TPD05 Tripod
- 1 X Quick Release Plate with 1/4"-20 Screw Mount
- 1 X Carrying Bag
4. Product Features
4.1. 901CG Laser Level Features
- 360-Degree Horizontal Line: Provides comprehensive leveling coverage with one ultra-bright 360° horizontal green beam and one 130° vertical green beam. This allows for simultaneous work in different parts of a room.
- Green Laser Unit: Utilizes an Osram’s green laser unit, which is significantly brighter than red lasers, offering an accuracy of ± 1/9 inch at 33 feet and a maximum working range of 130 feet.
- Multifunctional Mode: Easy one-button operation to project lines together or independently (cross line, vertical, and 360-degree horizontal).
- Smart Pendulum System: Self-levels and indicates out-of-level conditions when unlocked. When locked, it switches to manual mode for angled line projection.

Figure 4.1: The Huepar 901CG laser level emitting an ultra-bright green laser beam, highlighting its visibility.
4.2. TPD05 Tripod Features
- Lightweight and Extendable: Expands up to 20 inches (1.64 feet) for precise laser positioning and collapses to 10 inches for easy storage.
- Quick Release Plate: Features a standard 1/4" quick release plate for fast installation and removal of the laser level.
- 3-Section Legs: Adjustable height with flip-locks on each leg for independent height adjustment.
- 3-Way Swivel Pan Head: Allows 360-degree rotation horizontally and vertically, with a built-in bubble level for angle and accuracy adjustment.
- Rubber Feet: Curved design for stability on various surfaces.

Figure 4.2: Close-up of the TPD05 Tripod's 3-way swivel pan head, illustrating its rotational and tilting capabilities.

Figure 4.3: Detail of the TPD05 Tripod's 3-section legs, highlighting the flip-lock mechanism for height adjustment and the rubber feet for stability.
5. Setup
5.1. Installing Batteries
- Locate the battery compartment on the back of the 901CG laser level.
- Open the battery compartment cover.
- Insert 4 AA batteries, ensuring correct polarity (+/-).
- Close the battery compartment cover securely.
5.2. Assembling the Tripod
- Unfold the tripod legs and extend them to the desired height using the flip-locks.
- Adjust the center column for additional height if needed.
- Ensure the tripod is stable on a flat, secure surface.

Figure 5.1: The TPD05 Tripod demonstrating its various height adjustments, from minimum to maximum extension.
5.3. Mounting the Laser Level
- Attach the quick release plate to the bottom of the 901CG laser level using the 1/4"-20 screw mount.
- Secure the quick release plate with the laser level onto the tripod head.
- Alternatively, use the magnetic pivoting base to attach the laser level to metal surfaces. The base also has a 1/4"-20 thread for tripod mounting.

Figure 5.2: The Huepar 901CG laser level illustrating its compatibility with tripods via a 1/4"-20 thread and its magnetic pivoting bracket for versatile mounting.
6. Operating Modes
The Huepar 901CG laser level offers two primary operating modes: Self-Leveling Mode and Manual Mode.
6.1. Self-Leveling Mode
- To activate, unlock the pendulum by sliding the pendulum lock switch to the unlocked position.
- The laser level will automatically self-level within its compensation range (4° ± 1°).
- If the device is outside its self-leveling range, the laser lines will flash rapidly to indicate an out-of-level condition. Adjust the device's position until the lines become steady.
6.2. Manual Mode
- To activate, lock the pendulum by sliding the pendulum lock switch to the locked position.
- In this mode, the laser lines can be projected at any angle, which is useful for tasks like installing handrails or decorative projects.
- The laser lines will not self-level in this mode.

Figure 6.1: Visual representation of the Huepar laser level operating in self-leveling mode (horizontal line) versus manual mode (angled line).
6.3. Line Selection
Press the power button to cycle through different laser line combinations:
- Press once for horizontal line only.
- Press twice for vertical line only.
- Press three times for both horizontal and vertical lines (cross line).
- Press again to turn off the laser lines.

Figure 6.2: Illustration of the three selectable modes for the Huepar laser level: vertical line, 360-degree horizontal line, and both lines combined.
7. Maintenance
- Cleaning: Use a soft, damp cloth to clean the laser level and tripod. Do not use harsh chemicals or abrasive cleaners.
- Storage: Store the device and tripod in their cloth case and carrying bag, respectively, in a cool, dry place when not in use. Remove batteries if storing for extended periods.
- Calibration: While the device is factory calibrated, if you suspect accuracy issues, refer to the troubleshooting section or contact customer support.

Figure 7.1: The Huepar TPD05 Tripod demonstrating its compact folded size, suitable for storage in small spaces like a drawer or shelf.
8. Troubleshooting
| Problem | Possible Cause | Solution |
|---|---|---|
| Laser lines are flashing rapidly. | Device is out of self-leveling range. | Place the laser level on a more level surface or adjust the tripod until the lines become steady. |
| Laser does not turn on. | Low or dead batteries; Incorrect battery polarity. | Replace batteries with new ones; Ensure batteries are inserted with correct polarity. |
| Laser lines are dim. | Low battery power; Bright ambient light. | Replace batteries; Use the laser target plate to enhance visibility; Reduce ambient light if possible. |
| Laser lines are not straight in manual mode. | This is expected behavior in manual mode. | Manual mode allows for projection at any angle. If you require a level line, ensure the pendulum is unlocked for self-leveling mode. |
9. Specifications
9.1. 901CG Laser Level Specifications
- Laser Class: Class 2
- Laser Wavelength: 510±5 nm (Green Laser)
- Leveling Accuracy: ± 1/9 Inch at 33 Feet
- Horizontal/Vertical Accuracy: ± 1/9 Inch at 33 Feet
- Leveling/Compensation Range: 4°±1°
- Working Distance with Huepar Receiver: 130Ft (Receiver not included)
- Operating Time: 4~6 hours (with all laser beams on)
- Power Source: 4×'AA' (LR6) batteries (large capacity rechargeable batteries recommended)
- IP Rating: IP54 (waterproof, dustproof, shockproof)
- Operation Temperature Range: 14℉- 122℉ (-10℃-+50℃)
- Storage Temperature Range: -4℉- 158℉ (-20℃-+70℃)
9.2. TPD05 Tripod Specifications
- Screw Mount Size: 1/4"-20
- Leg Sections: 3 Sections
- Leg Locking Type: Pull Buckle
- Head Type: Ball Head (3-Way Swivel Pan Head)
- Pan Range: 360°
- Tilt Range: 180°
- Lateral Tilt: 90°
- Load Capacity: 9LB
- Min Height: 0.8 Feet (10 inches)
- Max Height: 1.64 Feet (19.7 inches)
- Net Weight: 0.8LB
- Pipe Diameter: 2/3 Inch
10. Warranty & Support
For warranty information and customer support, please refer to the documentation included with your purchase or visit the official Huepar website. Keep your purchase receipt as proof of purchase for warranty claims.
Huepar Official Store: Visit the Huepar Store on Amazon