OUBO HEADLAMP
OUBO DY-105 Binocular Loupes with Head Light User Manual
Model: HEADLAMP
1. Introduction
This manual provides comprehensive instructions for the safe and effective use of the OUBO DY-105 Binocular Loupes with Head Light. This device is designed to provide magnification and illumination for various precision tasks, enhancing visibility and comfort during extended use. Please read this manual thoroughly before operating the device and retain it for future reference.
2. Product Contents
Upon unboxing, please verify that all components listed below are present and in good condition.
- 1 x Binocular Loupe Assembly
- 1 x Head Light (5W)
- 1 x Headband
- 1 x Lens Cover
- 1 x Grip Cap
- 1 x Screwdriver
- 1 x Instruction Manual (this document)
- 1 x Power Adapter (Input: 100-240V/50-60Hz)

Image: The OUBO DY-105 Binocular Loupes and its packaging box, illustrating the product's appearance upon delivery.
3. Specifications
Key technical specifications of the OUBO DY-105 Binocular Loupes with Head Light:
| Feature | Specification |
|---|---|
| Magnification | 2.5X |
| Working Distance | 280-380mm |
| Field of View | 60mm |
| Lens Material | Optical Glass |
| Frame Type | Headband Mounted |
| Optical System | Compound Optics (Galilean) |
| Lamp Power | 5W LED |
| Light Intensity | 65000 lux |
| Light Life | 20,000 hours |
| Focus Size (at 420mm) | 1-9mm (Adjustable) |
| Working Time (Battery) | ≥6 hours |
| Charging Time | 4 hours |
| Input Voltage | 100-240V/50-60Hz |
| Brightness | Adjustable |
| Point Size | Adjustable |
| Box Dimensions | 26.5 x 23.5 x 16.5 cm |
4. Safety Information
Please observe the following safety precautions to prevent injury or damage to the device:
- Do not look directly into the LED light source, as it can cause eye damage.
- Keep the device away from water or excessive moisture.
- Do not disassemble or modify the device. Refer all servicing to qualified personnel.
- Use only the provided power adapter for charging.
- Store the device in a cool, dry place when not in use.
- Avoid dropping or subjecting the device to strong impacts.
- Ensure the headband is securely fitted to prevent the device from falling during use.
5. Setup and Assembly
Follow these steps to assemble and prepare your binocular loupes for use:
- Attach the Headband: Ensure the headband is correctly oriented with the adjustment knob at the back.
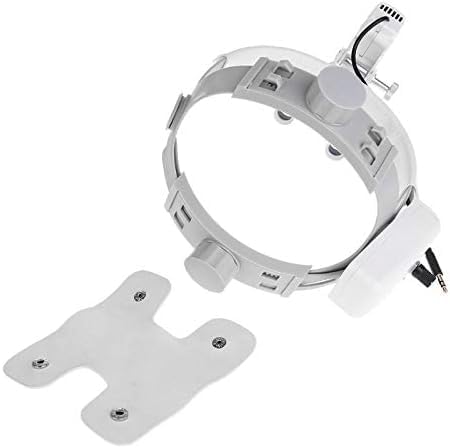
Image: The headband component with its removable comfort pad, ready for assembly.
- Mount the Loupe Assembly: Slide the binocular loupe assembly onto the front of the headband. Secure it using the provided screws or locking mechanism.

Image: Side view of the assembled binocular loupes and headband, showing the connection points.
- Adjust Head Girth: Place the assembled unit on your head. Use the size adjustor knob at the back of the headband to achieve a comfortable and secure fit.

Image: Diagram illustrating the LED light source, magnifying lens, interpupillary distance adjustor, and the head girth adjustor on the headband.
- Adjust Interpupillary Distance (IPD): While looking through the loupes, adjust the interpupillary distance adjustor until the two circular fields of view merge into a single, clear image.
- Adjust Working Distance: The loupes have a fixed working distance (280-380mm). Position yourself at the appropriate distance from your subject to achieve optimal focus.
- Charge the Battery: Before first use, fully charge the integrated battery using the provided power adapter. Connect the adapter to the charging port on the device and plug it into a standard electrical outlet. The charging indicator will show status. Charging time is approximately 4 hours.

Image: A detailed diagram highlighting key features such as the headband-mounted power pack, adjustment points for perfect fit, shadow-free image design, adjustable spot size, and the i-View Loupe Mount with flip-up function.
6. Operating Instructions
Once assembled and charged, your OUBO DY-105 is ready for operation.
- Power On/Off: Locate the power button on the head light unit. Press and hold for a few seconds to turn the light on or off.
- Adjust Brightness: Rotate the brightness control knob on the head light unit to increase or decrease the light intensity. The light intensity can reach up to 65000 lux.
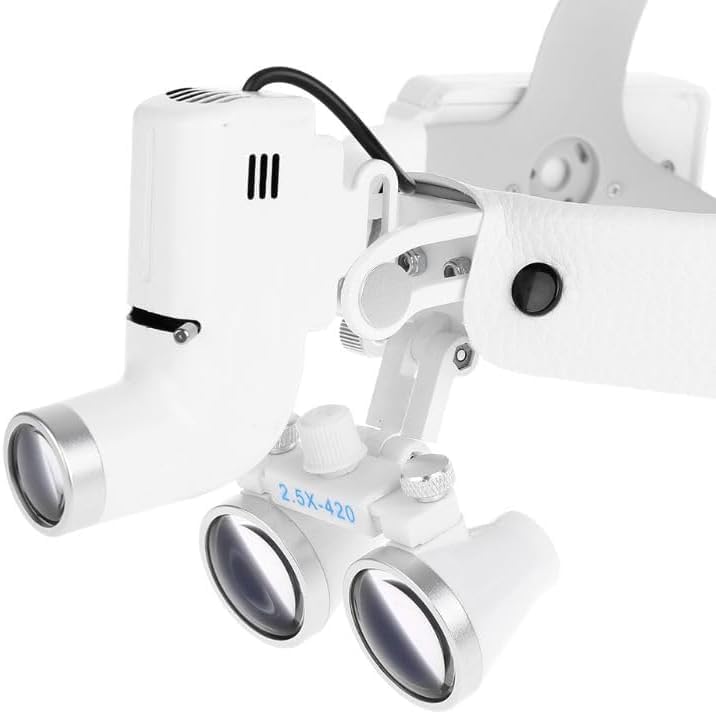
Image: A close-up view of the loupes and the integrated head light unit, showing the controls.
- Adjust Spot Size: The light features an adjustable spot size (1-9mm at 420mm working distance). Rotate the spot size adjustment ring on the light head to modify the illuminated area.
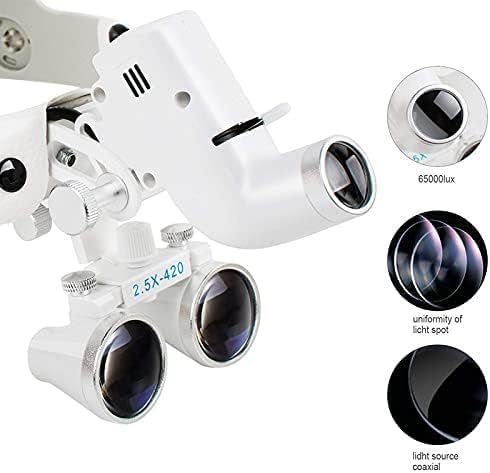
Image: Detailed view of the light source and lens components, illustrating the uniformity of the light spot and the coaxial light source design.
- Using the Loupes: Position your head at the optimal working distance from your subject. The 2.5X magnification will provide a clear, enlarged view. The Galilean optical system ensures a wide field of view with minimal distortion.
- Flip-up Function: The i-View Loupe Mount allows the loupes to be flipped up and out of the way when magnification is not required, without needing to remove the entire unit.

Image: The OUBO DY-105 Binocular Loupes worn on a mannequin head, demonstrating proper fit and positioning.
7. Maintenance
Proper maintenance ensures the longevity and optimal performance of your device.
- Cleaning Lenses: Use a soft, lint-free cloth specifically designed for optical lenses. For stubborn smudges, a small amount of lens cleaning solution can be applied to the cloth (not directly to the lens). Avoid abrasive materials or harsh chemicals.
- Cleaning Exterior: Wipe the exterior surfaces with a soft, damp cloth. Do not immerse the device in water.
- Battery Care: To maximize battery life, avoid fully discharging the battery frequently. Recharge the battery when the light dims or indicates low power. If storing for extended periods, charge the battery to approximately 50% every few months.
- Storage: Store the loupes in their original box or a protective case when not in use to prevent dust accumulation and physical damage. Keep away from extreme temperatures and direct sunlight.
8. Troubleshooting
If you encounter issues with your OUBO DY-105, refer to the following common problems and solutions:
| Problem | Possible Cause | Solution |
|---|---|---|
| Light does not turn on. | Battery is discharged. | Charge the battery for 4 hours. |
| Light is dim. | Low battery or brightness setting too low. | Recharge battery or adjust brightness knob. |
| Image is blurry or unclear. | Incorrect interpupillary distance (IPD) or working distance. Lenses are dirty. | Adjust IPD until fields merge. Ensure you are within the 280-380mm working distance. Clean lenses as per maintenance section. |
| Headband feels uncomfortable. | Headband not properly adjusted. | Adjust the head girth knob and ensure the comfort pad is correctly positioned. |
If the problem persists after attempting these solutions, please contact customer support.
9. Warranty and Support
OUBO products are manufactured to high quality standards. While specific warranty details are not provided in this manual, please retain your purchase receipt as proof of purchase. For any product inquiries, technical support, or warranty claims, please contact your retailer or the manufacturer directly through their official website or customer service channels.
For more information, you may visit the OUBO brand page on Amazon: OUBO Brand Store.
Ask a question about this manual
Ask about setup, troubleshooting, compatibility, parts, safety, or missing instructions. Manuals+ will review the question and use this page’s manual context to help answer it.