Outsunny 84C-476V03CG
Outsunny Retractable Pergola User Manual
Model: 84C-476V03CG
1. Introduction
This user manual provides essential information for the safe and effective assembly, operation, and maintenance of your Outsunny Retractable Pergola. Please read this manual thoroughly before installation and keep it for future reference.

Figure 1.1: The Outsunny Retractable Pergola providing shade in an outdoor living space.
2. Safety Information
WARNING: Failure to follow these safety instructions could result in serious injury or property damage.
- Assembly required.
- Not recommended for use in extreme weather conditions.
- Secure the pergola to the ground using the provided ground nails and expansion screws to prevent injuries during use and storage.
- Follow the provided assembly instructions carefully to prevent injuries during installation and disassembly.
- Ensure all components are securely fastened before use.
- Do not hang heavy objects from the pergola frame.
- Regularly inspect the pergola for any signs of wear or damage.
3. Package Contents
Before beginning assembly, ensure all parts listed below are present and undamaged. If any parts are missing or damaged, do not proceed with assembly and contact customer service.
- Steel Frame Components (beams, posts, connectors)
- Retractable Polyester Canopy
- 8 x Ground Nails (for soft ground)
- 8 x Expansion Screws (for hard ground)
- Assembly Hardware (bolts, nuts, washers, tools if included)
- Instruction Manual
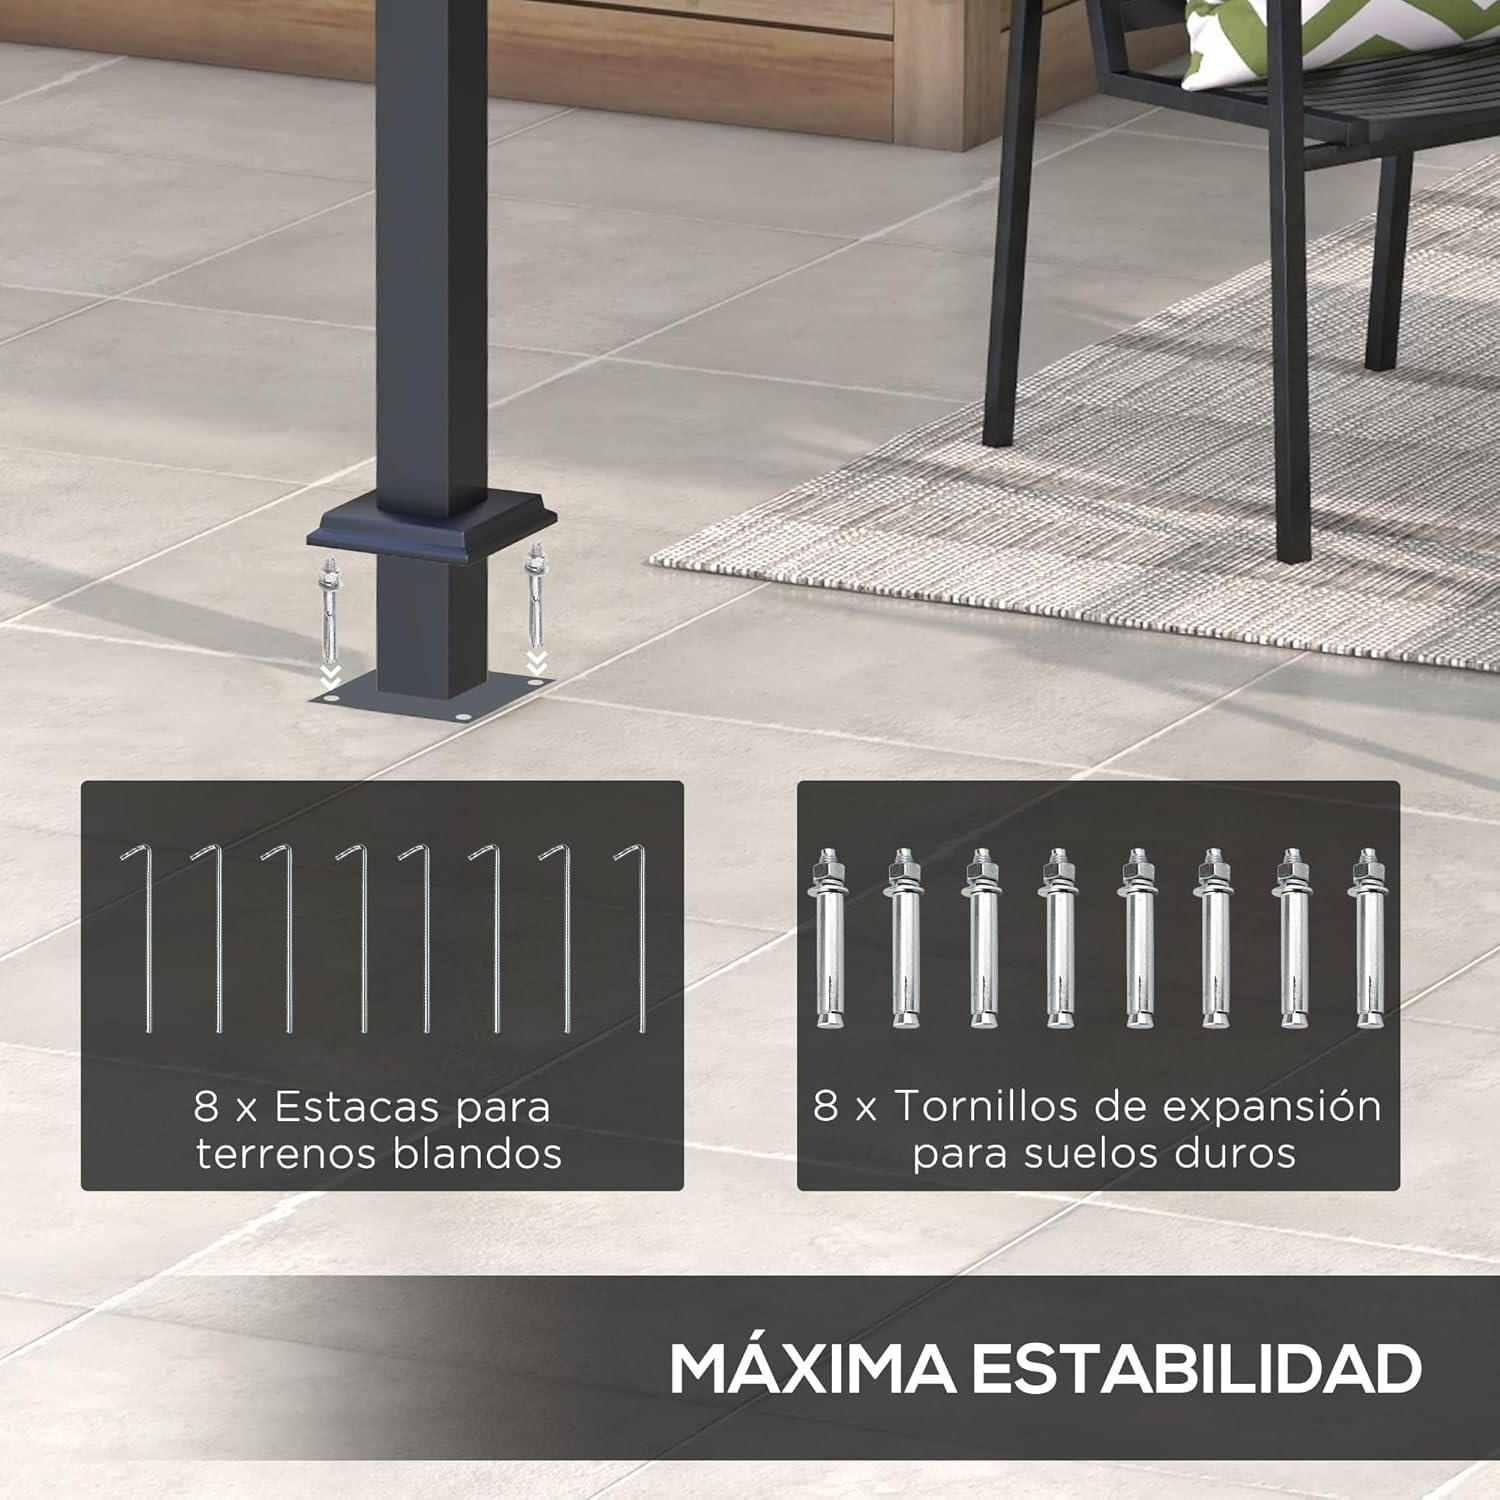
Figure 3.1: Included ground nails and expansion screws for securing the pergola.
4. Setup and Assembly
Assembly of the Outsunny Retractable Pergola requires at least two adults. Follow the steps below carefully. It is recommended to lay out all components on a clean, flat surface before starting.
4.1. Site Preparation
- Choose a level and stable location for your pergola.
- Clear the area of any debris or obstacles.
- Ensure adequate clearance around the pergola for safe operation of the retractable canopy.
4.2. Frame Assembly
- Unpack all components and verify against the package contents list.
- Assemble the main support posts and crossbeams according to the diagram in your separate assembly guide. Ensure all connections are finger-tight initially.
- Once the main frame is upright, securely tighten all bolts and fasteners.
- Attach the canopy support rails to the main frame.

Figure 4.1: The assembled steel frame of the pergola.
4.3. Canopy Installation
- Carefully unfold the polyester canopy.
- Slide the canopy sections onto the designated rails or attach them as per the specific instructions in your assembly guide.
- Ensure the canopy is properly aligned and can slide smoothly.

Figure 4.2: Overhead view illustrating the retractable canopy system.
4.4. Securing the Pergola
To ensure maximum stability and safety, the pergola must be securely anchored to the ground.
- For soft ground (e.g., lawn), use the provided ground nails by driving them through the base plates of the posts into the soil.
- For hard ground (e.g., concrete patio), use the provided expansion screws. Drill appropriate holes and secure the base plates firmly.
5. Operating Instructions
5.1. Retracting and Extending the Canopy
The pergola features a retractable canopy, allowing you to adjust the amount of shade as needed.
- To extend the canopy for full shade, gently pull the canopy sections along the rails until fully open.
- To retract the canopy for more sunlight, push the canopy sections back along the rails until they are neatly folded.
- Ensure the canopy moves freely and does not snag on any part of the frame.

Figure 5.1: Adjusting the retractable canopy for desired shade.
5.2. Water Drainage
The canopy is designed with 12 drainage eyelets to prevent water accumulation. These eyelets allow rainwater to drain off, preventing pooling and potential damage to the fabric or frame.

Figure 5.2: Drainage eyelets on the canopy to prevent water pooling.
6. Maintenance
Regular maintenance will extend the life of your pergola and ensure its continued performance.
- Cleaning the Frame: Wipe the steel frame with a damp cloth and mild soap. Rinse thoroughly and dry to prevent rust. Avoid abrasive cleaners.
- Cleaning the Canopy: Clean the polyester canopy with mild soap and water. Do not use harsh chemicals or bleach. Allow the canopy to air dry completely before retracting or storing.
- Inspections: Periodically check all bolts and fasteners to ensure they are tight. Inspect the canopy for any tears or damage. Check the ground anchors for stability.
- Winter Storage: In areas with harsh winters, it is recommended to remove the canopy and store it indoors to protect it from snow and ice. The frame can remain outdoors if properly anchored, but extreme weather conditions should be avoided.
7. Troubleshooting
| Problem | Possible Cause | Solution |
|---|---|---|
| Pergola feels unstable or wobbly. | Loose fasteners; inadequate anchoring; uneven ground. | Ensure all bolts are tightened. Verify ground anchors are securely installed. Relocate to a level surface or use shims to level the base. |
| Canopy is difficult to retract/extend. | Rails are dirty or obstructed; canopy fabric is snagged; frame is misaligned. | Clean the canopy rails. Check for any obstructions or fabric snags. Inspect the frame for proper alignment. |
| Water pools on the canopy. | Drainage eyelets are blocked; canopy is not fully extended/tensioned. | Clear any debris from the drainage eyelets. Ensure the canopy is fully extended and properly tensioned to allow water runoff. |
| Rust appearing on the frame. | Protective coating damaged; prolonged exposure to moisture without drying. | Clean and dry the affected area. Apply rust-inhibiting paint if necessary. Ensure regular cleaning and drying. |
8. Specifications
| Feature | Detail |
|---|---|
| Model Number | 84C-476V03CG |
| Overall Dimensions (L x W x H) | 397 cm x 297 cm x 235 cm (3.97m x 2.97m x 2.35m) |
| Column Spacing (L x W) | 320 cm x 283 cm |
| Product Weight | 33.5 kg |
| Frame Material | Alloy Steel |
| Canopy Material | Polyester with PA coating |
| Color | Dark Grey |
| Water Resistance Level | Water Resistant |
| Assembly Required | Yes |

Figure 8.1: Detailed dimensions of the pergola.
9. Warranty and Support
For warranty information, product support, or to order replacement parts, please contact Outsunny customer service. Refer to your purchase documentation for specific warranty terms and contact details.
Manufacturer: SPANISH AOSOM
Brand: Outsunny
Website: Outsunny Brand Store
No official product videos from the seller were found in the provided data.
Ask a question about this manual
Ask about setup, troubleshooting, compatibility, parts, safety, or missing instructions. Manuals+ will review the question and use this page’s manual context to help answer it.