1. Introduction
Thank you for choosing the METRO Professional GDW1045E Commercial Dishwasher. This manual provides essential information for the safe and efficient installation, operation, and maintenance of your appliance. Please read these instructions carefully before using the dishwasher and keep them for future reference.
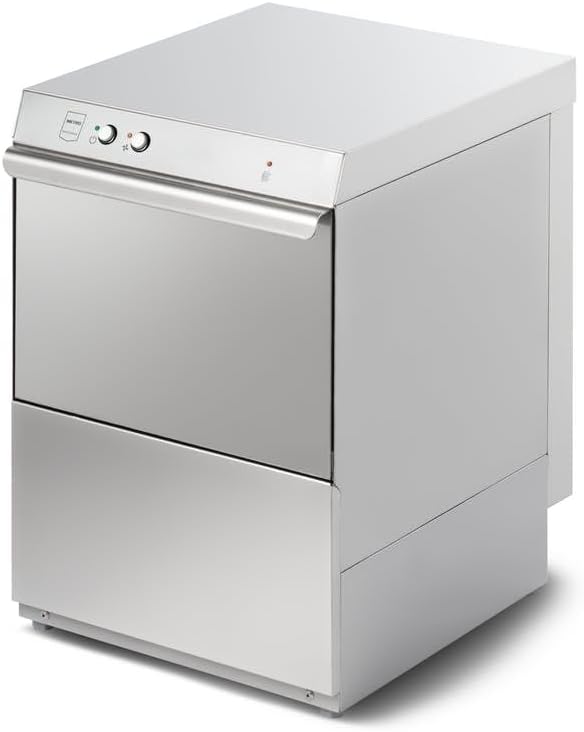
Figure 1: Front view of the METRO Professional GDW1045E Commercial Dishwasher. This image displays the stainless steel exterior, control panel with two rotary knobs, and the main door handle.
2. Safety Information
To ensure safe operation, always adhere to the following safety precautions:
- Read all instructions before use.
- This appliance is intended for commercial use only.
- Ensure the power supply matches the specifications of the appliance (230V).
- Do not operate the dishwasher with a damaged power cord or plug.
- Keep children and unauthorized personnel away from the appliance during operation.
- Do not open the door during a wash cycle, as hot water and steam may escape.
- Use only detergents and rinse aids specifically designed for commercial dishwashers.
- Disconnect the appliance from the power supply before cleaning or maintenance.
- Installation and repairs should only be performed by qualified technicians.
3. Setup and Installation
Proper installation is crucial for the performance and longevity of your dishwasher.
3.1 Unpacking
- Carefully remove the dishwasher from its packaging.
- Inspect the appliance for any damage incurred during transit. Report any damage to your supplier immediately.
- Remove all packing materials, including any internal protective elements.
3.2 Positioning
- Place the dishwasher on a stable, level surface capable of supporting its weight when full.
- Ensure adequate ventilation around the appliance.
- Maintain sufficient clearance for opening the door and accessing connections.
- The dimensions of the unit are approximately 51.5 cm (width) x 55 cm (depth) x 80 cm (height).
3.3 Water Connection
- Connect the dishwasher to a cold or hot water supply (max 60°C) using the provided inlet hose.
- Ensure all connections are tight to prevent leaks.
- This model does not include an internal drain pump. Therefore, the drain hose must be connected to a drain point that is lower than the dishwasher's drain outlet to allow for gravity drainage.
- Secure the drain hose to prevent it from dislodging during operation.
3.4 Electrical Connection
- Connect the appliance to a grounded 230V electrical outlet.
- Do not use extension cords or adapters.
- Ensure the electrical circuit can handle the dishwasher's power requirements.
4. Operating Instructions
4.1 Initial Start-up
- Ensure water and power connections are secure.
- Fill the rinse aid dispenser and, if applicable, the detergent dispenser.
- Close the dishwasher door securely.
4.2 Loading the Dishwasher
- Scrape off large food particles from dishes before loading.
- Place dishes in the racks, ensuring they do not block the spray arms.
- Load glasses and cups upside down.
- Separate stainless steel and silver items to prevent corrosion.
4.3 Selecting a Wash Program
The control panel features rotary knobs for program selection and operation. Refer to the markings on the control panel for specific program details.
- Turn the program selector knob to choose the desired wash cycle.
- Press the start button to begin the cycle.
- The indicator light will illuminate to show the dishwasher is operating.
4.4 After the Wash Cycle
- Wait a few minutes after the cycle finishes before opening the door to allow steam to dissipate and dishes to cool.
- Unload the lower rack first to prevent water from dripping onto dry dishes.
- Turn off the dishwasher and close the water tap if the machine will not be used for an extended period.
5. Maintenance
Regular maintenance ensures optimal performance and extends the lifespan of your dishwasher. Always disconnect power before performing maintenance.
5.1 Cleaning Filters
- Locate the filter assembly at the bottom of the wash cabinet.
- Remove the coarse and fine filters.
- Rinse them under running water to remove food debris. Use a brush if necessary.
- Reassemble the filters correctly before operating the dishwasher.
5.2 Cleaning Spray Arms
- Periodically check the spray arm nozzles for blockages.
- Remove the spray arms and clear any debris from the nozzles using a thin wire or toothpick.
- Ensure spray arms rotate freely after reinstallation.
5.3 Descaling
- Depending on water hardness, regular descaling may be required.
- Use a commercial descaling agent suitable for dishwashers, following the manufacturer's instructions.
- Perform a descaling cycle without dishes.
5.4 Exterior Cleaning
- Wipe the exterior surfaces with a damp cloth and mild detergent.
- Do not use abrasive cleaners or solvents.
6. Troubleshooting
Before contacting service, check the following common issues and solutions:
| Problem | Possible Cause | Solution |
|---|---|---|
| Dishwasher does not start | No power; Door not closed properly; Program not selected. | Check power connection; Ensure door is latched; Select a program and press start. |
| Poor washing results | Clogged filters/spray arms; Incorrect loading; Insufficient detergent; Water temperature too low. | Clean filters and spray arms; Reload dishes correctly; Add appropriate detergent; Check water heater settings. |
| Water not draining | Clogged drain hose/filter; Drain hose not positioned correctly (gravity drain). | Clean drain filter; Ensure drain hose is clear and positioned below the outlet. |
| Excessive foam | Too much detergent; Incorrect detergent type. | Reduce detergent quantity; Use only commercial dishwasher detergent. |
7. Specifications
| Feature | Detail |
|---|---|
| Model | GDW1045E |
| Brand | METRO Professional |
| Dimensions (W x D x H) | 51.5 cm x 55 cm x 80 cm |
| Voltage | 230 V |
| Water Consumption per Cycle | 2.6 Liters |
| Drain Pump | Not included (Gravity drain required) |
8. Warranty and Support
For warranty information and technical support, please refer to the documentation provided at the time of purchase or contact your METRO Professional supplier. Keep your purchase receipt as proof of purchase.