NUOGE NGORANGE
NUOGE PCP Air Compressor User Manual
Model: NGORANGE
1. Introduction
This manual provides essential information for the safe and efficient operation, maintenance, and troubleshooting of your NUOGE PCP Air Compressor. Please read this manual thoroughly before using the compressor to ensure proper function and longevity of the device.
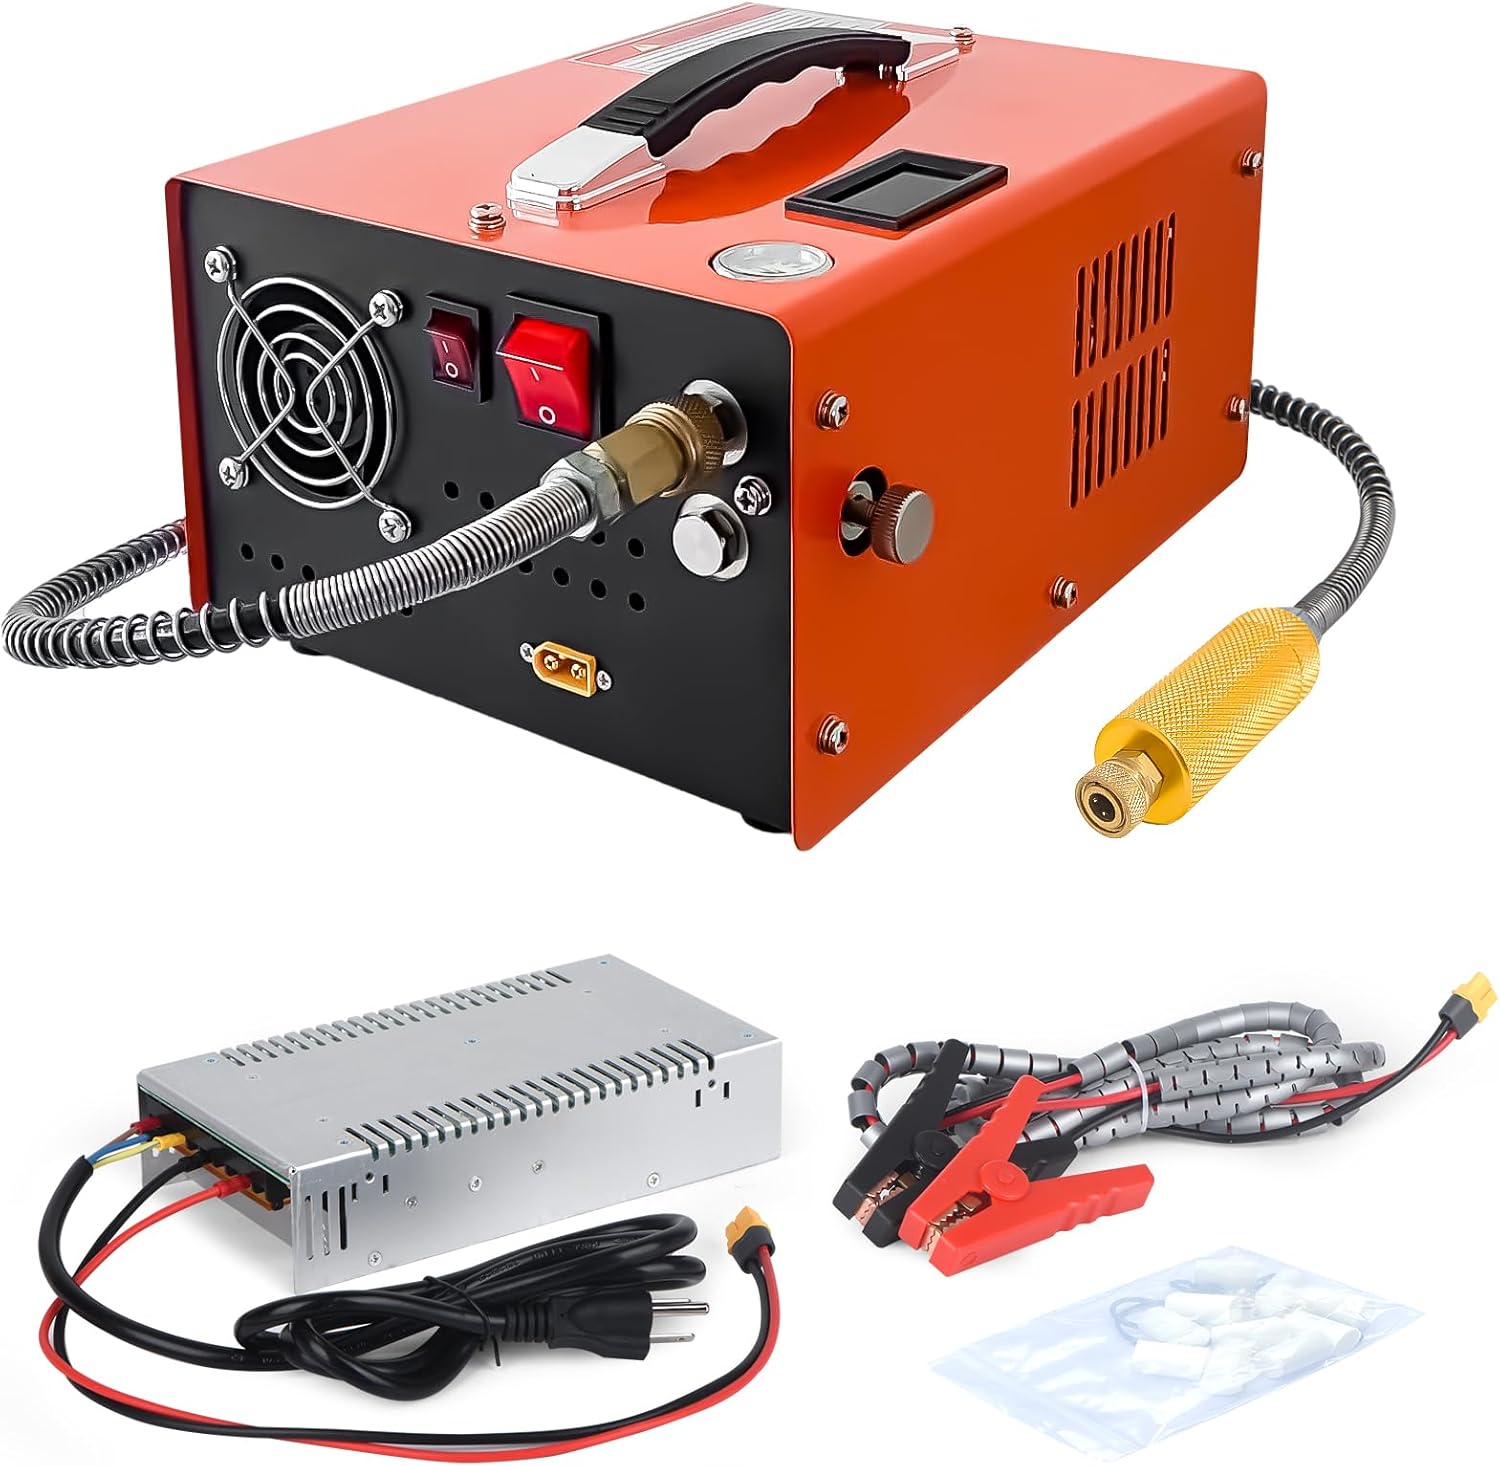
Figure 1: NUOGE PCP Air Compressor and included accessories.
2. Safety Information
WARNING: Failure to follow these safety instructions may result in serious injury or property damage.
- Always operate the compressor in a well-ventilated area.
- Do not exceed the maximum inflation pressure of 30 MPa (4500 PSI).
- The recommended air cylinder volume for inflation is no more than 1L (60ci).
- Monitor the temperature indicator during operation. The compressor has a duty cycle of 25 minutes continuous inflation followed by 10 minutes of rest to prevent overheating.
- The explosion-proof valve is a safety feature. If pressure exceeds safe limits, the valve will automatically pop out, stopping operation. Ensure the valve and explosion-proof piece are correctly installed before use. Avoid direct exposure to the pressure release if the valve activates.
- Ensure all connections, especially the 8mm quick disconnect coupling, are secure before operating.
- The hose is designed to withstand up to 60 MPa. Regularly inspect for damage.
- Keep the oil and moisture filter integrated at the hose end clean to prevent corrosion of your air gun or tank.
- Keep children and pets away from the compressor during operation.
3. Package Contents
Verify that all items listed below are included in your package:
- 1 x PCP Air Compressor
- 1 x AC Power Adapter (for 110V home use)
- 1 x Car Power Line (for 12V automotive use)
- 1 x Home Power Line
- 1 x Air Outlet Hose with 8mm quick disconnect fitting
- 1 x Spare Parts Suit (includes extra filters and gaskets)
- 1 x User Manual

Figure 2: Visual representation of package contents.
4. Product Features
- Water/Oil Free Design: No external cooling water or oil required, simplifying operation and maintenance. Features a powerful built-in side fan and multiple vents for efficient heat dissipation.
- Dual Power Capability: Can be powered by a 12V car battery (DC) or a 110V AC home power outlet (power converter included), offering versatility for field or home use.
- High Pressure Output: Capable of reaching a maximum inflation pressure of 30 MPa (4500 PSI).
- Quick Connect System: Equipped with an 8mm self-locking quick disconnect fitting for direct connection to most PCP airguns and paintball cartridges.
- Safety Features: Includes a safe bursting disc, a hose rated for 60 MPa, and a temperature indicator to monitor internal temperature. An explosion-proof valve prevents over-pressurization.
- Integrated Filtration: An oil and moisture filter is integrated into the hose to protect your air gun or tank from contaminants.
- Compact and Portable: Weighing only 5.2 kg (11.5 lbs) with compact dimensions (6.7"L x 8.3"W x 4.6"H), it is easy to transport and store.

Figure 3: Key components and features of the compressor.
5. Setup
5.1 Power Connection
The compressor offers two power options:
5.1.1 Home Use (110V AC)
- Connect the external AC power adapter to the compressor's power input port.
- Plug the home power line into the AC power adapter.
- Insert the home power line plug into a standard 110V AC wall socket.

Figure 4: Connecting for home use.
5.1.2 Automotive Use (12V DC)
- Connect the 12V car power line to the compressor's power input port.
- Connect the red clip of the car power line to the positive (+) terminal of your 12V car battery.
- Connect the black clip of the car power line to the negative (-) terminal of your 12V car battery.
- Ensure the car engine is running while using the compressor to provide stable power.

Figure 5: Connecting for automotive use.
5.2 Hose Connection
- Attach the air outlet hose to the compressor's air outlet port.
- Connect the 8mm quick disconnect fitting on the hose to the male nozzle of your PCP airgun or paintball cartridge. Ensure a secure connection.
6. Operating Instructions
- Prepare for Inflation: Ensure the compressor is placed on a stable surface in a well-ventilated area. Connect the power source and the air hose to your device (airgun, tank, etc.).
- Activate Fan: Locate the fan switch on the compressor and turn it ON. The fan should start running to ensure proper cooling during operation.
- Start Compressor: Locate the compressor switch and turn it ON. The compressor will begin to inflate the connected device.
- Monitor Pressure and Temperature:
- Observe the pressure gauge to monitor the inflation progress.
- Monitor the LED temperature display. The operating temperature should not exceed 70°C.
- Inflation Rate Example: For a 450 cc tank, inflating from 100 BARS to 200 BARS takes approximately 7 minutes. Inflating from 0 BARS to 300 BARS takes approximately 18 minutes.
- Stop Operation: Once the desired pressure is reached, turn OFF the compressor switch, then turn OFF the fan switch.
- Bleed Air: Slowly open the bleed valve to release residual pressure from the hose before disconnecting.
- Disconnect: Once pressure is fully released, disconnect the quick connect fitting from your device.

Figure 6: Pressure gauge and temperature display for monitoring.
7. Maintenance
- Filter Replacement: The integrated oil and moisture filter should be regularly inspected and replaced as needed to ensure clean air delivery and prevent corrosion of your airgun or tank. Spare filters are included.
- Cooling: Allow the fan to run for a few minutes after turning off the compressor to ensure adequate cooling and extend the lifespan of the unit.
- Storage: Store the compressor in a dry, clean environment away from direct sunlight and extreme temperatures.
- General Cleaning: Keep the exterior of the compressor clean and free of dust and debris, especially around the fan and heat dissipation vents.

Figure 7: High-power cooling fan and reusable active carbon filter for maintenance.
8. Troubleshooting
| Problem | Possible Cause | Solution |
|---|---|---|
| Compressor does not turn on. | No power supply; loose connection. | Check power connections (AC adapter or car battery). Ensure switches are ON. |
| Compressor stops during operation. | Over-pressurization (safety valve activated); overheating. | Check if the explosion-proof valve has popped out. Allow the unit to cool down if temperature is high. Ensure proper ventilation. |
| Slow inflation or no pressure build-up. | Air leak in connections; clogged filter. | Check all hose connections for tightness. Inspect and replace the oil/moisture filter if necessary. |
| Excessive noise or vibration. | Unit not on a stable surface; internal issue. | Ensure the compressor is on a flat, stable surface. If noise persists, contact customer support. |
9. Specifications
- Model Name: NGORANGE
- Voltage: 12V DC / 110V AC
- Maximum Operating Pressure: 4500 PSI (30 MPa)
- Rated Power: 250 Watts
- Noise Level: 70 dB
- Cooling Method: Built-in Fan (Water/Oil Free)
- Recommended Tank Volume: Max 1 Liter (60ci)
- Item Weight: 6.5 Kilograms (14.3 pounds)
- Product Dimensions: 6.7"L x 8.3"W x 4.6"H
- Hose Length: 60 Centimeters
- Nozzle Material: Copper
- Safety Valve Pressure: 30 MPa - 35 MPa

Figure 8: Product dimensions.
10. Warranty and Support
Your NUOGE PCP Air Compressor comes with a one-year no-hassle warranty from the date of purchase. This warranty covers manufacturing defects and ensures high-quality product performance.
For warranty claims, technical support, or any inquiries, please contact NUOGE customer service through the retailer where you purchased the product. Please have your purchase receipt and product model number (NGORANGE) ready when contacting support.
Additional protection plans may be available for purchase from your retailer:
- 3-Year Protection Plan
- 4-Year Protection Plan
- Complete Protect (monthly billing option)
Ask a question about this manual
Ask about setup, troubleshooting, compatibility, parts, safety, or missing instructions. Manuals+ will review the question and use this page’s manual context to help answer it.