1. Introduction
This manual provides essential instructions for the safe and efficient operation of your GROVIEW Mini Projector Bluetooth, Model Groview-B2D-US. Please read this manual thoroughly before using the projector and retain it for future reference.
The Groview-B2D-US is a compact and portable projector featuring electric focus, Bluetooth 5.1 connectivity, and a fully sealed optical engine designed for reduced noise and extended lifespan. It supports Full HD 1080P input with a native 720P resolution and offers a digital zoom function.
2. Safety Information
- Do not look directly into the projector lens when the lamp is on.
- Ensure proper ventilation around the projector to prevent overheating. Do not block ventilation openings.
- Use only the power adapter supplied with the projector.
- Do not expose the projector to rain, moisture, or extreme temperatures.
- Avoid placing the projector on unstable surfaces.
- Do not attempt to disassemble or repair the projector yourself. Contact qualified service personnel for assistance.
- Keep the projector away from children and pets.
3. What's in the Box
Verify that all items are present in the packaging:
- 1 x Groview Electric Focus Projector
- 1 x HDMI Cable
- 1 x Power Cord
- 1 x Remote Control
- 1 x User Manual (this document)
4. Product Overview
4.1 Projector Components
The following image illustrates the main components of the Groview Mini Projector.

4.2 Input/Output Ports
The rear panel of the projector features various ports for connecting external devices.
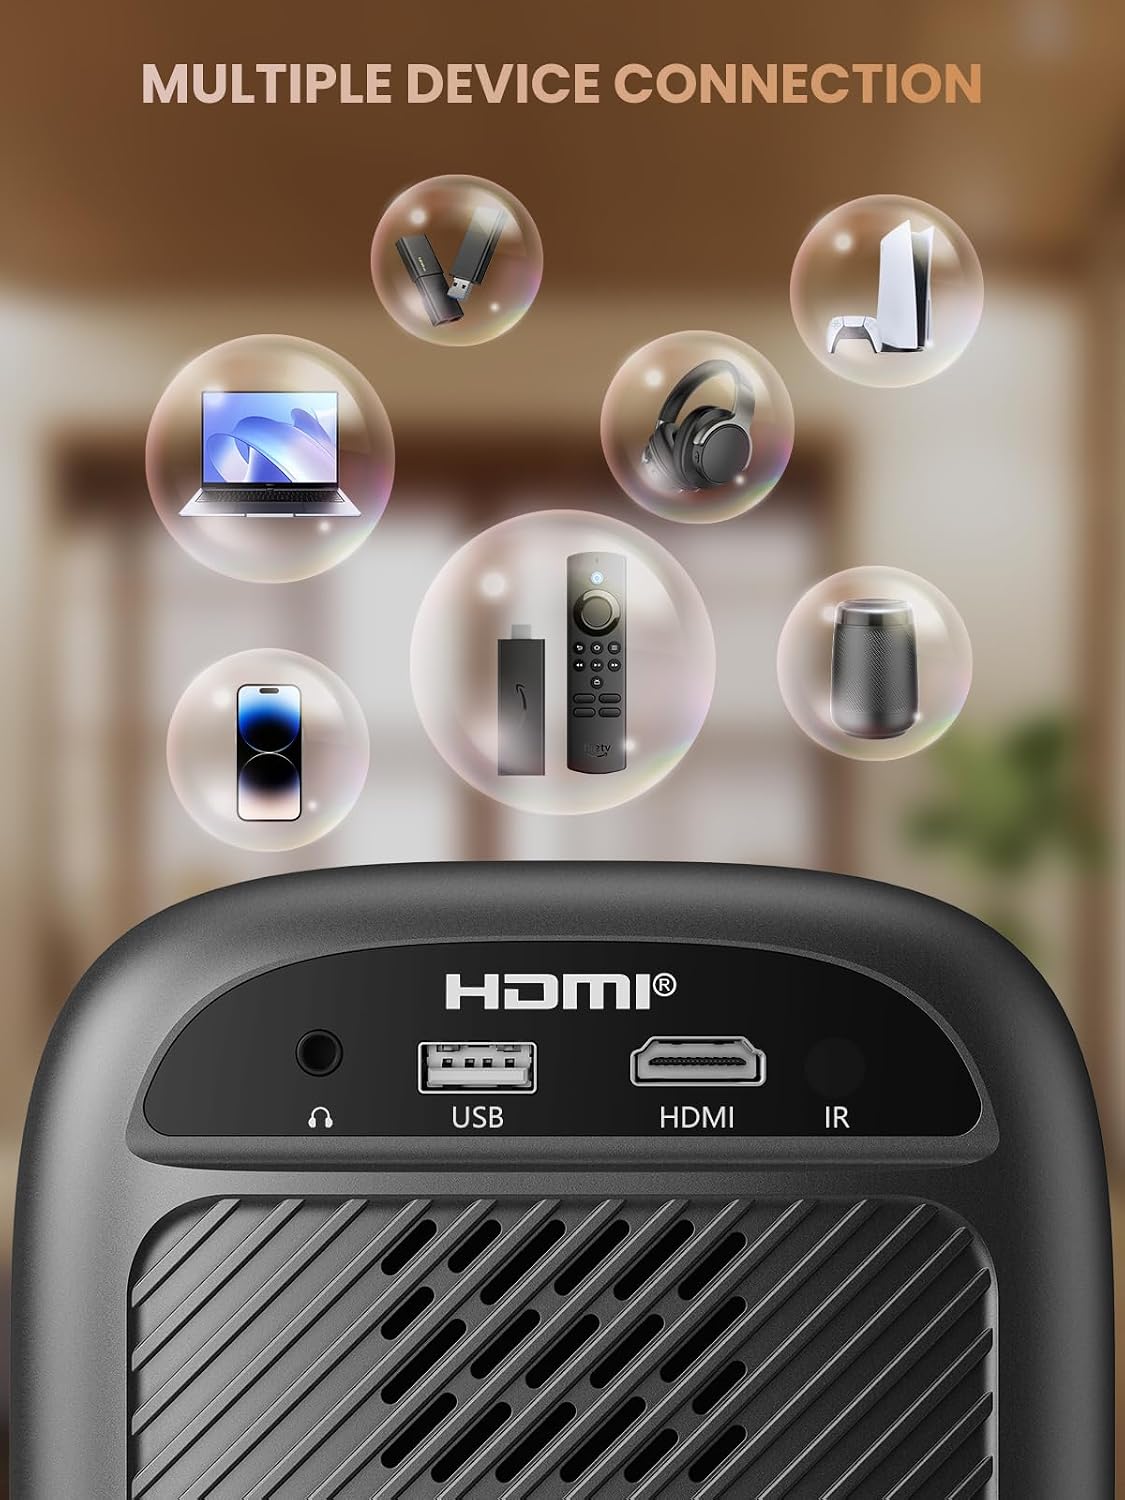
- HDMI Port: Connects to devices such as TV sticks, laptops, game consoles, and Blu-ray players.
- USB Port: Connects to USB flash drives for media playback.
- Audio Port (3.5mm Jack): Connects to external speakers or headphones.
- IR Receiver: For remote control signals.
5. Setup
5.1 Power Connection
- Connect the power cord to the projector's power input.
- Plug the other end of the power cord into a power outlet.
5.2 Projector Placement
Place the projector on a stable, flat surface. For optimal image quality, position the projector perpendicular to the projection surface (wall or screen). The projector can create a large image from a relatively short distance.
5.3 Focus Adjustment
The Groview-B2D-US features electric focus, allowing for precise image clarity adjustment using the remote control.

- Turn on the projector.
- Point the remote control at the projector.
- Press the dedicated focus buttons (usually marked with 'F+' and 'F-' or similar icons) on the remote until the projected image is sharp and clear.
5.4 Keystone Correction
The projector includes a keystone adjustment slider on the rear panel. This allows you to correct trapezoidal distortion if the projector is not perfectly aligned with the screen. Adjust the slider until the image appears rectangular.
5.5 Initial Power On
Press the power button on the projector or the remote control to turn on the device. The projector will boot up and display the main interface.
6. Operating Instructions
6.1 Connecting Devices
The projector offers multiple connectivity options:
- HDMI: Connect an HDMI cable from your source device (e.g., TV Stick, laptop, game console) to the projector's HDMI port. Select the HDMI input source from the projector's menu.
- USB: Insert a USB flash drive into the USB port. The projector's media player will typically detect the drive automatically, allowing you to browse and play supported media files.
- Bluetooth 5.1: Connect to external Bluetooth speakers or headphones for enhanced audio.

- Enable Bluetooth on your external audio device and set it to pairing mode.
- On the projector, navigate to the Bluetooth settings menu.
- Select your device from the list of available devices to pair.
Note: Bluetooth does not support smartphone mirroring.
6.2 Smartphone Connection Methods
To connect a smartphone, an adapter is required:

- iOS Devices: Use a Lightning to HDMI adapter cable.
- Android Devices: Use a Micro USB/Type C to HDMI adapter cable or a Google Chromecast.
6.3 Navigation and Menu
Use the arrow buttons on the remote control to navigate through the projector's on-screen menu. The 'OK' or 'Enter' button confirms selections, and the 'Back' or 'Return' button goes back to the previous menu.
6.4 Digital Zoom Function
The projector features a digital zoom function, allowing you to adjust the image size from 75% to 100% without moving the projector.

Access the zoom settings through the projector's menu and use the remote control to adjust the desired size.
6.5 Remote Control Usage
The included remote control operates the projector's functions. Ensure batteries are correctly installed. Note: A coin may be needed to open the battery compartment.
7. Maintenance
7.1 Cleaning
- Lens: Gently wipe the lens with a soft, lint-free cloth specifically designed for optical surfaces. Do not use abrasive cleaners.
- Exterior: Wipe the projector's exterior with a soft, dry cloth. For stubborn marks, a slightly damp cloth can be used, followed by a dry one.
7.2 Dust-proof Design
The Groview-B2D-US features a fully sealed optical engine, which helps prevent dust and debris from entering the projector and affecting image quality or lifespan.

7.3 Storage
When not in use, store the projector in a cool, dry place, away from direct sunlight and extreme temperatures. Use the lens cap to protect the lens from dust and scratches.
8. Troubleshooting
- No Image: Check power connection, input source selection, and ensure the lens cap is removed. Verify the connected device is powered on and outputting a signal.
- Blurry Image: Adjust the electric focus using the remote control. Ensure the projector is placed at an appropriate distance from the screen.
- No Sound: Check the volume settings on both the projector and the connected source device. If using Bluetooth, ensure the external audio device is properly paired and its volume is up.
- Remote Control Not Working: Check the batteries in the remote control and ensure there are no obstructions between the remote and the projector's IR receiver.
- Overheating Warning: Ensure ventilation openings are not blocked. Turn off the projector and allow it to cool down before restarting.
For further assistance, please contact Groview customer support.
9. Specifications
| Feature | Specification |
|---|---|
| Brand | Groview |
| Model Number | Groview-B2D-US |
| Native Resolution | 1280 x 720 pixels |
| Supported Resolution | 1080P Full HD |
| Connectivity Technology | 3.5mm Jack, Bluetooth 5.1, HDMI, USB |
| Special Features | Electric Focus, Fully Sealed Optical Engine, Mini size & Lightweight, 150" Display, Digital Zoom (75%-100%) |
| Recommended Uses | Indoor/Outdoor |
| Item Weight | 2.99 pounds |
| Product Dimensions | 4.8 x 5.7 x 6.9 inches |
| Color | Gray |
10. Warranty and Support
Groview products are designed for reliability and performance. For information regarding warranty coverage and customer support, please refer to the warranty card included with your purchase or visit the official Groview website. Our service team is available to assist with any product-related inquiries.