
Introduction
This manual provides instructions for the assembly, operation, and maintenance of your Outsunny 2 Tier Raised Garden Bed Planter Box. Please read these instructions carefully before assembly and retain them for future reference. This raised garden bed is designed to provide an elevated growing space for various plants, including vegetables, flowers, and herbs, utilizing a two-tier design for different root depths and an open bottom for optimal drainage.

Image: The Outsunny 2 Tier Raised Garden Bed Planter Box in a garden setting, showcasing its two-tier design filled with plants.
Safety Information
- Always assemble the product on a flat, stable surface to prevent tipping.
- Wear appropriate safety gear, such as gloves, during assembly to protect hands from sharp edges of metal panels.
- Ensure all fasteners are securely tightened before filling the garden bed with soil.
- Do not overload the garden bed with excessive weight beyond its structural capacity.
- Keep children and pets away from the assembly area to prevent accidents.
- Position the garden bed in a location where it will not obstruct pathways or create tripping hazards.
Package Contents
Please verify that all components are present before beginning assembly. Refer to the detailed parts list provided in the physical manual included with your product for specific quantities and identification.
- Galvanized steel panels (various sizes for two tiers)
- Corner brackets/connectors
- Fasteners (screws, nuts, washers)
- Assembly tool (e.g., screwdriver, wrench)
- Instruction manual
Setup and Assembly
Assembly is designed to be straightforward. It is recommended to have two people for easier handling of panels. Follow the steps below:
- Unpack and Identify Parts: Carefully remove all components from the packaging. Lay them out and compare them against the parts list in your physical manual to ensure everything is accounted for.
- Assemble the Lower Tier: Begin by connecting the larger galvanized steel panels to form the base rectangular shape of the lower tier. Use the provided fasteners and corner brackets. Ensure the horizontal stripe construction aligns correctly.
- Secure Lower Tier Connections: Tighten all screws firmly, but do not overtighten, to ensure a stable structure.
- Assemble the Upper Tier: Construct the smaller rectangular shape for the upper tier using the remaining galvanized steel panels and fasteners, similar to the lower tier.
- Attach Upper Tier: Carefully position the assembled upper tier onto the lower tier, aligning it according to the design. Secure it using the designated connection points and fasteners.
- Final Tightening: Double-check all connections and tighten any loose fasteners. Ensure the entire structure is rigid and stable.
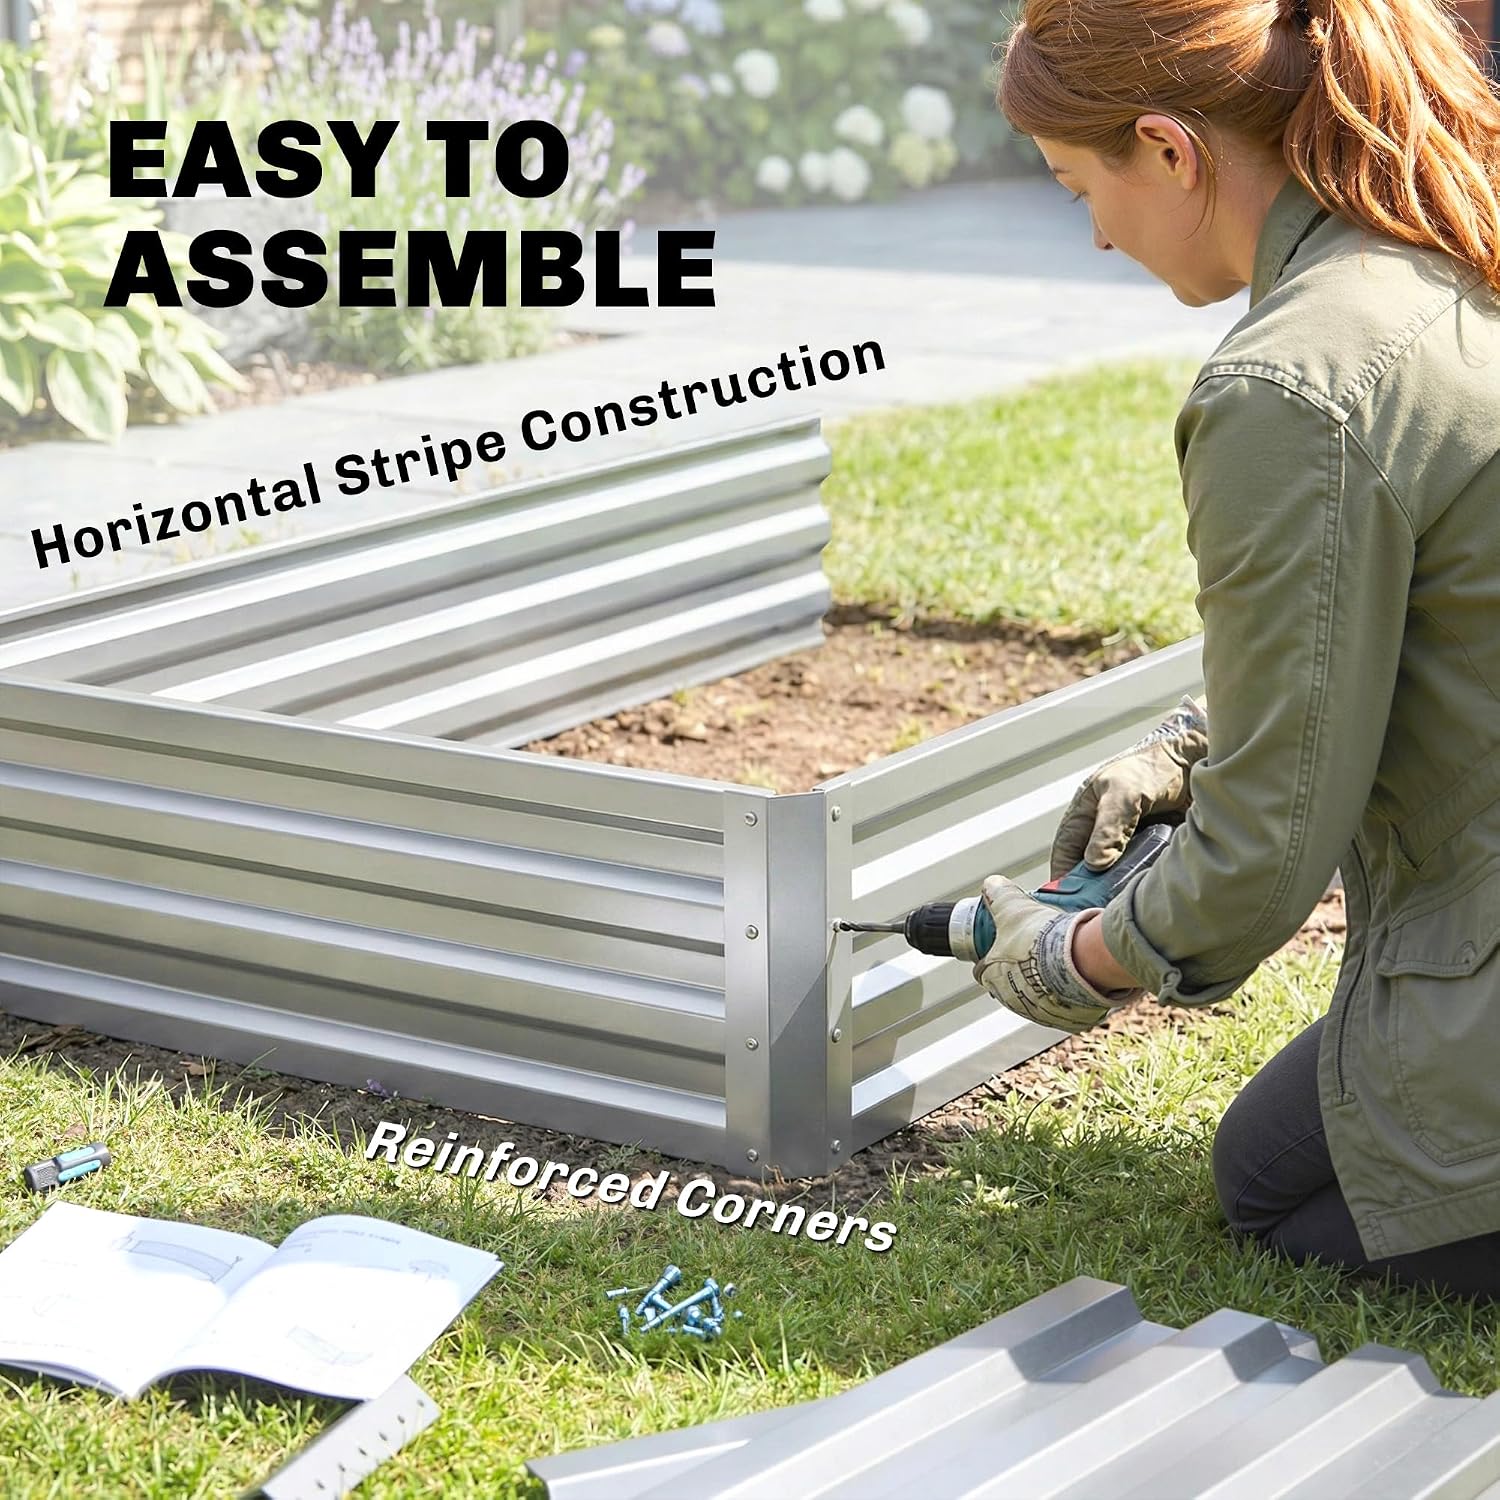
Image: A person assembling the garden bed, highlighting the horizontal stripe construction and reinforced corners for stability.
Operation and Usage
Your Outsunny 2 Tier Raised Garden Bed is designed for versatile planting. Here’s how to best utilize its features:
- Tiered Design: The two-tier stair-step design allows you to plant different types of plants based on their root length and height requirements. Use the deeper section for plants with longer roots (e.g., carrots, tomatoes) and the shallower section for plants with shorter roots (e.g., lettuce, herbs, flowers).
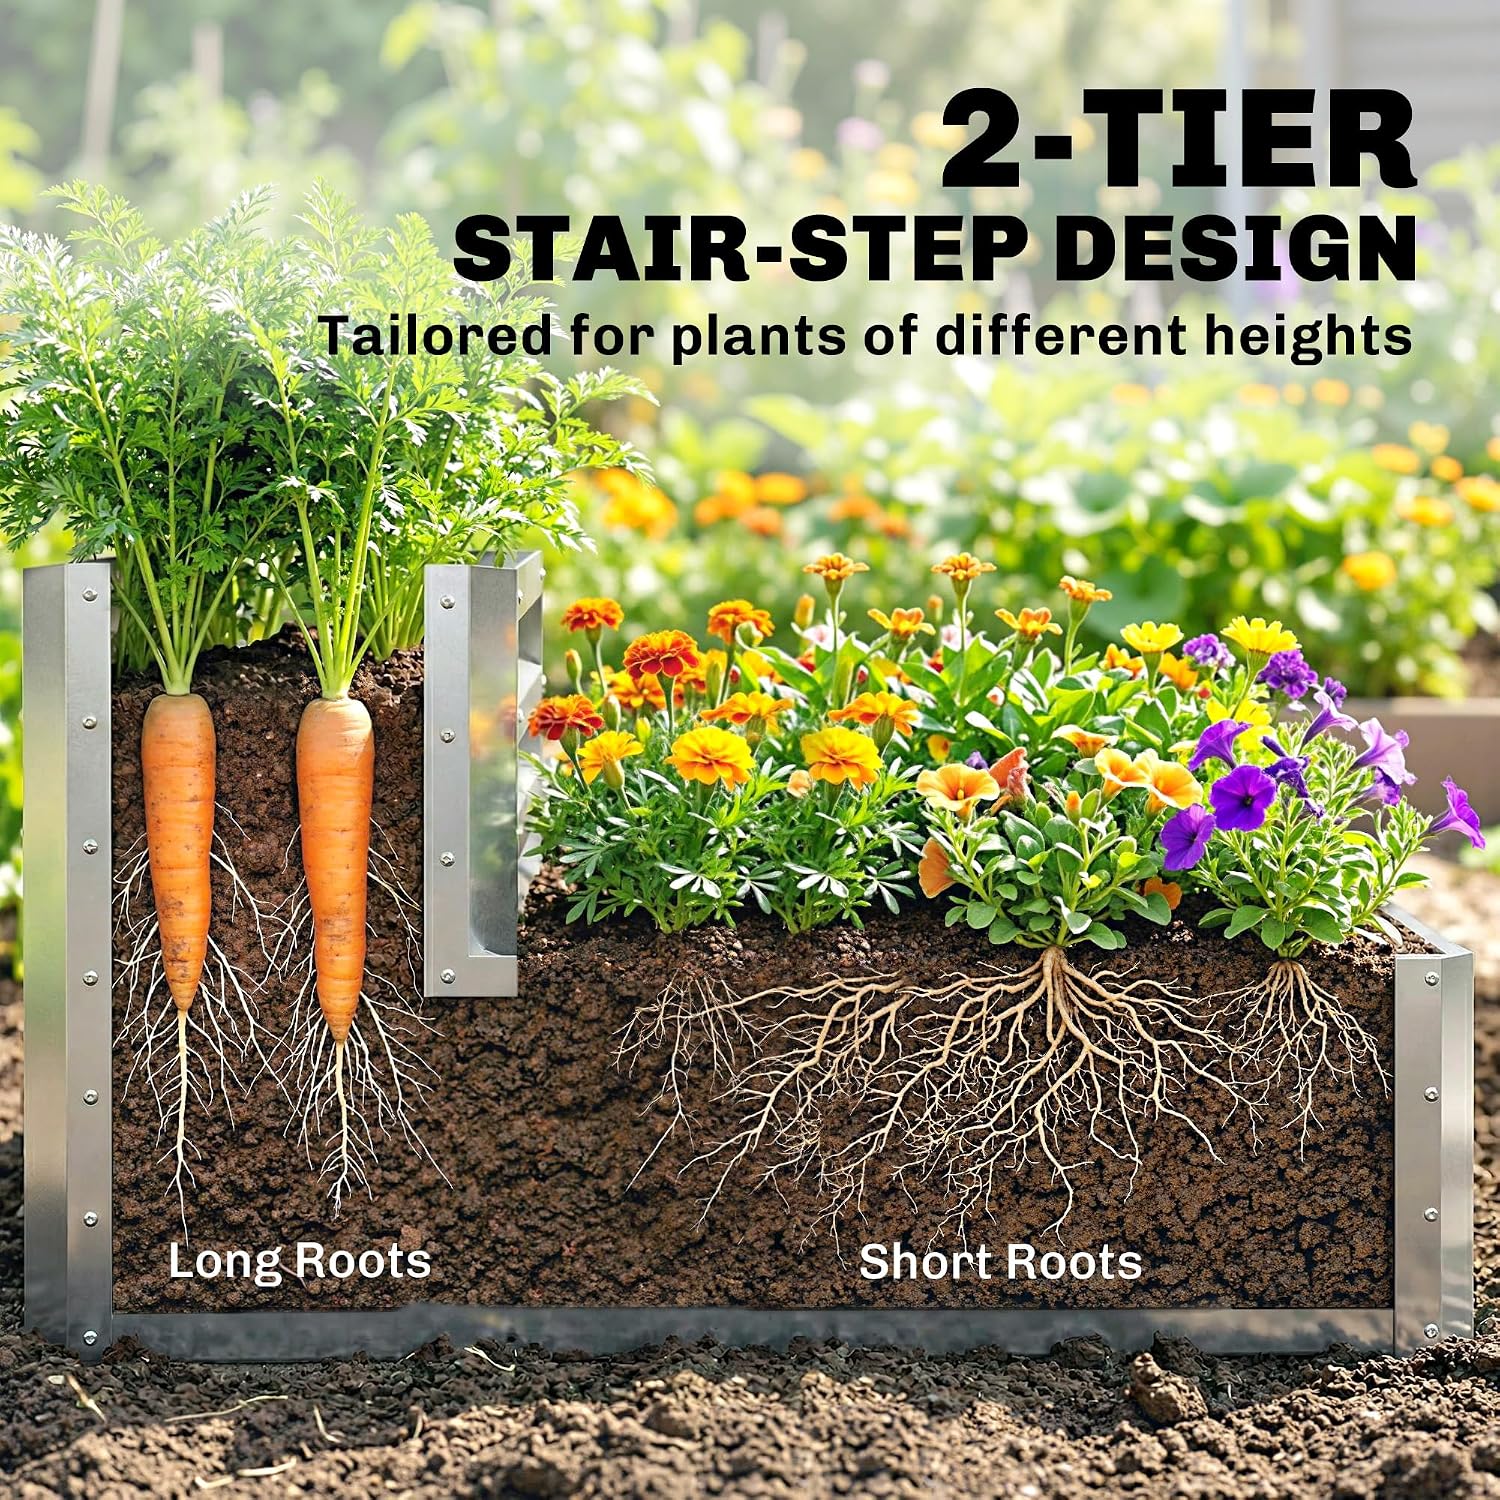
Image: A cross-section view illustrating the two-tier design, showing how it supports plants with varying root depths.
- Open Bottom: The open-bottom design promotes healthy root growth by allowing roots to extend deeper into the ground. It also facilitates excellent drainage, preventing water accumulation and root rot. When filling, consider adding a layer of coarse material (e.g., branches, leaves) at the very bottom before adding soil to further improve drainage and reduce the amount of potting mix needed.

Image: A diagram demonstrating the open-bottom feature, showing water drainage and root penetration into the ground.
- Filling with Soil: Fill the garden bed with a high-quality soil mix suitable for your chosen plants. Ensure the soil level is a few inches below the top edge to prevent overflow when watering.
- Planting: Plant your desired vegetables, flowers, or herbs according to their specific spacing and depth requirements.
- Watering: Water regularly, especially during dry periods. The open bottom design will help prevent overwatering.
Maintenance
- Cleaning: Periodically clean the exterior of the galvanized steel panels with a soft cloth and mild soap solution to remove dirt and maintain appearance. Avoid abrasive cleaners or tools that could scratch the surface.
- Inspection: Regularly inspect all fasteners to ensure they remain tight. Re-tighten if necessary. Check for any signs of damage or wear on the panels.
- Winter Care: In regions with harsh winters, consider emptying the garden bed or covering it to protect plants and the structure from extreme cold and heavy snow loads. While galvanized steel is durable, proper care extends its lifespan.
- Soil Management: Replenish soil nutrients annually by adding compost or organic fertilizers. Rotate crops if possible to maintain soil health.
Troubleshooting
| Issue | Possible Cause | Solution |
|---|---|---|
| Waterlogging | Soil too dense, poor drainage. | Ensure the open bottom is not obstructed. Mix in more perlite or sand to improve soil drainage. |
| Instability after assembly | Loose fasteners, uneven ground. | Re-tighten all screws. Ensure the garden bed is placed on a level surface. |
| Rust spots on screws | Exposure to moisture, non-galvanized screws. | Clean rust spots and apply a rust-inhibiting paint. Consider replacing with stainless steel fasteners if persistent. |
Specifications
| Feature | Detail |
|---|---|
| Model Number | 845-843V00SR |
| Overall Dimensions | 101D x 120W x 58H centimetres (47.2" L x 39.8" W x 22.8" H) |
| Planting Area (Bottom Tier) | 114 x 95 x 31 cm (44.9" L x 37.4" W x 12.2" H) |
| Planting Area (Top Tier) | 115 x 32 x 27 cm (45.3" L x 12.6" W x 10.6" H) |
| Material | Galvanized Steel |
| Color | Silver |
| Special Features | Open Bottom, Outdoor, Two-tier |
| Item Weight | 9.48 kg |
| Capacity | 114.9 gallons |
| Number of Levels | 2 |

Image: Visual representation of the garden bed with key dimensions.
Warranty and Support
Warranty: This Outsunny product comes with a 90 Day Warranty Against Manufacturer Defects. Please retain your proof of purchase for warranty claims.
Returns: The standard return policy allows for returns within 30 days for refund or replacement.
Customer Support: For any questions, assistance with assembly, or to report missing/damaged parts, please contact the manufacturer:
- Manufacturer: Aosom Canada
- Contact Information: Markham, Ontario, CA Tel. 1-416-792-6088