Introduction
The BSIDE S20 Digital Multimeter is a high-speed, automatic intelligent multimeter designed for precise electrical measurements. It features an integrated EMF detector, a large EBTN color LCD, and a rechargeable battery. This manual provides detailed instructions for safe and effective use of your device.
Key Features
- High-Speed Digital Multimeter: Equipped with a powerful chip for rapid and accurate measurements, including capacitance.
- Large Color LCD Display: Features a 3.5-inch EBTN color screen showing test values, analog bars, and frequency/ambient temperature for enhanced readability.
- Automatic Identification: Smart technology automatically identifies tested parameters and selects the appropriate range, making it user-friendly for beginners.
- Rechargeable Battery: Includes a built-in 800mAh Li-ion rechargeable battery and charging cable for convenient power.
- Integrated EMF Detector: Detects electromagnetic fields from various electronic devices, providing an alarm and analog bar display.
- Versatile Measurements: Capable of measuring DC/AC voltage, resistance, capacitance, frequency, diode, and continuity.
- Additional Functions: Auto-ranging, auto power-off, data hold, and low battery indication.
Package Contents
Verify that all items are present in your package:
- BSIDE S20 Smart Multimeter EMF
- Test Leads
- Carrying Case
- USB Charging Cable
- User Manual (English)

Image: The BSIDE S20 Multimeter shown with its included test leads, USB charging cable, and protective carrying case.
Setup
1. Charging the Battery
The BSIDE S20 Multimeter is equipped with a built-in rechargeable Li-ion battery. Before first use, ensure the device is fully charged.
- Connect the provided USB charging cable to the multimeter's charging port.
- Connect the other end of the USB cable to a standard USB power adapter (not included) or a computer's USB port.
- The charging indicator on the display will show the charging status. A full charge typically takes a few hours.

Image: The BSIDE S20 Multimeter being charged via a USB cable connected to a laptop, illustrating the rechargeable battery feature.
2. Connecting Test Leads
Properly connect the test leads for accurate measurements.
- Insert the black test lead into the "COM" (Common) input jack.
- Insert the red test lead into the "INPUT" input jack.
- Ensure connections are secure before performing any measurements.
Operating Instructions
The BSIDE S20 features an intelligent automatic mode for most measurements. It can also be manually switched to specific functions.
1. Power On/Off
Press and hold the power button (usually located on the top right of the device) to turn the multimeter on or off. The device will automatically power off after a period of inactivity to conserve battery.
2. Automatic Mode Selection
In automatic mode, the multimeter intelligently identifies the type of measurement (AC/DC voltage, resistance, continuity) and displays the result. This is the default mode upon power-on.
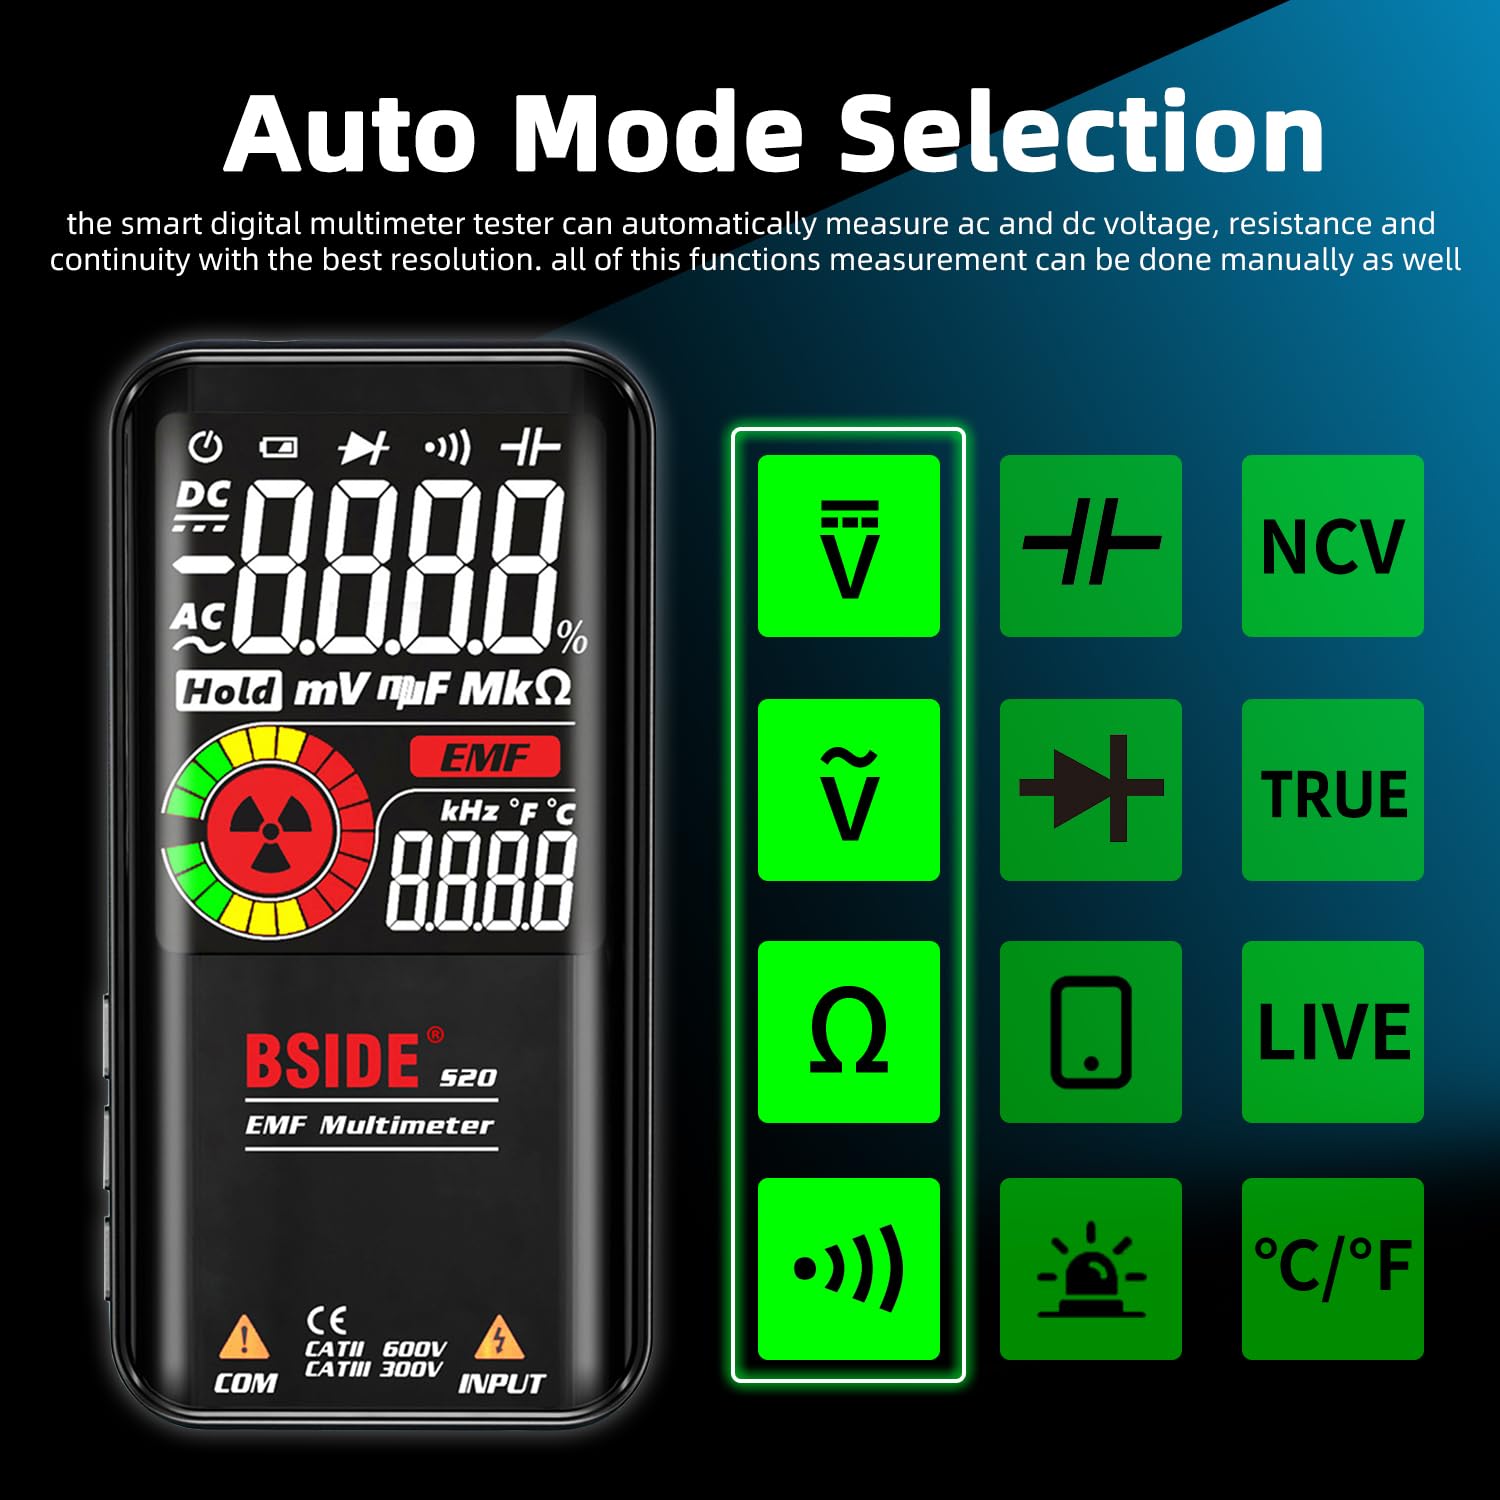
Image: The BSIDE S20 Multimeter display highlighting the automatic mode selection feature, with icons for different measurement types.
3. Understanding the Display
The 3.5-inch EBTN color LCD provides clear readings with three main results:
- Test Value: The primary numerical measurement.
- Analog Bar: A graphical representation of the measurement, useful for quick trend observation.
- Frequency/Ambient Temperature: Additional contextual information displayed simultaneously.

Image: The BSIDE S20 Multimeter display showing a voltage reading of 110.0V AC, a frequency of 60.00 Hz, and an analog bar graph.
4. Performing Measurements (General Steps)
- Ensure the test leads are correctly connected to the multimeter.
- Turn on the multimeter. It will typically start in automatic mode.
- Select the desired measurement function if not using automatic mode (refer to the device's buttons for mode selection).
- Carefully connect the test probes to the circuit or component you wish to measure.
- Read the measurement value on the display.
- Always disconnect the test probes from the circuit before changing functions or turning off the device.
5. Voltage Measurement (AC/DC)
To measure voltage, connect the test probes in parallel with the circuit or component. The multimeter will automatically detect AC or DC voltage in auto mode.
Video: Demonstration of the BSIDE S20 Multimeter measuring AC and DC voltage, resistance, continuity, capacitance, live wire detection, and EMF detection in an electrical setup.
6. Resistance Measurement
To measure resistance, ensure the circuit is de-energized. Connect the test probes across the component.
Note: The video above also shows a resistance measurement of 100.0 kΩ.
7. Continuity Test
For continuity, ensure the circuit is de-energized. Connect the test probes across the path to be tested. If the resistance is below 30Ω, an audible beep will sound, indicating continuity.
Note: The video above also shows a continuity test with an audible beep.
8. Capacitance Measurement
To measure capacitance, ensure the capacitor is discharged before connecting the test probes. The BSIDE S20 offers high-speed capacitance measurement.

Image: The BSIDE S20 Multimeter connected to a capacitor on a circuit board, displaying a capacitance reading of 68.00 uF.
Note: The video above also shows a capacitance measurement of 37.1 uF.
9. EMF Detection
The integrated EMF detector helps identify electromagnetic fields. Move the multimeter near potential sources of EMF radiation.
- The display will show an EMF reading and an analog bar.
- An audible alarm will sound if a significant EMF is detected.
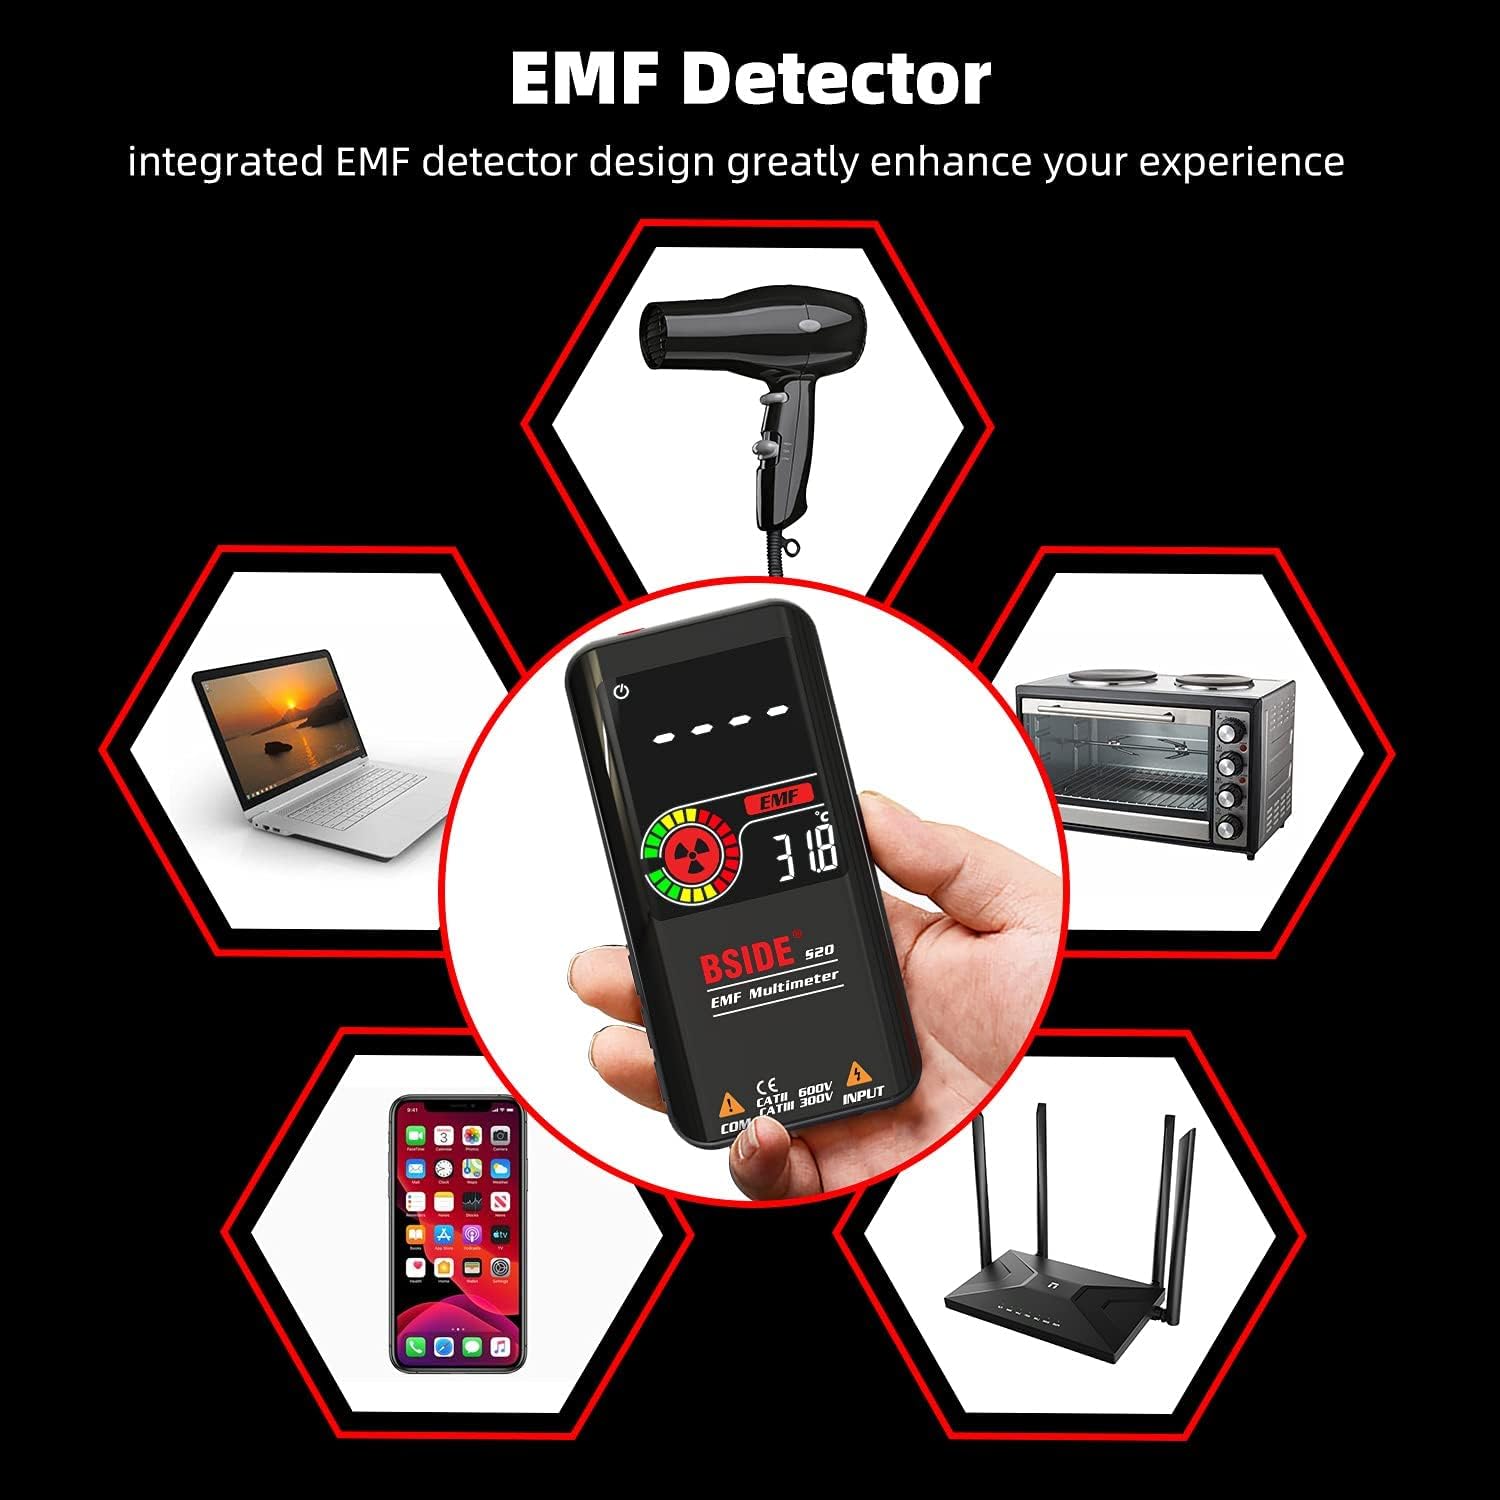
Image: The BSIDE S20 Multimeter displaying an EMF reading, surrounded by common household electronics that emit electromagnetic fields.
Note: The video above also shows the EMF detection feature with an audible alarm.
10. Live Wire Detection
To detect live wires, select the "LIVE" function. Use the red test probe to approach the wire. The multimeter will indicate the presence of live voltage with an alarm and display changes.
Note: The video above also shows the live wire detection feature.
Maintenance
Cleaning
Wipe the device with a dry, soft cloth. Do not use abrasive cleaners or solvents. Ensure the device is powered off and disconnected from any circuits before cleaning.
Storage
Store the multimeter in its protective carrying case in a cool, dry place, away from direct sunlight and extreme temperatures. If storing for extended periods, ensure the battery is partially charged (around 50%) to prolong its lifespan.

Image: A close-up view of the BSIDE S20 Multimeter, highlighting its durable protective case.
Troubleshooting
| Problem | Possible Cause | Solution |
|---|---|---|
| Device does not power on. | Low or depleted battery. | Charge the battery using the provided USB cable. |
| Inaccurate readings. | Incorrect mode selection; poor test lead connection; external interference. | Ensure correct mode (Auto or specific function). Check test lead connections. Move away from strong electromagnetic fields. |
| No continuity beep. | Resistance is too high; circuit is open. | Verify the circuit path. The beep activates for resistance below 30Ω. |
| EMF detector not responding. | No significant EMF source nearby; device not in EMF mode. | Ensure the device is in EMF detection mode. Move closer to known EMF sources. |
Specifications
| Parameter | Value |
|---|---|
| Max Display | 9999 counts |
| Display Type | Color LCD EBTN |
| Screen Size | 3.5 inches |
| DC Voltage | 0.5V-620V ±(0.8%+3); Resolution: 0.001V |
| AC Voltage | 1.0V-620V ±(1.2%+5); Resolution: 0.001V |
| Resistance | 1Ω-10.0MΩ ±(1.2%+3); Resolution: 0.1Ω |
| Capacitance | 0.5uF-1000uF ±(3.5%+8), 1000uF-6000uF ±(4.5%+10); Resolution: 0.1uF |
| Frequency | 10Hz-1000Hz ±(2.0%+10); Resolution: 1Hz |
| Diode Test | Measures diodes within 1.0V |
| EMF Detection | Alarm beep, LCD with analog bars |
| Live Wire Check | Alarm beep, LCD with analog bars |
| Continuity | Audible signal if resistance is less than 30Ω |
| Power Supply | 3.7V Rechargeable Battery (included) |
| Dimensions | 143 x 69 x 17 mm (5.63 x 2.72 x 0.67 inches) |
| Weight | 143g (0.31 lbs) |
| Safety Compliance | CE |
Warranty and Support
For warranty information and technical support, please refer to the official BSIDE website or contact your retailer. Keep your purchase receipt for warranty claims.