
1. Product Overview
The M93DVN Hinged Mulch Plug Assembly is designed to convert your Troy-Bilt lawn mower into a mulching mower. When installed, it blocks the discharge chute, allowing grass clippings to be finely cut and recirculated back into the lawn as natural fertilizer. This promotes healthier turf and eliminates the need for bagging clippings. This assembly is compatible with various Troy-Bilt lawn mower models, including but not limited to 12AM2MR766, 12ABD3BZ711, 12AEA29L066, and 12AN2DQ711.
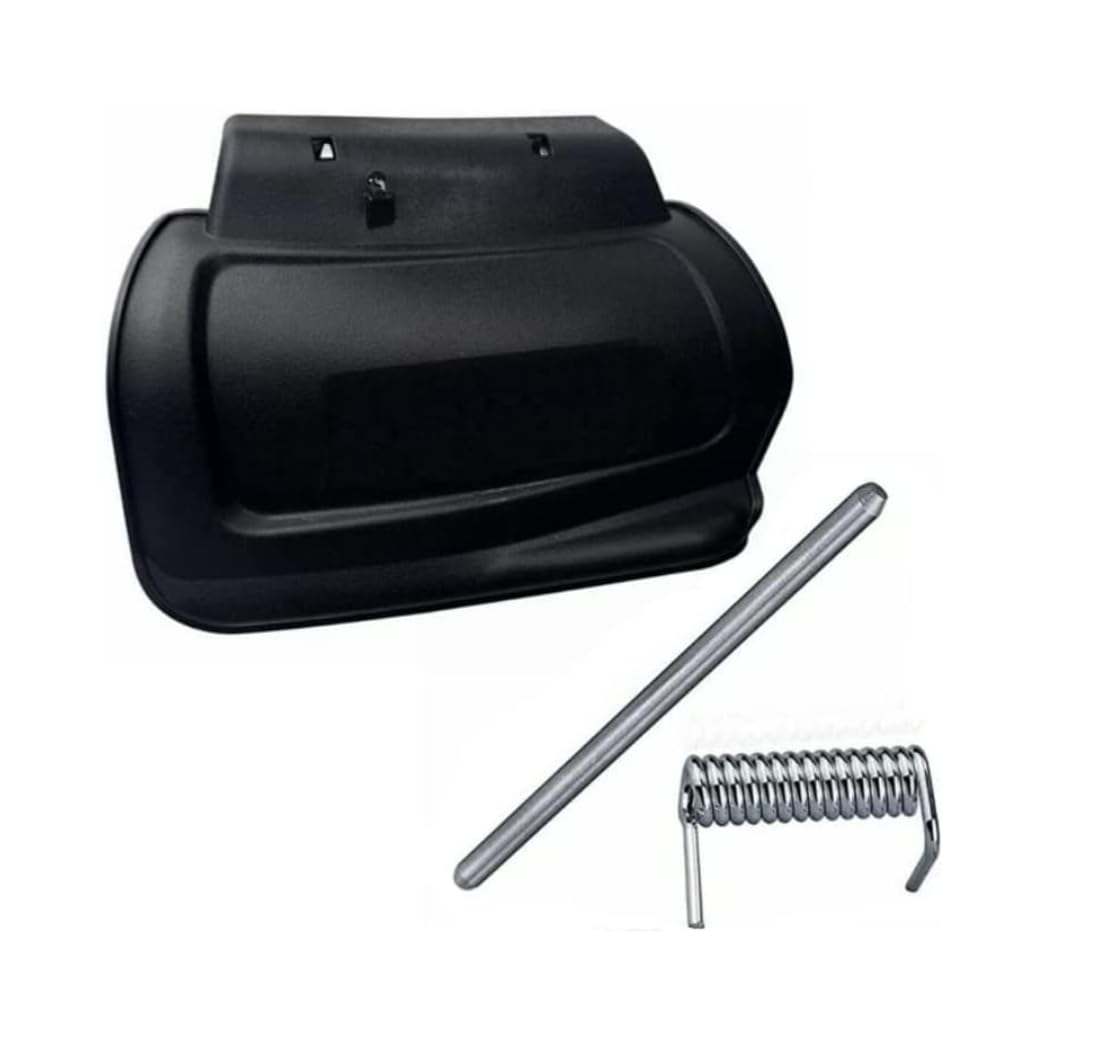
Figure 1: M93DVN Hinged Mulch Plug Assembly. This image shows the complete mulch plug assembly, including the main body and attachment points, ready for installation into a lawn mower's discharge opening.
2. Safety Information
Always prioritize safety when working with lawn care equipment. Failure to follow safety instructions can result in serious injury.
- Read Your Mower Manual: Always consult your lawn mower's owner's manual for specific safety precautions and instructions related to accessory installation.
- Disconnect Spark Plug: Before performing any maintenance or installation on your lawn mower, ensure the engine is off and disconnect the spark plug wire to prevent accidental starting.
- Wear Protective Gear: Always wear appropriate personal protective equipment, including safety glasses, gloves, and sturdy footwear.
- Engine Cool Down: Allow the engine and muffler to cool completely before handling any parts.
- Stable Surface: Work on a flat, stable surface to prevent the mower from tipping.
3. Installation Instructions
3.1. Before You Begin
- Ensure the lawn mower engine is off and the spark plug wire is disconnected.
- Allow the engine to cool down.
- Clean any grass clippings or debris from the mower deck, especially around the discharge chute area.
- Gather any necessary tools (e.g., wrench, screwdriver) if required by your specific mower model for accessing the discharge chute.
3.2. Installing the Mulch Plug
The installation process may vary slightly depending on your specific Troy-Bilt lawn mower model. Refer to your mower's manual for detailed instructions if needed.
- Locate the Discharge Chute: Identify the side discharge opening on your lawn mower deck.
- Remove Existing Components (if any): If your mower has a side discharge deflector or bagger attachment, remove it according to your mower's instructions.
- Position the Mulch Plug: Align the M93DVN Hinged Mulch Plug Assembly with the discharge opening. The hinged part should typically face upwards or towards the front of the mower, allowing it to seal the opening.
- Secure the Plug: Insert the attachment pins or clips of the mulch plug into the corresponding holes or slots on the mower deck. Ensure it is firmly seated and securely latched. The plug should fit snugly to prevent grass from escaping.
- Verify Installation: Gently tug on the mulch plug to ensure it is securely attached and will not dislodge during operation.
- Reconnect Spark Plug: Once installation is complete, reconnect the spark plug wire.
4. Operating Your Mulch Plug
With the mulch plug installed, your lawn mower is now configured for mulching. Follow these tips for optimal performance:
- Cut Dry Grass: Mulching works best on dry grass. Wet grass tends to clump and can clog the mower deck.
- Cut Frequently: For best results, cut your lawn frequently, removing no more than one-third of the grass blade length at a time. This ensures smaller clippings that decompose quickly.
- Maintain Proper Engine Speed: Operate the mower at full throttle to ensure the blades generate sufficient lift and cutting power for effective mulching.
- Overlap Passes: Overlap your mowing passes slightly to ensure even distribution of clippings.
- Blade Sharpness: Ensure your mower blades are sharp. Dull blades tear grass, leading to an unhealthy lawn and poor mulching performance.
5. Maintenance
Regular maintenance of your mulch plug assembly will ensure its longevity and continued effectiveness.
- Clean After Each Use: After each mowing session, ensure the engine is off and the spark plug wire is disconnected. Clean any accumulated grass clippings from the mulch plug and the inside of the mower deck. This prevents buildup that can hinder mulching performance.
- Inspect for Damage: Periodically inspect the mulch plug for any signs of wear, cracks, or damage. Ensure all attachment points are secure. Replace the plug if it is damaged.
- Storage: When not in use, store the mulch plug in a clean, dry place, away from direct sunlight and extreme temperatures.
6. Troubleshooting
If you encounter issues while using your mulch plug, refer to the following table for common problems and solutions.
| Problem | Possible Cause | Solution |
|---|---|---|
| Poor mulching performance (large clumps of grass) |
|
|
| Mulch plug does not fit or is loose |
|
|
| Excessive vibration or noise |
|
|
7. Specifications
- Product Dimensions: 1 x 1 x 1 inches (Approximate)
- Manufacturer: M93DVN
- Item Model Number: 12AM2MR766
- ASIN: B0CRQWGS26
- Compatibility: Designed for various Troy-Bilt lawn mower models, including 12AM2MR766, 12ABD3BZ711, 12AEA29L066, 12AN2DQ711, and others listed in the product description.
- Material: Durable plastic composite (Inferred for typical mulch plugs)
8. Warranty and Support
M93DVN stands behind the quality of its products. If you are not satisfied with your mulch plug assembly, we offer a replacement or a refund. For support or inquiries, please refer to your purchase platform or contact the seller directly.