1. Product Overview
The Douk Audio VU9 is a unique sound level meter that blends vintage Nixie tube aesthetics with modern audio spectrum display technology. It offers versatile audio input options and customizable visual effects, making it an ideal addition to any home, office, or studio audio setup.
Key Features:
- Retro Design with Modern Functionality: Combines vintage charm with contemporary technology for a unique audio-visual experience.
- Versatile Audio Input Options: Equipped with both microphone and 3.5mm AUX inputs for wireless pickup and precise audio level display. Compatible with smartphones, computers, CD players, and speakers.
- Adjustable Visual Effects: Features full-function adjustments including display mode, gain, color, speed, peak color, and brightness for customized audio visualization.
- Energy-Efficient and User-Friendly: Powered by a USB 5V connection. Built-in power-off saving settings retain preferences after restarting.
- Comprehensive Package: Includes two tubes, a USB-C cable, a 3.5mm splitter cable, screws, a screwdriver, isolation stand feet, and a user manual.
Video: Demonstration of the Douk Audio VU9 Pixie Tube Sound Level Meter in operation, showcasing its dynamic light display.
2. Package Contents
Please verify that all items listed below are included in your package:
- 1x Douk Audio VU9 Main Unit
- 2x Pixie Tubes
- 1x USB-C Cable
- 1x 3.5mm Splitter Cable
- 4x M2 Screws
- 1x Screwdriver
- 1 Set Isolation Stand Feet
- 1x User Manual (this document)
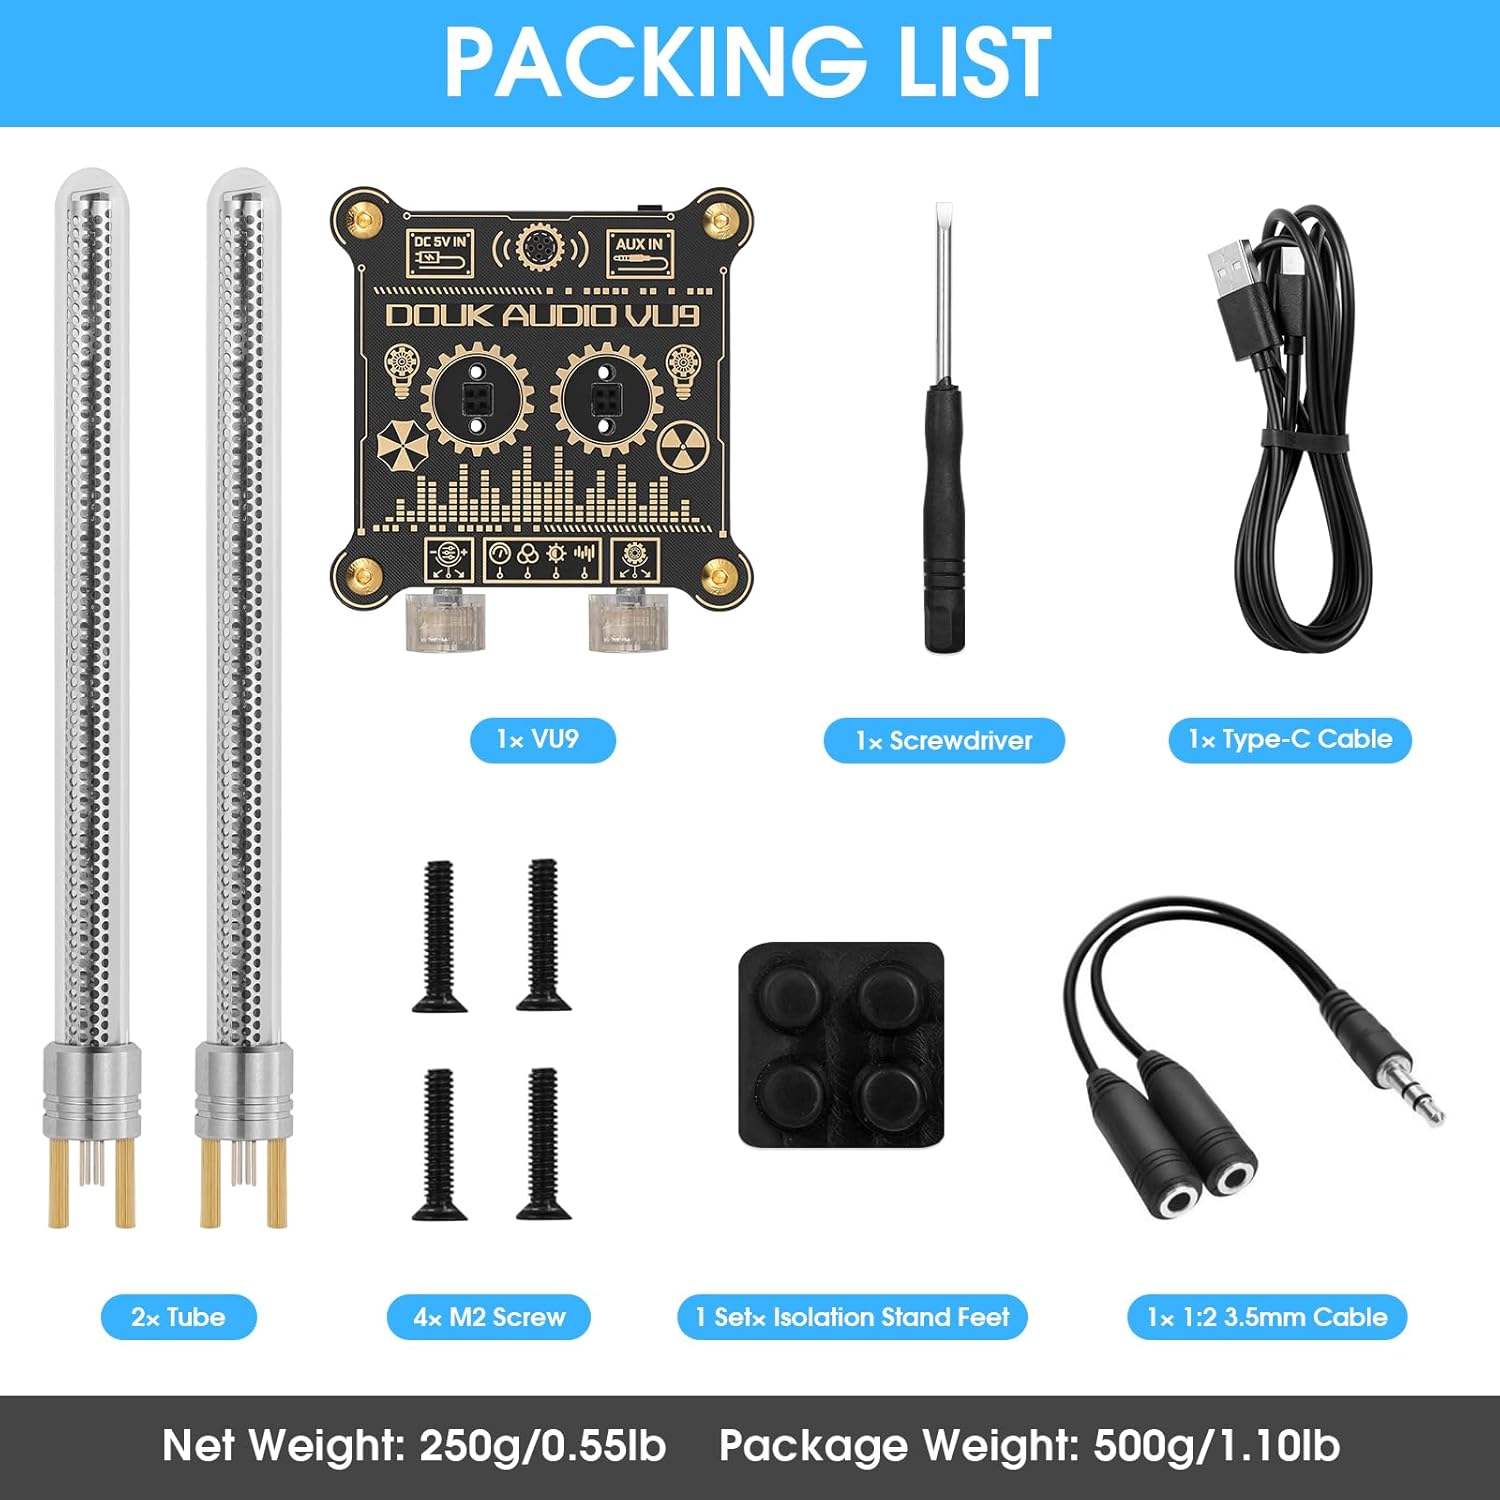
Image: Visual representation of all items included in the Douk Audio VU9 package.
3. Setup Instructions
3.1 Tube Installation
- Carefully unpackage the two Pixie Tubes.
- Insert each tube into the designated tube sockets on the main unit. Ensure they are seated firmly.
- Use the provided M2 screws and screwdriver to secure the tubes in place.
3.2 Power Connection
- Connect the supplied USB-C cable to the DC 5V IN port on the back of the VU9 unit.
- Plug the other end of the USB-C cable into a 5V USB power adapter (not included) or a compatible USB port on a computer.
3.3 Audio Input Connection
The VU9 supports two audio input methods: Microphone Pickup and 3.5mm AUX input. The 3.5mm AUX input takes priority if both are connected.
- Microphone Pickup: The built-in microphone will automatically detect ambient sound and display the audio spectrum.
- 3.5mm AUX Input: Connect your audio source (e.g., smartphone, computer, CD player) to the AUX IN port using the provided 3.5mm splitter cable or a standard 3.5mm audio cable.

Image: Diagram illustrating the input ports, tube sockets, and control knobs on the Douk Audio VU9 unit.
4. Operating Instructions
The VU9 features two control knobs for adjusting various display parameters.
4.1 Control Knobs
- Left Knob (Gain Adjustment): Rotate to adjust the sensitivity of the audio input. This controls how responsive the display is to sound levels.
- Right Knob (Mode/Parameter Adjustment):
- Click: Short press to cycle through setup modes (e.g., display mode, color, speed, peak color, brightness).
- Rotation: Rotate to change the parameter value within the currently selected setup mode.
4.2 Display Modes and Customization
The VU9 offers multiple display modes and extensive customization options to match your preferences and environment.
- Display Mode: Select from various visual patterns for the audio spectrum.
- Color: Choose from a wide range of colors for the tube display.
- Speed: Adjust the animation speed of the light effects.
- Peak Color: Customize the color of the peak hold indicators.
- Brightness: Control the overall brightness of the display.

Image: Examples of various display modes and color options available on the Douk Audio VU9.

Image: A collage showing the Douk Audio VU9 displaying different color schemes and light patterns.
5. Specifications
| Feature | Detail |
|---|---|
| Brand | Douk Audio |
| Model Number | XX-VU9-2024 |
| Product Dimensions | 3.35"W x 6.89"H |
| Item Weight | 250 Grams (8.8 ounces) |
| Power Source | USB 5V |
| Connectivity Technology | 3.5mm AUX, USB (for power) |
| Input Options | Microphone Pickup, 3.5mm AUX |
| Frame Material | Plastic |
| Indoor/Outdoor Usage | Indoor |

Image: Detailed dimensions of the Douk Audio VU9 unit.
6. Maintenance
- Keep the unit clean by wiping it with a soft, dry cloth. Avoid using harsh chemicals or abrasive materials.
- Ensure the unit is placed on a stable, flat surface to prevent accidental falls.
- Avoid exposing the unit to extreme temperatures, direct sunlight, or high humidity.
- Do not attempt to disassemble the unit beyond tube installation, as this may void the warranty.
7. Troubleshooting
- No Power:
- Check if the USB-C cable is securely connected to both the VU9 unit and the power source.
- Ensure the USB power adapter is functioning correctly and providing 5V output.
- No Audio Display:
- If using 3.5mm AUX input, ensure the cable is fully inserted and the audio source is playing.
- If using microphone pickup, ensure there is ambient sound for the unit to detect.
- Adjust the 'Gain Adjustment' knob to increase sensitivity.
- Tubes Not Lighting Up:
- Verify that the Pixie Tubes are correctly installed and secured in their sockets.
- Check power connection as described above.
- Settings Not Saving:
- The unit has built-in power-off saving settings. If settings are not retained, ensure the unit is powered off correctly (if applicable) or contact support.
8. Warranty and Support
For warranty information and customer support, please refer to the official Douk Audio website or contact your retailer. Keep your purchase receipt for warranty claims.
Douk Audio is committed to providing high-quality products and excellent customer service. If you encounter any issues not covered in this manual, please reach out to our support team for assistance.