
1. Introduction
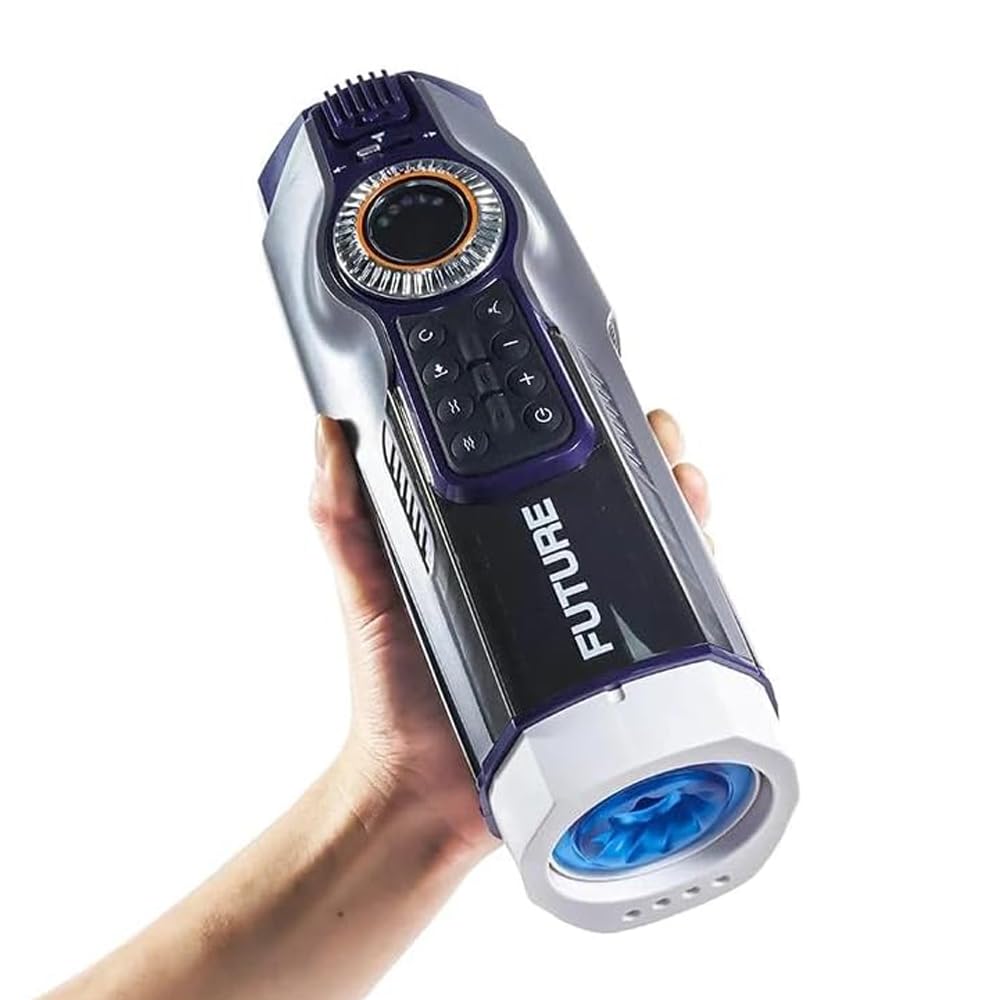
Thank you for choosing the vergeaura Leten Future Pro Gen 3. This device is designed to provide a unique experience with its automatic telescopic, rotating, and heating functions. This manual provides essential information for safe and effective use, maintenance, and troubleshooting.
2. Safety Information
- Read all instructions before first use.
- This product is for adult use only.
- Clean the product thoroughly before and after each use with mild soap and water. Ensure it is completely dry before storage.
- Do not immerse the main unit in water. The sleeve is removable for cleaning.
- Use only water-based lubricants with this product. Oil-based lubricants may damage the material.
- Discontinue use immediately if you experience any discomfort, irritation, or pain. Consult a medical professional if symptoms persist.
- Keep out of reach of children.
- Store in a cool, dry place away from direct sunlight and extreme temperatures.
- Do not attempt to disassemble or repair the device yourself. This will void the warranty.
3. Product Features
- 10 Modes of Stroking: Offers varied and intense stroking patterns.
- Airbag Massage: Features 4 built-in airbag squeezers with 10 massage modes for a lifelike sensation.
- Hot Air Heating System: Warms the sleeve to approximately 40℃ (104℉) before use and includes a drying function after use.
- Rotary Speed Control Ring: Allows precise adjustment of stroking speed and intensity.
- Interactive Moaning Options: Provides 3 language moaning options with adjustable volume.
- Bluetooth Connectivity: Connects to wireless headphones for an immersive audio experience.
- Perfume Box: Integrated compartment to enhance the ambiance.
- Interchangeable Sleeves: Includes 2 distinct sleeves for varied sensations.
- Easy Cleaning: Designed for simple disassembly and cleaning.
4. Package Contents
The package typically includes:
- Leten Future Pro Gen 3 Main Unit
- 2 x Interchangeable Sleeves
- USB Charging Cable
- User Manual
5. Setup
5.1 Charging the Device
Before first use, fully charge the device. Connect the provided USB charging cable to the charging port on the device and to a compatible USB power source. The LED display will indicate charging status. A full charge typically takes approximately 3.5 hours.

5.2 Inserting the Sleeve
- Ensure the device is turned off.
- Carefully insert one of the clean, dry sleeves into the main unit. Ensure it is seated correctly and securely.
- Apply a small amount of water-based lubricant to the entrance of the sleeve for comfortable use.
6. Operating Instructions
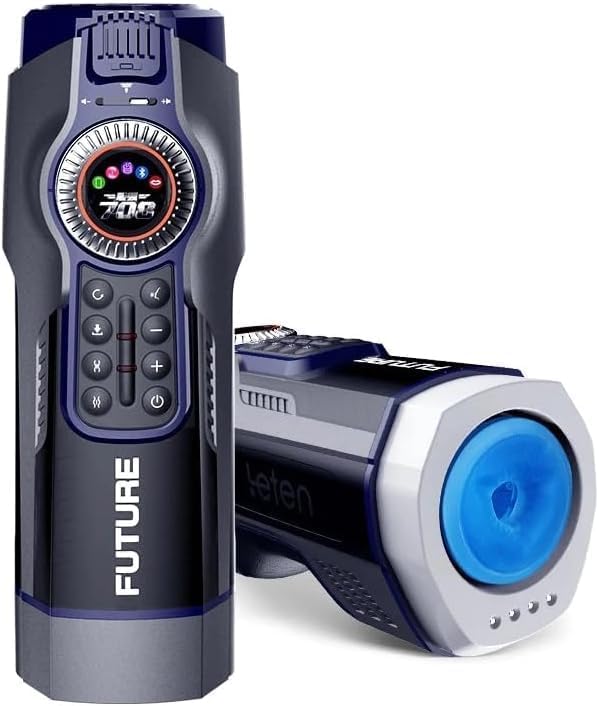
Familiarize yourself with the control panel before operation.

6.1 Power On/Off
- Press and hold the ON/OFF button (power symbol) to turn the device on or off. The LED display will illuminate upon activation.
6.2 Stroking Functions
- Use the 10 Stroking + and 10 Stroking - buttons to adjust the intensity of the telescopic stroking motion. There are 10 modes available.
- The Rotary Speed Control Ring (located around the LED display) can be rotated to fine-tune the speed of the stroking mechanism.
6.3 Airbag Massage
- Press the 10 Airbag + and 10 Airbag - buttons to cycle through the 10 airbag massage modes and adjust their intensity.
6.4 Heating and Drying
- Press the Heating button (flame symbol) to activate the hot air heating system. Allow a few minutes for the sleeve to reach the optimal temperature of 40℃.
- After use, press the Drying button (fan symbol) to activate the drying function for the sleeve.
6.5 Interactive Features
- Press the 3 Moaning button (lips symbol) to cycle through the three language moaning options.
- Use the Voice button (volume symbol) to adjust the volume of the interactive sounds.
- To connect wireless headphones, activate Bluetooth on your headphones and press the Bluetooth button (Bluetooth symbol) on the device to pair.
6.6 Perfume Box
- The device features a perfume box. Open the compartment, insert a scent of your choice, and close it. The aroma can be adjusted to enhance your experience.
7. Maintenance and Cleaning
Proper maintenance ensures hygiene and extends the product's lifespan.
- Turn off the device and disconnect it from any power source before cleaning.
- Carefully remove the internal sleeve from the main unit.
- Wash the sleeve by hand with mild soap and warm water. Rinse thoroughly to remove all soap residue.
- Allow the sleeve to air dry completely before reinserting it into the device or storing. The device's drying function can assist with this.
- Wipe the exterior of the main unit with a damp cloth. Do not use abrasive cleaners or submerge the main unit in water.
- Ensure all components are dry before storage.
8. Troubleshooting
| Problem | Possible Cause | Solution |
|---|---|---|
| Device does not turn on. | Battery is depleted. | Charge the device fully. |
| Functions (stroking, airbag) are weak or unresponsive. | Low battery. | Charge the device fully. |
| Heating function is not working. | Device not powered on or low battery. | Ensure device is on and charged. Activate heating function. |
| Bluetooth connection issues. | Headphones not in pairing mode or too far. | Ensure headphones are in pairing mode and close to the device. Re-attempt pairing. |
| Sleeve difficult to insert/remove. | Incorrect alignment or residue. | Ensure sleeve is clean and dry. Align carefully before inserting. |
If troubleshooting steps do not resolve the issue, please contact customer support.
9. Specifications
- Model: Leten Future Pro Gen 3
- Brand: vergeaura
- Manufacturer Reference: vergeaura-05
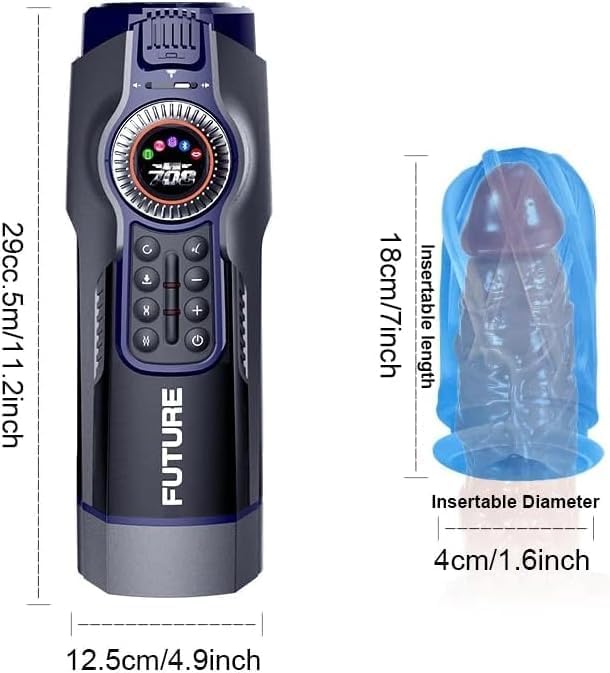
- Product Dimensions: 12.8 x 10.5 x 29 cm (5.04 x 4.13 x 11.42 inches)
- Weight: 2.1 kg (4.63 lbs)
- Color: Black
- Number of Settings: 10 (stroking modes), 10 (airbag modes)
- Water Resistance Level: Waterproof (for sleeve, main unit is not submersible)
- Product Care Instructions: Hand Wash (sleeve)
- Charging Time: Approximately 3.5 hours
- Working Time: Approximately 1.5 hours
- UPC: 761086964142
10. Warranty and Support
For warranty information or technical support, please refer to the documentation included with your purchase or contact the seller directly. Keep your proof of purchase for any warranty claims.