ELYKEN B0CR2YVG7W
ELYKEN 2-Tier Narrow Console Sofa Table User Manual
Model: B0CR2YVG7W
1. Introduction
Thank you for choosing the ELYKEN 2-Tier Narrow Console Sofa Table. This manual provides essential information for the safe assembly, operation, and maintenance of your new furniture. Please read it thoroughly before use and retain it for future reference.
This console table is designed to fit narrow spaces behind sofas, offering a convenient surface, integrated power outlets, USB ports, and customizable LED lighting.
2. Important Safety Instructions
- Keep the table and its electrical components (cords, outlets, USB ports) away from water sources to prevent electric shock.
- Do not overload the electrical outlets. Ensure total current draw does not exceed the rated capacity.
- Ensure the LED light strip is properly installed and secured to prevent detachment or damage.
- Place the table on a stable, level surface. If placing behind a sofa, ensure it is securely positioned to prevent tipping.
- Utilize the provided anti-tip device to secure the table to a wall, especially if it is free-standing or in an area with potential for tipping.
- Do not allow children to climb on or play with the table.
- Maximum weight recommendation for the tabletop is 110 pounds. Do not exceed this limit.
3. Package Contents
Before assembly, verify that all parts are present and undamaged. If any parts are missing or damaged, contact customer support.
- Tabletop panels (2)
- Metal frame components
- Power outlet unit with 2 AC outlets and 2 USB ports (2)
- LED light strip (2)
- Remote control for LED lights (2)
- 6.5-foot extension cord (2)
- Assembly hardware (screws, bolts, etc.)
- Anti-tip device (straps and wall anchors)
- Assembly tools (e.g., screwdriver)
4. Product Specifications
| Feature | Detail |
|---|---|
| Brand | ELYKEN |
| Model | B0CR2YVG7W |
| Dimensions (D x W x H) | 5.9"D x 78.8"W x 39.4"H (for 2-pack combined) |
| Material | Engineered Wood (Top), Metal (Frame) |
| Color | Rustic Brown |
| Maximum Weight Capacity | 110 Pounds |
| Power Outlets | 2 Standard 120VAC outlets (per unit) |
| USB Ports | 2 USB ports (5V/2A) (per unit) |
| Power Cord Length | 6.5 feet |
| LED Lighting | Adjustable, 15 dimmable color options, 4 dynamic modes, remote controlled |
5. Assembly and Setup
Assembly is designed to be straightforward. All necessary tools are included. It is recommended to assemble the table on a soft, clean surface to prevent scratches.
5.1 Step-by-Step Assembly
- Unpack Components: Carefully remove all parts from the packaging and lay them out. Check against the package contents list.
- Assemble Frame: Attach the metal frame components using the provided screws and tools. Ensure all connections are secure but do not overtighten until the entire frame is assembled.
- Attach Tabletop Panels: Secure the engineered wood tabletop panels to the assembled metal frame.
- Install Power Outlet Unit: Place the power outlet unit into its designated slot on the table. Connect the power cord.
- Apply LED Light Strip: Carefully peel the adhesive backing from the LED light strip and attach it to the underside of the top shelf or desired location. Connect the LED strip to a USB port on the power outlet unit.
- Secure Anti-Tip Device: If desired or necessary for stability, attach the anti-tip straps to the table frame and secure them to a wall using appropriate anchors.
- Final Tightening: Once all components are in place, carefully tighten all screws and bolts.

6. Operating Instructions
6.1 Power Outlets and USB Ports
- Plug the table's main power cord into a standard 120VAC wall outlet.
- Use the integrated 120VAC outlets to power small appliances or chargers.
- Use the 5V/2A USB ports to charge compatible electronic devices such as smartphones, tablets, and headphones.

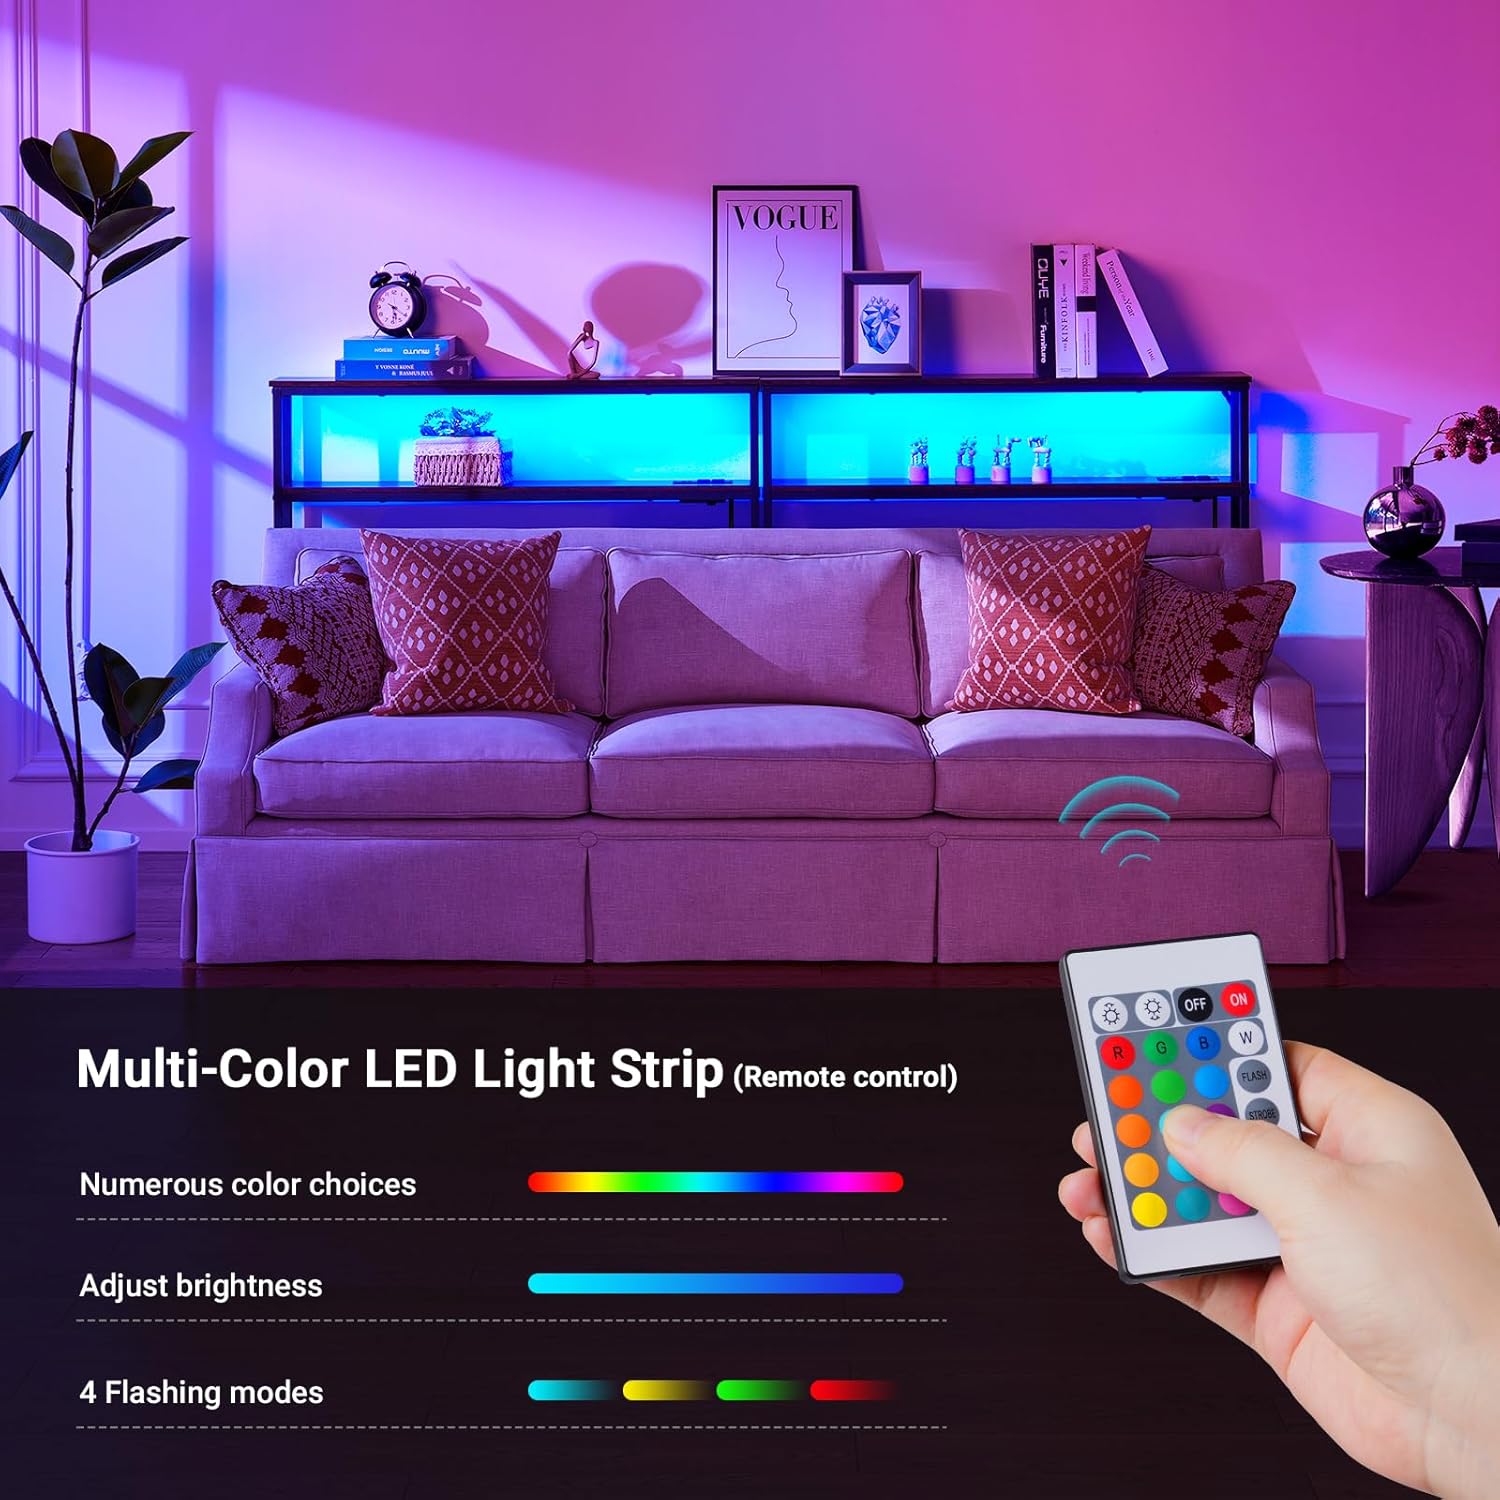
6.2 LED Strip Light Operation
The LED strip light is controlled by the included remote control.
- Power On/Off: Press the ON or OFF button on the remote.
- Color Selection: Use the color buttons (R, G, B, W, etc.) or the color wheel on the remote to select from 15 dimmable color options.
- Brightness Adjustment: Use the brightness up/down buttons to adjust the intensity of the light.
- Dynamic Modes: Select from 4 dynamic modes (FLASH, STROBE, FADE, SMOOTH) to create different lighting effects.

Note: The remote control requires line-of-sight to the LED sensor, typically located near where the LED strip connects to the USB port.
7. Care and Maintenance
- Cleaning: Wipe the table surfaces with a soft, damp cloth. Avoid harsh chemicals or abrasive cleaners that could damage the finish.
- Dusting: Regularly dust the table and LED strip to maintain appearance and light output.
- Electrical Components: Ensure all electrical connections are dry and free from dust. Do not attempt to repair or modify the power outlet unit or LED strip.
- Stability Check: Periodically check all screws and bolts to ensure they remain tight. Re-tighten if necessary.
8. Troubleshooting
| Problem | Possible Cause | Solution |
|---|---|---|
| LED lights do not turn on. |
|
|
| Power outlets/USB ports not working. |
|
|
| Table feels unstable. |
|
|
9. Warranty and Customer Support
ELYKEN products are manufactured with quality and care. For warranty information, missing parts, or technical assistance, please contact ELYKEN customer support through your purchase platform or the official ELYKEN website.
Manufacturer: ELYKEN
Brand Store: Visit the ELYKEN Store on Amazon
Ask a question about this manual
Ask about setup, troubleshooting, compatibility, parts, safety, or missing instructions. Manuals+ will review the question and use this page’s manual context to help answer it.